
Triggers 101: How to start a workflow in Flodesk
Overview
A trigger is what starts a workflow. It tells Flodesk: when this happens, begin the sequence.
Every workflow needs at least one trigger. When the trigger condition is met, such as someone joining a segment, submitting a form, making a purchase, or abandoning a cart, Flodesk automatically starts that subscriber on their journey through the workflow.
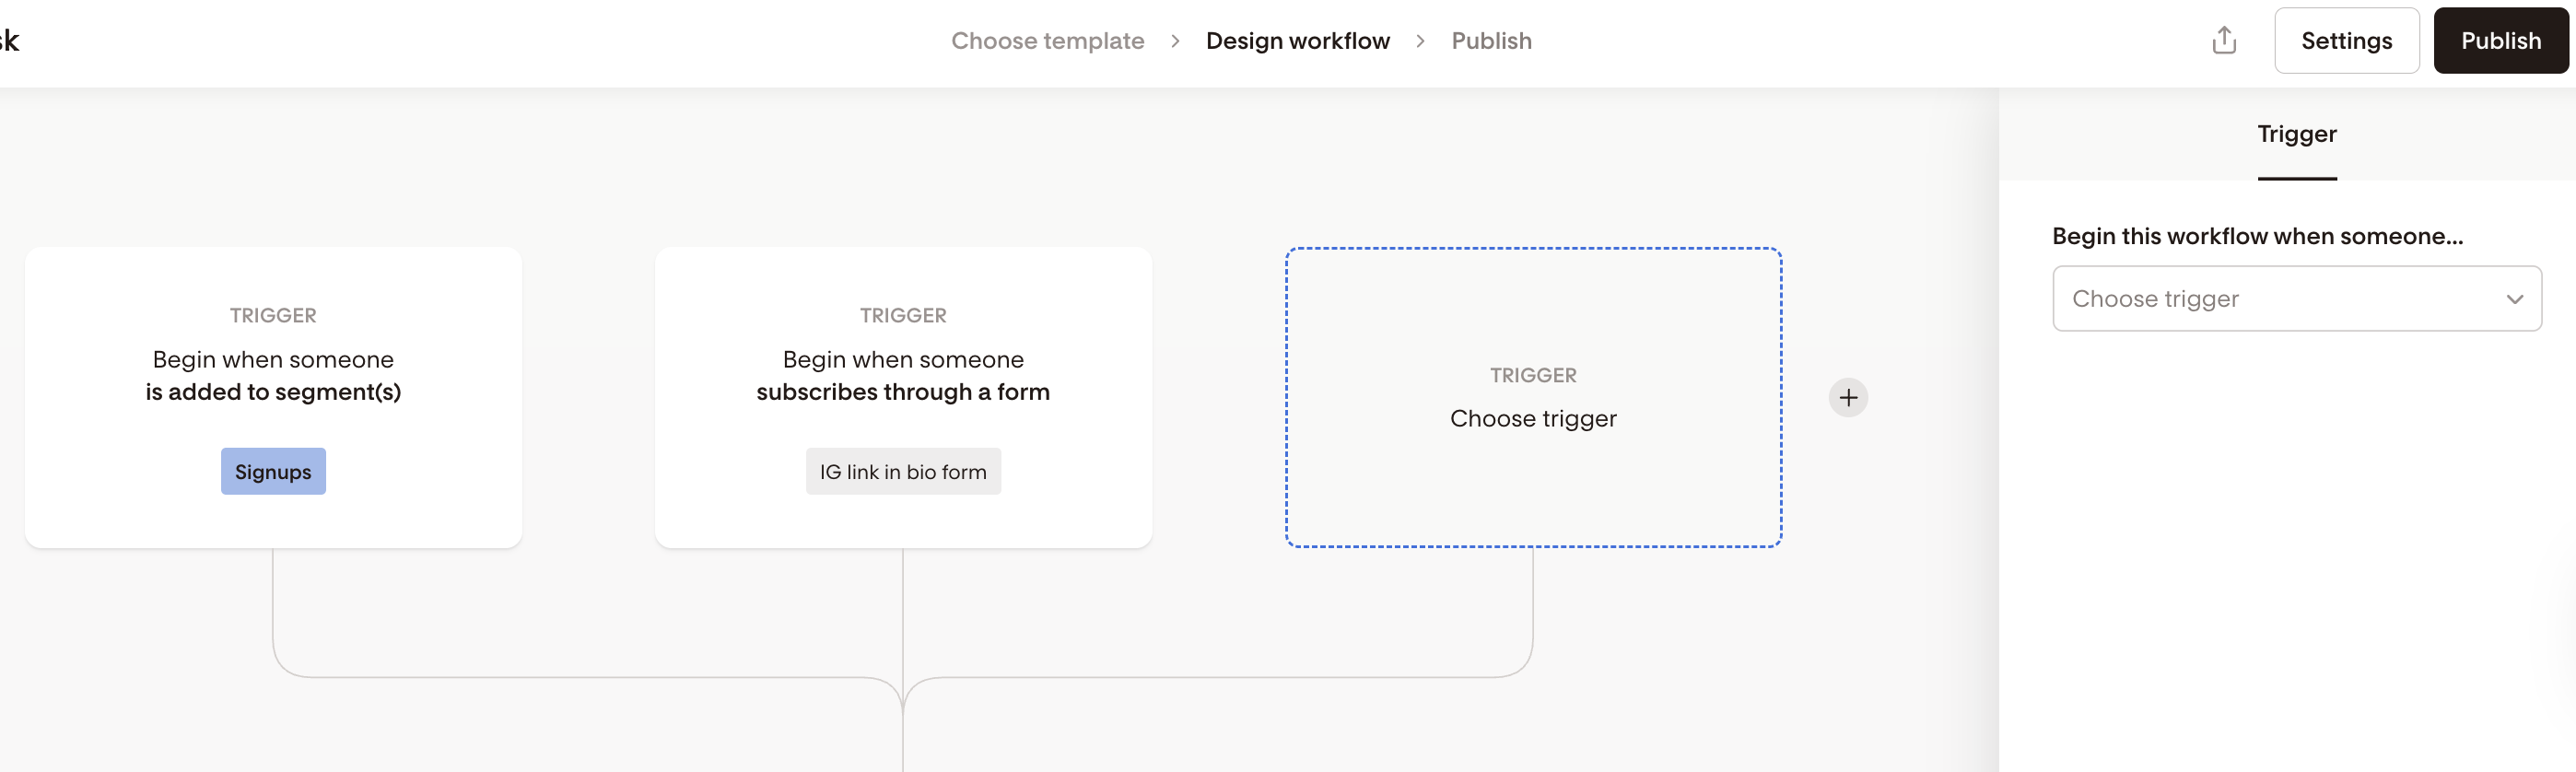
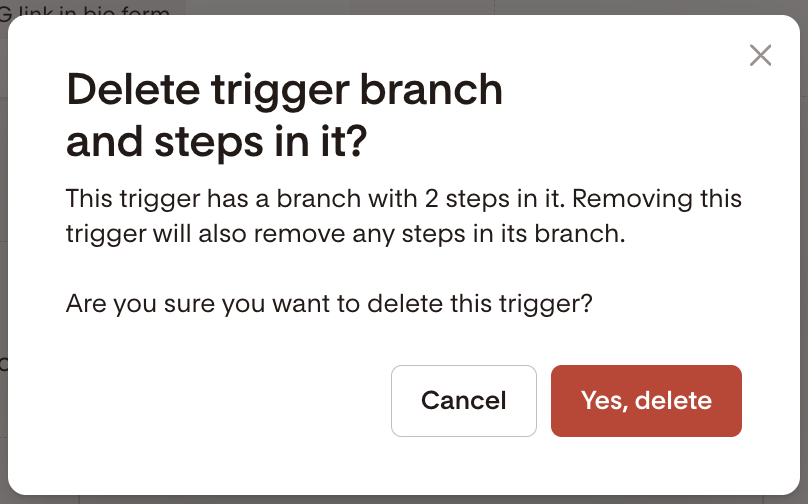
You can also add multiple trigger branches to a single workflow, so subscribers coming from different sources (like two different signup forms, or purchases from multiple stores) all flow into the same automation. Each branch can start with its own unique steps before merging into a shared path.
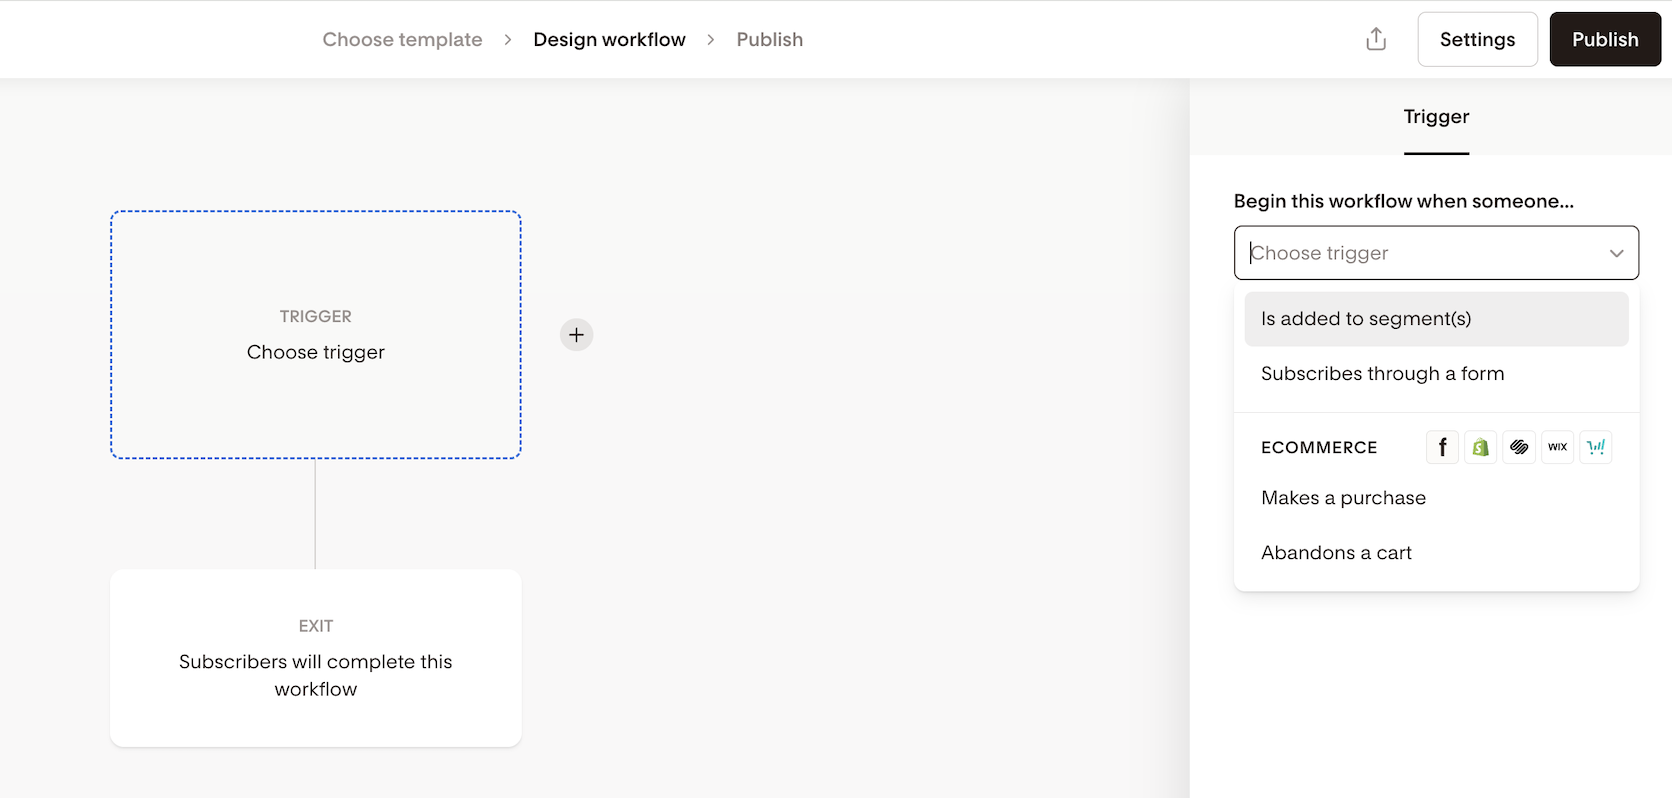
What you can use as a trigger
A workflow can begin when:
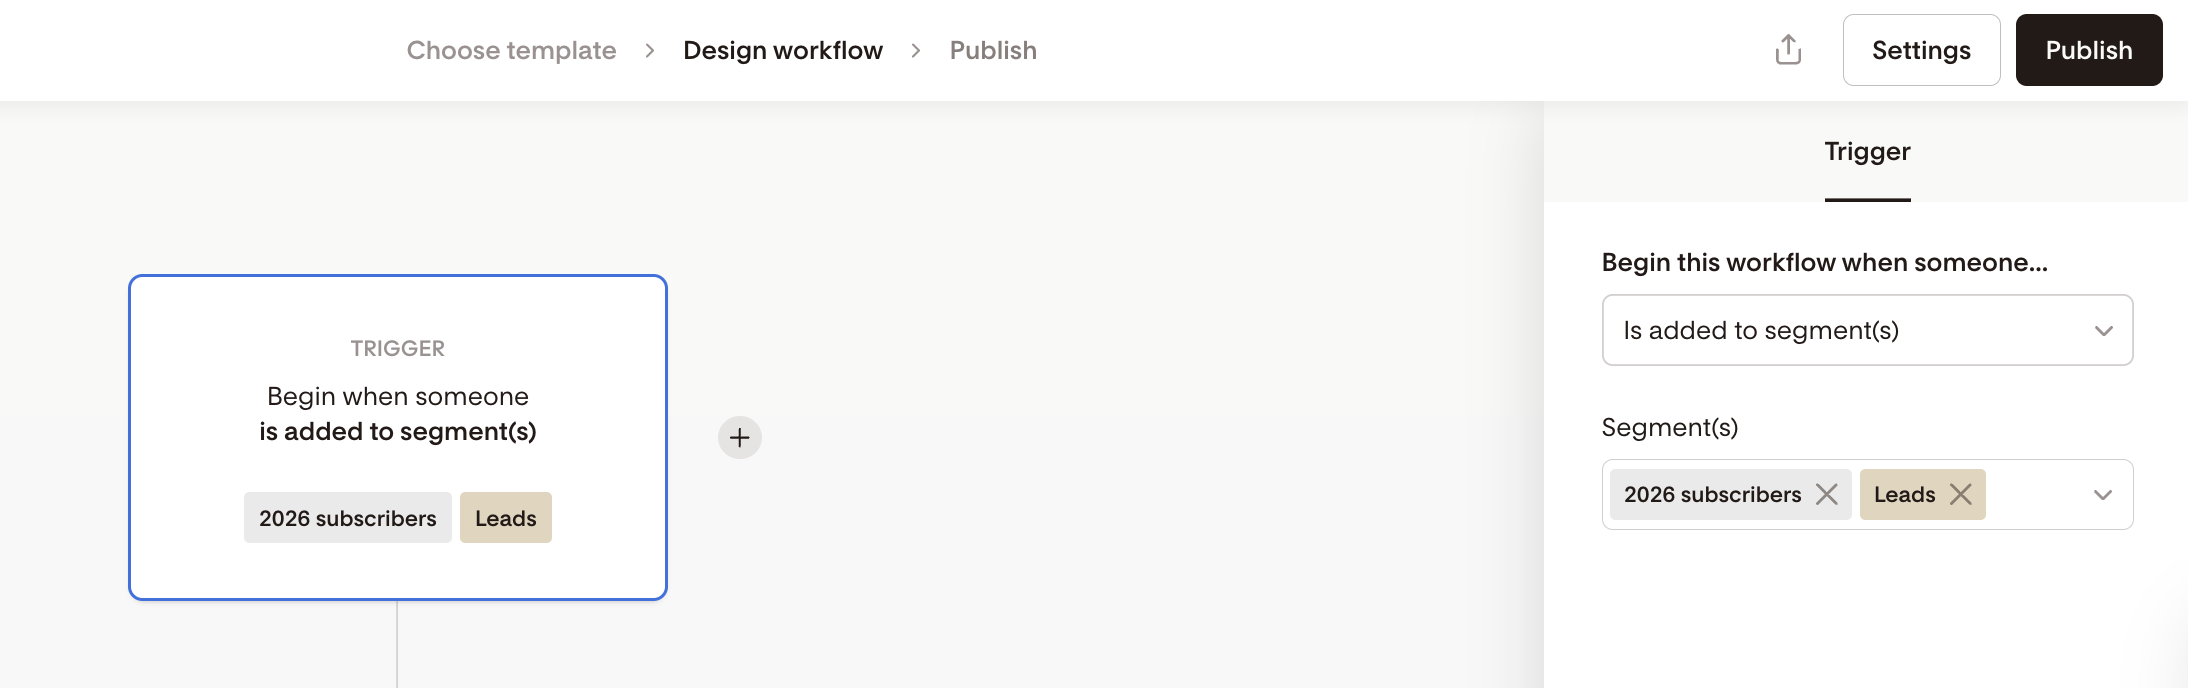
A subscriber is added to a segment
A subscriber submits an opt-in form
A purchase is made (Flodesk Checkout, Shopify, Squarespace, Wix, or ThriveCart)
A cart is abandoned (Flodesk Checkout, Shopify, Wix, or ThriveCart)
You can add up to six trigger branches in a single workflow. You don’t have to use multiple triggers, but a workflow must have at least one trigger.
Note: abandoned cart triggers can't be mixed with other trigger types in the same workflow. If you use an abandoned cart trigger, all triggers in that workflow must be of the same type. You can, however, have multiple abandoned cart triggers (for example, one for Shopify and one for Flodesk Checkout) in the same workflow.
How to add and configure triggers
Go to Workflows and click + New workflow
Choose a template or start from scratch
In the trigger step, select your trigger type: added to segment, subscribed via form, makes a purchase, or abandons a cart
To add another trigger branch, click the + icon to the right of the last trigger card
Each branch supports one trigger type. You can add up to five additional branches, for a maximum of six total.
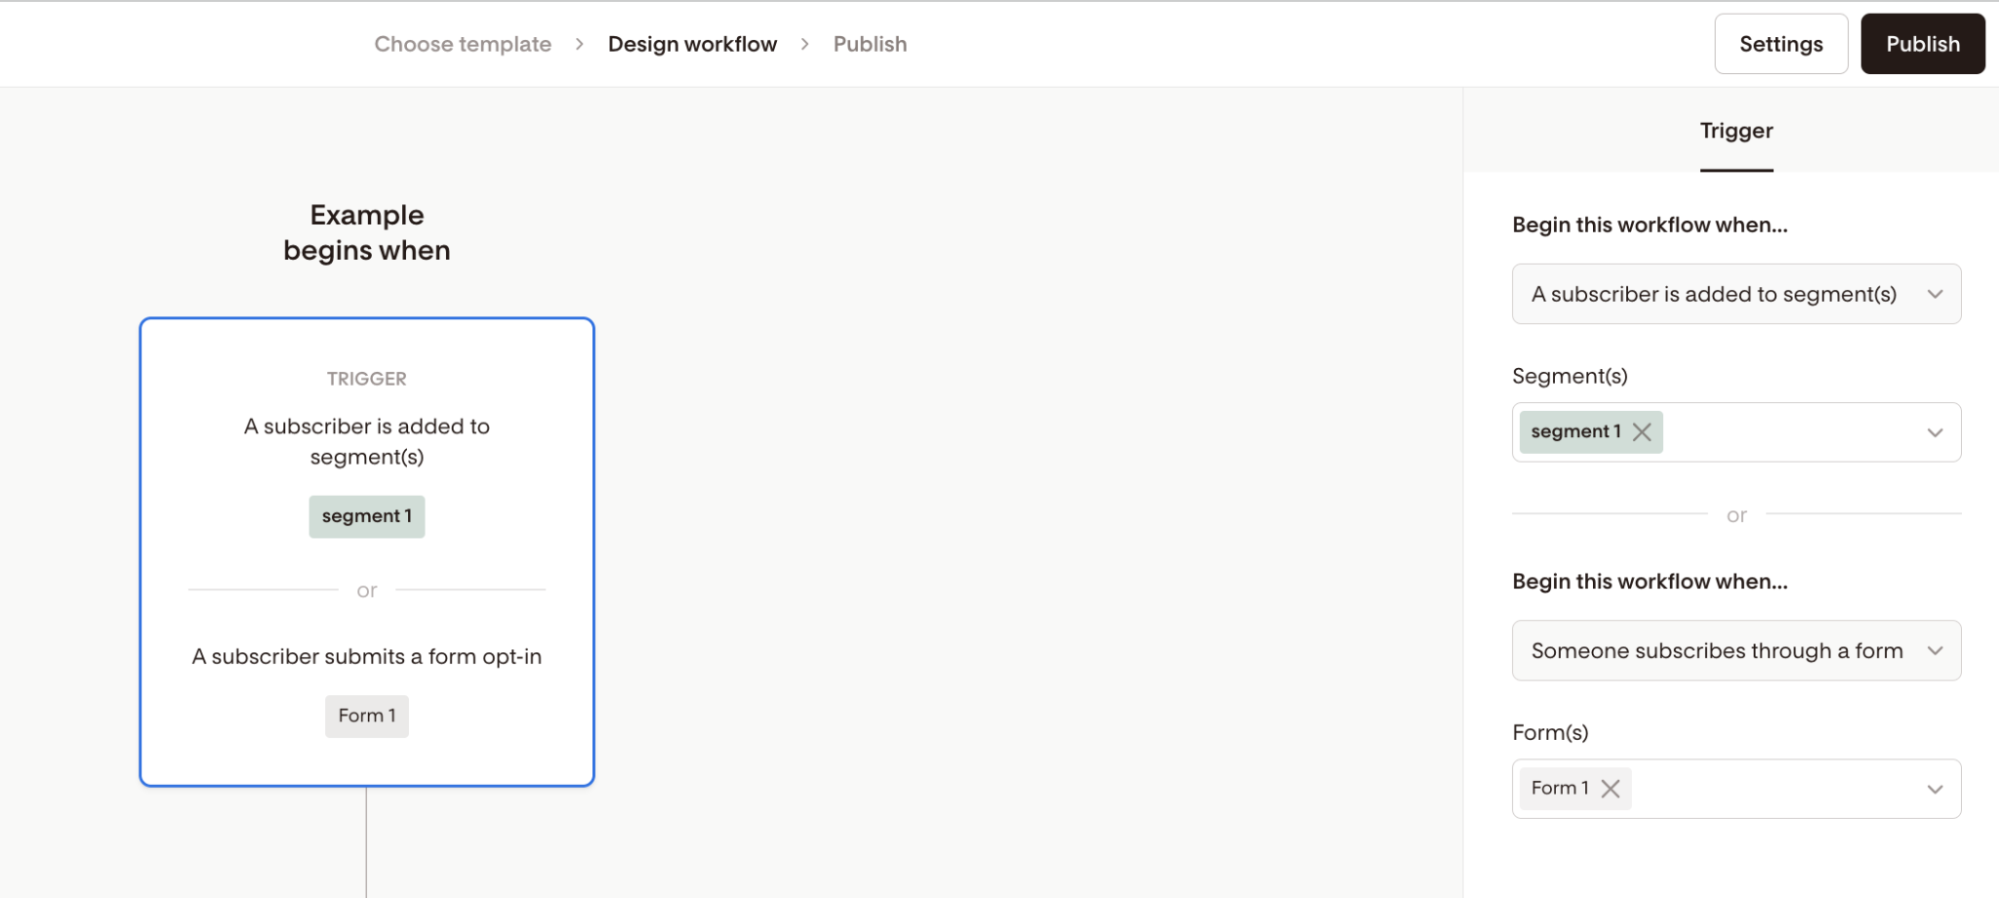
If you use the "is added to segment(s)" trigger:
You have to add at least one segment as the trigger event. But you can also select more than one.
Important: Flodesk only shows a limited number of segments in the Segment(s) selector drop-down. If you can't see the segment you want to select as the trigger right away, start typing its name so it shows up.
If you select more than one segment as the trigger event, your workflow is triggered when someone is in any of the segments you’ve selected, either in this or in that.
Note: If your subscriber is in both segments you defined as the trigger event, it will still trigger only once. They won’t get your workflow emails duplicated.
How to use multiple trigger branches
Each trigger branch can have its own unique first steps (emails, time delays, or actions) before all branches merge into a single shared workflow path. From the merge point onward, all subscribers follow the same sequence.
This is useful when you want different subscribers to receive a personalized opening message before entering the same automation.

Example: multiple signup forms
You have two signup forms: one on your website and one in your Instagram bio. Both audiences should receive your welcome sequence, but you want each group to see a different intro message first.
Set up two trigger branches, one for each form. Add a unique welcome email under each branch. After those, the branches merge and all subscribers continue through the same nurture sequence.
Example: multiple stores
You sell on Flodesk Checkout and Squarespace. Both sets of buyers should receive the same post-purchase sequence, but you want each group to see a store-specific confirmation first.
Set up two trigger branches, one for each platform. Add a unique first email to each. After those, the branches merge and all buyers continue through the same follow-up sequence.
Managing Legacy Workflows
If you have older workflows that combined multiple trigger types in a single trigger step (for example, a form + segment), those will continue to work as they are. And you will be able to add up to 4 additional trigger branches (for a total of max 5 trigger steps with 6 total triggers).
When you duplicate or create new workflows, each trigger source will appear as its own separate branch.
Workflow Behavior and Tips
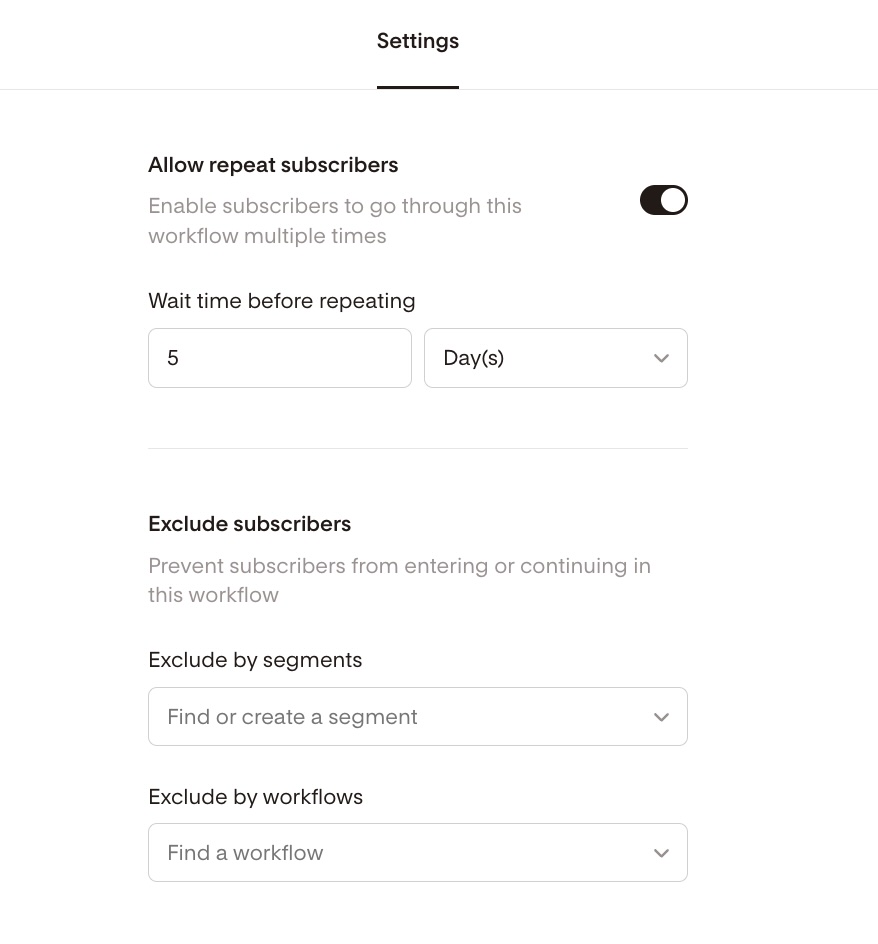
Allow repeat subscribers
If you want subscribers to go through a workflow again:
Click the Settings button (top right).
Turn on Allow repeat subscribers.
Set a wait time before they can re-enter.
Note: Turning on this setting allows a subscriber to re-enter the workflow only after they’ve completed it once. This means that if a subscriber is still moving through the workflow and triggers it again via another trigger action, they won’t restart in the workflow.
Removing or deleting triggers
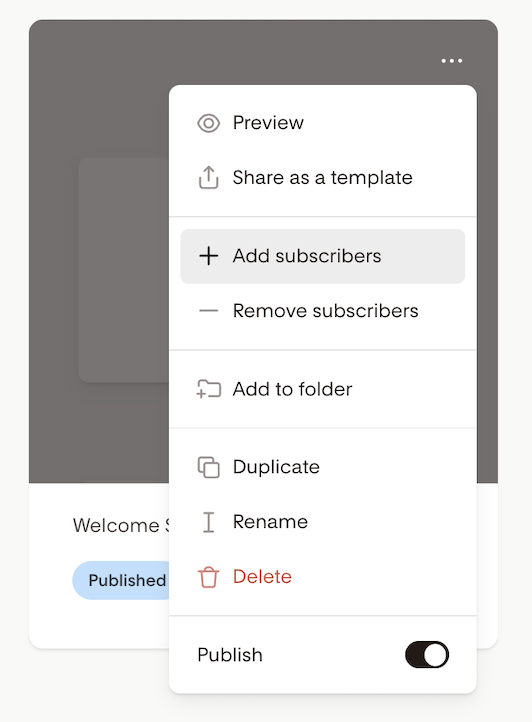
You can delete a trigger step anytime by clicking the trash icon in the top-right corner of the card upon hover.
If a segment, form, or integration connected to a trigger is deleted, that trigger becomes inactive.
If your workflow has only one trigger, when a third-party integration is disconnected/segment is deleted/form is deleted the workflow will be paused.
If your workflow has multiple trigger branches, it will only pause if no valid triggers remain.
Manually add subscribers to deleted trigger branch
When you pause a workflow with multiple triggers, then add subscribers directly to the deleted trigger in a subsequent step:
The subscriber is added to the joined branch of the workflow
They are automatically added to the workflow, not placed in the cache (queued subscribers)
Abandoned cart triggers
Abandoned cart workflows work a bit differently:
Because content of abandoned cart emails is dependent on the abandoned cart trigger, you can’t mix abandoned cart triggers with other trigger types in the same workflow.
You can have multiple abandoned cart triggers (for example, one for Shopify, one for Flodesk Checkout) in the same workflow.
Subscribers removed from trigger segments
Once a subscriber has been added to a workflow, their status in the trigger segment has no impact on whether they continue through the workflow or not. If they have already started going through the workflow, and you remove them from the trigger segment, they will still continue in the workflow.
If you want to stop someone from continuing through the workflow:
You must manually remove them from the workflow, not just from the trigger segment. See the steps here on how to remove a subscriber from a workflow.
Adding subscribers manually to the workflow
You can still manually add people to your workflow from the workflow card menu using “Add subscribers”. When manually added, subscribers join the main (rejoined) branch of the workflow.
If you use an action step in another workflow called “Add subscribers to segment” or upload a CSV of subscribers to the trigger segment, then they will be added to that trigger step. Keep this in mind when there are steps between the trigger and the main (rejoined) branch of the workflow.
FAQ
What is a trigger in a Flodesk workflow?
A trigger is the event that starts a workflow. When the trigger condition is met (for example, someone joins a segment or submits a form), Flodesk automatically begins that subscriber's journey through the workflow.
What can I use as a workflow trigger in Flodesk?
You can trigger a workflow when someone is added to a segment, submits an opt-in form, makes a purchase (via Flodesk Checkout, Shopify, Squarespace, Wix, or ThriveCart), or abandons a cart (via Flodesk Checkout, Shopify, Wix, or ThriveCart).
Can I have more than one trigger in a single workflow?
Yes. You can add up to six trigger branches in one workflow. Each branch can have its own unique first steps before merging into a shared automation path.
Why would I use multiple trigger branches?
Multiple triggers let you bring subscribers from different sources into the same workflow without duplicating it. For example, you can have two signup forms each send a personalized first email, then merge both paths into the same welcome sequence. Or you can handle purchases from two different stores in one workflow, with a unique confirmation for each store at the start.
Can each trigger branch send different emails?
Yes. Each branch can have its own unique steps (emails, time delays, or actions) before the branches merge into the shared workflow path.
Can I mix different trigger types in the same workflow?
Yes, with one exception. Abandoned cart triggers can't be mixed with other trigger types. If you use an abandoned cart trigger, all triggers in that workflow must be abandoned cart triggers. You can, however, have multiple abandoned cart triggers from different platforms (for example, Shopify and Flodesk Checkout) in the same workflow.
If I select multiple segments as a trigger, will subscribers receive the workflow more than once?
No. If a subscriber is in more than one of the selected trigger segments, the workflow will only trigger once. They won't receive duplicate emails.
If I remove a subscriber from the trigger segment, will they stop receiving workflow emails?
No. Once a subscriber has entered a workflow, their segment membership no longer affects whether they continue. To stop them, you need to remove them from the workflow directly, not just from the segment.
What happens if the form or segment connected to a trigger is deleted?
That trigger becomes inactive. If it was your only trigger, the workflow will pause. If you have multiple trigger branches, the workflow will keep running as long as at least one valid trigger remains.
Can I delay the start of a workflow after the trigger fires?
Yes. Add a time delay step right after the trigger, for example "Wait 1 day," and Flodesk will hold subscribers at that step before moving them forward.
Can subscribers go through the same workflow more than once?
Yes, but you need to turn this on. In the workflow editor, click Settings in the top-right corner and toggle on Allow repeat subscribers. You can also set a wait time before they can re-enter. Subscribers can only re-enter after they've completed the workflow, not while they're still active in it.