
Actions 101: Automate Audience Segmentation in Workflows
Flodesk’s Action step gives you powerful automation tools to manage and segment your audience based on how they behave within your workflows.
Think of it as your behind-the-scenes assistant—automatically organizing subscribers into the right buckets, so your messaging is always targeted and relevant.
What is the Action Step?
The Action step allows you to:
Add subscribers to one or more segments
Remove subscribers from one or more segments
Move subscribers from one segment to another (by combining add + remove actions)
Each Action step executes immediately once a subscriber reaches it in the workflow—no delay required.
Available Actions
1. Add subscribers to segment(s)
Use this to segment or group subscribers based on their behavior or preferences. This action will add a subscriber to one or more segments that you specify.
Use Case: Segment subscribers who watched a webinar replay
Scenario:
You’re promoting a webinar replay via email and want to follow up only with those who actually clicked the replay link.
How to set it up in your workflow:
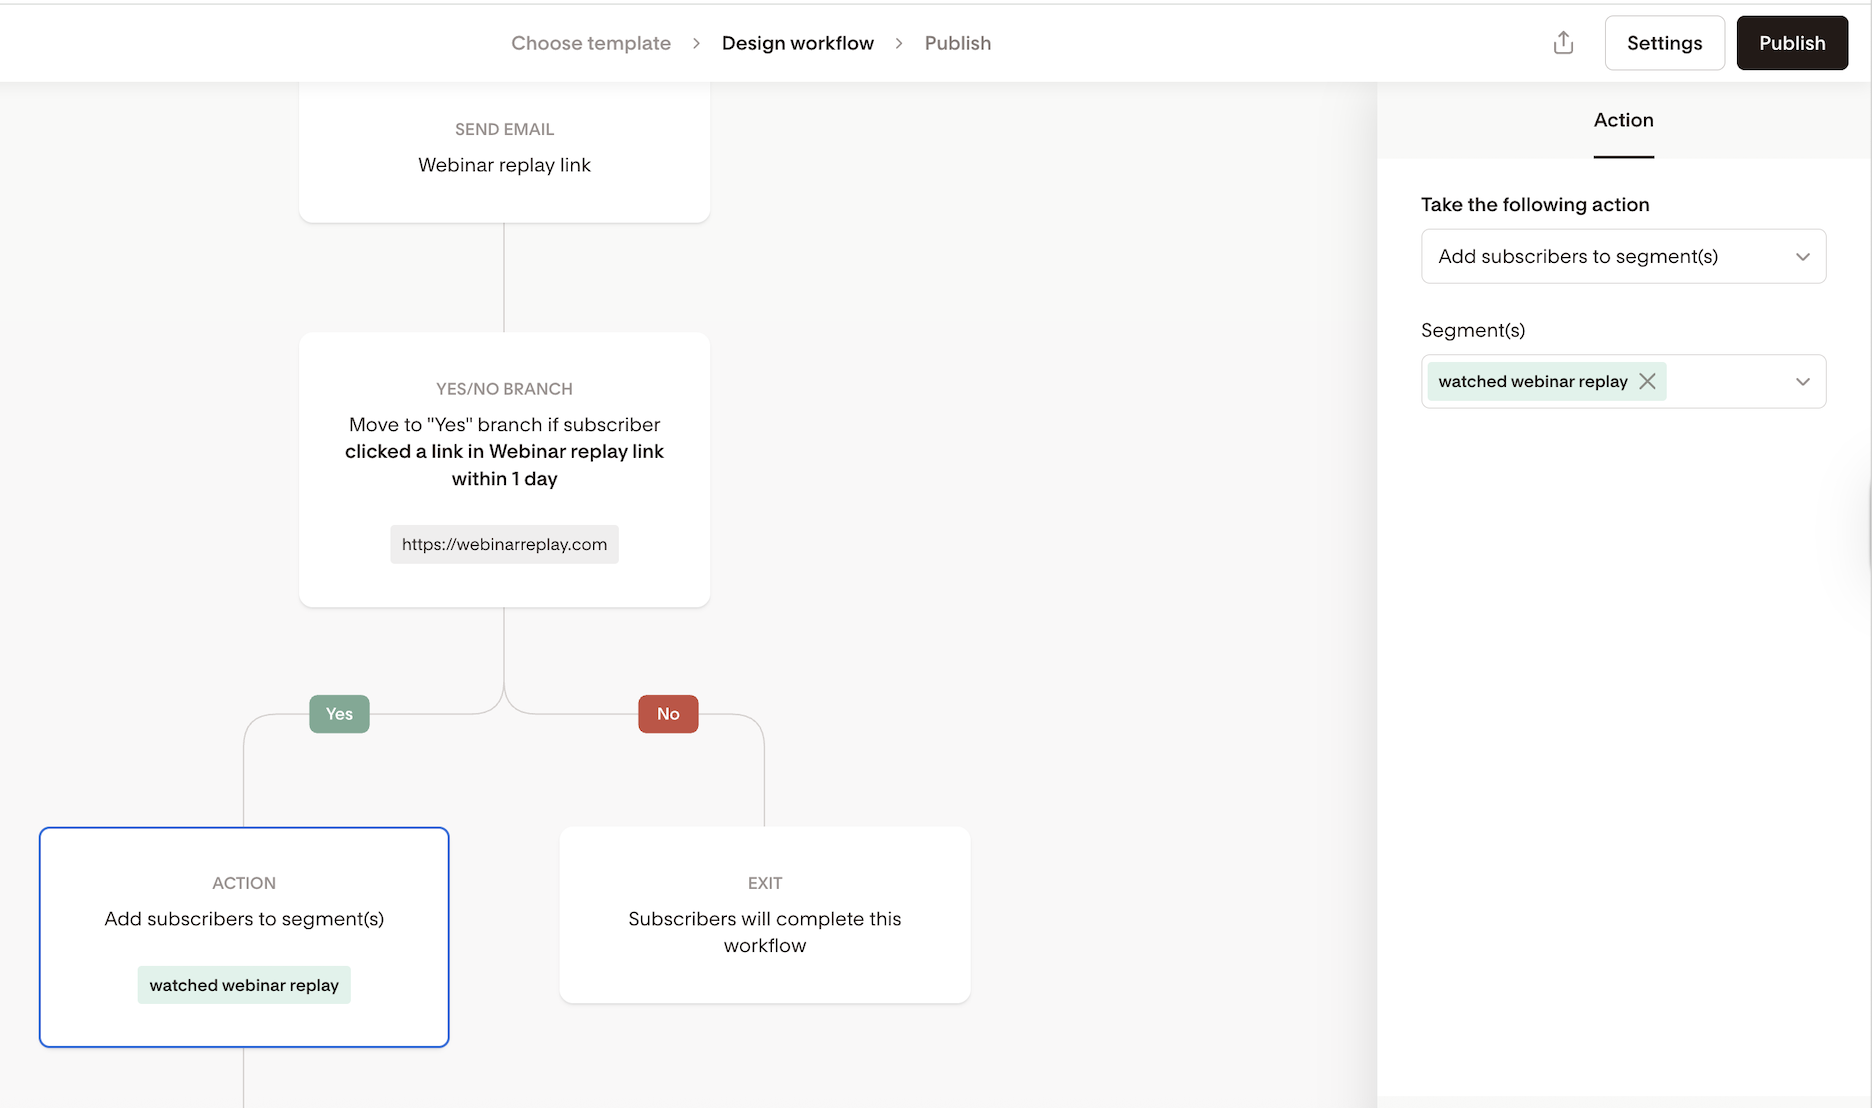
Send a workflow email with the webinar replay link.
Add a Yes/No branch step → “Click a workflow email link” → Choose the email and webinar link → Set a timeframe
Under the YES path, insert an Action step:
Add subscribers to segment(s) → “Watched webinar replay”
Why it’s helpful:
Now you have a segment of engaged subscribers who showed interest. You can:
Send them advanced training or product offers
Invite them to a paid course
Trigger a specific follow-up workflow
This approach helps you tailor your content based on behavior and increase conversion rates with minimal manual work.
2. Remove subscribers from segment(s)
Use this when you want to clean up or update your subscribers’ segments as they progress through your workflow. This action will remove a subscriber from one or more segments that you specify.
Use Case: Clean up your launch list after a promotion ends
Scenario:
You ran a product launch and added everyone interested in updates to a “Launch interest” segment. After the launch ends, you want to remove those subscribers from that segment so it’s clean for the next campaign.
How to set it up in your workflow:
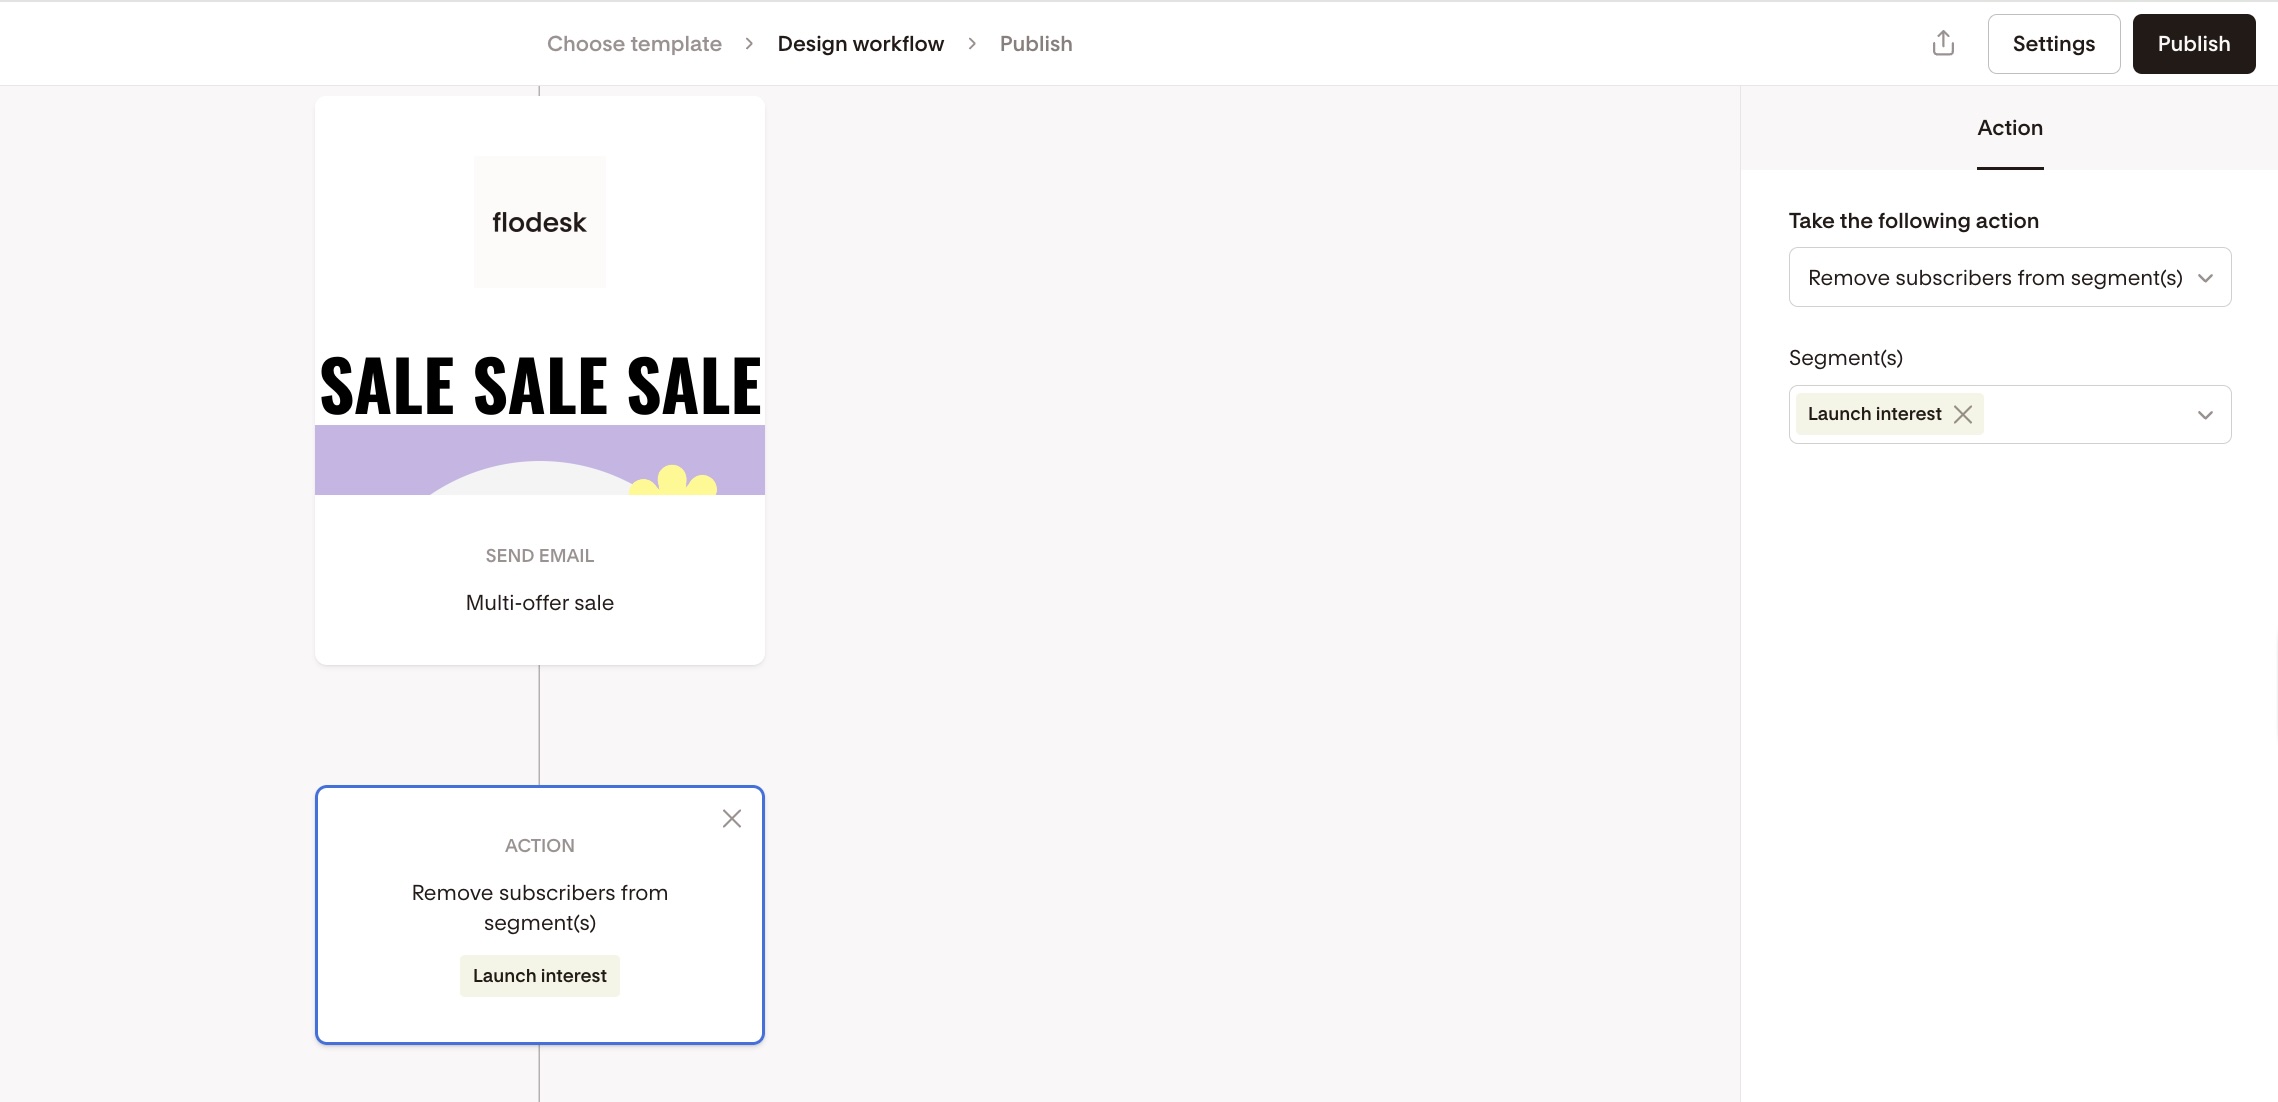
At the end of your launch workflow (after the last promo email or delivery),
Add an Action step:
Remove subscribers from segment(s) → “Launch interest”
Why it’s helpful:
This keeps your segment lists clean and organized. When you start your next promotion, you won’t accidentally re-target subscribers who already saw the previous one—unless you choose to re-engage them intentionally.
3. Move Between Segments
To move a subscriber from one segment to another, simply stack two Action steps:
Add them to the new segment
Remove them from the old one
Use Case: Transition subscribers from a launch list to your main nurture list
Scenario:
After completing a launch campaign, you want to move subscribers out of your “Launch interest” segment and into a more general “Post-launch” segment for continued nurturing.
How to set it up in your workflow:
Add an Action step to
Add subscribers to segment(s) → “Post-launch”
Immediately follow it with another Action step to
Remove subscribers from segment(s) → “Launch interest”

Why it’s helpful:
This keeps your audience organized and ensures subscribers receive the right messaging at the right time—without lingering in outdated segments.
Bonus tip: This setup is especially useful if you reuse segments for future launches. Keeping them clean between campaigns prevents accidental re-inclusion.
Summary
Action | What It Does |
|---|---|
Add subscribers to segment(s) | Segments or organizes subscribers for future targeting |
Remove subscribers from segment(s) | Cleans up outdated segments |
Move segments (Add + Remove) | Combines add + remove to keep subscribers flowing through your funnel |
Using the Action step smartly allows you to deliver personalized experiences, keep your segments clean, and automate follow-ups—without lifting a finger.