
How to move your subscriber list from your old platform to Flodesk
Overview
This guide walks you through how to export your subscribers from your old platform, create organized segments in Flodesk, and upload your subscriber CSVs to the right places.
Following these steps helps you maintain compliance, protect your sender reputation, and start sending confidently from Flodesk.
Step 1. Export your subscriber list from your old platform
Your subscriber list is stored as a CSV file (comma-separated values). It’s a simple spreadsheet containing your subscribers’ email addresses, names, and other data you’ve collected. Perfect for moving data between platforms.
How to export
Each provider’s export process is a little different. Here’s where you can find help on the most common ones:
How to export your list from MailChimp
How to export your list from MailerLite
How to export your list from Constant Contact
How to export your list from ConvertKit
How to export your list from Campaign Monitor
How to export your list from Brevo
How to export your list from AWeber
How to export your list from Active Campaign
How to export your list from Drip
How to export your list from GetResponse
eCommerce platforms
If you sell through Shopify, WooCommerce, BigCommerce, or similar, only export customers who explicitly opted in to receive marketing emails. Someone who made a purchase but didn’t consent to marketing should not be added to your email list for sending.
If you weren’t explicitly asking customers to opt into your email list or receive marketing updates from you, you will not be able to upload these customers’ emails into Flodesk for sending, but we can help you obtain permission:
Create a full-page form in your Flodesk account and link it to a new segment. Be sure the form very clearly states that by subscribing, they will receive ongoing email communication from your business.
Using an alternate contact option (your own email, CRM, previous Email Service Provider, Social Media, etc.), send them the link to your form so they can quickly click and opt-in.
Your customers who confirm their opt-in will be added to your Flodesk audience. This also creates an opt-in record to protect your business in the event of spam complaints.
Prepare your CSV for Flodesk
When exporting, include these key data fields if available:
Subscriber Email address
Subscriber First name / Last name
Opt-in Time/ Signup Timestamp
Opt-in IP address / Signup IP address
Confirmation date and IP (if you used double opt-in)
Marketing permission or consent status
Most platforms either include all fields as default, or you can select them via a tick box.
Do not include:
Unsubscribed contacts
Hard bounces or invalid addresses
Contacts who marked your email as spam
Important: if your list is organized into various tags and segments in your old platform, and you want to keep that structure, make sure to download each tag or segment into its own CSV file. You then need to upload these individual CSVs into their respective segments on your Flodesk Audience > Segments dashboard. See Step 2 and Step 3 below.
To avoid any issues later when you’re uploading the CSV to Flodesk, here are a few things to check:
Make sure you have no empty columns or rows in your CSV. If you have any title rows or other rows without email addresses, you'll need to delete them from the file.
Double-check that the file is saved as a .CSV and not an Excel file, Numbers file, Zip file, etc.
If your list is larger than 10 MB, you'll need to break it down into smaller lists. Our system can not process files larger than 10 MB.
If all the above are correct, try clearing your browser cache and uploading the CSV again.
Step 2. Plan your Flodesk segments
Before importing, decide how to organize your audience in Flodesk. Create separate segments in Flodesk for each "tag" and "segment" you plan to move over from your old platform.
Creating logical segments helps you manage engagement, track performance, and personalize your campaigns. As your business and marketing needs evolve, so will your segments. You can edit them at any time, create new ones or delete those you don’t need anymore.
Here are a few strategies to get started:
Segment type | When to use it | Example |
Source-based segments | To know where subscribers came from | “Mailchimp import” or “Shopify signups” |
Interest-based segments | To group contacts by topic or content type | “Newsletter readers,” “Freebie downloaders” |
Engagement segments | To monitor activity | “Clicked in last 90 days,” “Inactive 6+ months” |
Customer type segments | To separate subscribers in the buyer’s journey | “Leads,” “Customers,” “VIP buyers” |
Note: You can create unlimited segments and one subscriber can be in multiple segments.
Step 3. Create segments in Flodesk
Go to Audience → Segments.
Click + New segment.
Give your segment a clear name (e.g., MailerLite Imports or Engaged Contacts).
Choose a color to help visually organize your segments.
Repeat this step for each list, segment or tag group you plan to import.
Step 4. Upload your CSV files to the right segments
Open the segment you just created.
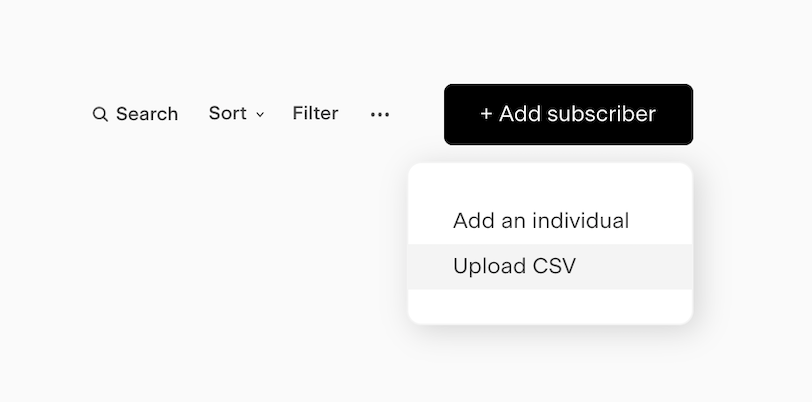
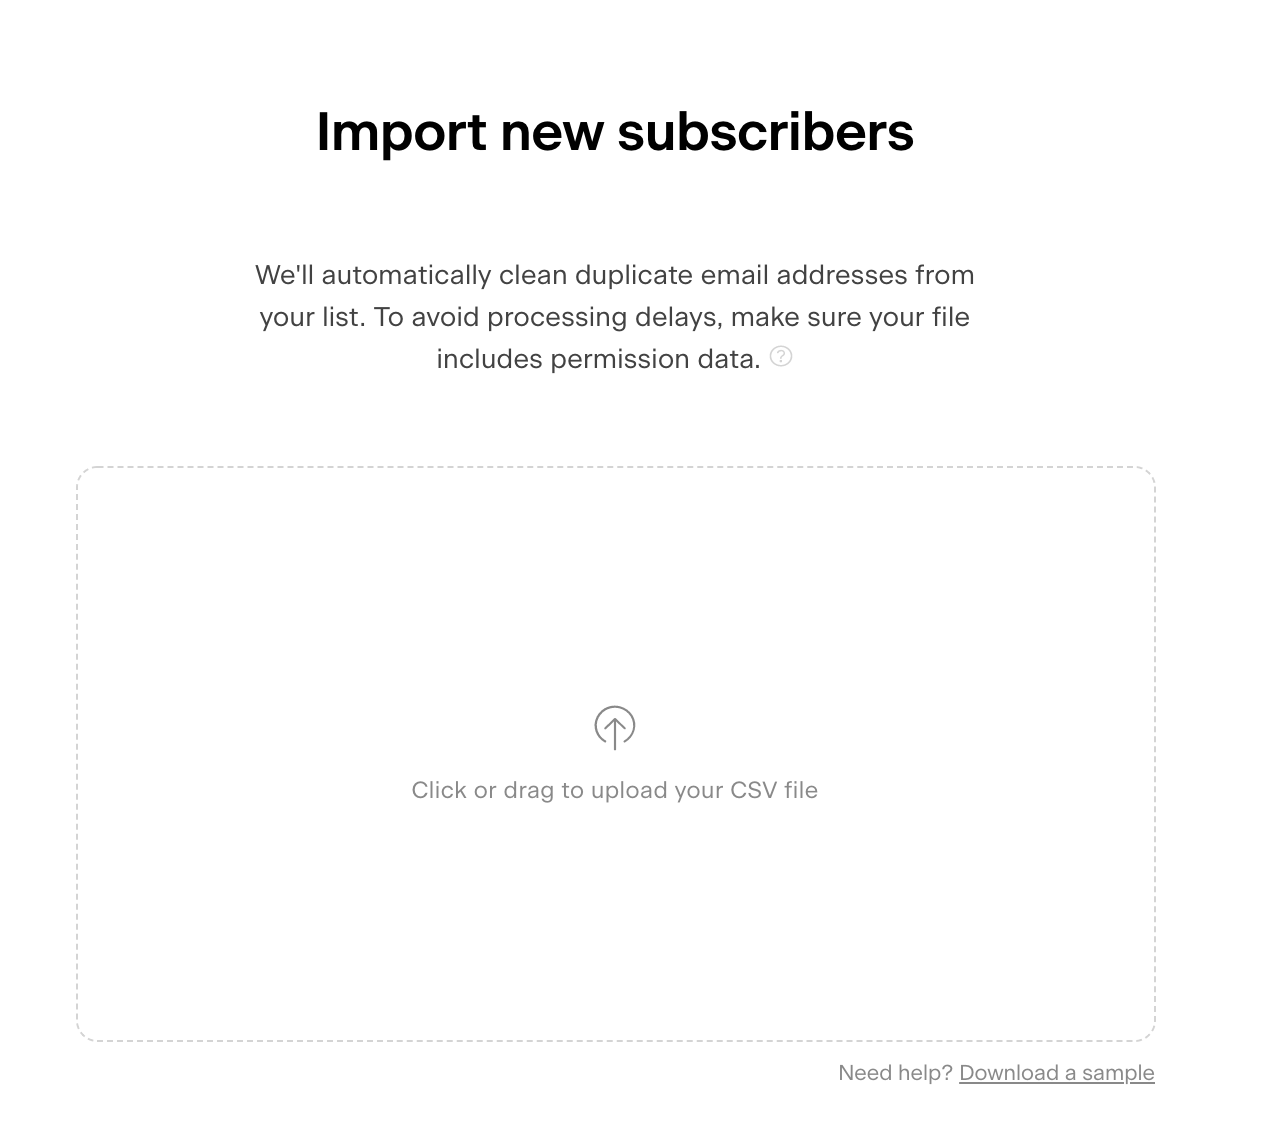
Click Add subscriber → Upload CSV.
Select your CSV file and wait for it to load.
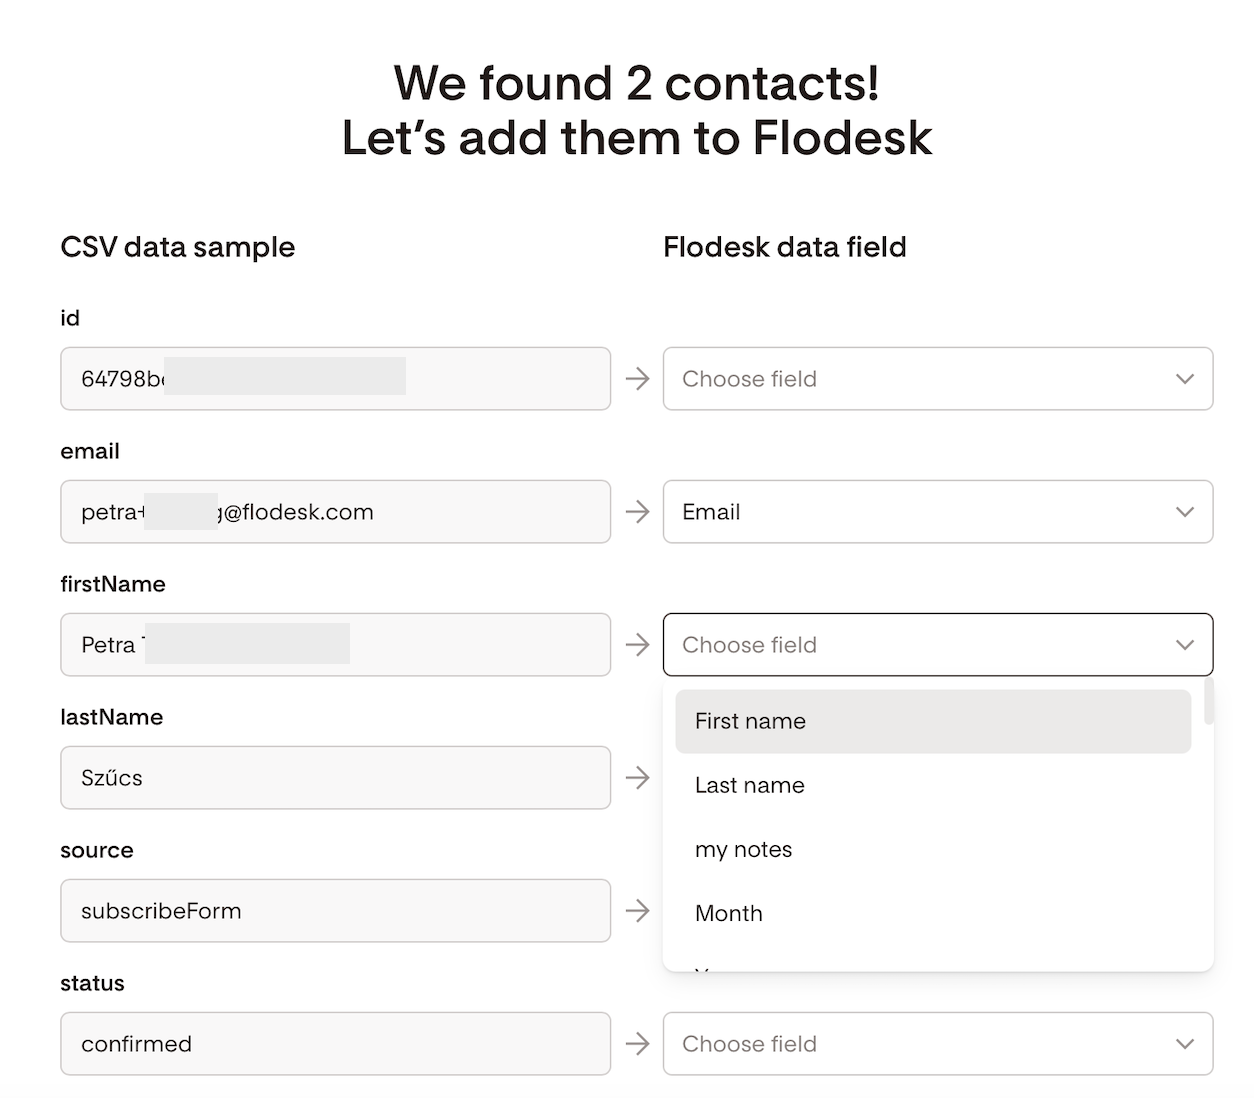
Map your data fields:
Match each column from your CSV (email, name, etc.) to the correct Flodesk data field.
If a field doesn’t exist yet, you can create the data field by starting to type the field name you want to use, in our case, it's Address and hitting the +Create option.
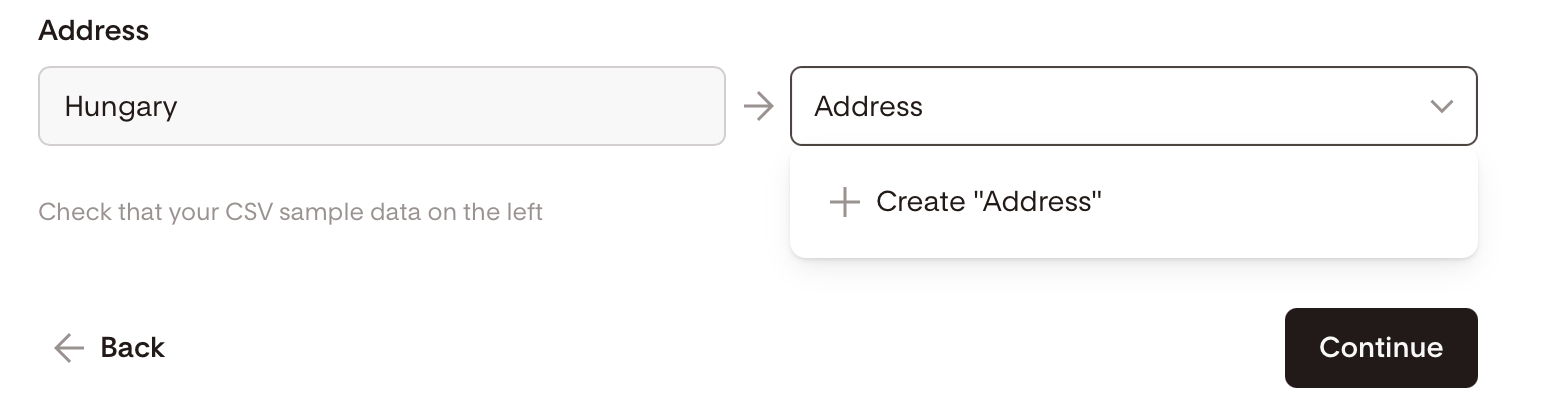
Review your mappings and click Continue → Finish.
Flodesk will automatically detect and remove duplicates or invalid addresses as part of our automatic list cleaning process.
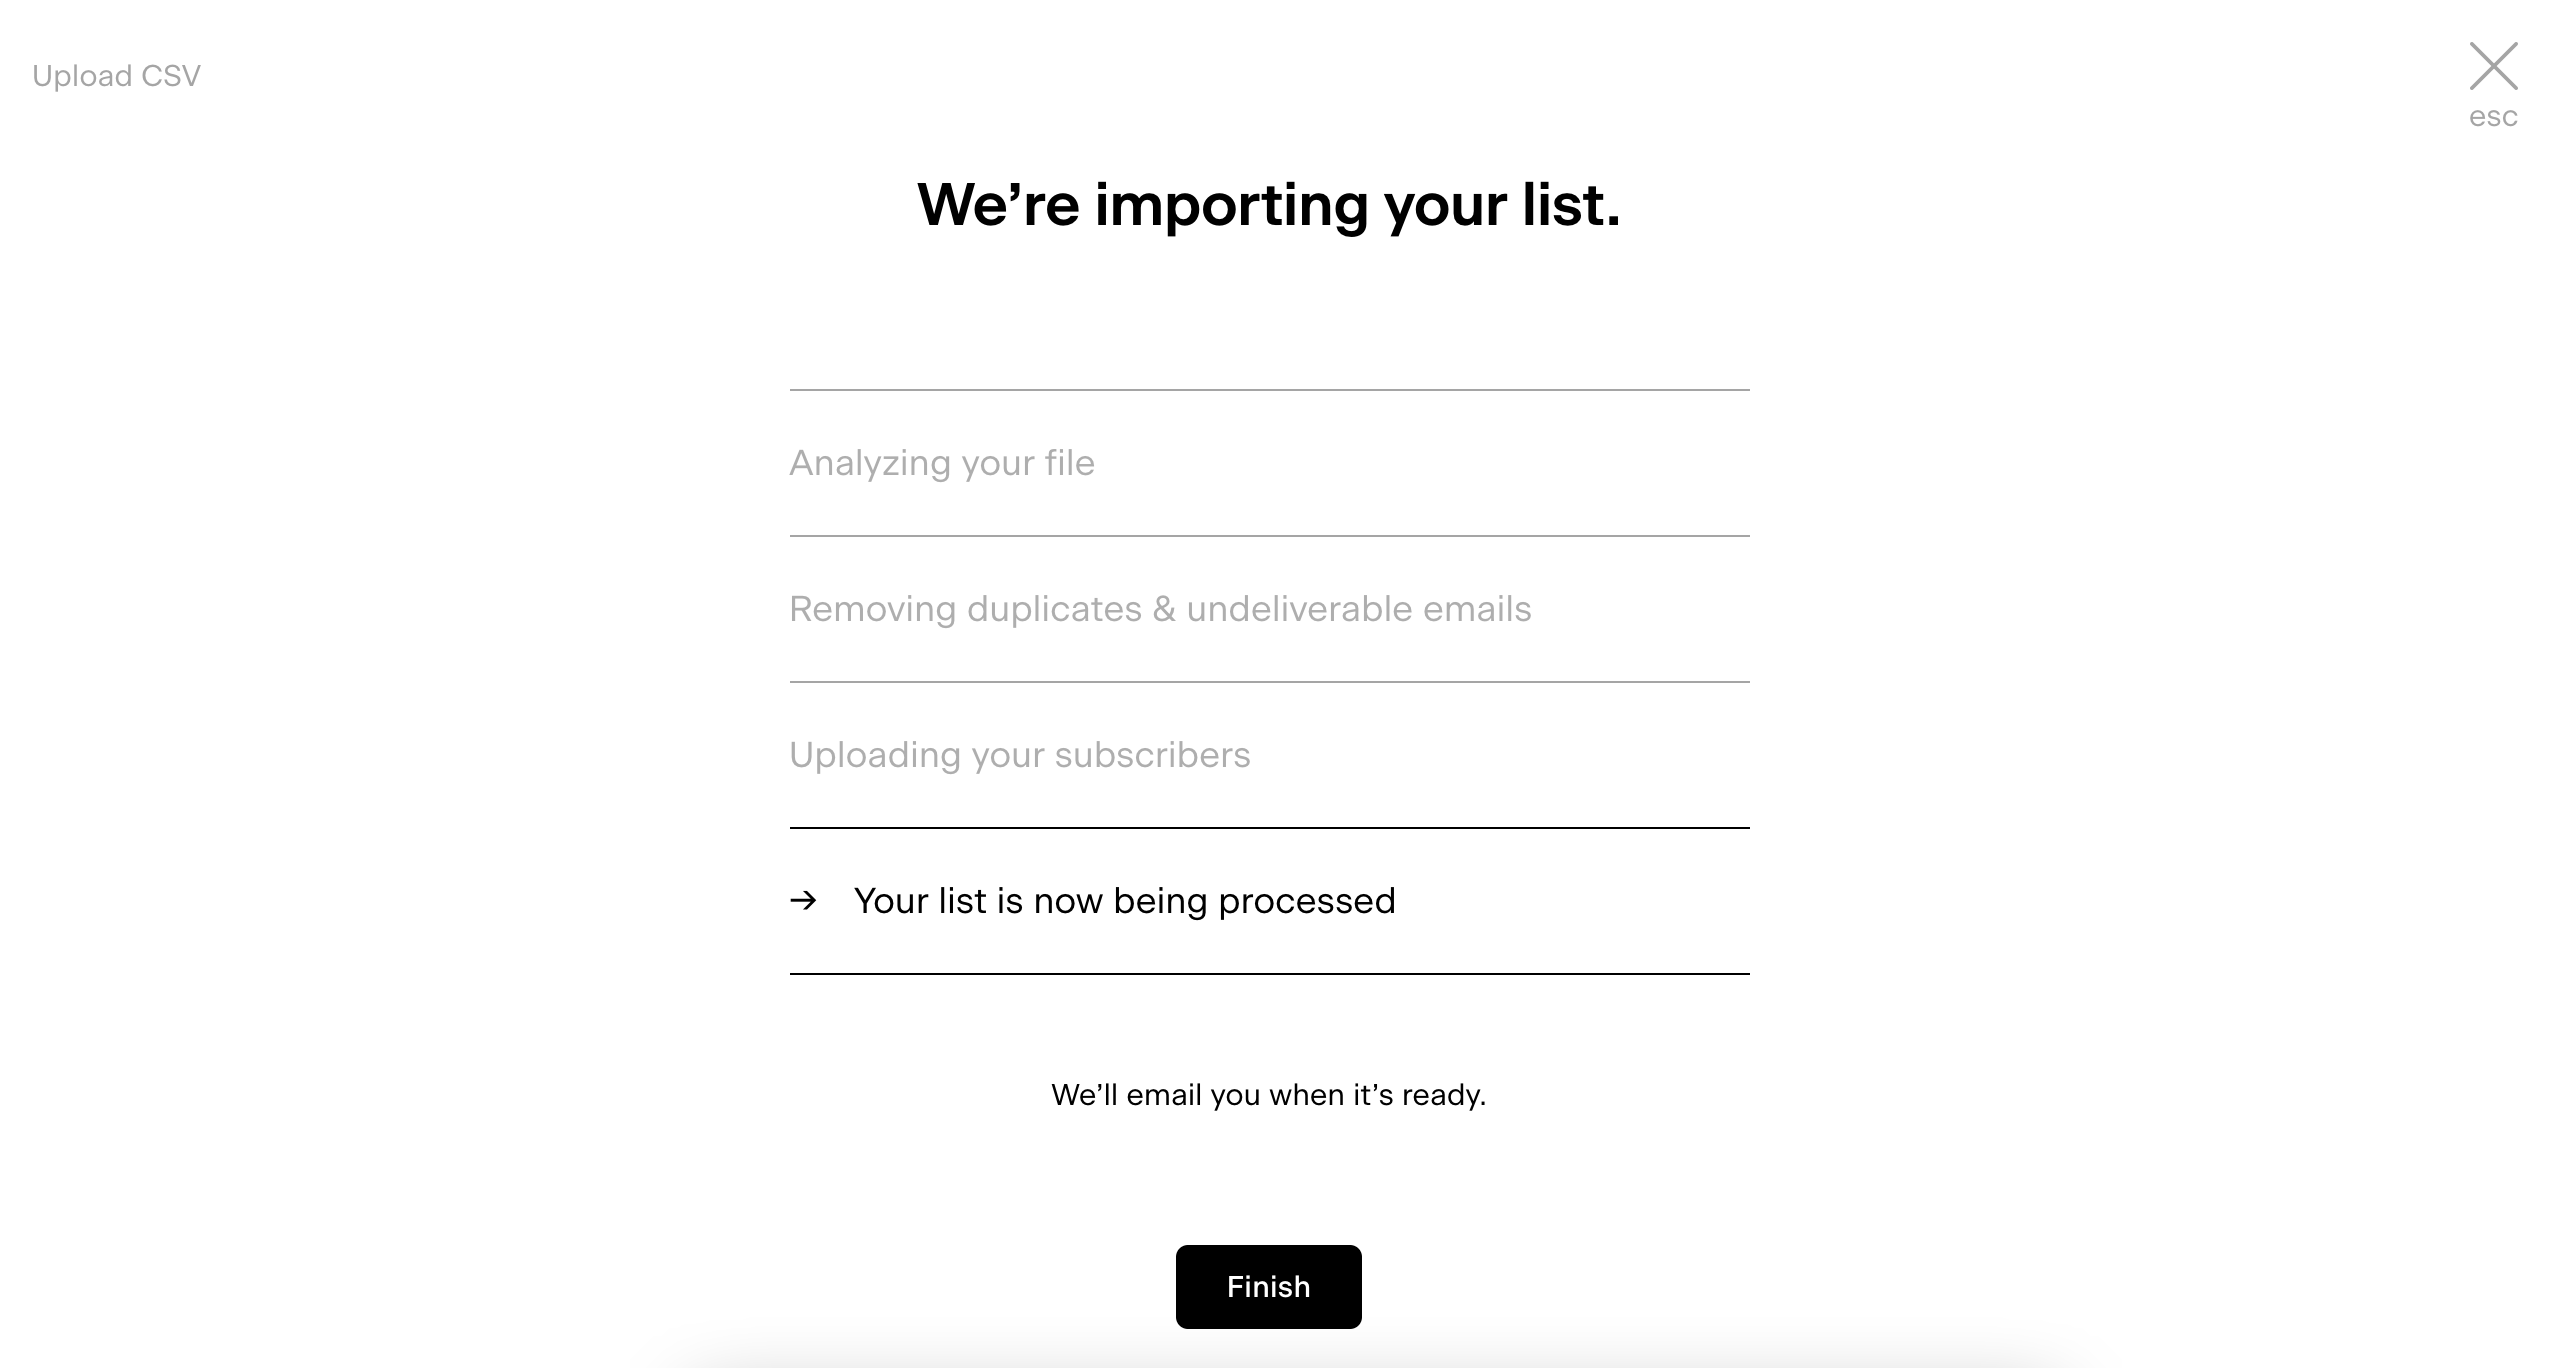
Once complete, refresh your page. Your subscribers will now appear in your segment. You’ll also receive a confirmation email when your upload is processed.
Step 5. Verify and organize
After upload:
Check that subscriber counts look correct.
Review fields (like first names) to make sure data is mapped properly.
Do this next
Now that your subscribers are safely in Flodesk, here’s what to do next: