
What is the right image size for Layout blocks or opt-in forms
Overview
Flodesk Layout blocks and opt-in forms are responsive, meaning they automatically adjust to different screen sizes and devices. Because of this, there isn’t one single “perfect” image size that works everywhere.
Instead of focusing on exact pixel dimensions, the best results come from:
Choosing the right image shape (aspect ratio)
Staying within the maximum image file size
Designing images that work well even if slight cropping occurs
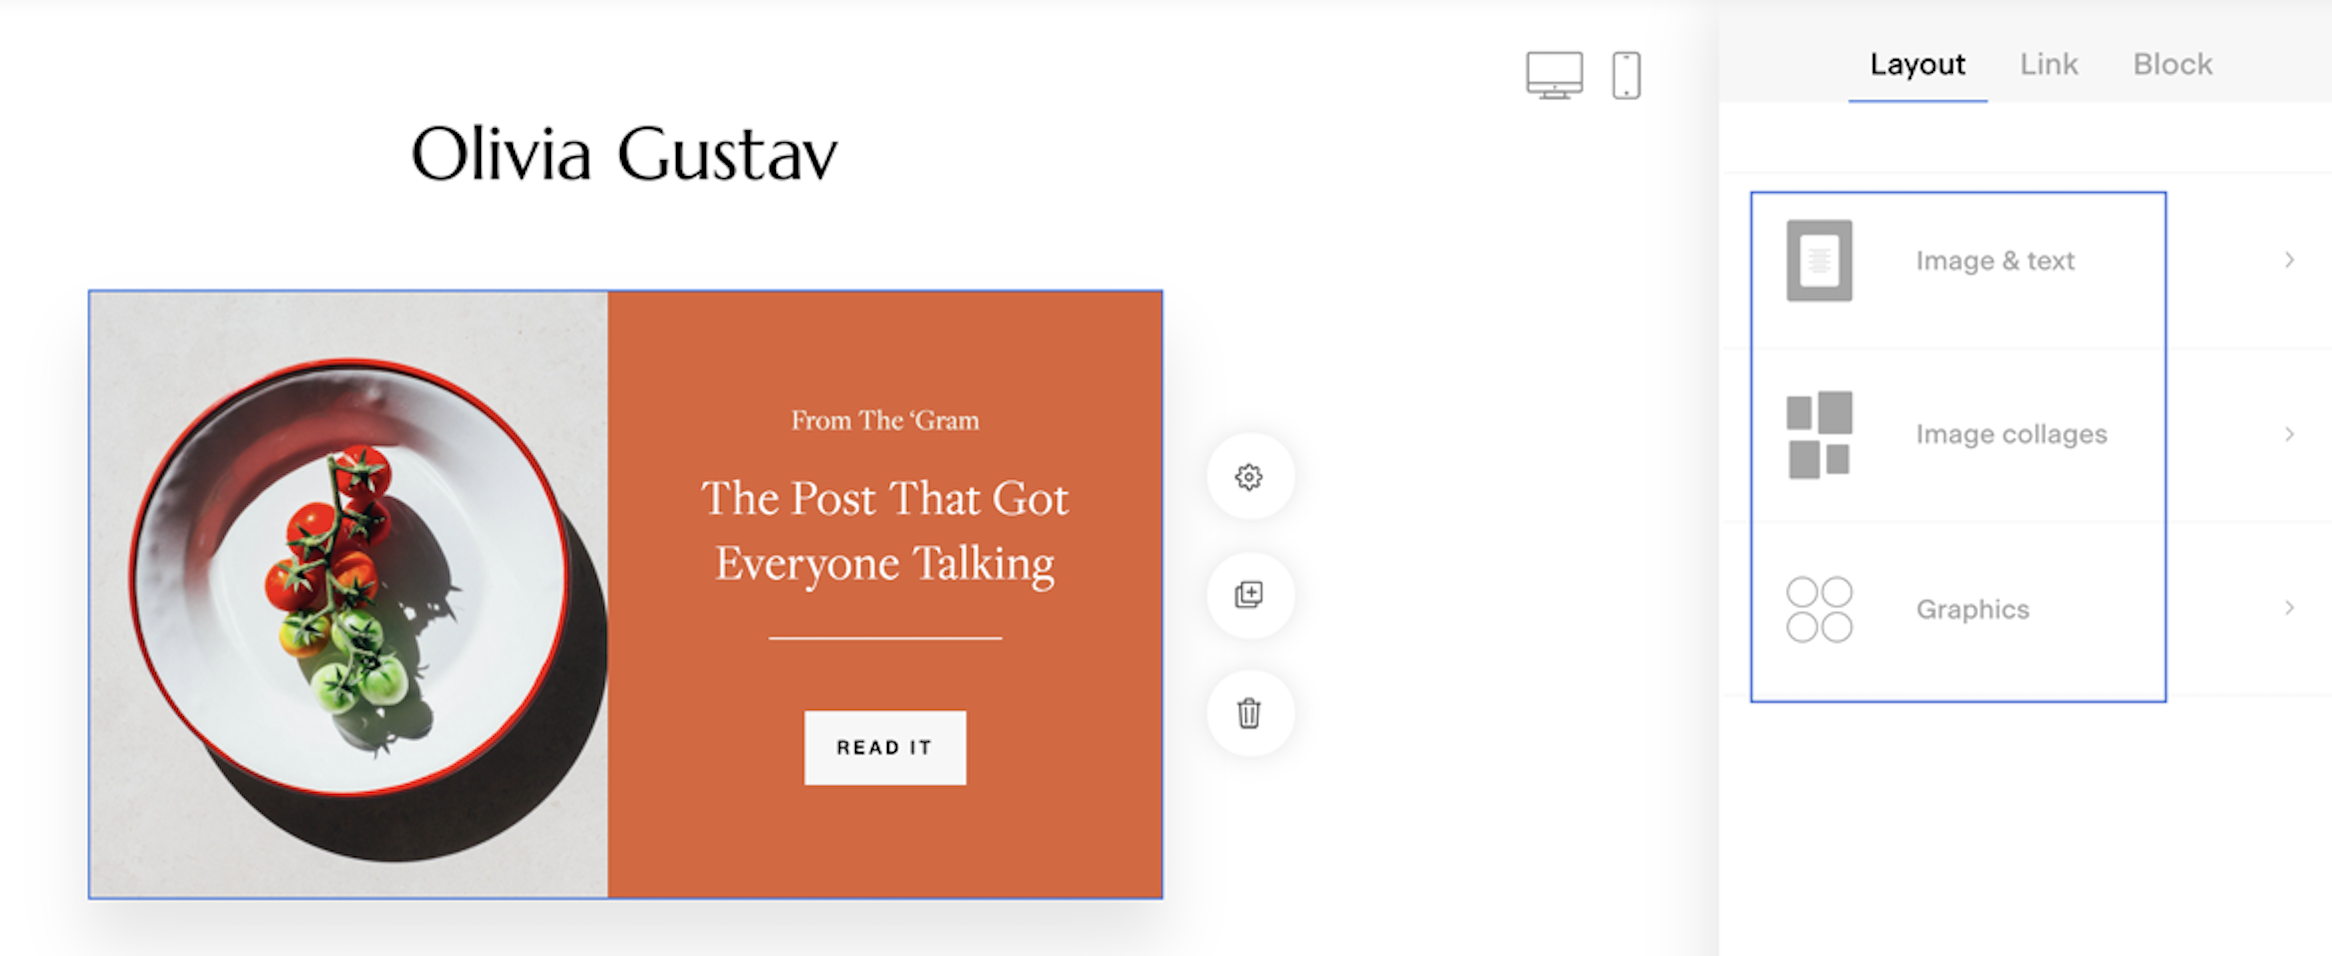
Image size basics (important to know first)
Before adding images to your email or form, keep these key points in mind:
Images in Flodesk must be 10 MB or smaller in file size. There is no fixed pixel-size limit, but very large images may still be resized or cropped automatically to fit different layouts and screen sizes.
What matters most is using an image that matches the shape of the image placeholder, rather than trying to match exact pixel dimensions. Because layouts are responsive, some cropping is normal, especially on mobile devices.
Images that are simple, clear, and not text-heavy tend to perform best.
Choosing the right image size for Layout blocks
Layout blocks come in many styles, including square, portrait, landscape, circle, collage, and text-only options. Because of this variety, image sizing depends on the block you choose.
Best practice: match the aspect ratio
Look at the image placeholder inside the Layout block and choose an image with a similar shape.
Here’s how that usually looks:
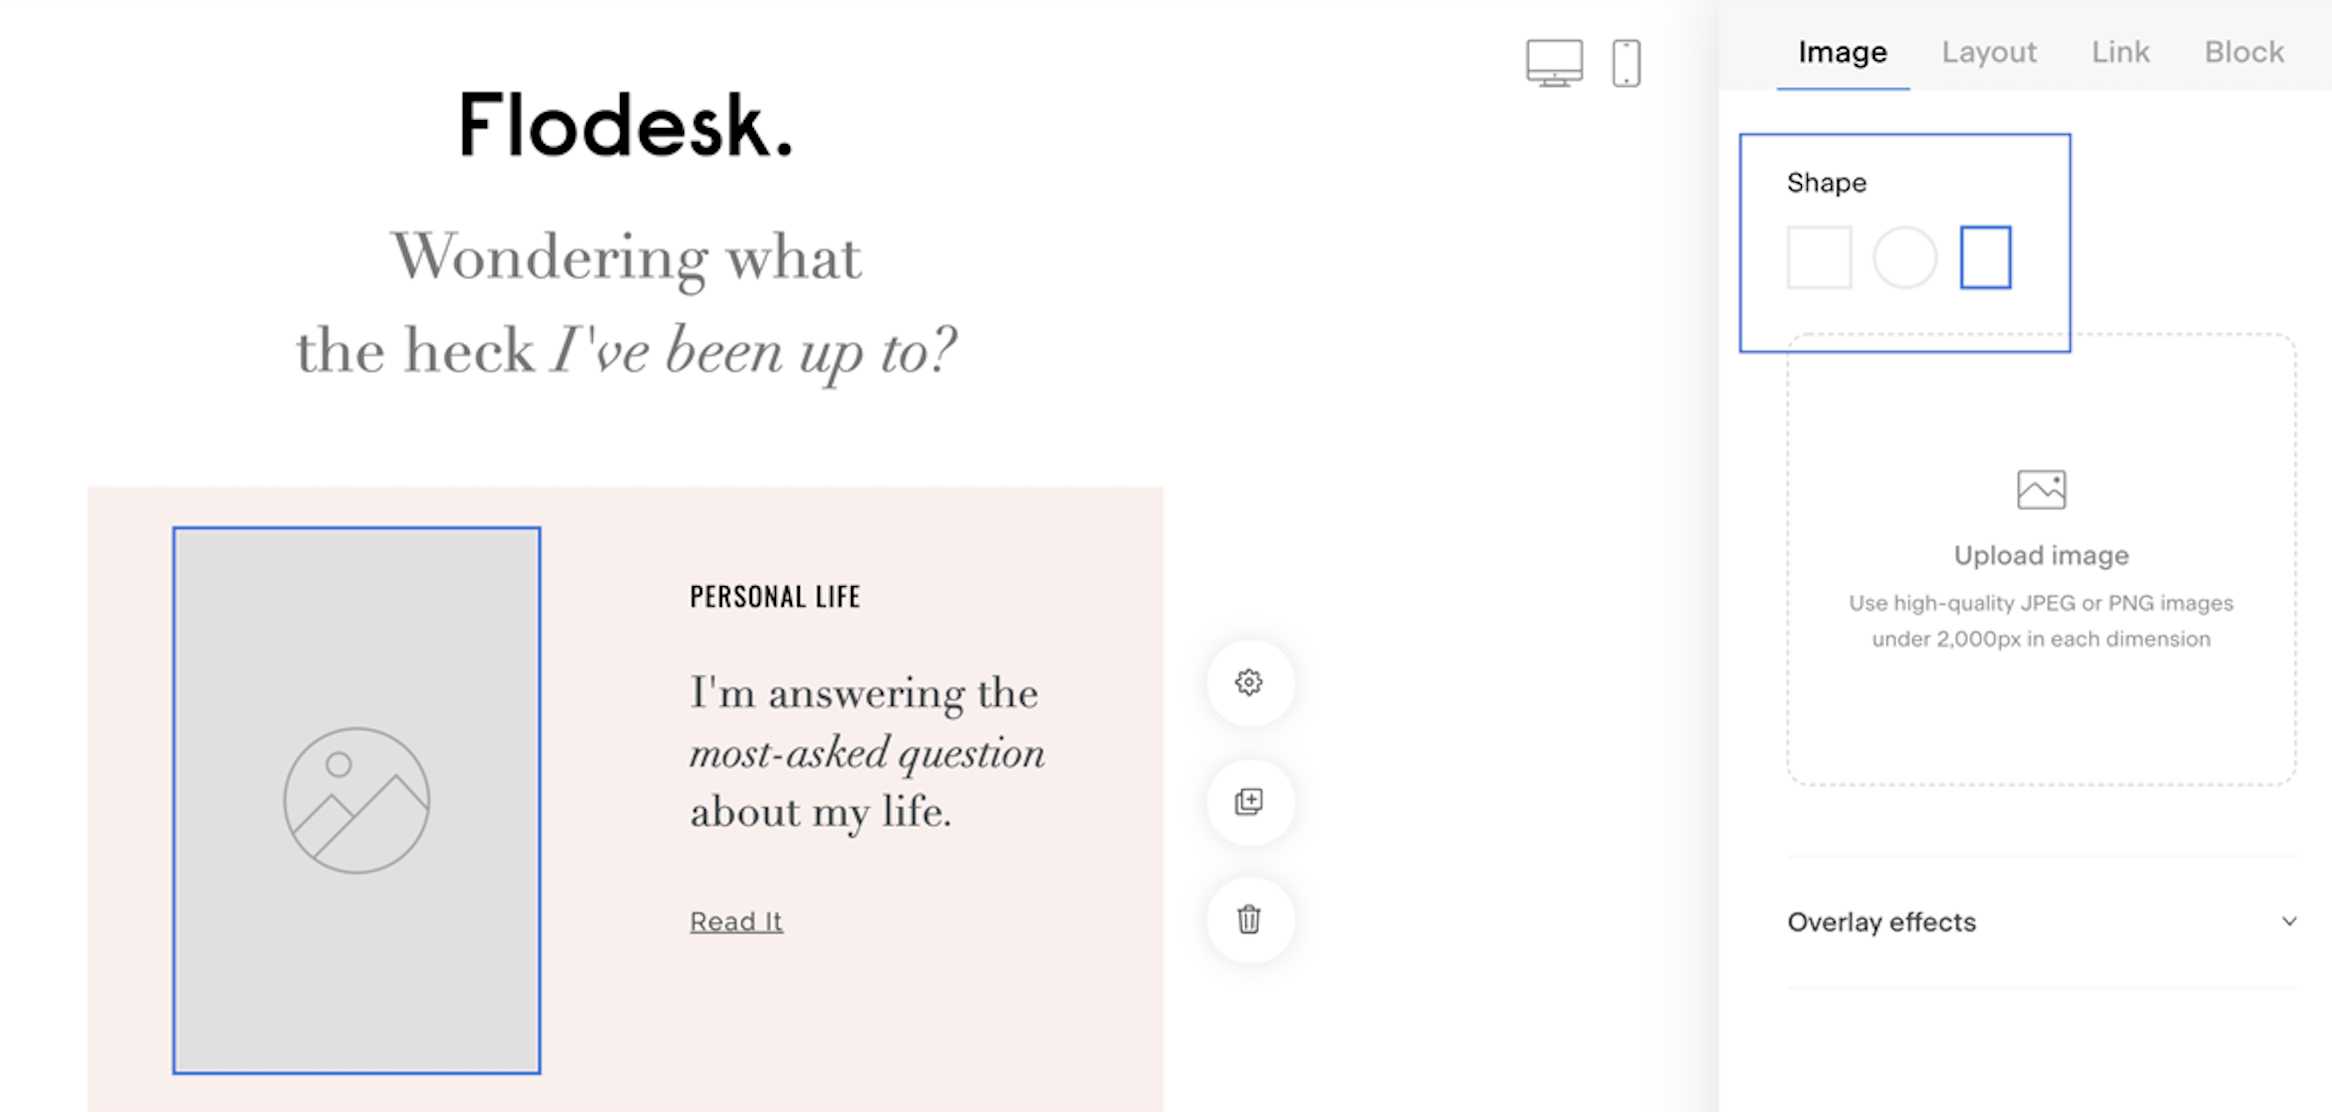
Square image placeholders (1:1)
Use a square image. This works well for product images, portraits, or simple graphics.Circle image placeholders
These are square images with a circular mask applied. A square (1:1) image works best, and important details should be centered so nothing gets cut off.Portrait or landscape placeholders
Choose an image that is taller (portrait) or wider (landscape) to match the orientation of the placeholder.
How to measure an image placeholder in a Layout block
If you want a more precise reference before creating your image, you can measure the placeholder visually.
Step-by-step
Add the Layout block to your email so the image placeholder is visible.
Use a screenshot tool to capture just the image placeholder area on your screen.
Save that screenshot to your computer.
Locate the saved image file on your computer.
If you’re on a Mac, right-click the image and choose Get Info. A window will open showing the image dimensions in pixels.
If you’re on a PC, right-click the image, choose Properties, then open the Details tab to see the image dimensions.
These measurements don’t need to be followed exactly. They simply give you a helpful size reference when designing your image.
Choosing the right image size for opt-in forms
All Flodesk opt-in forms are fully responsive. This means the image placeholder automatically resizes based on screen size and how much text is in your form.
Because of this, image sizing for forms should always start with your form content.
Recommended workflow
First, add all your form content, including:
The headline
Body text
Any custom fields
Form preferences (if you’re using them)
Once your form layout is finalized, take a screenshot of the image placeholder area.
Save the screenshot and check its image dimensions on your computer:
On a Mac, right-click the image and select Get Info
On a PC, right-click the image, choose Properties, then open Details
Use those dimensions as a general guide when creating your form image.
Leave extra space around the main subject of your image to reduce the chance of cropping.
Max image file size for opt-in forms: 10 MB
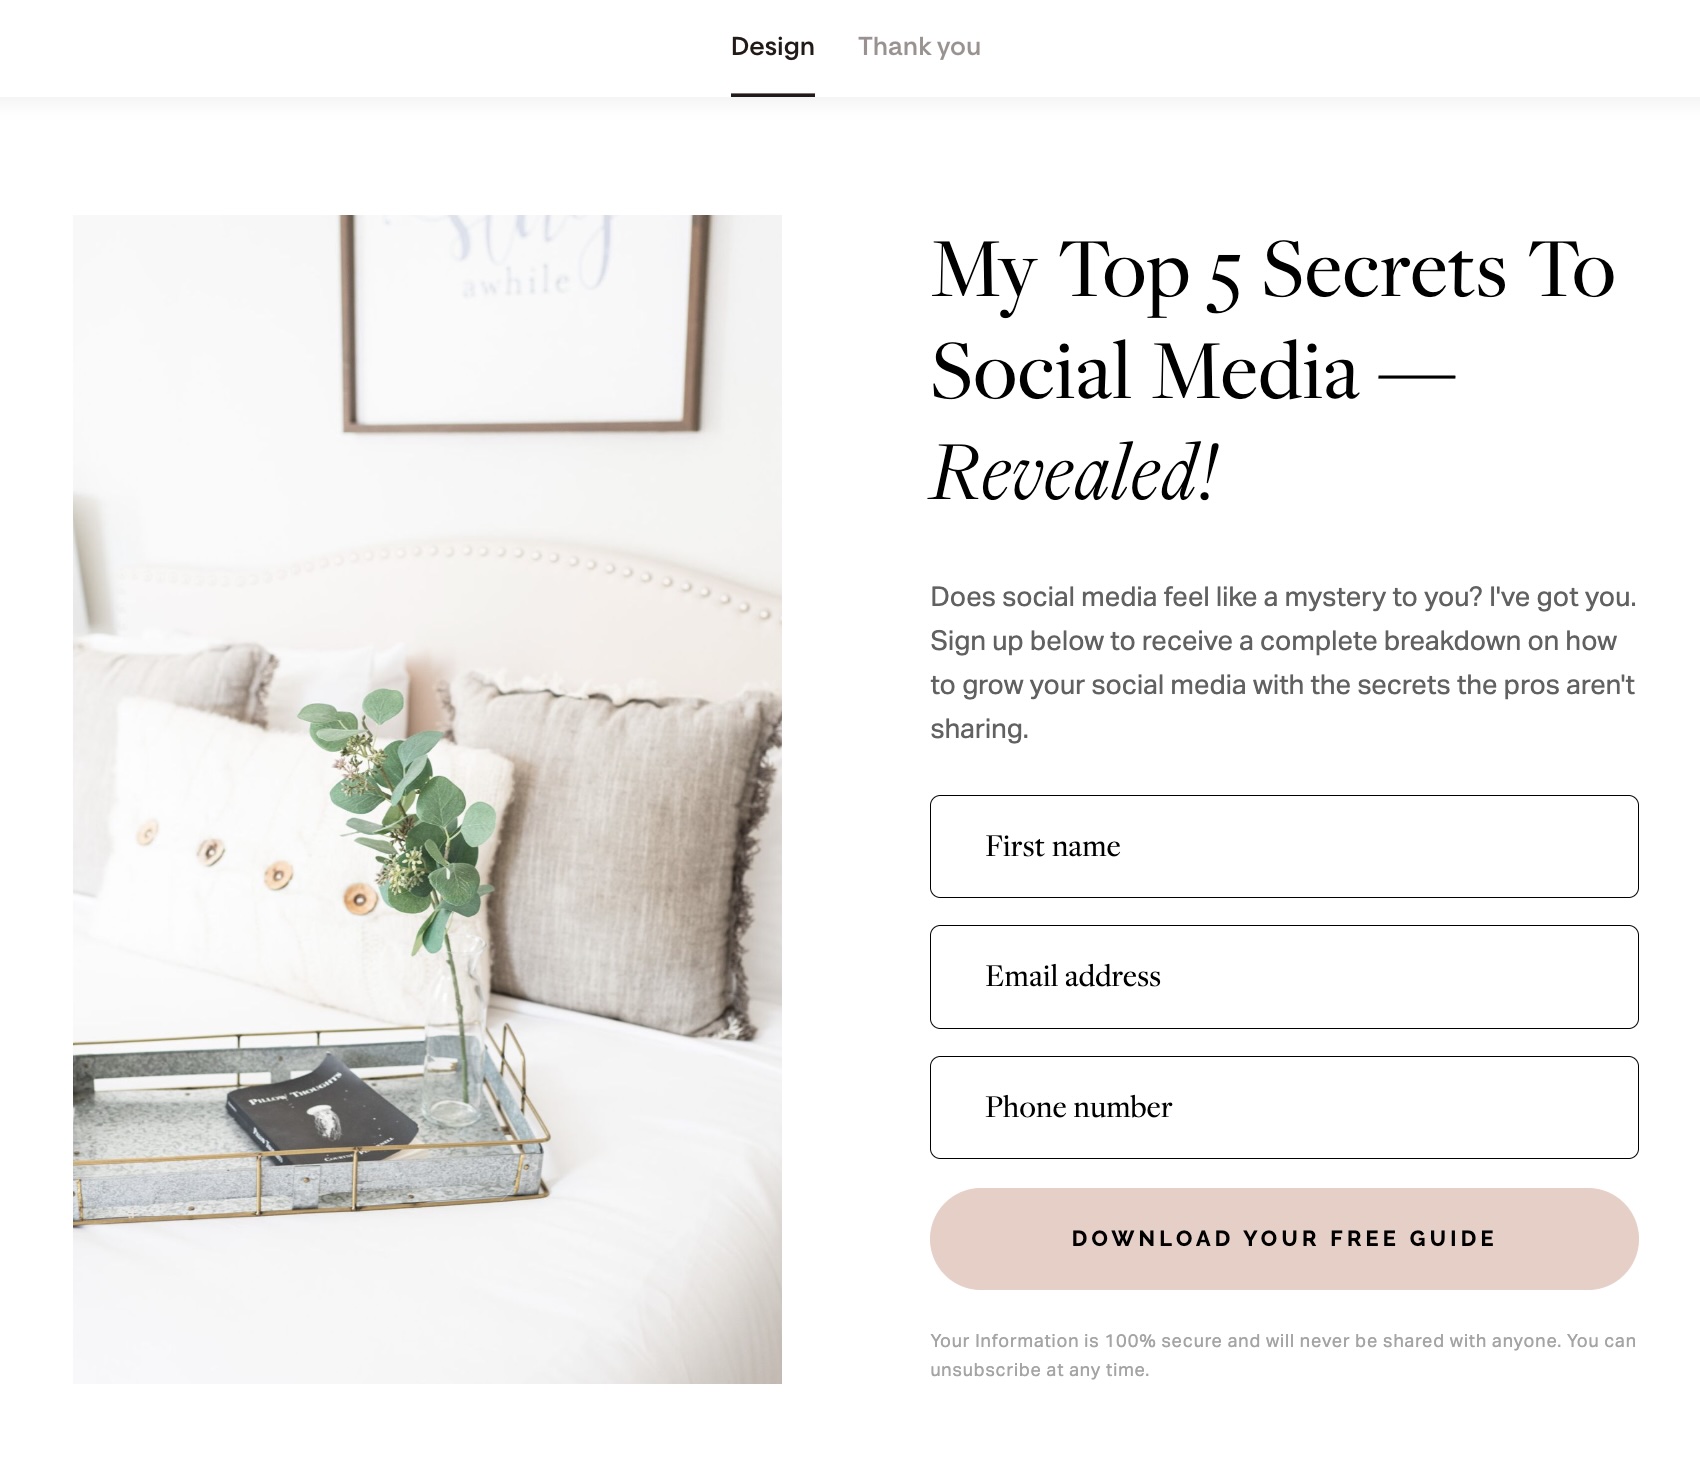
Image design tips
To keep your emails and forms clear and effective:
Choose images that support the message rather than compete with it. Images that are too busy or detailed can pull attention away from your call to action.
Avoid placing a lot of text inside images. Your email or form copy should explain the offer, while the image adds visual interest or context.
Leaving extra margin around important elements helps protect them from cropping on smaller screens.
Summary
There is no single “right” image size for Layout blocks or opt-in forms
Images must be 10 MB or smaller in file size
Matching the aspect ratio of the placeholder is more important than exact pixel dimensions
Responsive layouts may crop images slightly
Simple, focused images work best
FAQ
Is there a recommended image size for Flodesk Layout blocks?
There’s no fixed size. Choose an image that matches the placeholder’s shape and stays under 10 MB.
Is there a pixel limit for images in Flodesk?
No. There’s no fixed pixel limit, but images must be 10 MB or smaller and may be resized automatically.
Why does my image get cropped?
Layouts are responsive, so images adjust to different screen sizes. Leaving space around the main subject helps prevent important content from being cut off.
What image shape should I use for circle images?
Use a square (1:1) image and keep key elements centered.
Should I include text inside my images?
It’s best to avoid text-heavy images. Let your email or form copy communicate the message instead.