
How to Filter Your Subscribers in Flodesk
Learn how to use Flodesk’s advanced subscriber filtering system to segment your email list and take powerful actions.
Managing a high-performing email list starts with effective segmentation. With Flodesk’s enhanced subscriber filtering system, you can group subscribers based on who they are, how they signed up, and how they engage with your emails—so you can send the right message to the right people at the right time.
Why Use Subscriber Filters?
Use filters to:
Warm up a custom email domain with your most engaged subscribers
Remove inactive subscribers to improve deliverability
Run re-engagement or retargeting campaigns
Send personalized content based on behavior, source, or custom fields
Step-by-Step: How to Filter Subscribers
Go to Audience > All Subscribers or Audience > Segments and select a segment, depending on where you’d like to manage your subscribers.
Click the Filter (top right, next to “Add subscriber”)
The filter panel will slide out from the right—this is where you’ll build your filter criteria
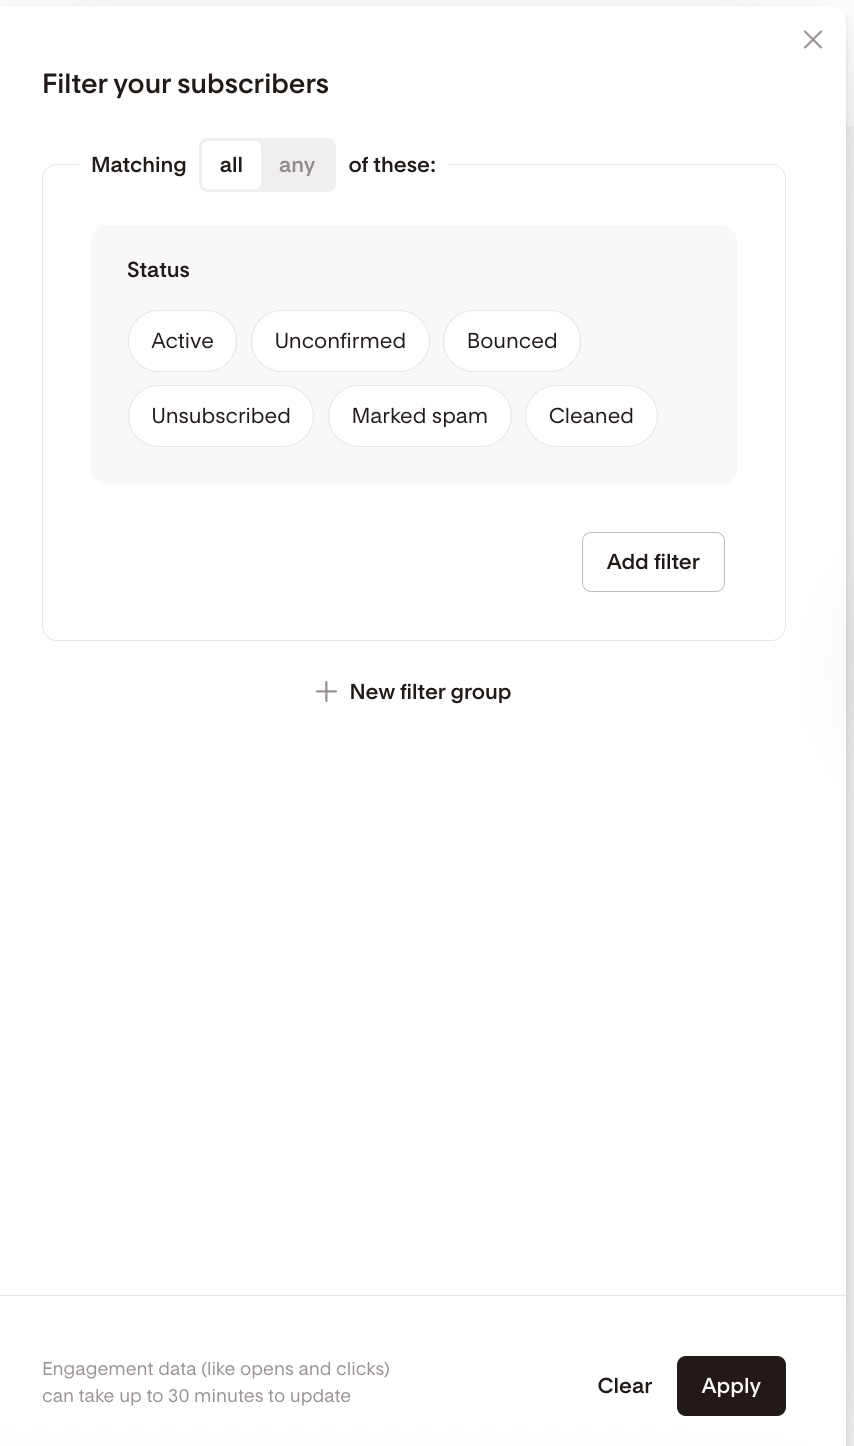
Filter Criteria: What You Can Segment By
You can combine one or more filters based on:
Subscriber status: active, unsubscribed, unconfirmed, bounced, spam, cleaned
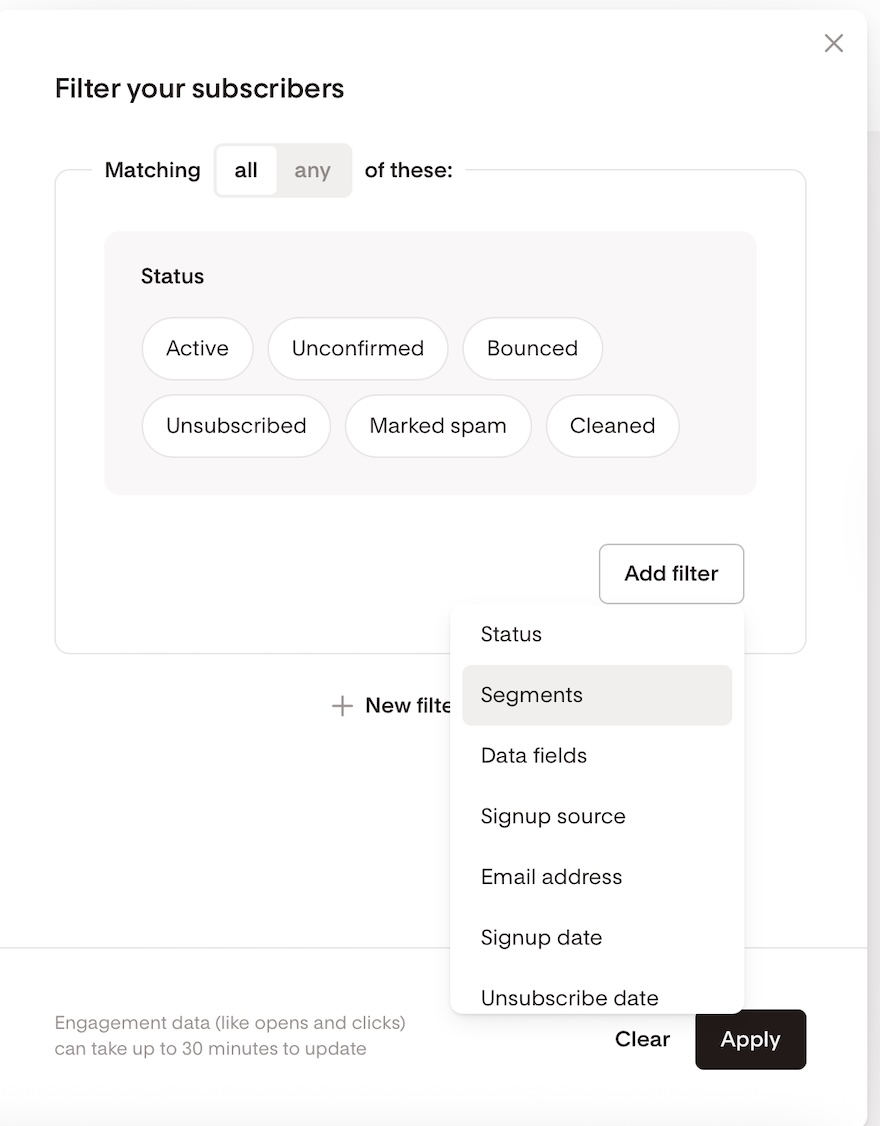
Signup source: form, integration, CSV, checkout, manual
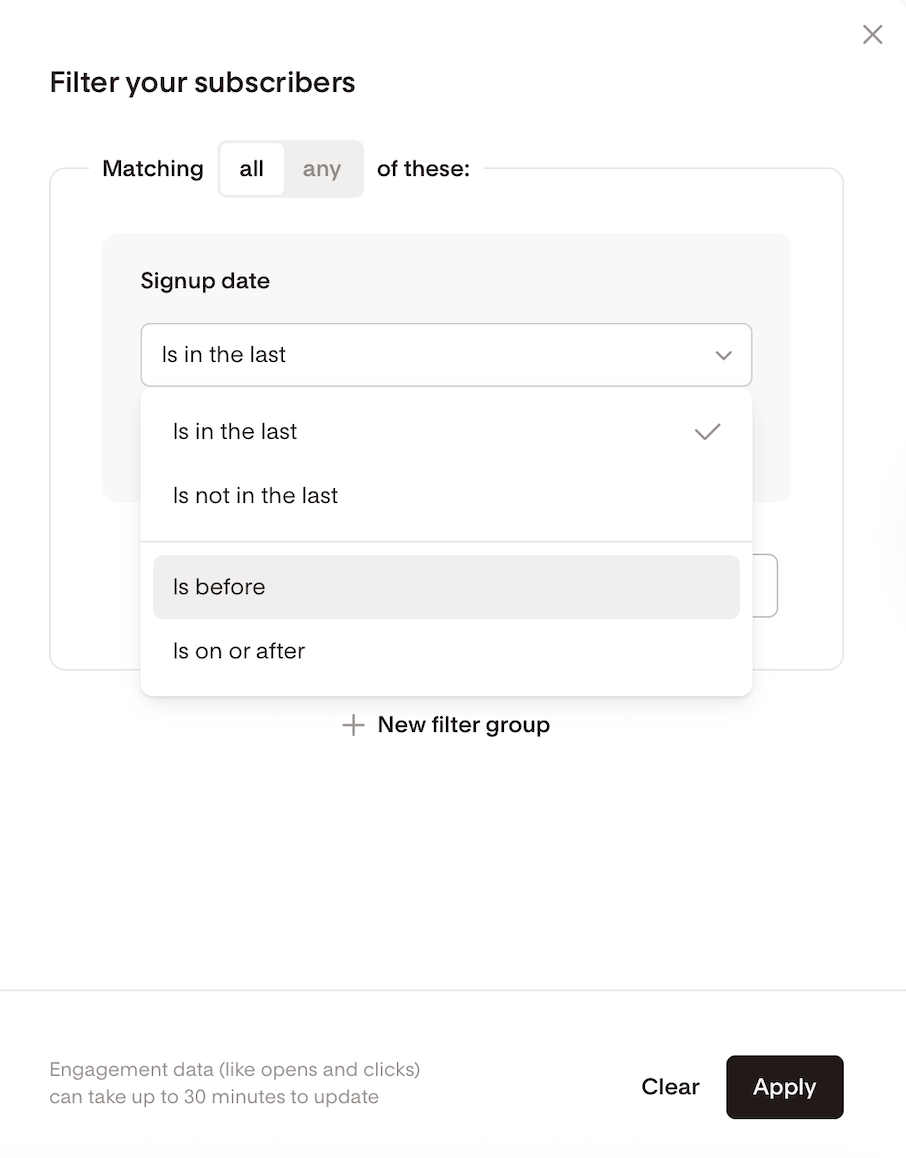
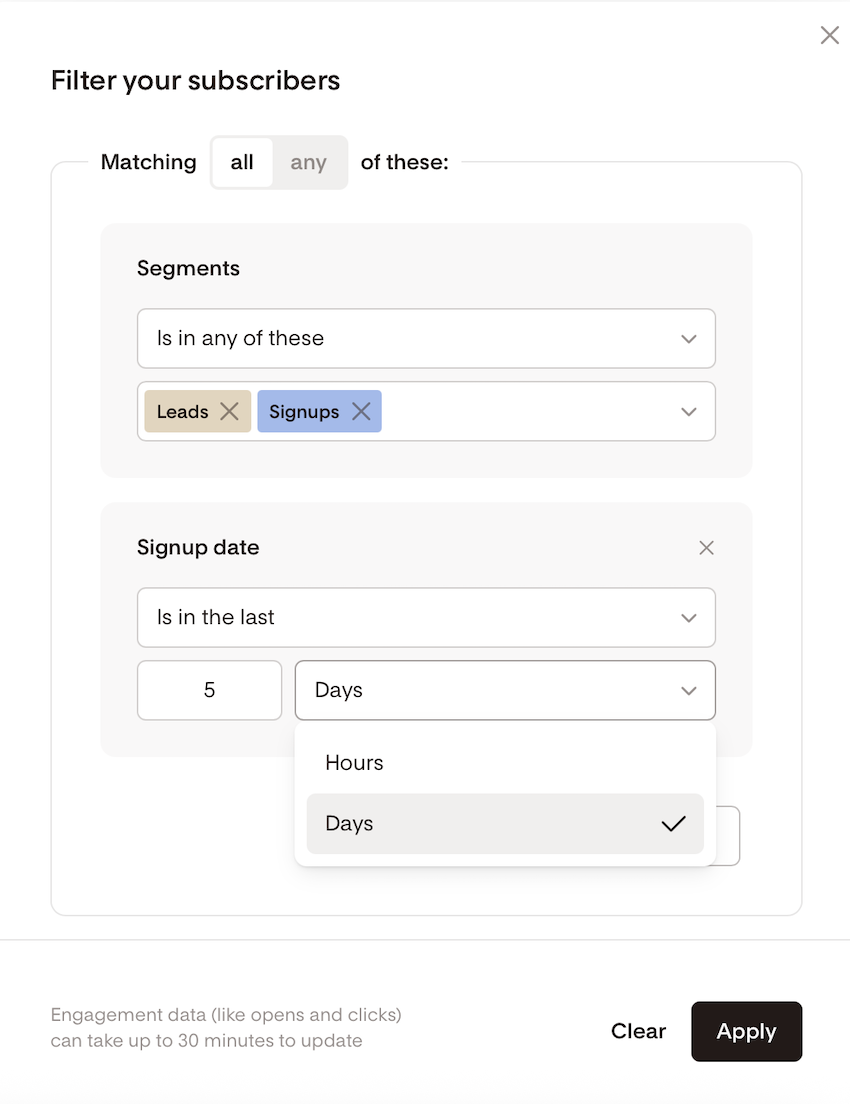
Signup date: use a custom date range or time-based filters like “last 30 days”
Engagement metrics: open rate, click rate, delivered emails, opened emails, clicked emails
Segment membership: in, not in, any or all selected segments
Custom data fields: location, preferences, tags, etc.
Email address: full or partial matches
How Filter Logic Works: Groups, Conditions, and Operators
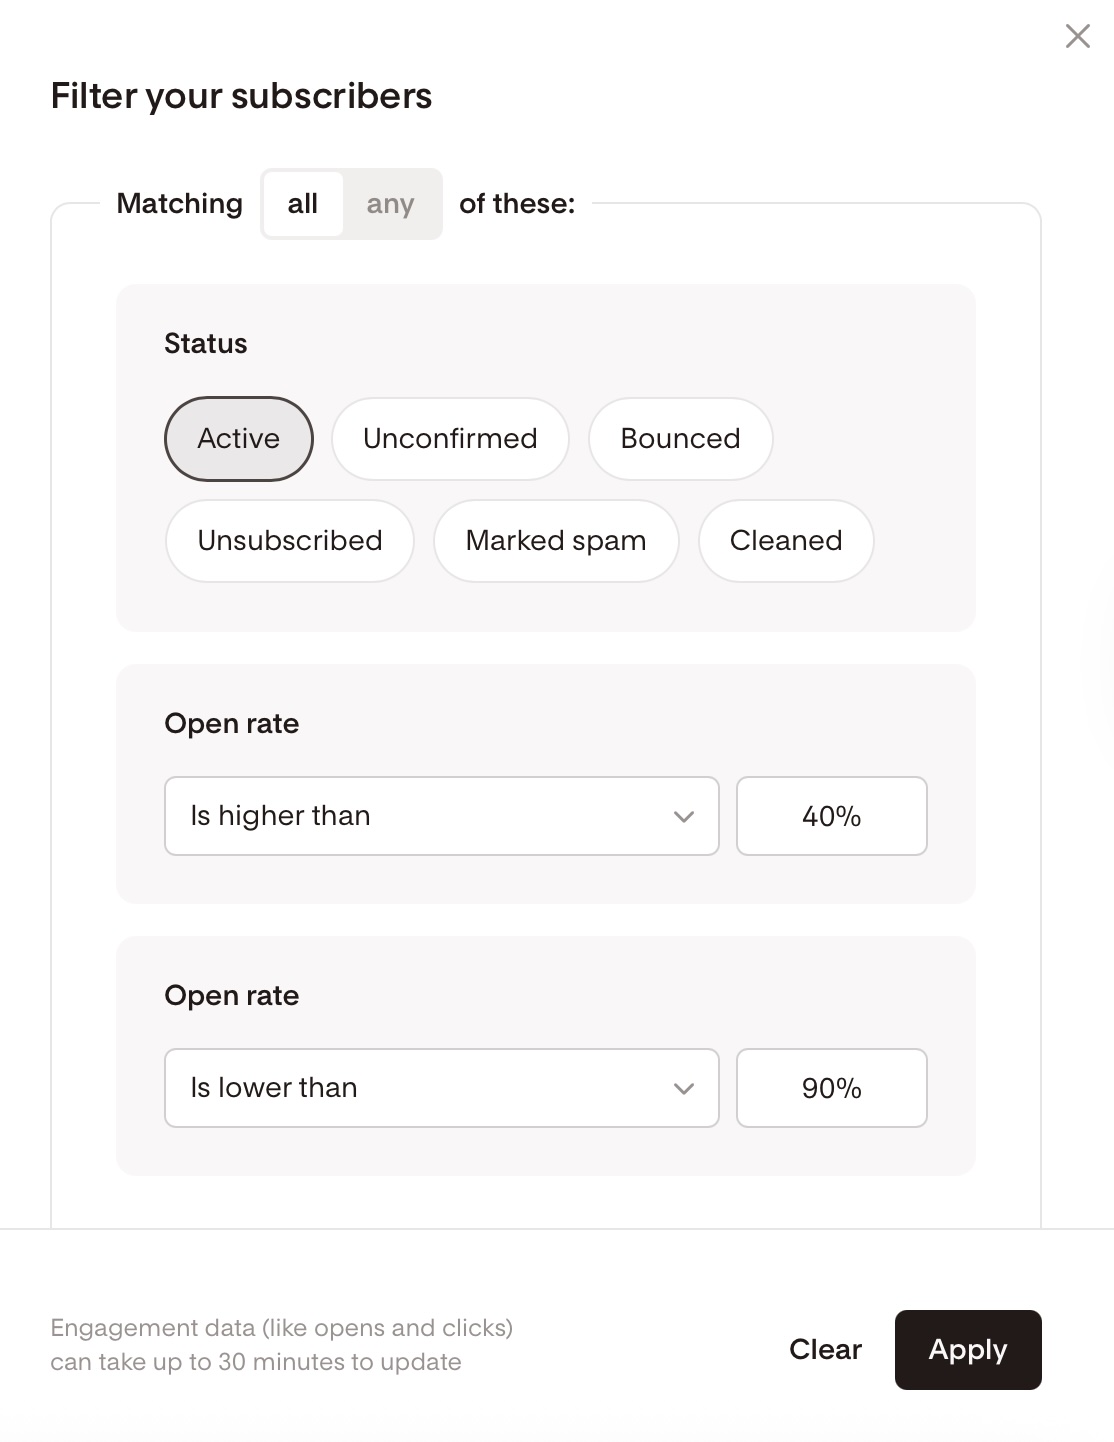
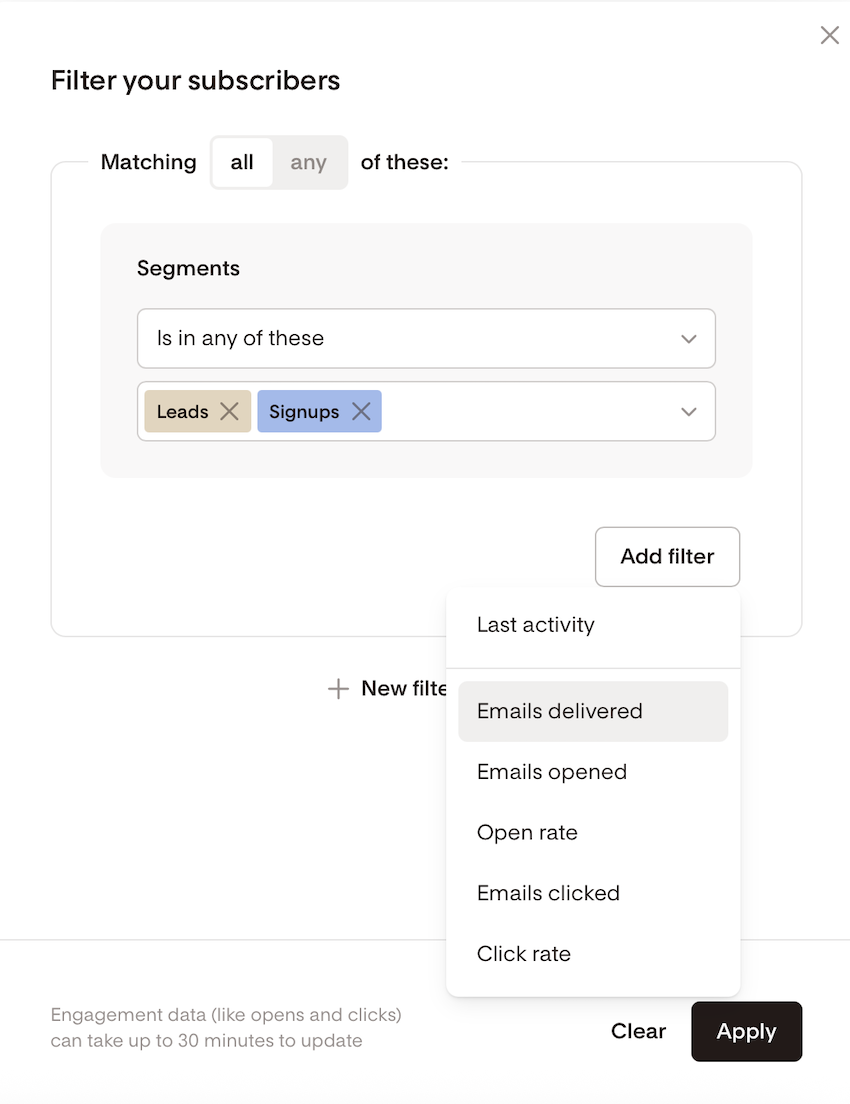
Add multiple filters
You can apply multiple filters—even the same type—with different conditions.
Example: Open rate > 40% and Open rate < 90%
Use “Any” vs. “All” (OR vs. AND)
Any = OR (subscriber meets any of the conditions)
All = AND (subscriber must meet all conditions)
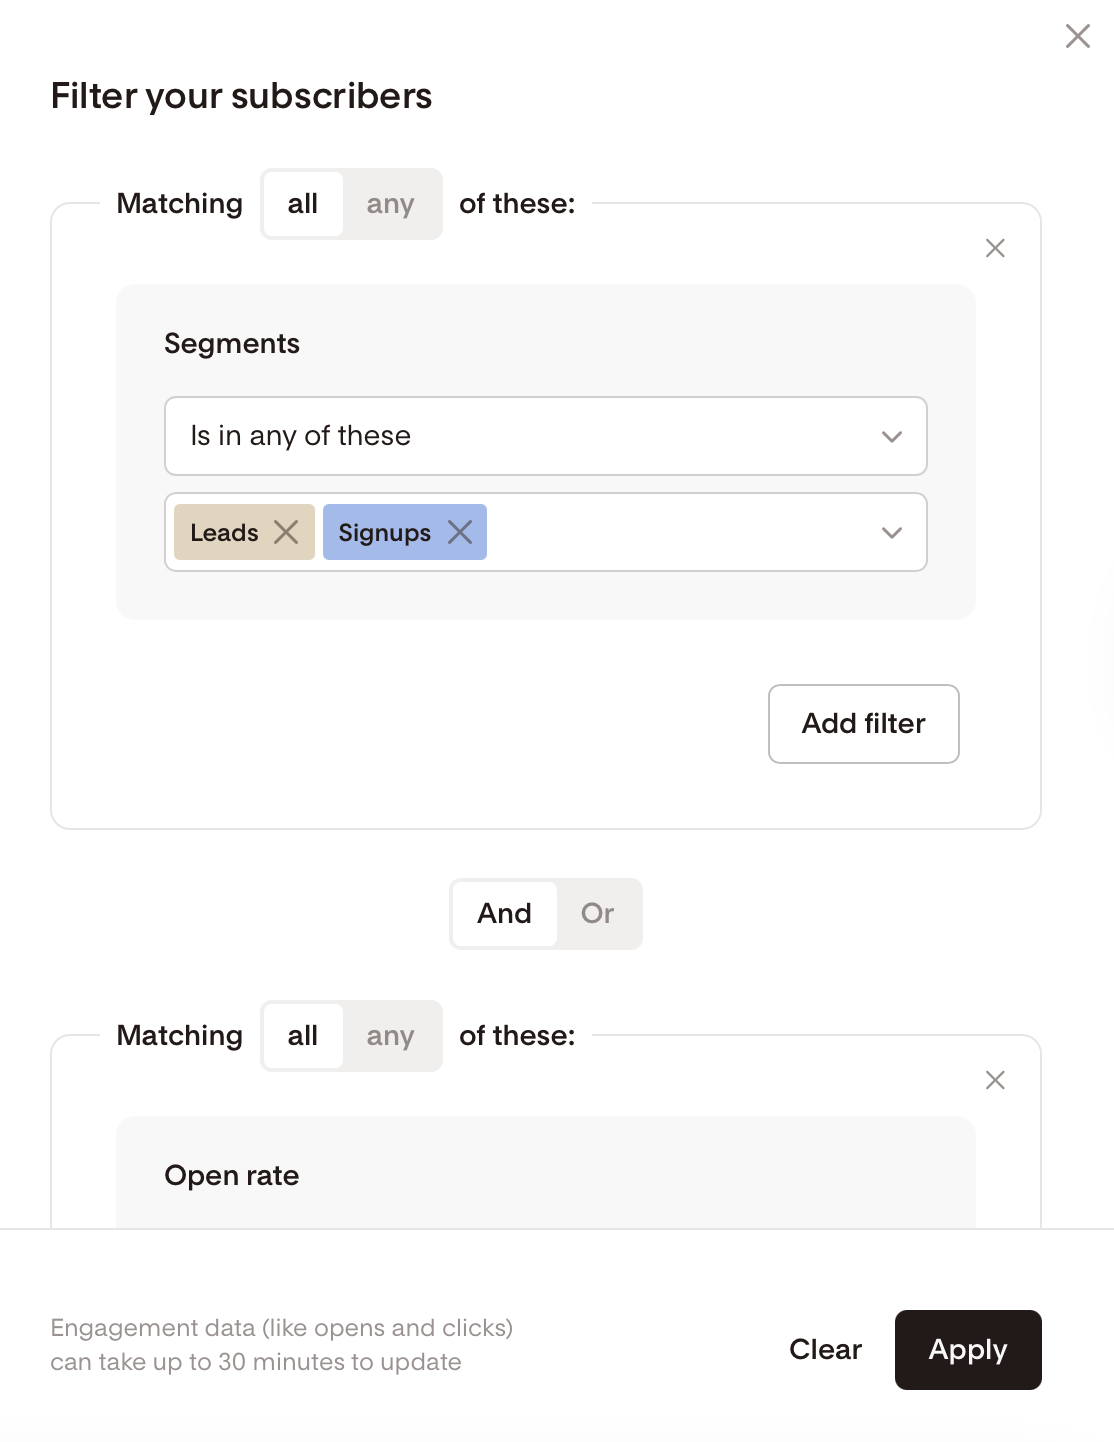
Filter Groups
Use up to 5 filter groups to create more complex logic. All groups must follow the same logic between them (all AND, or all OR).
Example:
Group 1: Segment = Leads OR Segment = Signups
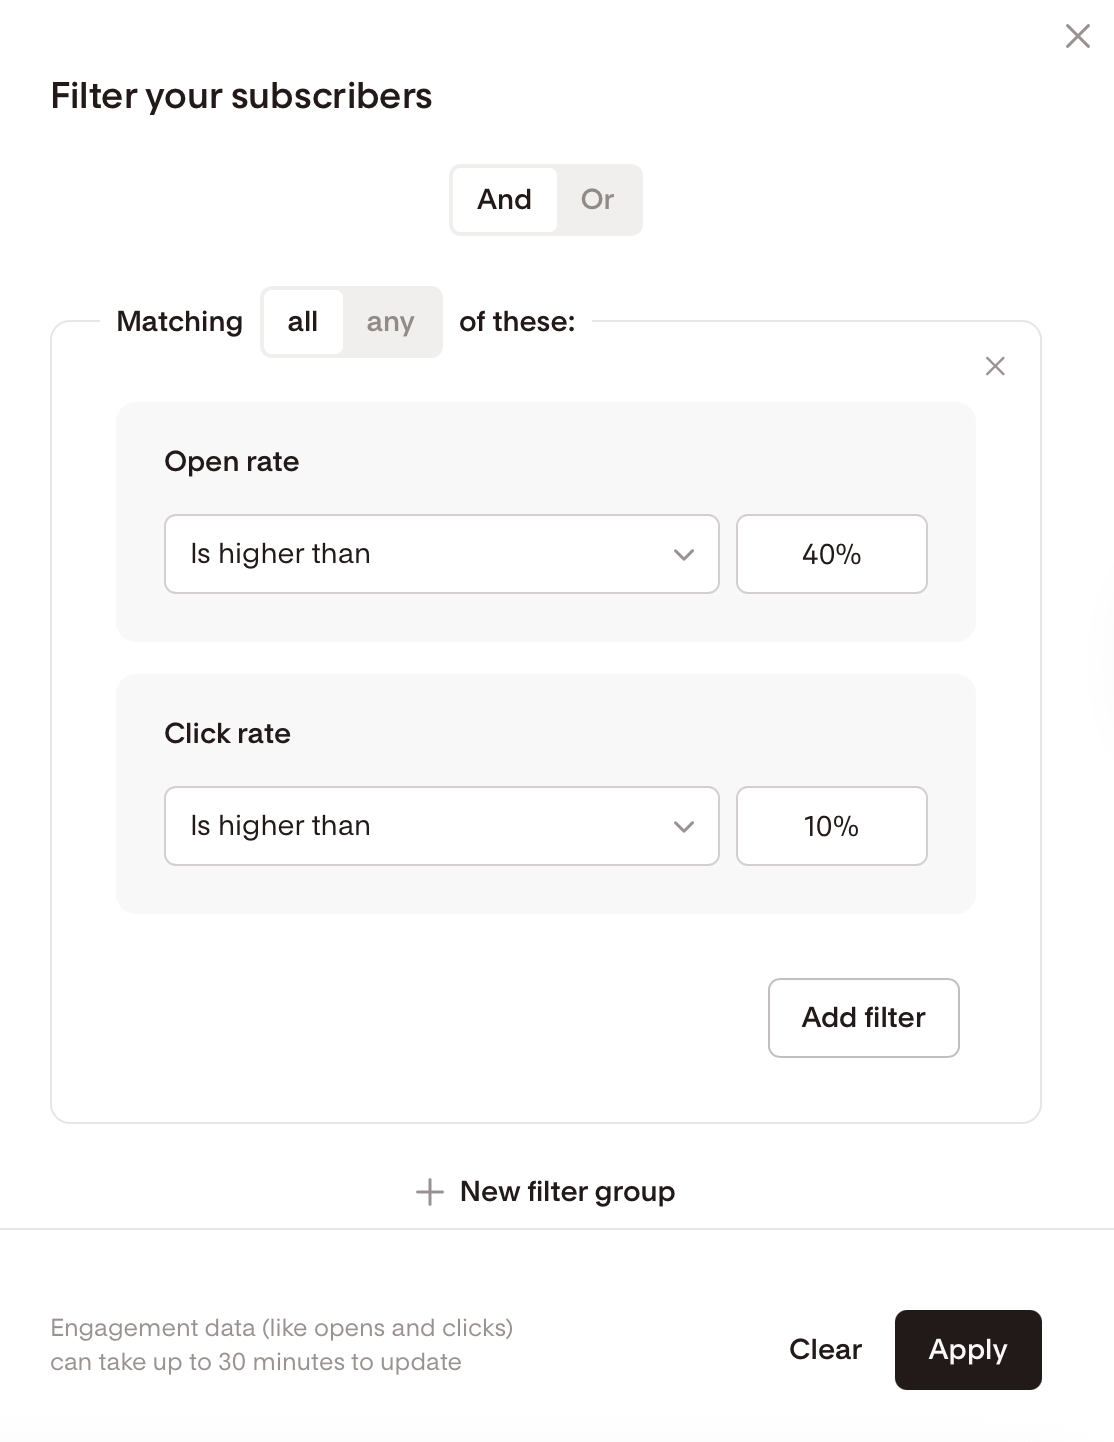
Group 2: Open rate > 40% AND Click rate > 10%
Available Filter Types (with Examples)
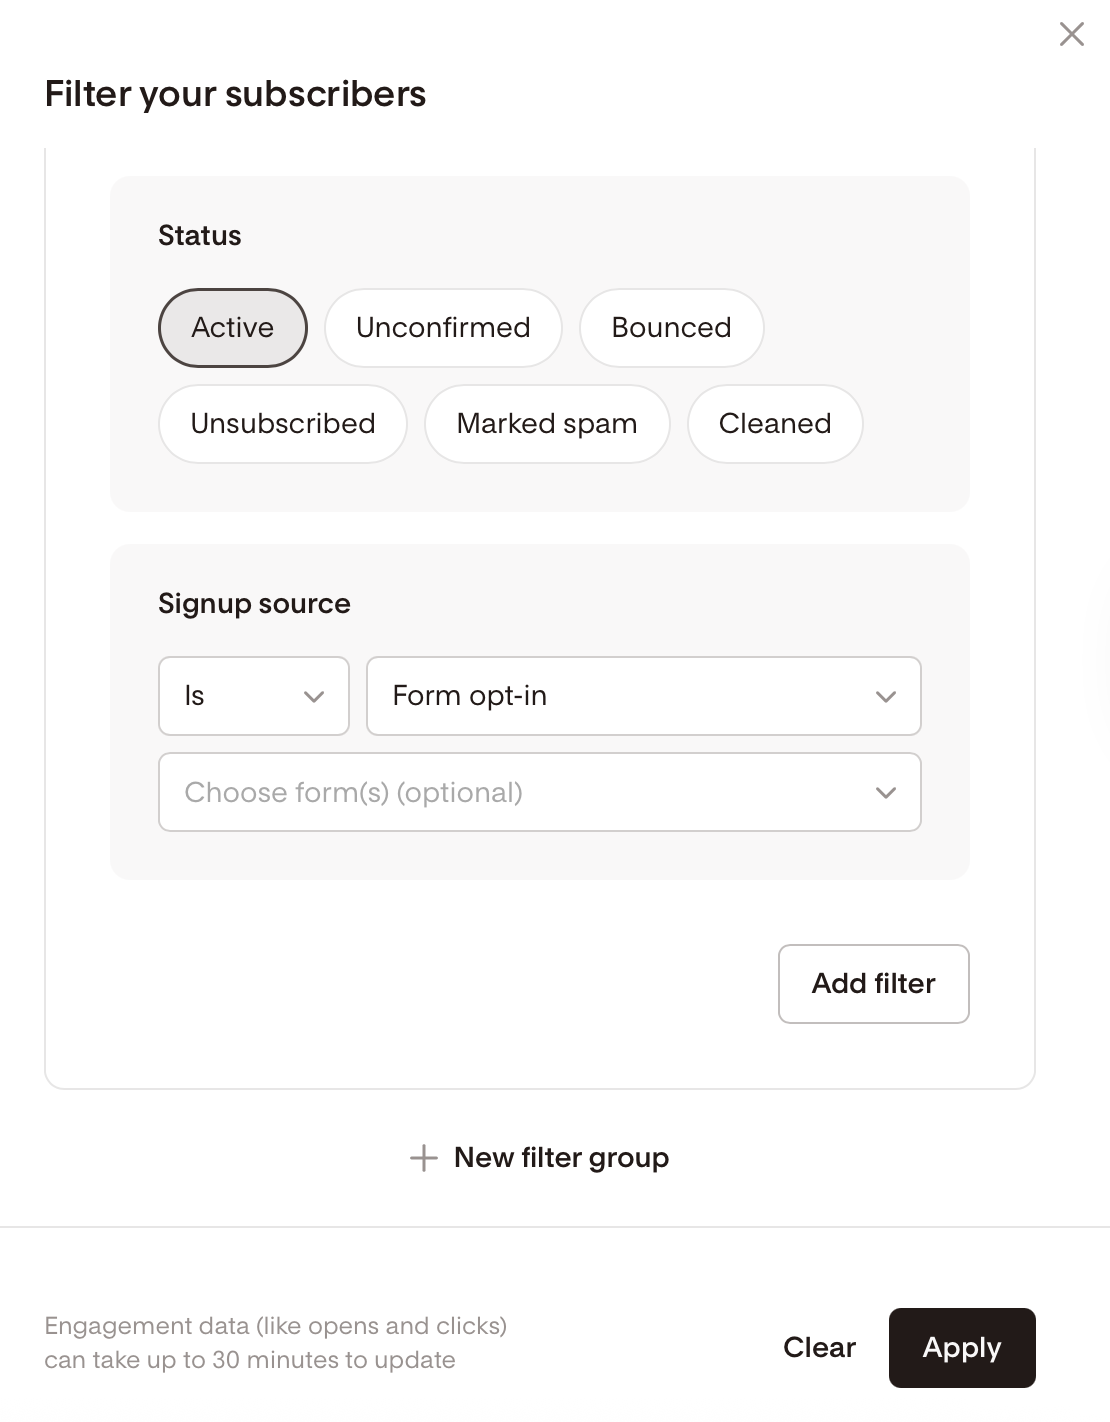
1. Status
Active
Unsubscribed
Unconfirmed
Bounced
Marked as Spam
Cleaned
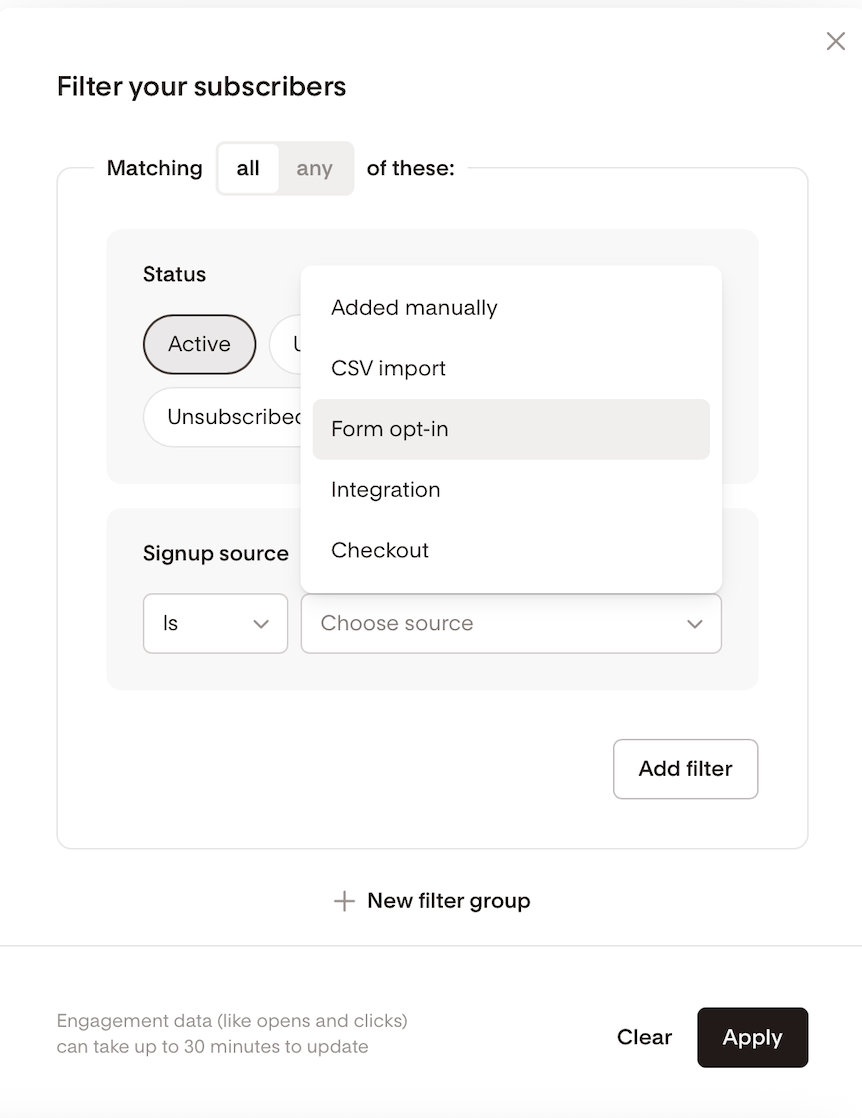
2. Signup Source
Forms (choose specific forms)
Integrations (Shopify, Zapier, etc.)
CSV Import
Checkout (specific checkout flows)
Manual
3. Segments
In any or all of selected segments
Not in selected segments
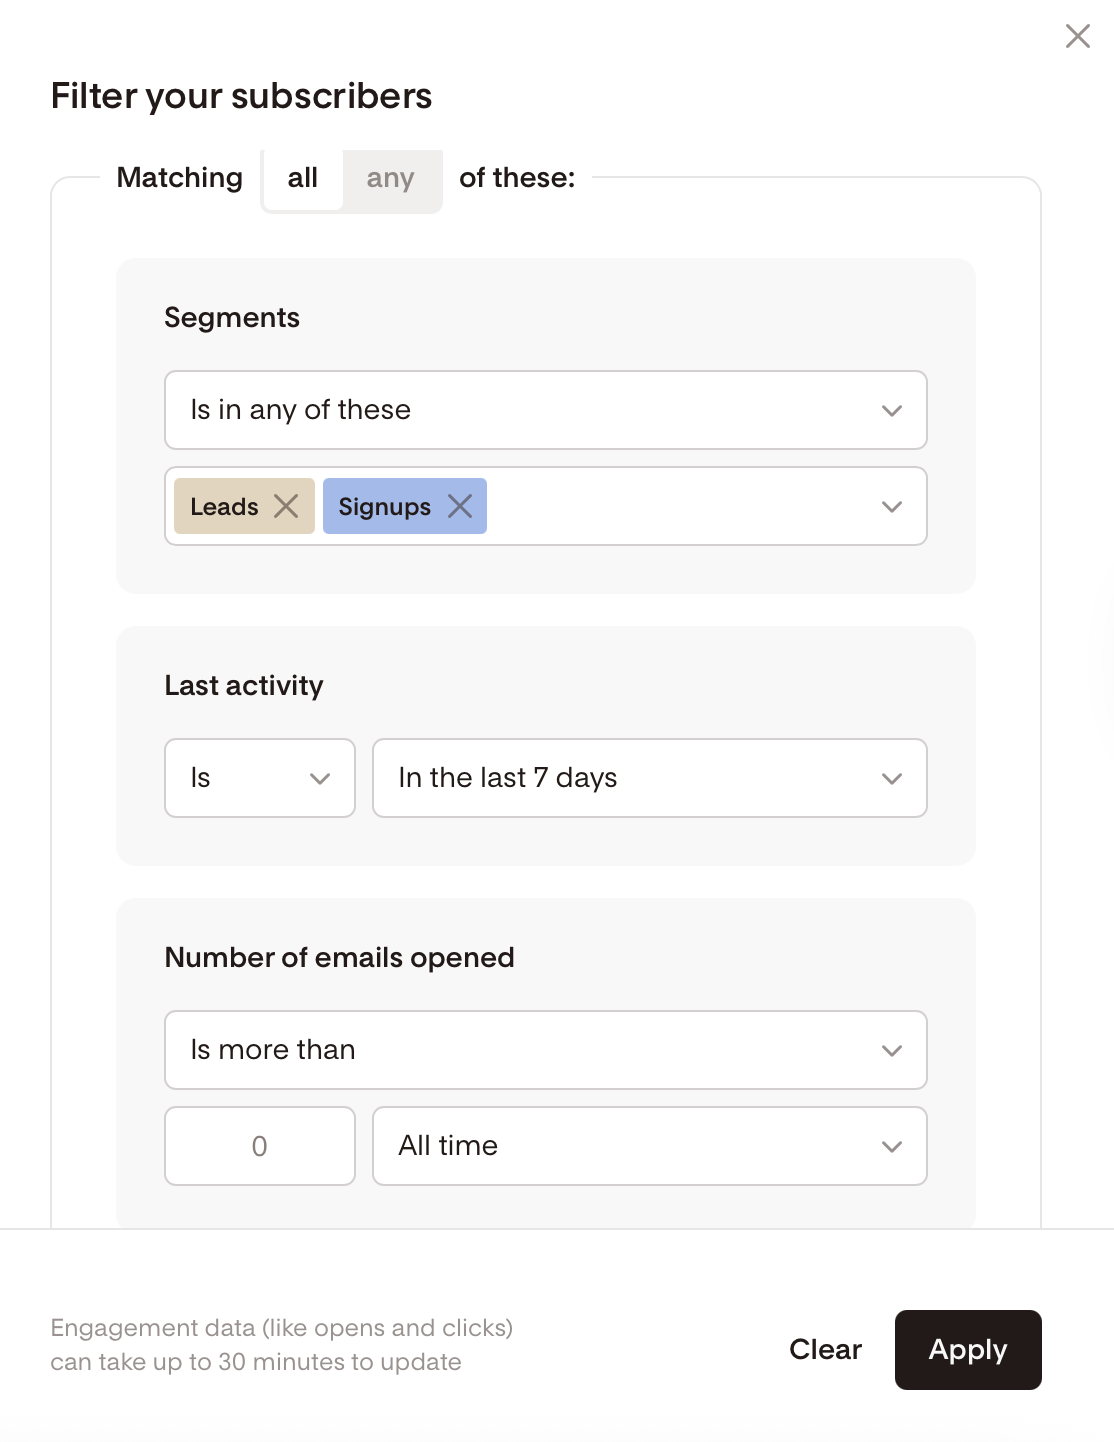
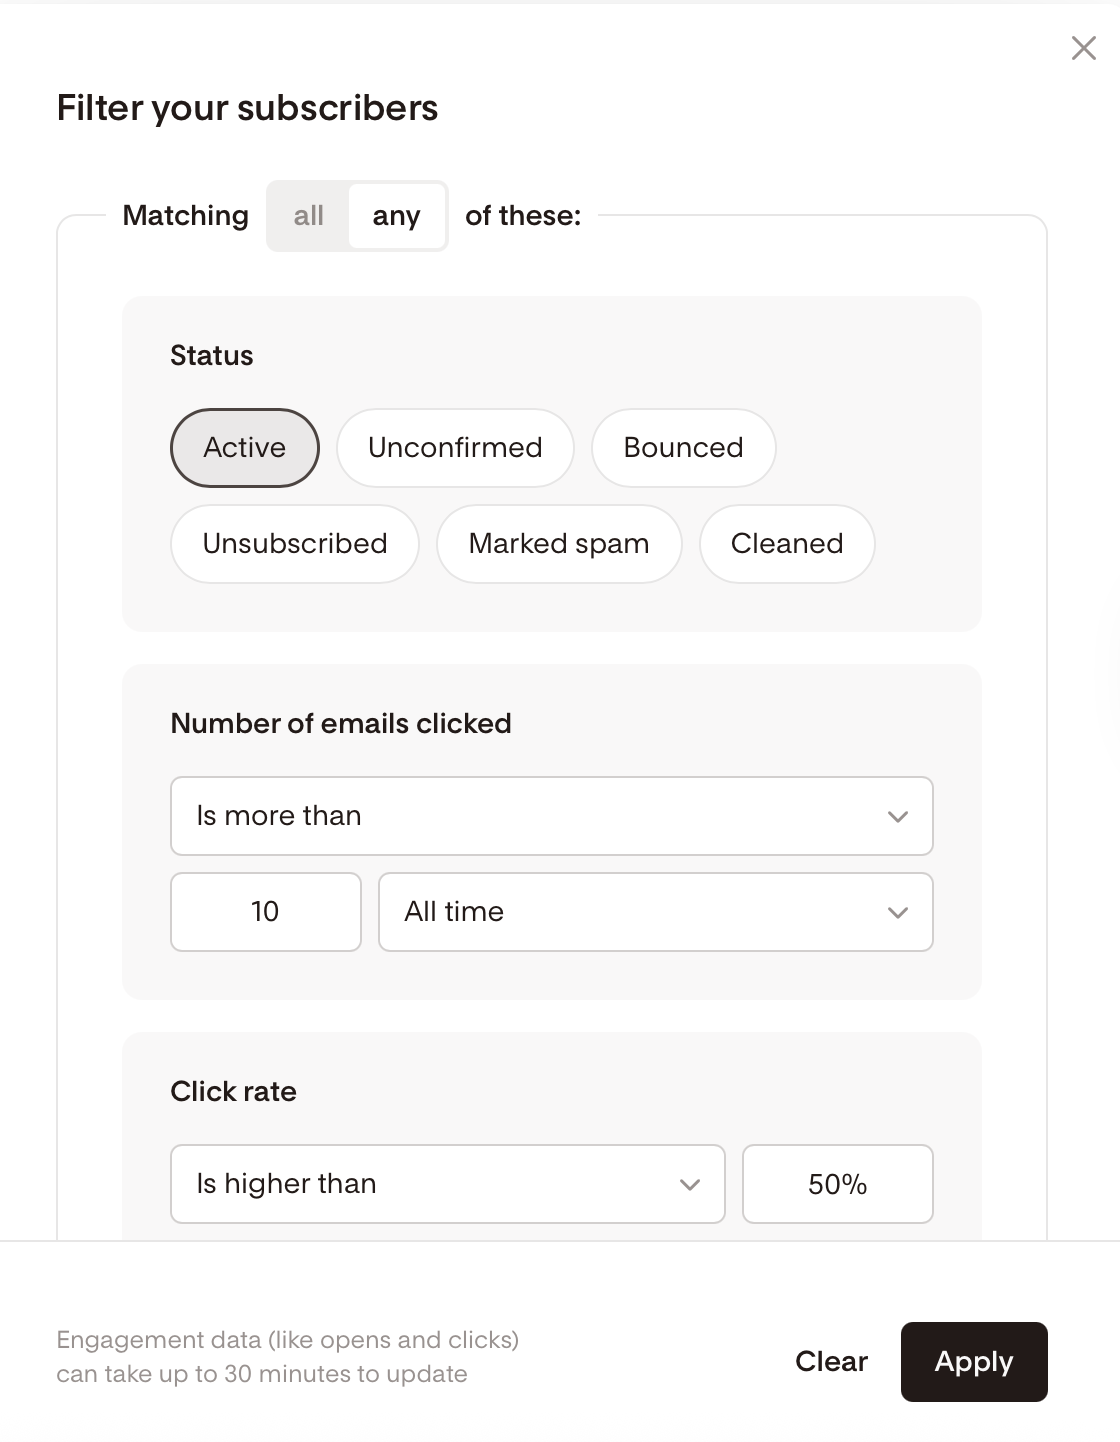
4. Engagement Activity
Emails delivered
Emails opened
Open rate
Emails clicked
Click rate
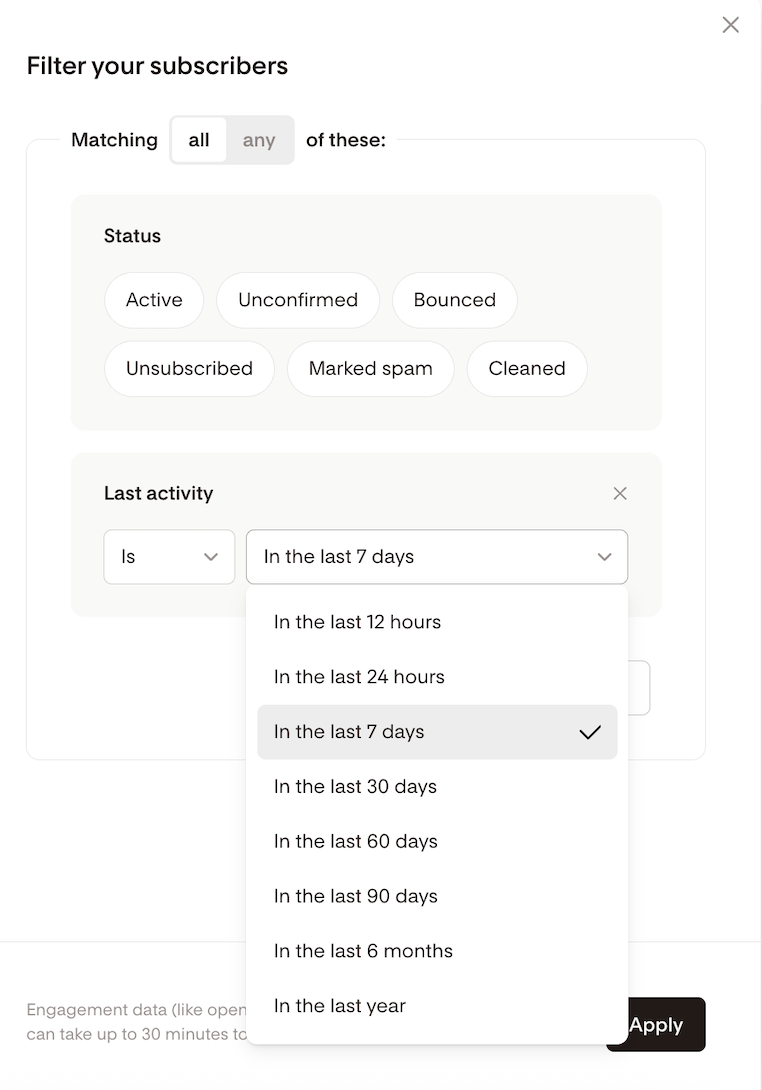
Use timeframes like:
Last 12 / 24 hours
Last 7 / 30 / 60 / 90 days
5. Signup Date
Custom date ranges
Relative time (e.g., last 30 days)
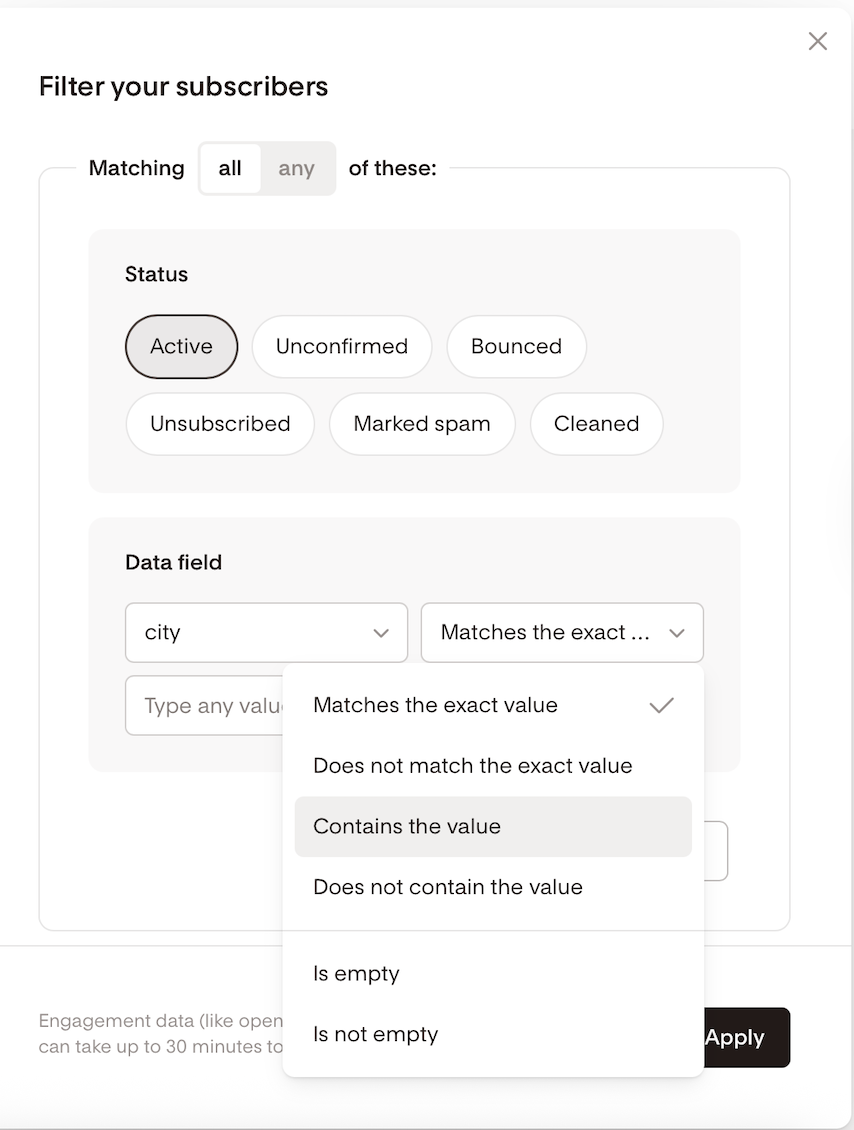
6. Custom Data Fields
Filter by any custom data field you collected, such as location, preferences, etc.
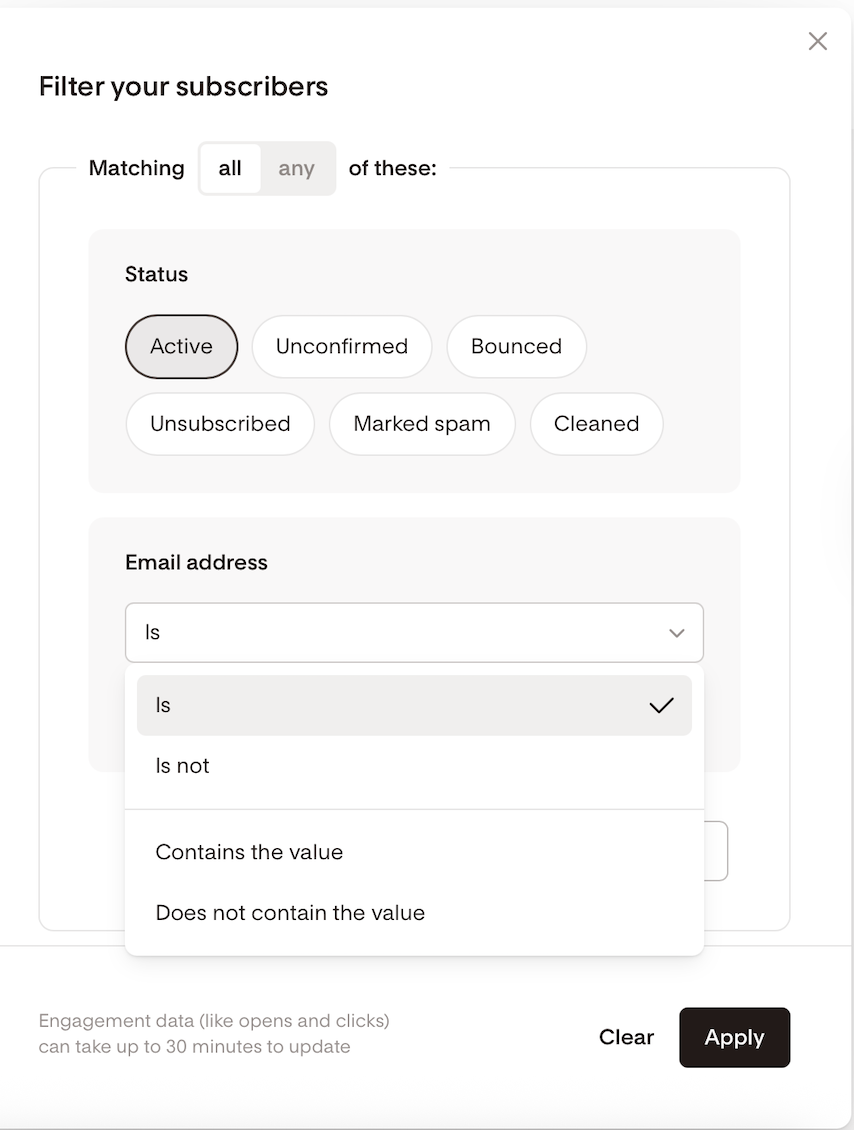
7. Email Address
Filter by specific email addresses, partial matches, or patterns (e.g. Contains specific domain)
7. Last activity
A subscriber's last activity is defined as the most recent action among open, click, or unsubscribe.
If a subscriber has not taken any of these actions, their last activity time defaults to the time they were first added to your audience list.
Note: only the most recent click, open, or unsubscribe is used to define the last activity.
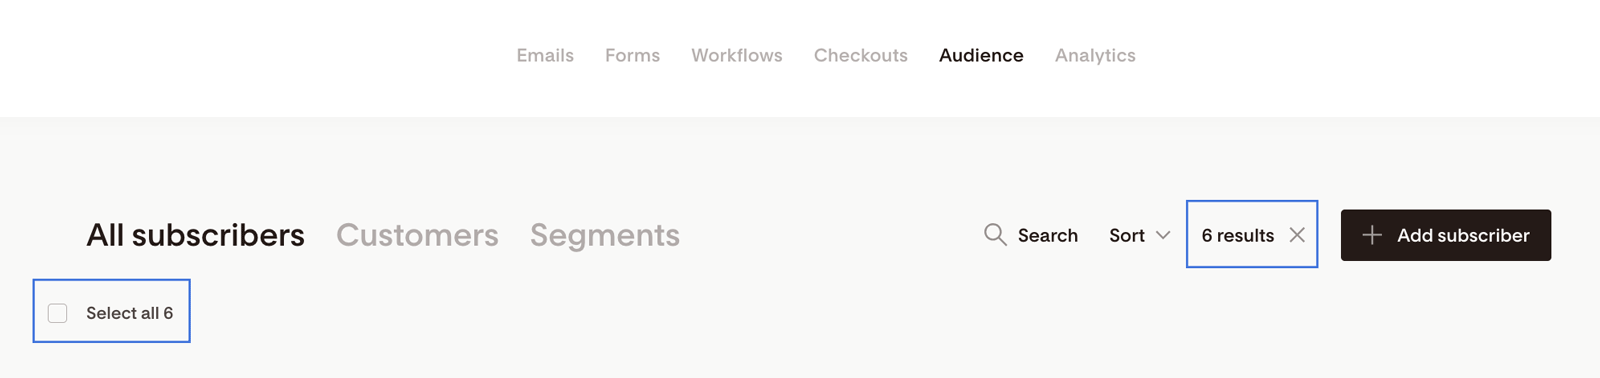
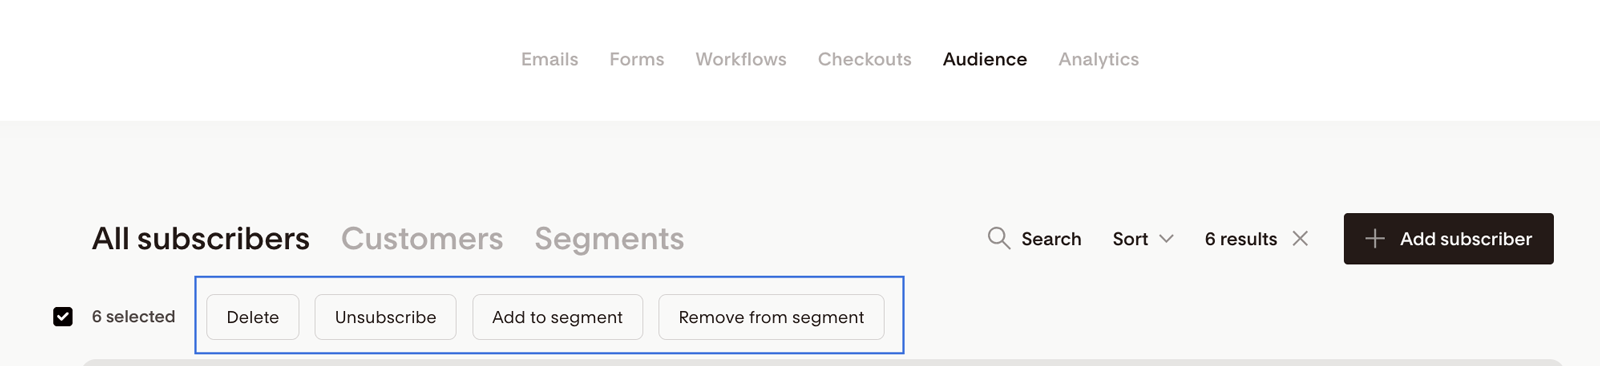
Taking Bulk Actions on Filtered Subscribers
After applying filters, use the Select All checkbox to take bulk actions:
Add to segment - Choose the segment(s) from the drop-down you want to add the selected subscriber(s) to.
Remove from segment - Choose the segment(s) you want to remove the selected subscriber(s) from.
Unsubscribe from your entire list
Delete permanently
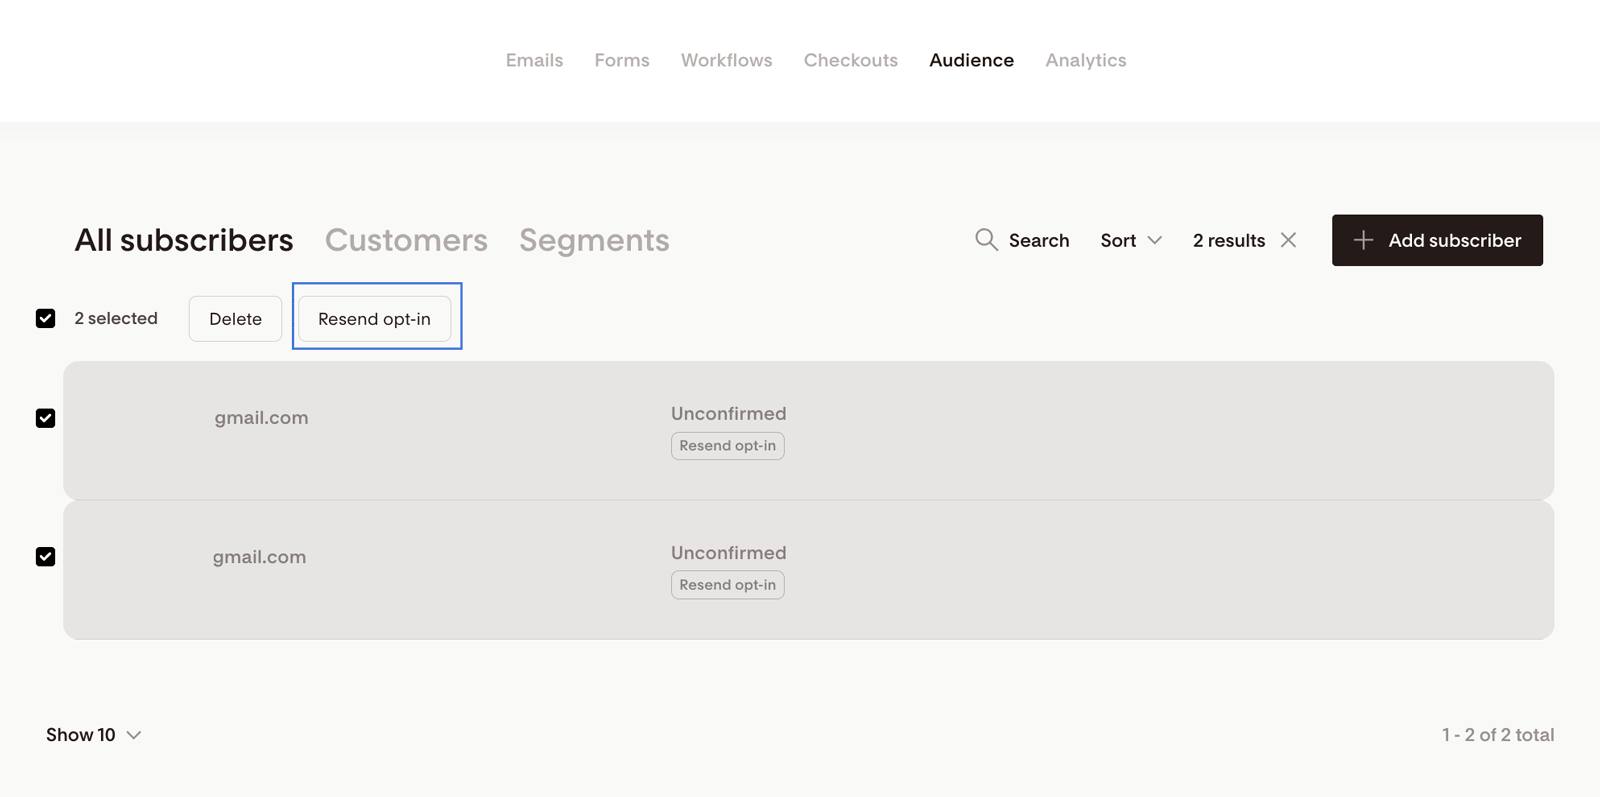
Resend confirmation to unconfirmed subscribers
Real-World Examples: What You Can Do with Filters
Warm up your domain: Filter subscribers with Open rate > 60% and Click rate > 10%
Re-engage cold leads: Filter those who haven’t opened in the last 60 days
Target by signup form: Combine multiple forms (e.g., “Form A” + “Form B”)
Run birthday campaigns: Filter based on custom birth month field
Clean your list: Remove subscribers who haven’t engaged in 90 days
Resend confirmation to unconfirmed leads from a recent giveaway
Segment by custom field like interest or location for personalized campaigns
Tips for Managing Filters
Click Clear to remove inputs (but keep filter types in place)
Delete individual filters by hovering and clicking the X
If filters conflict (e.g. Click rate > 90% and Click rate < 10%), results will be empty
Summary
Flodesk’s new subscriber filtering tools are more powerful, intuitive, and flexible than ever. Whether you’re refining your list, improving deliverability, or personalizing campaigns, smart filters help you reach the right subscribers faster.
To start filtering:
Go to Audience > All Subscribers
Click Filter
Add filters, apply them, and take action