
How to add an e-commerce block to your Flodesk email
Showcase products directly inside your emails—no sales page required.
Overview
The e-commerce block lets you display products or offers inside a Flodesk email using beautifully designed layouts. You can feature your own products or affiliate offers, customize the look to match your brand, and link each product to any page you want—like a checkout, sales page, or website.
This guide walks you through how to add, customize, and use the e-commerce block step by step.
What is the e-commerce block?
The e-commerce block is a content block in the Flodesk email builder that displays product cards. Each card can include an image, title, description, price, and button, making it easy for subscribers to browse and click directly from your email.
You do not need Flodesk Checkout to use the e-commerce block. Each product can link to any URL you choose.
How to add an e-commerce block to your email
Step 1: Open an email
In your Flodesk account, create a new email or open an existing email you want to edit.
Step 2: Insert the e-commerce block
In the email builder, hover over an existing block until you see the plus sign (+).
Click it and select E-commerce (the last option in the third row).
Step 3: Choose a layout
In the right-hand sidebar under the Layout tab, choose from the available e-commerce layouts. Once selected, you can begin customizing it to match your brand.
How to customize the e-commerce block
Step 1: Control what appears in the block
Click the Block settings tab to toggle these elements on or off:
Title
Price
Description
Button
This helps you keep your product display simple or more detailed, depending on your goal.

Step 2: Set the number of products
Use the Products slider to choose how many products appear in the block.
Note: Each e-commerce block can display up to 9 products. If you want to feature more, simply add another e-commerce block below.

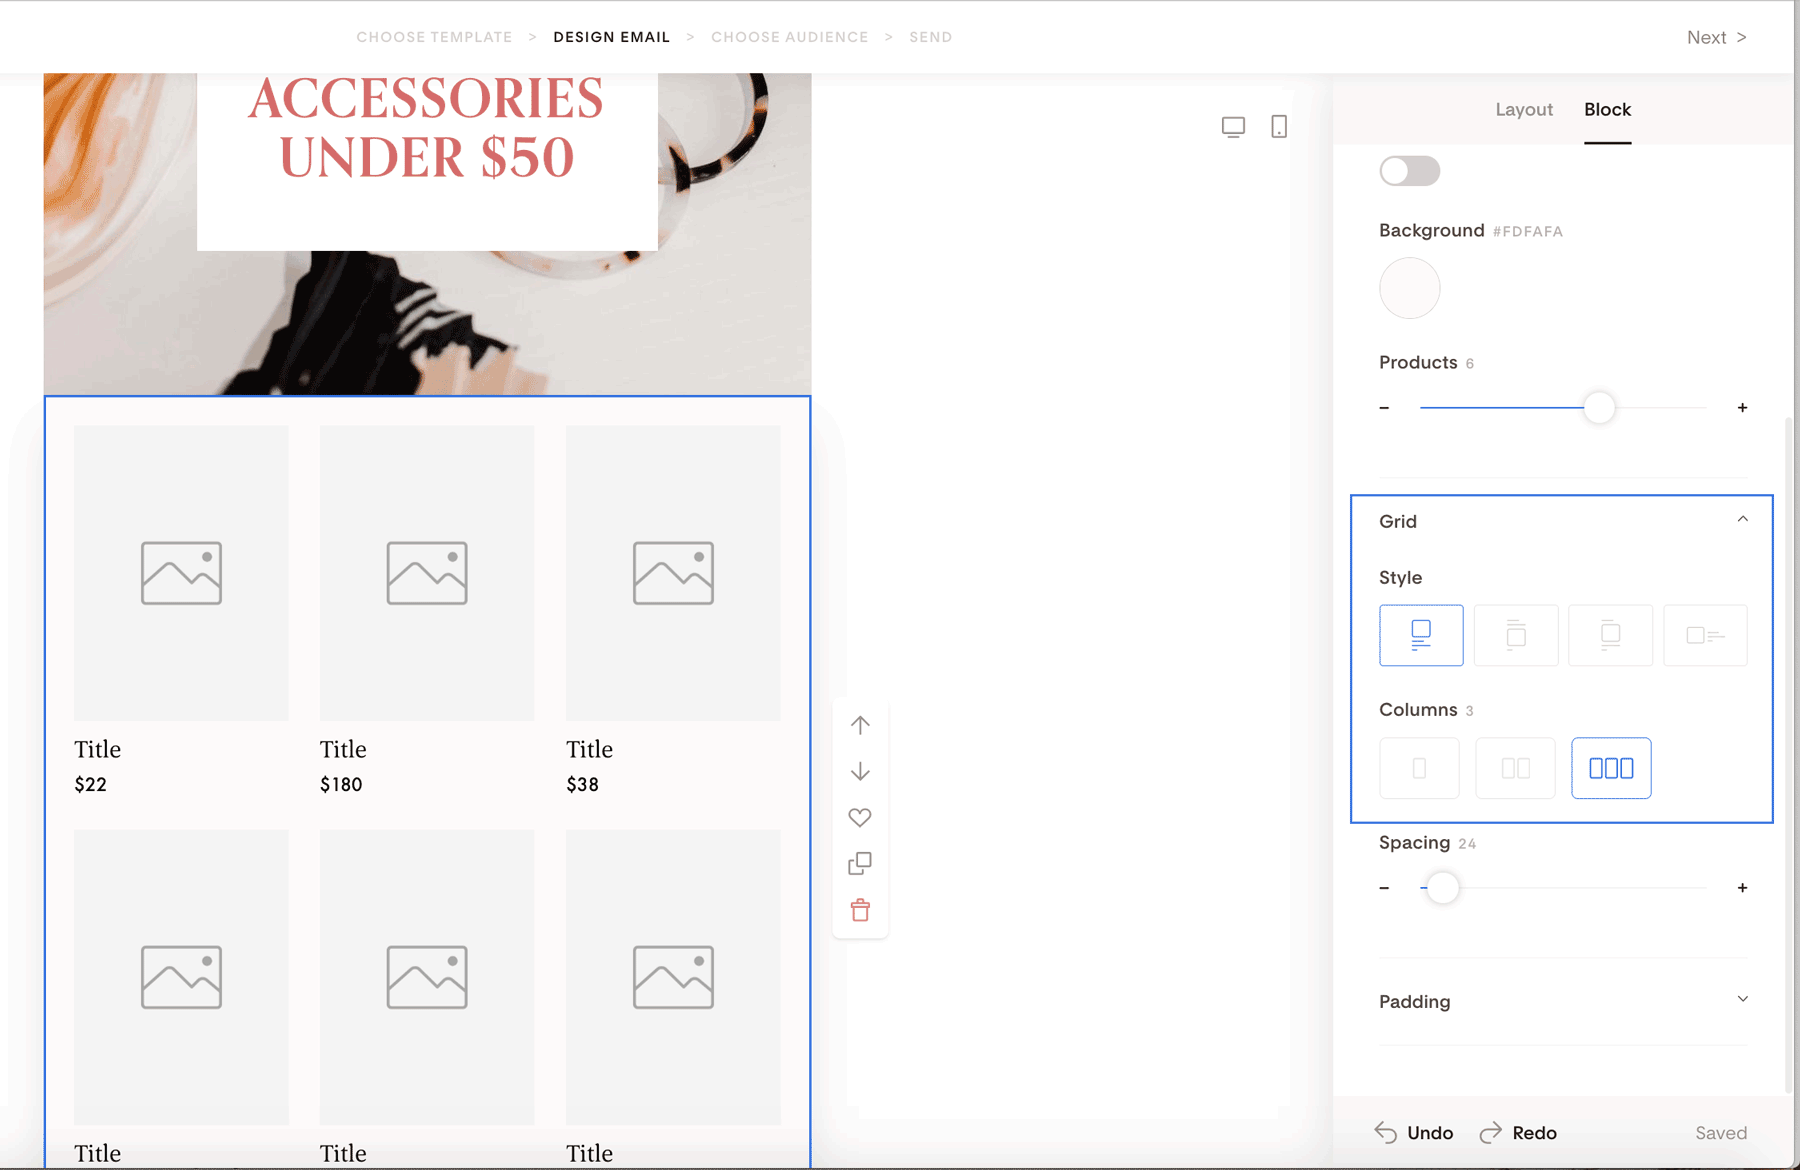
Step 3: Adjust the grid and layout
Under Grid settings, you can:
Choose a single, double, or triple column layout
Control how text, prices, descriptions, and buttons are displayed
Adjust image alignment (left, right, or alternating layouts, depending on the design)
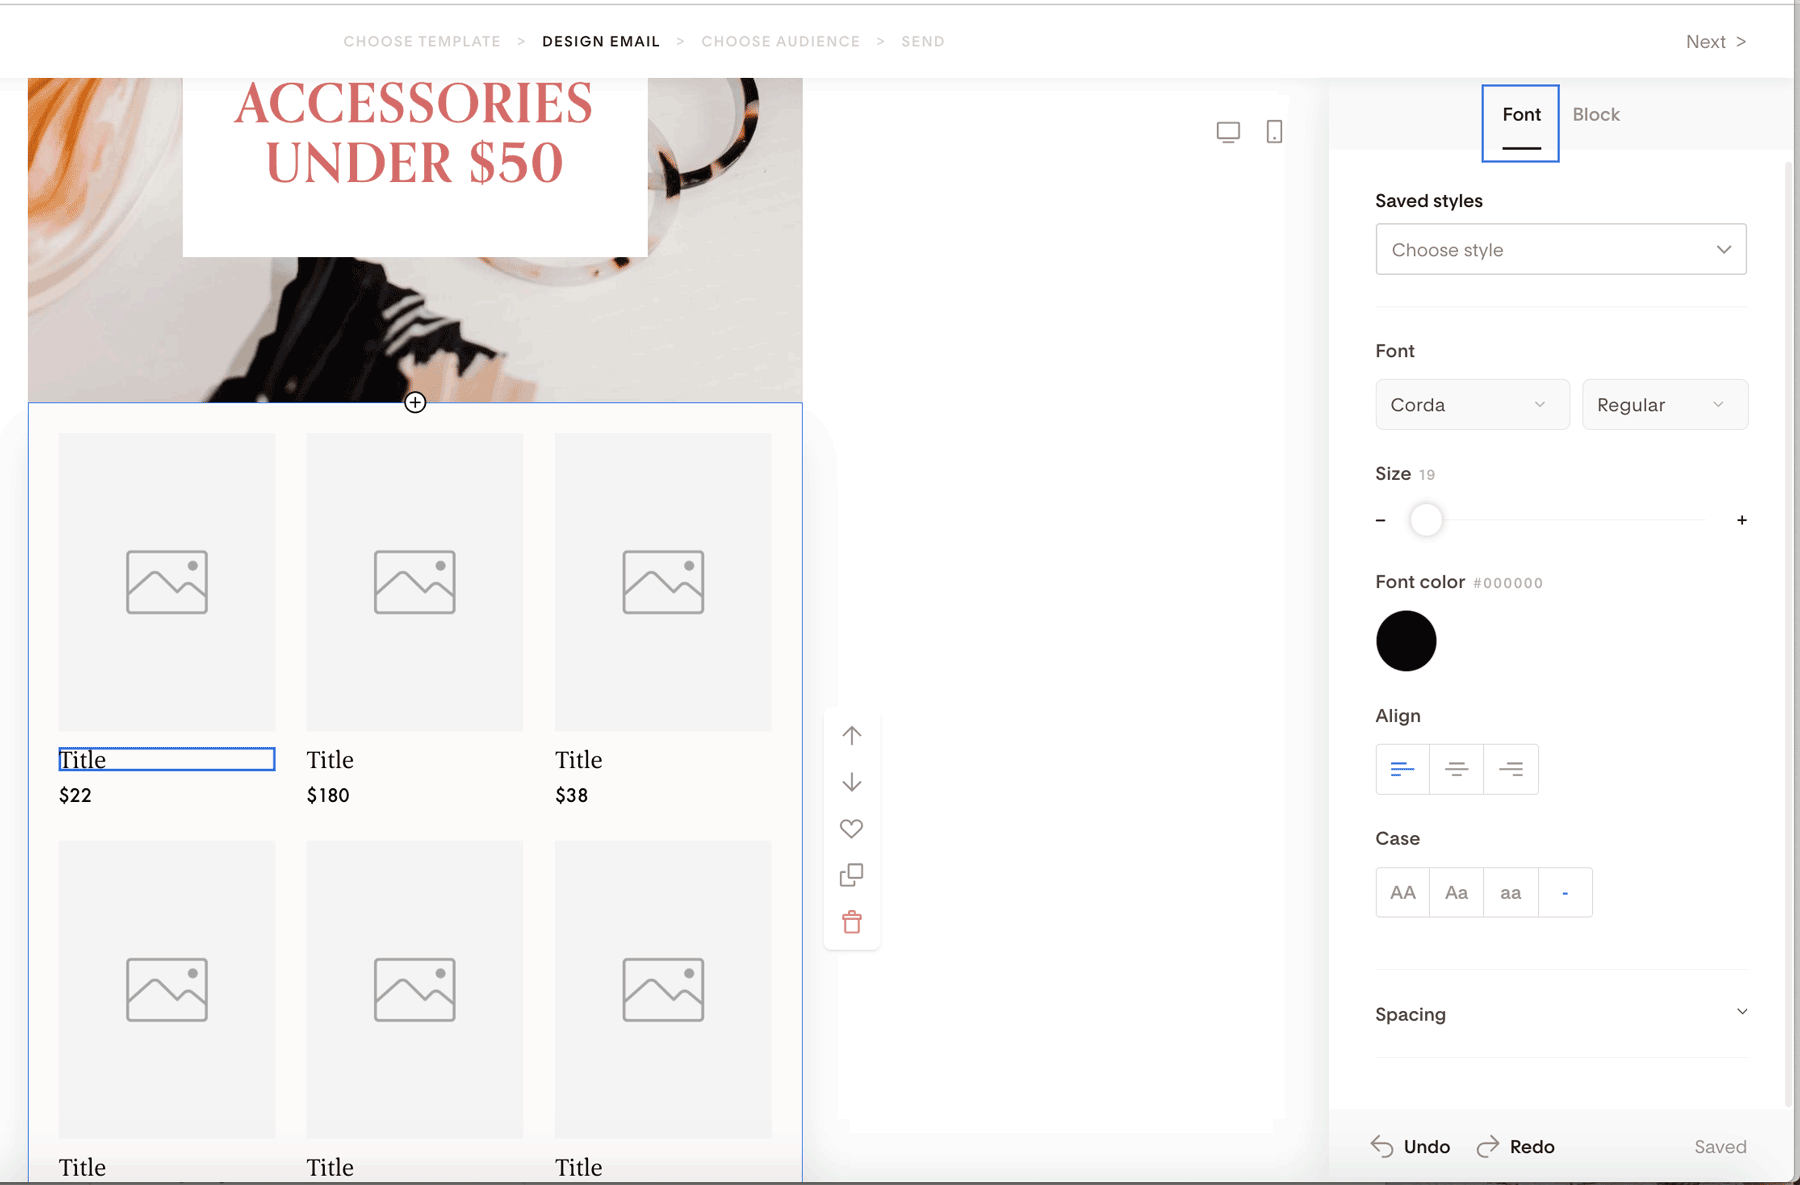
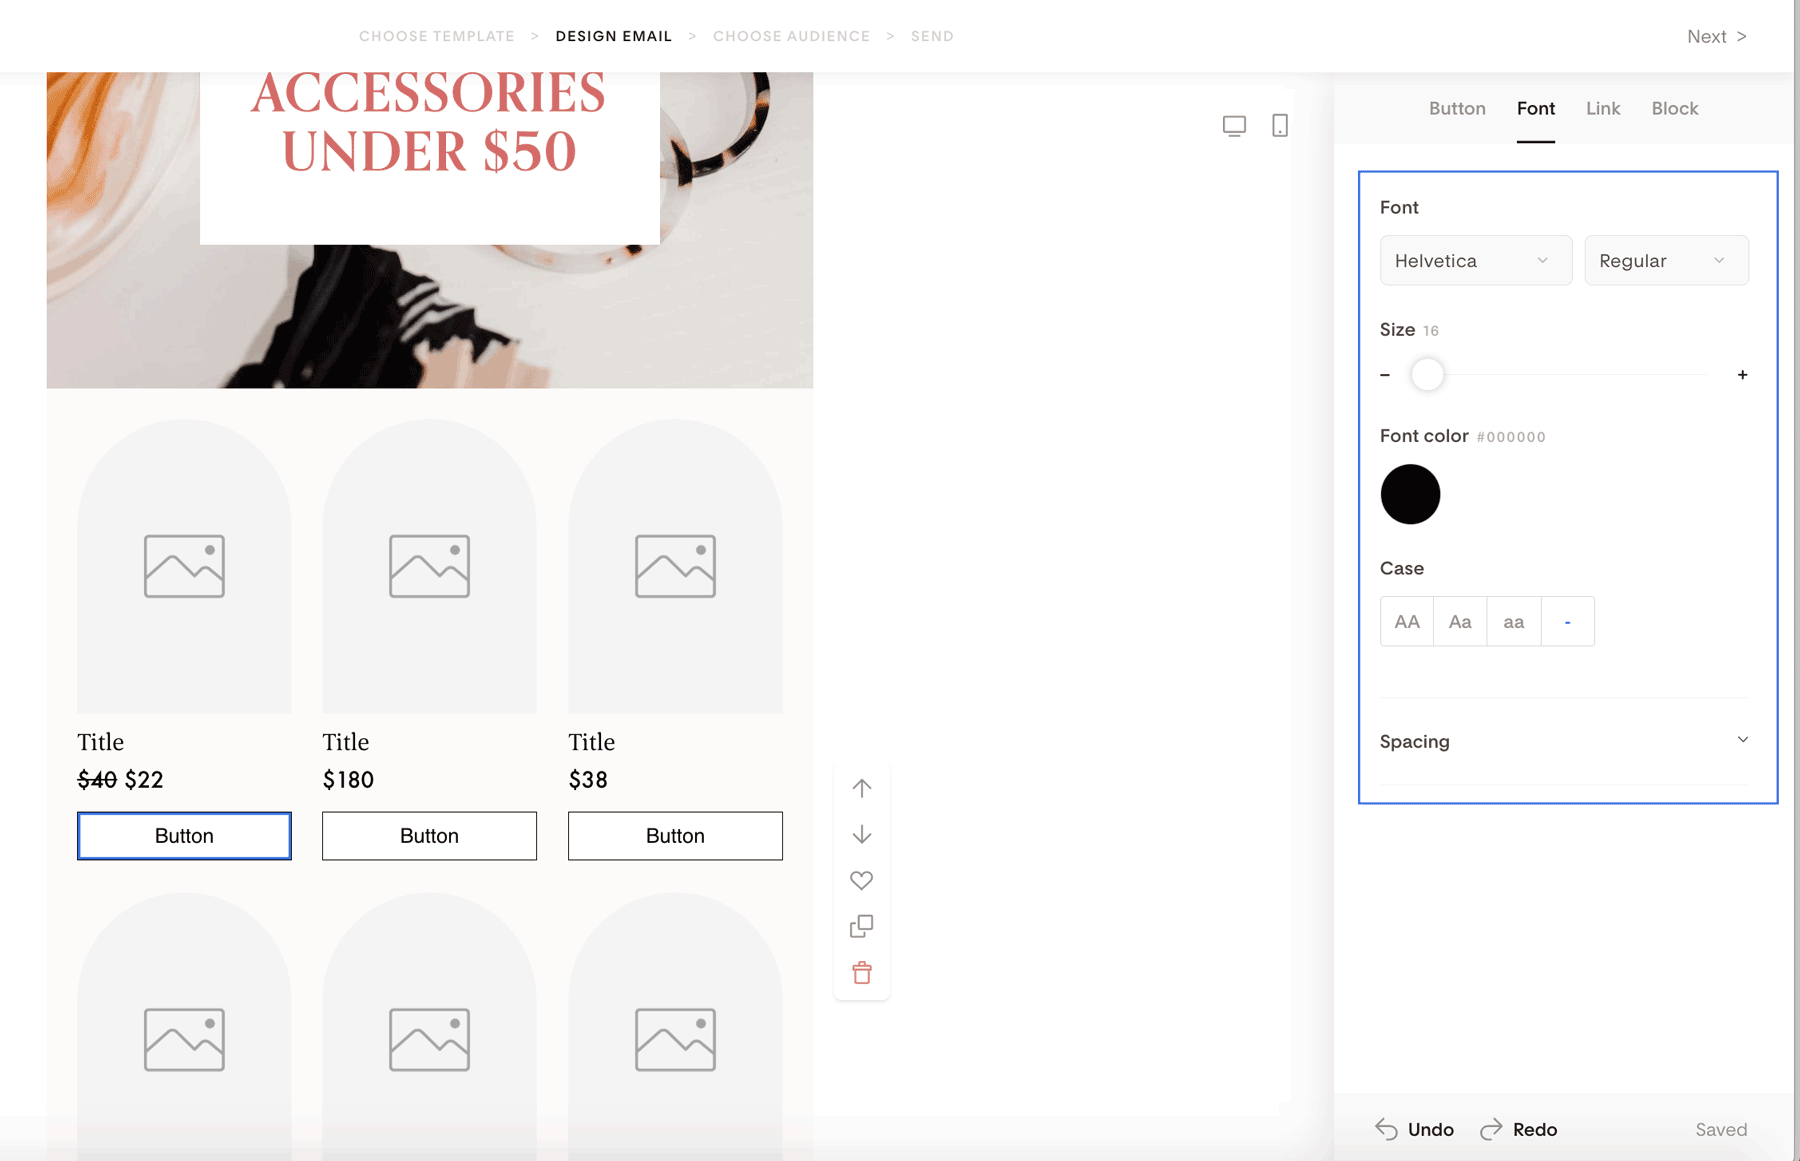
Step 4: Edit fonts and text styles
Click directly on any text element—like the title, description, or price—to edit:
Font type
Font size
Font color
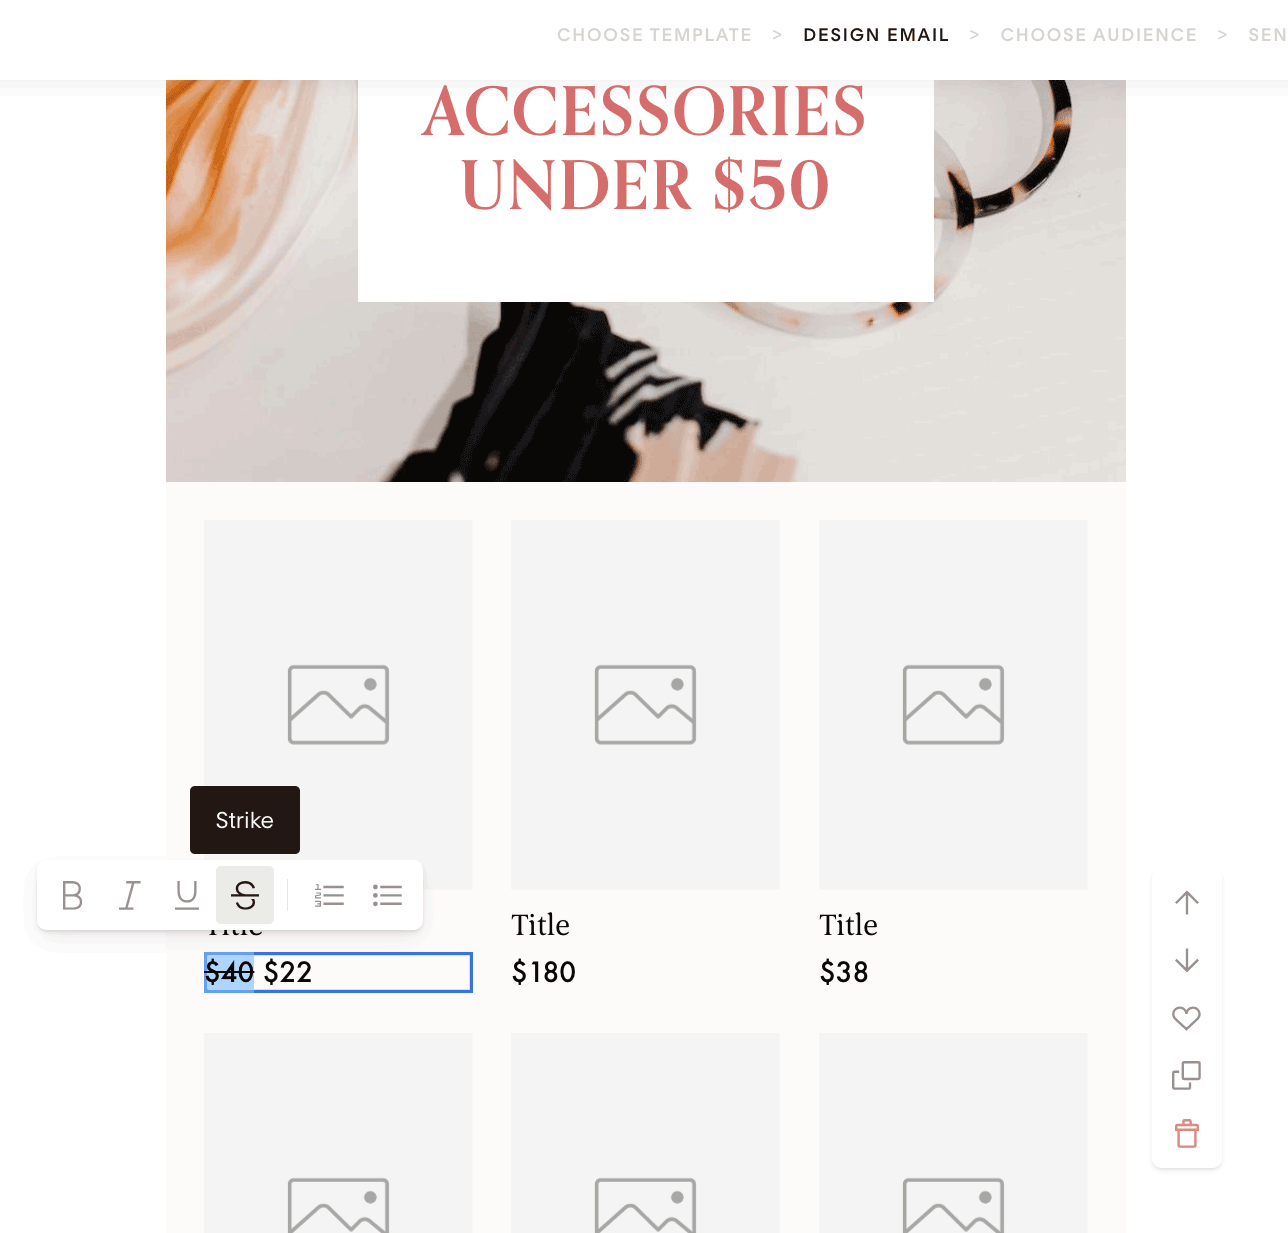
You can also strike through the price to highlight discounts or price changes.
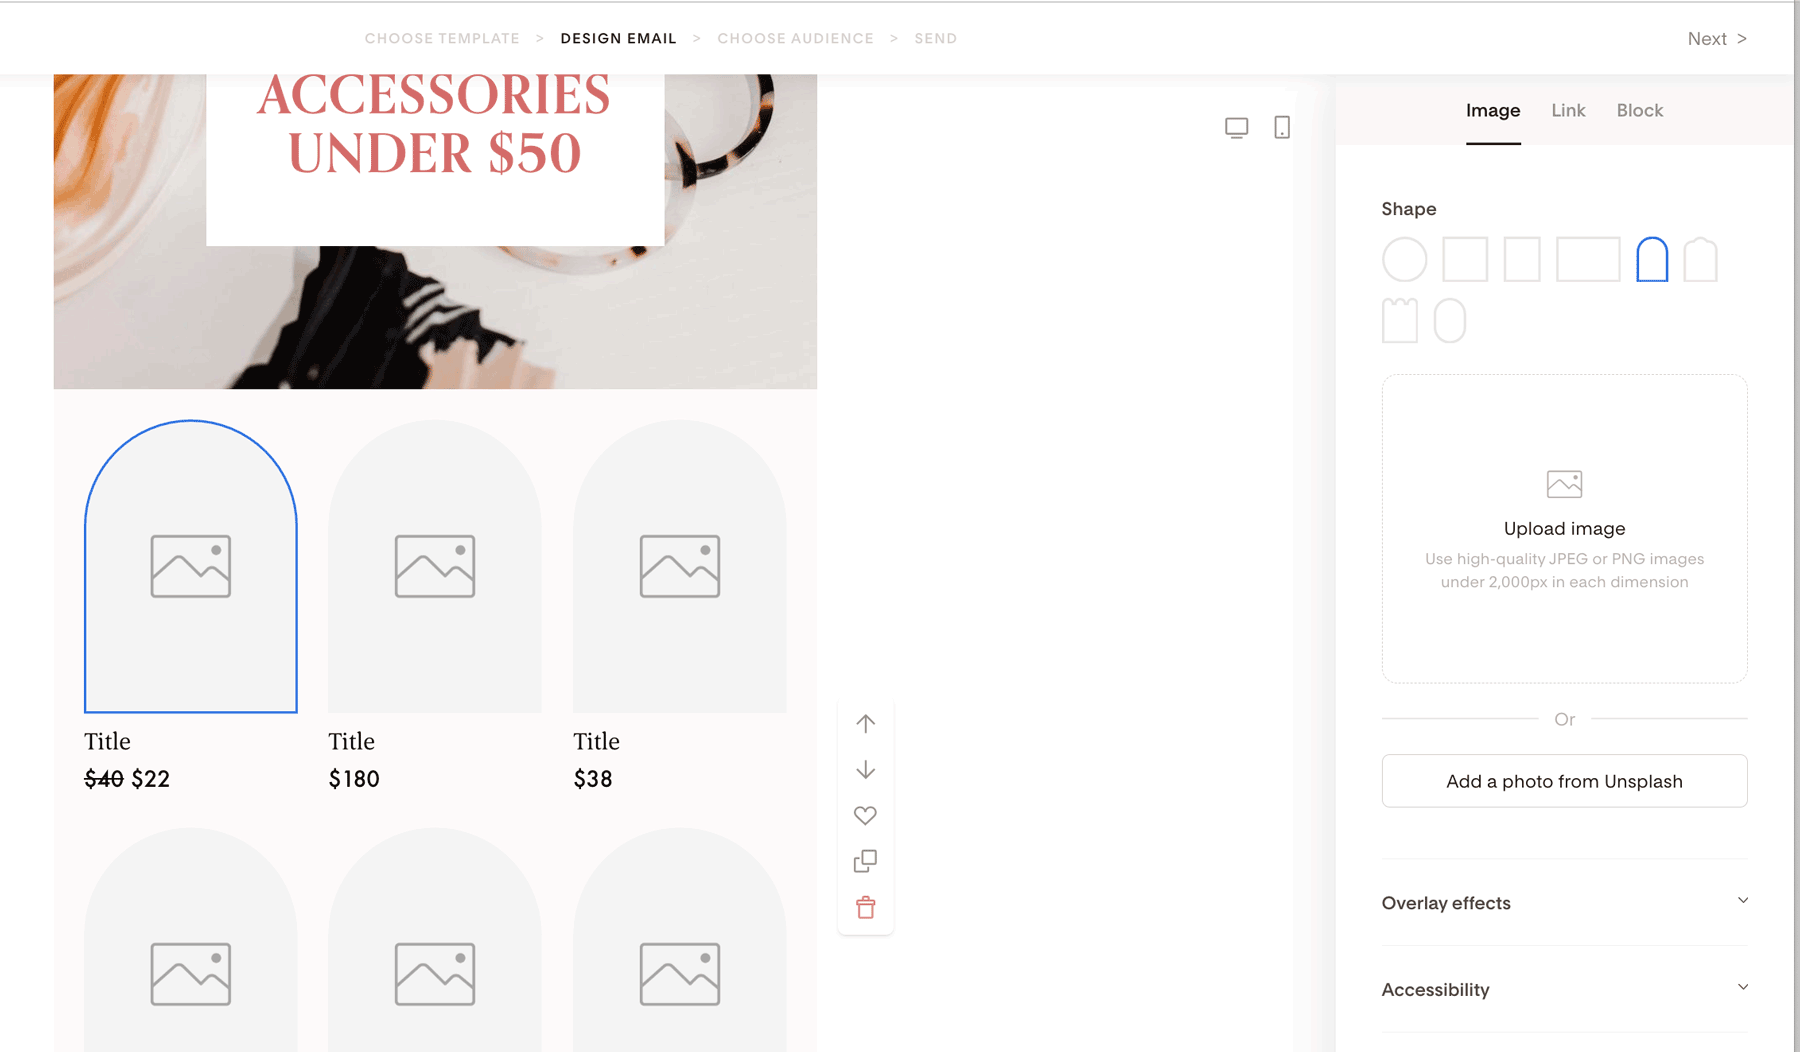
Step 5: Upload and style images
Click any image placeholder to:
Upload your product image
Choose from available image shapes
Adjust the visual style to match your email design
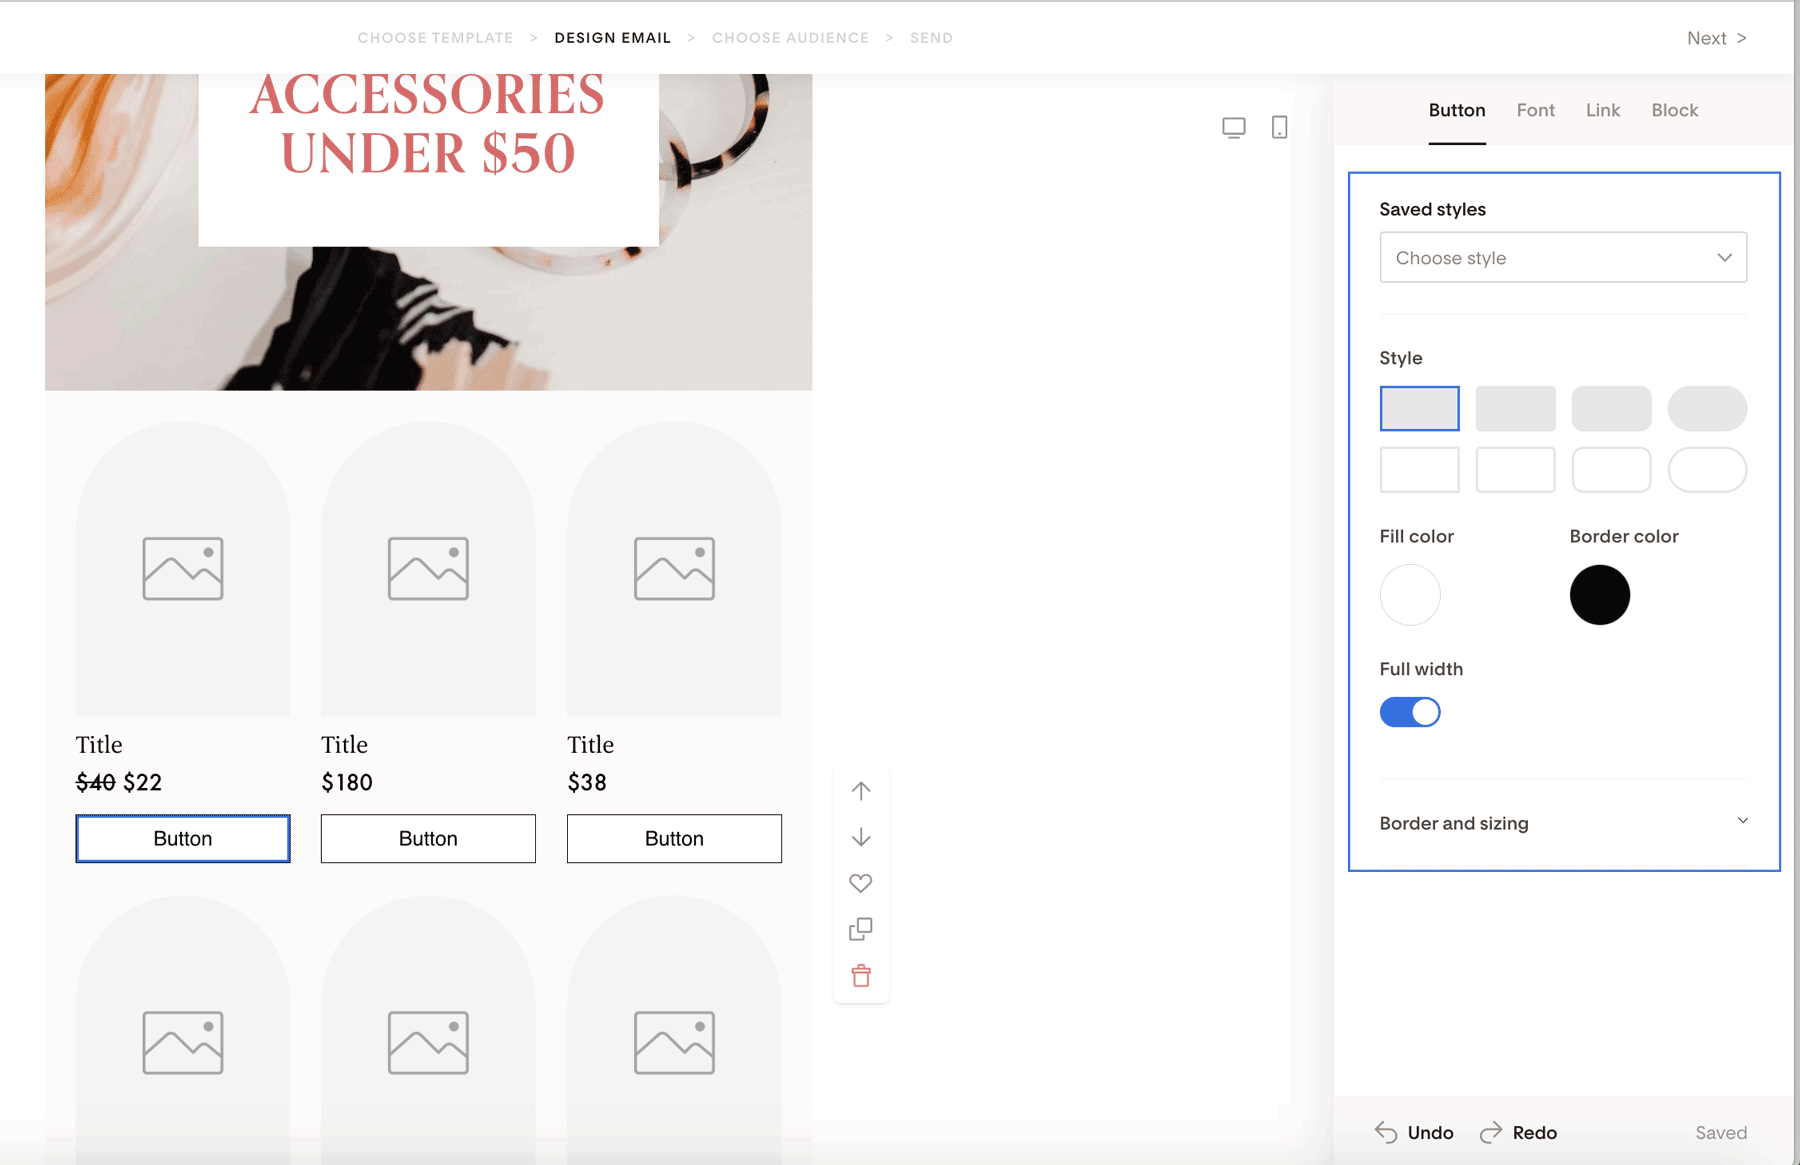
Step 6: Customize buttons and links
Click a button to access styling options under the Button tab, including:
Button shape
Fill color
Border color
Width
Under the Font tab, you can adjust:
Button font
Font size
Font color
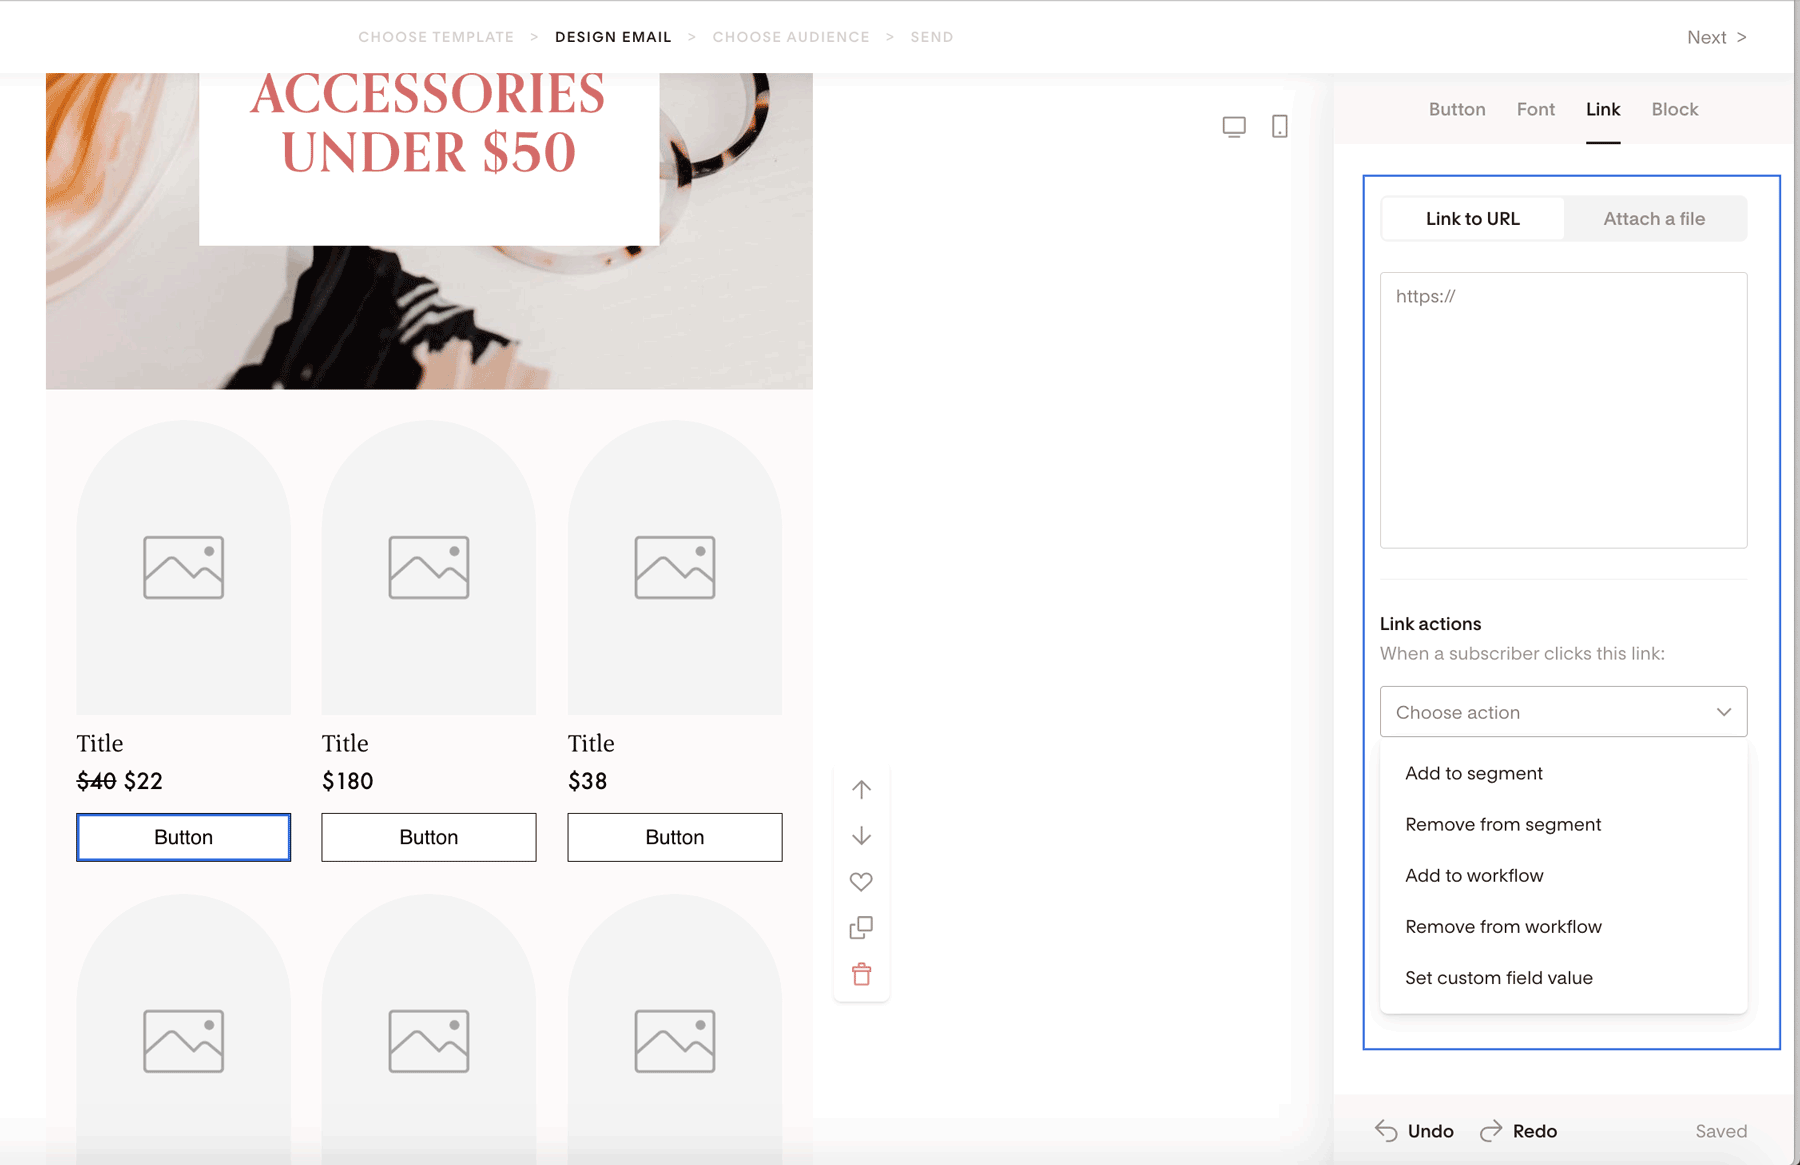
To link a product, open the Link tab and enter the URL you want that product to go to. Repeat this for each product card as needed.
Note: You don't need the Checkout feature in order to use the e-commerce block in your emails. You can link each featured product to any product details page you'd like—whether it's a Flodesk Checkout page or not.
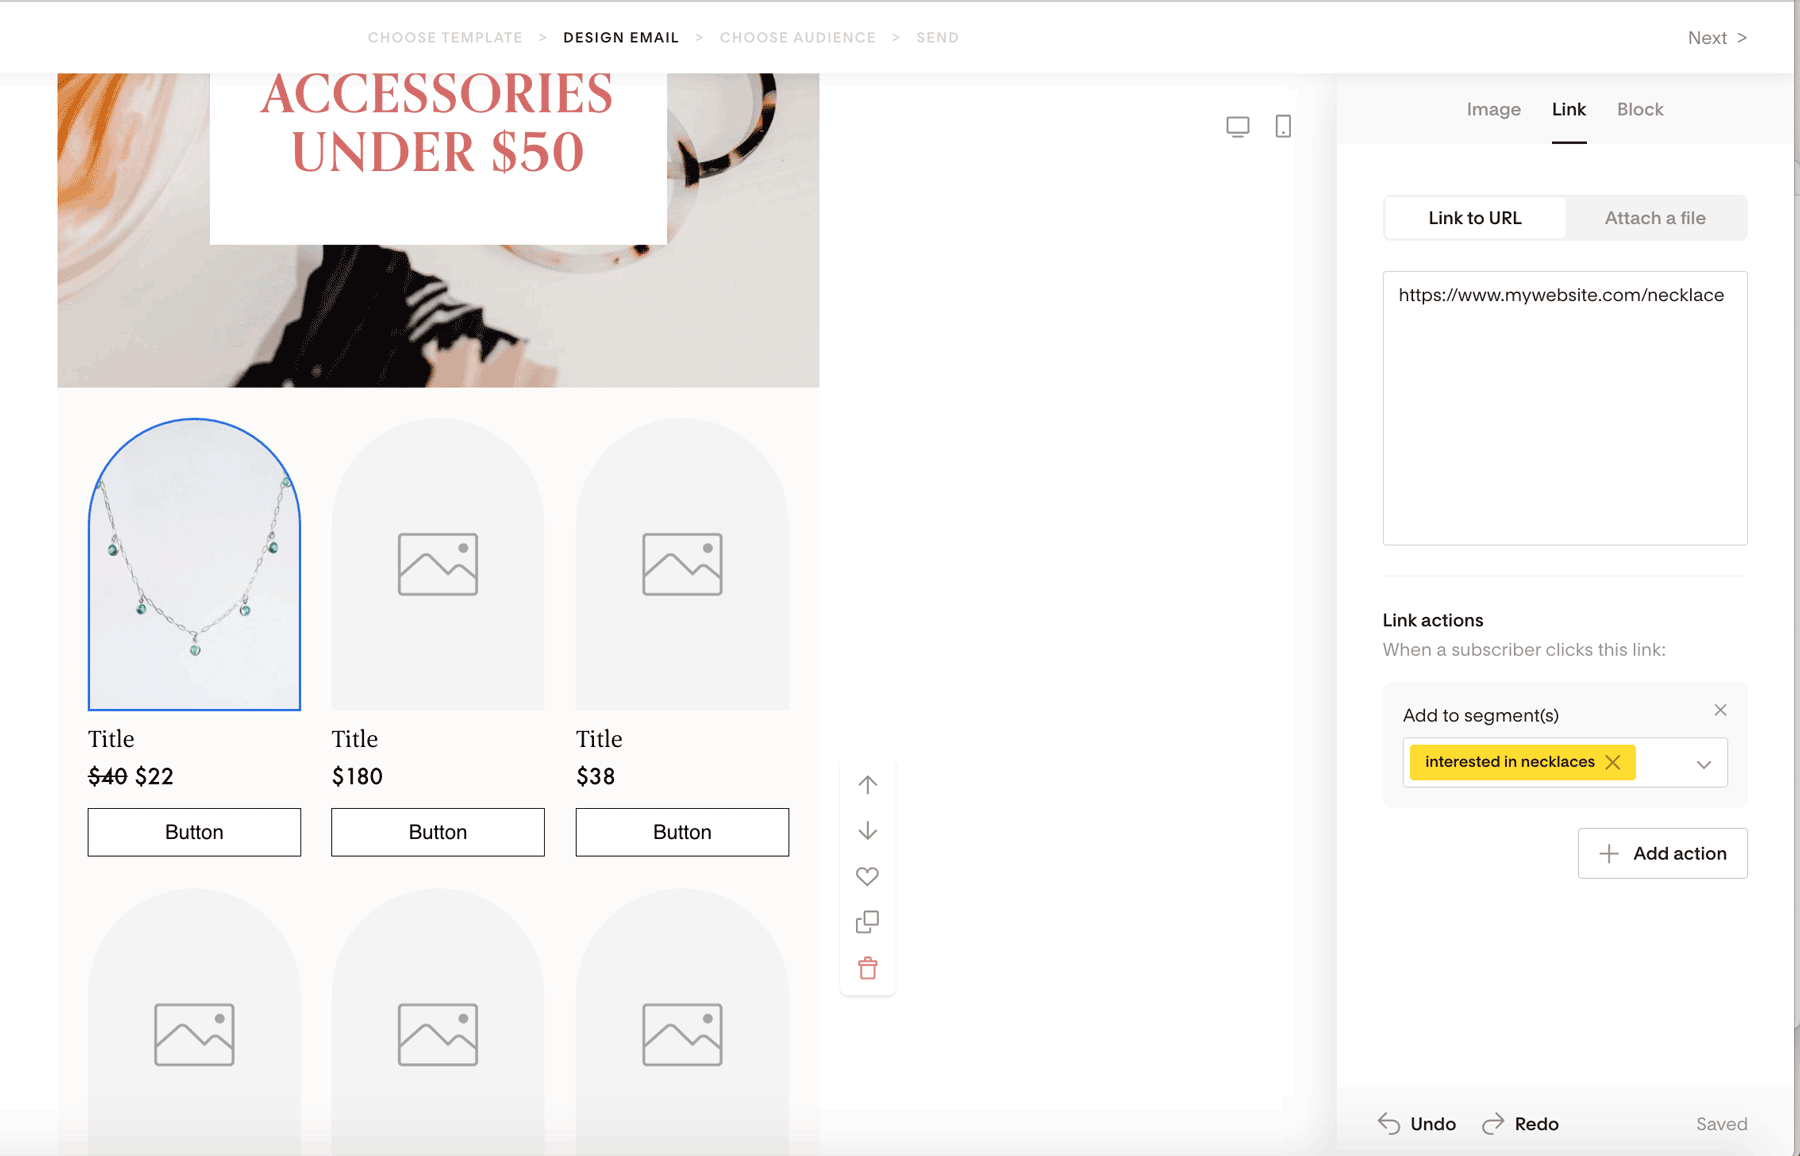
Optional: Use link actions for smarter targeting
You can assign actions to each product link so that when someone clicks, they can automatically be:
Added to or removed from segments
Added to or removed from workflows
Tagged with a custom field
Example:
If you feature a necklace, you could add a link action that places anyone who clicks into a segment called Interested in necklaces. You can then send more targeted emails later.
Pro tip
Running a flash sale or limited-time offer? Pair your e-commerce block with a Countdown timer block to create urgency.
Summary
To add an e-commerce block to your Flodesk email:
Open or create an email
Click the plus sign (+) and select E-commerce
Choose a layout and customize your products, images, text, and buttons
Link each product to the page you want subscribers to visit
That’s it—your email is now a shoppable experience!
FAQ
Do I need Flodesk Checkout to use the e-commerce block?
No. You can link each product to any URL, including a website, sales page, or third-party checkout.
How many products can I show in one e-commerce block?
Up to 9 products per block. You can add multiple e-commerce blocks if you need to feature more.
Can I use the e-commerce block for affiliate products?
Yes. You can link each product card to an affiliate URL.
Can I track interest based on product clicks?
Yes. By using link actions, you can add subscribers to segments or workflows when they click a product.
Can I customize the design to match my brand?
Absolutely. You can adjust fonts, colors, layouts, images, buttons, and alignment to match your brand style.
Will the e-commerce block work on mobile devices?
Yes. All e-commerce block layouts are responsive and adapt automatically for mobile viewing.