
How to add a fixed countdown timer to your Flodesk email
Create urgency in your emails by counting down to a specific date and time—perfect for launches, sales, and deadlines.
Overview
A fixed countdown timer lets you show subscribers exactly how much time is left until an offer ends. Everyone who receives your email sees the same countdown, based on the end date, end time, and timezone you choose.
This guide walks you through how to add and customize a fixed countdown timer in a Flodesk email.
If you’re looking for a timer that starts when each subscriber opens the email, check out How to add a personalized countdown timer to your Flodesk email instead.
What is a fixed countdown timer?
A fixed countdown timer counts down to one specific moment in time.
That means:
You choose the end date
You choose the end time
You choose the timezone
All subscribers see the same deadline, no matter when they open the email
Important limitation to know upfront:
Countdown timers can display a maximum of 99 days. This is because each time unit (days, hours, minutes, seconds) can only show two digits.
How to add a fixed countdown timer to your email
Step 1: Open your email
In your Flodesk account, create a new email or open an existing one you want to edit.
Step 2: Add the countdown block
In the email builder, hover over any existing block until you see the plus (+) icon.
Click it, then select Countdown from the block options.
Step 3: Choose a countdown design
In the right-hand sidebar under the Layout tab, browse the available countdown timer styles. Select the one you like, then adjust it to match your brand.
How to customize a fixed countdown timer
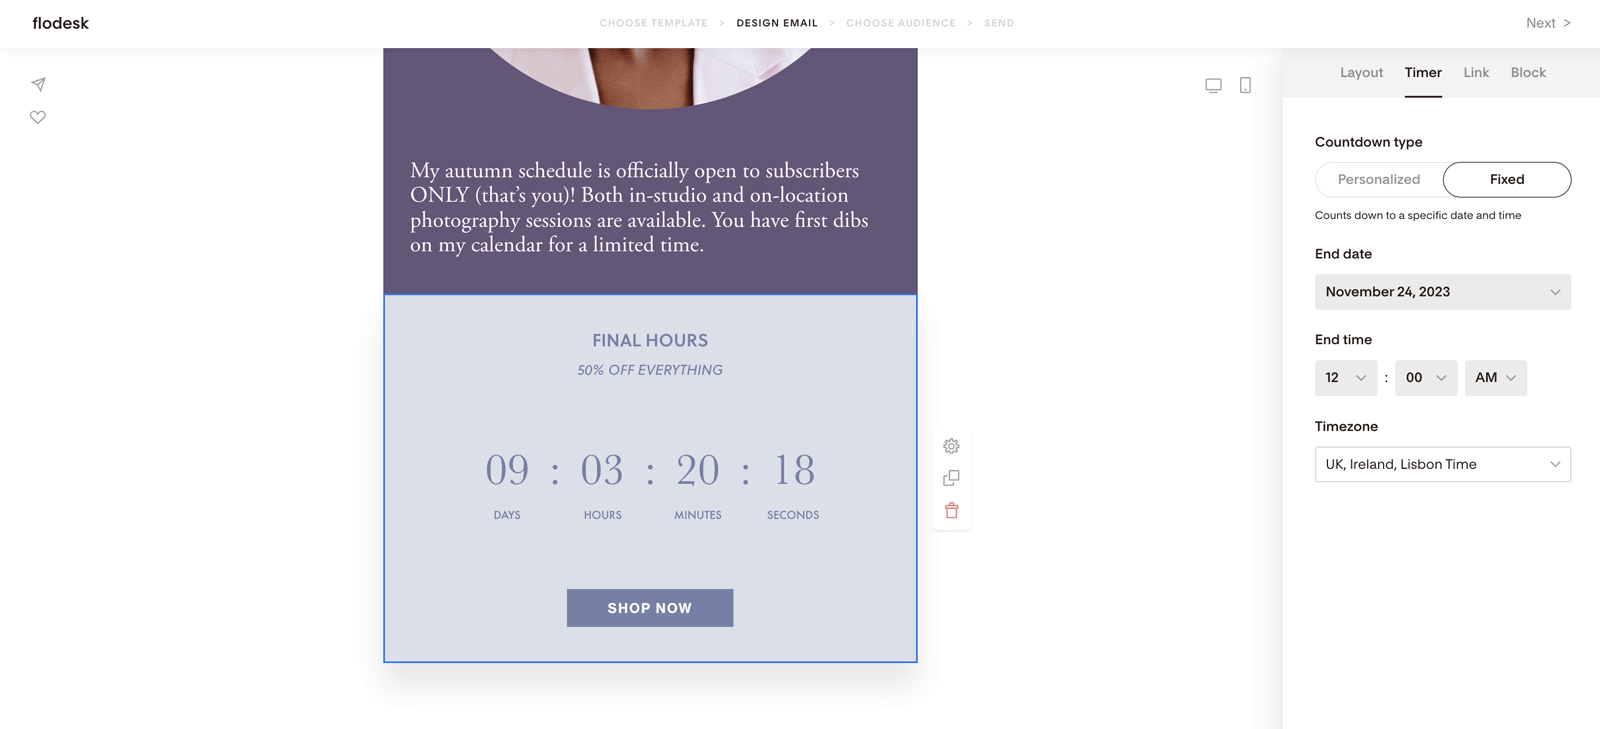
Step 1: Select the timer type
Click on the countdown block, then open the Timer tab.
You’ll see two options:
Fixed – counts down to a specific date and time
Personalized – starts counting down when a subscriber opens the email for the first time
For this article, make sure Fixed is selected.

Step 2: Set the end date, time, and timezone
Use the dropdown menus to choose:
The end date
The end time
The timezone
Example:
If you set the timer to end at midnight on November 24 in UK, Ireland, Lisbon time, the countdown will end at that exact moment for everyone—no matter where they’re located or when they open the email.
Step 3: Add a link
Open the Link tab and paste the URL you want subscribers to visit when they click the timer or button. This could be your website, sales page, or Flodesk Checkout page.
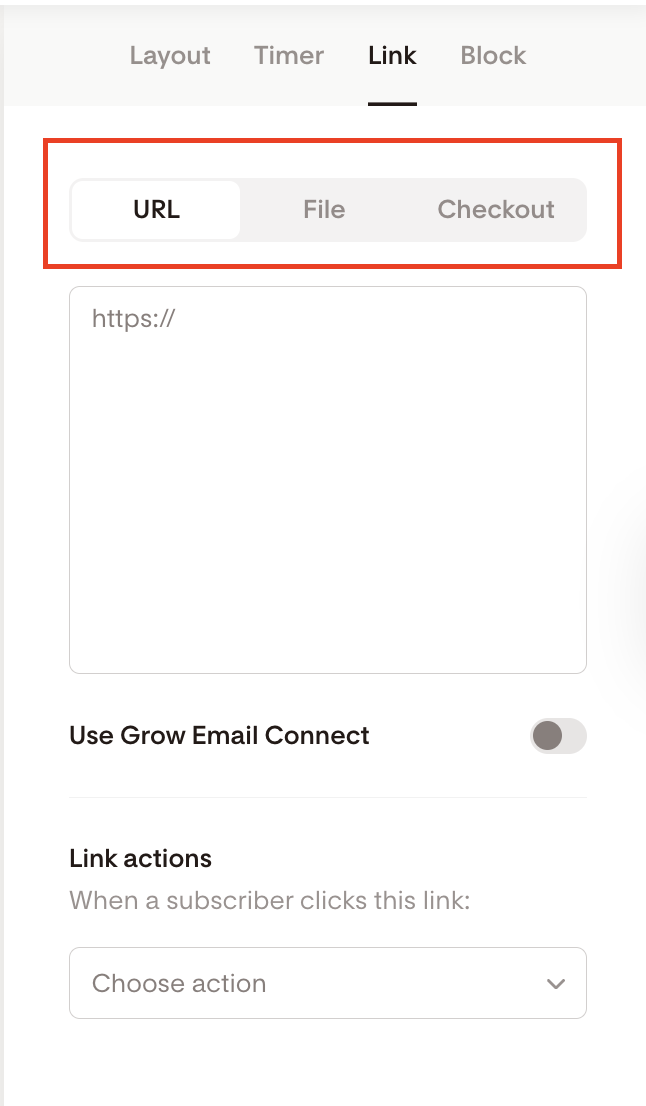
Optional: Use link actions for smarter targeting
You can assign actions to your link so that when someone clicks, they can automatically be:
Added to or removed from segments
Added to or removed from workflows
Tagged with a custom field
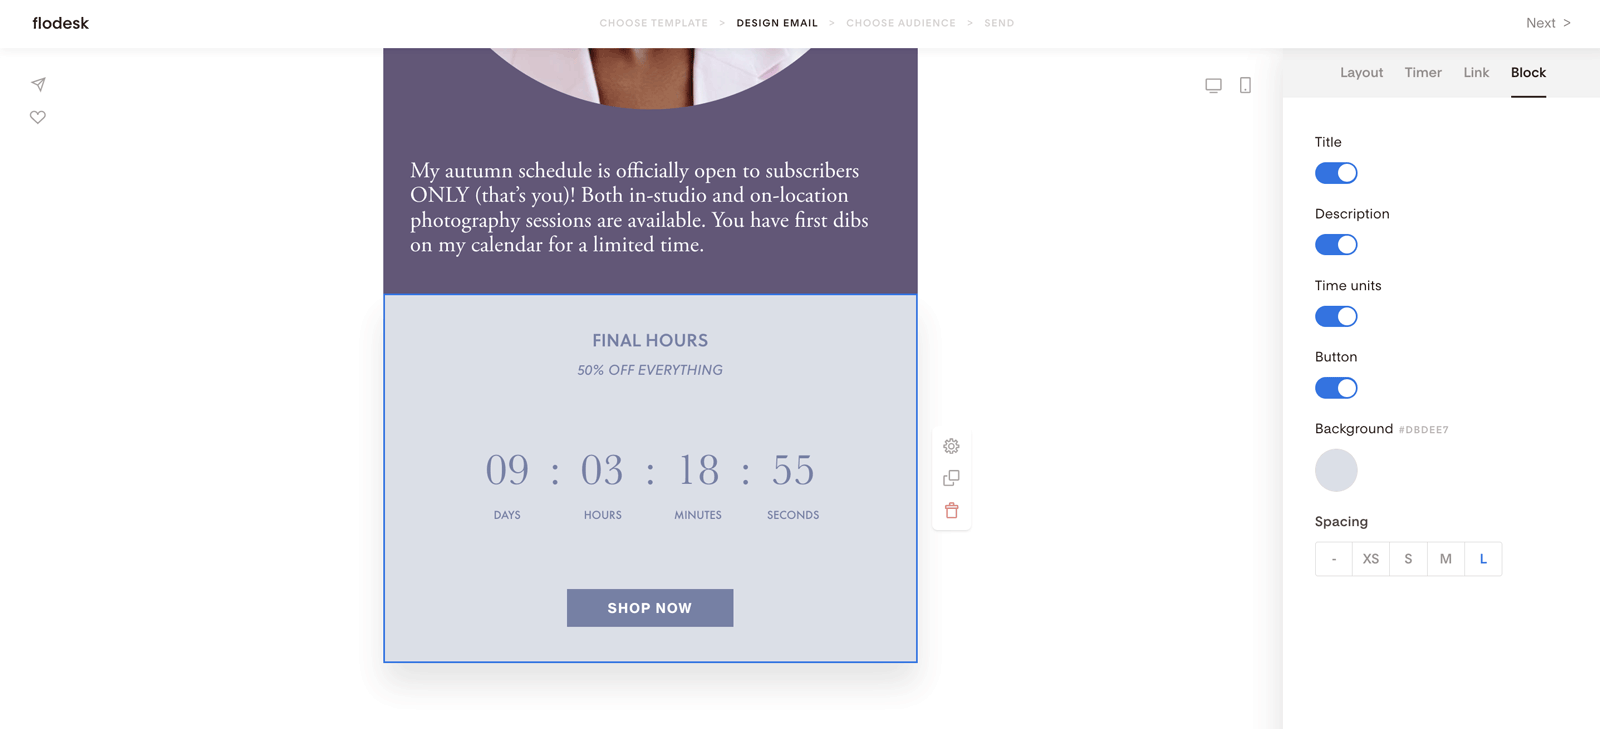
Step 4: Control what shows in the block
Under the Block tab, you can toggle different elements on or off, including:
Title
Description
Time units (days, hours, minutes, seconds)
Button
You can also adjust the background color and spacing so the countdown fits seamlessly into your email design.
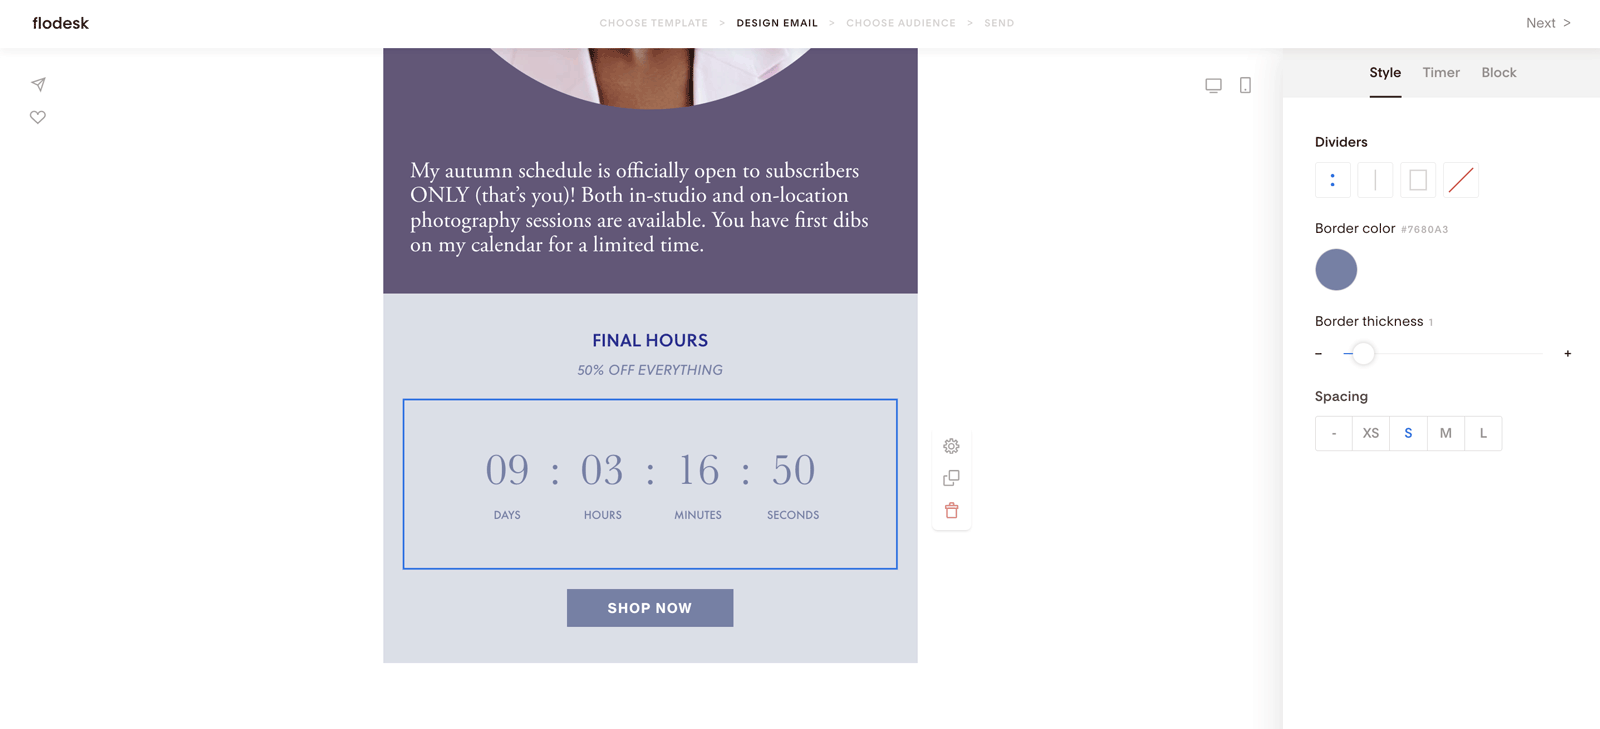
Step 5: Style the text and divider
Click on any text element to change the font, size, or color.
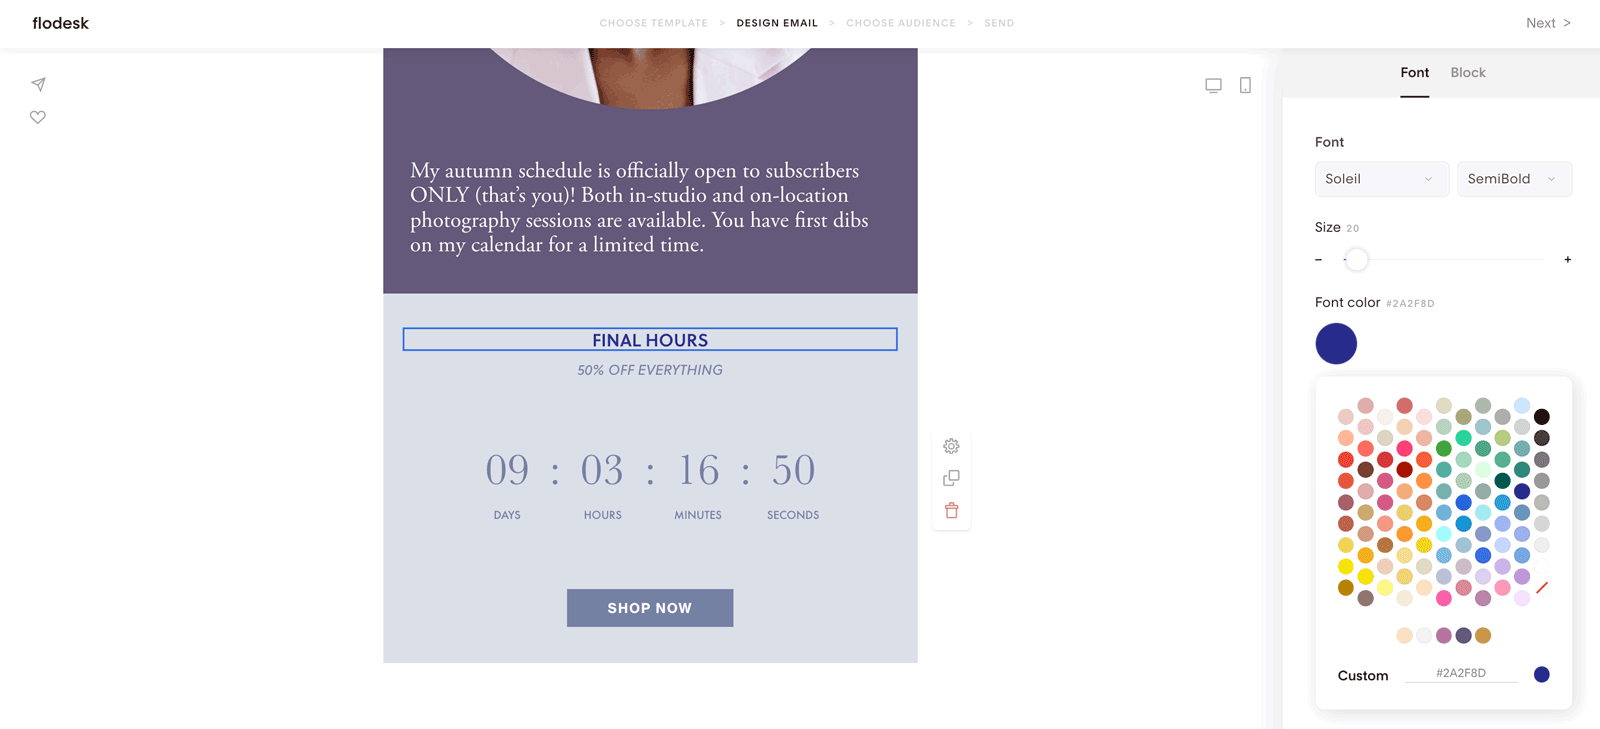
Pro tip:
Click directly on the countdown numbers to unlock extra options for customizing the divider style. This gives you even more creative control over how the timer looks.
Summary
To add a fixed countdown timer that counts down to a specific date and time:
Add a Countdown block in the email builder
Choose Fixed under the Timer settings
Set the end date, end time, and timezone
Add a link to your offer or checkout page
Customize the design to match your brand
That’s it! Once your email is sent, the countdown automatically updates in real time for your subscribers.
FAQ
What’s the difference between a fixed and a personalized countdown timer?
A fixed countdown timer ends at the same date and time for everyone.
A personalized countdown timer starts when each subscriber opens the email for the first time.
Can I use a fixed countdown timer for evergreen offers?
Fixed countdown timers work best for launches, flash sales, or real deadlines.
For evergreen funnels where timing should be unique to each subscriber, a personalized countdown timer is a better fit.
What happens after the countdown ends?
Once the timer reaches zero, it stops displaying time. Make sure your email copy and link still make sense after the deadline has passed.
Can I change the countdown after sending the email?
No. Once an email is sent, the countdown settings are locked in. Always double-check your date, time, and timezone before sending.
Why can’t I set a countdown longer than 99 days?
Countdown timers are limited to two digits per time unit. That means the maximum supported duration is 99 days.
Can I link the countdown timer to Flodesk Checkout?
Yes! You can link the timer (or its button) directly to your Flodesk Checkout page to make it easy for subscribers to act before time runs out.