How do I set up my product details in Flodesk Checkout?
All about the Product tab in Flodesk Checkout
Flodesk Checkout makes it easy to sell your next course, digital product or service. Even if you don't have a website yet.
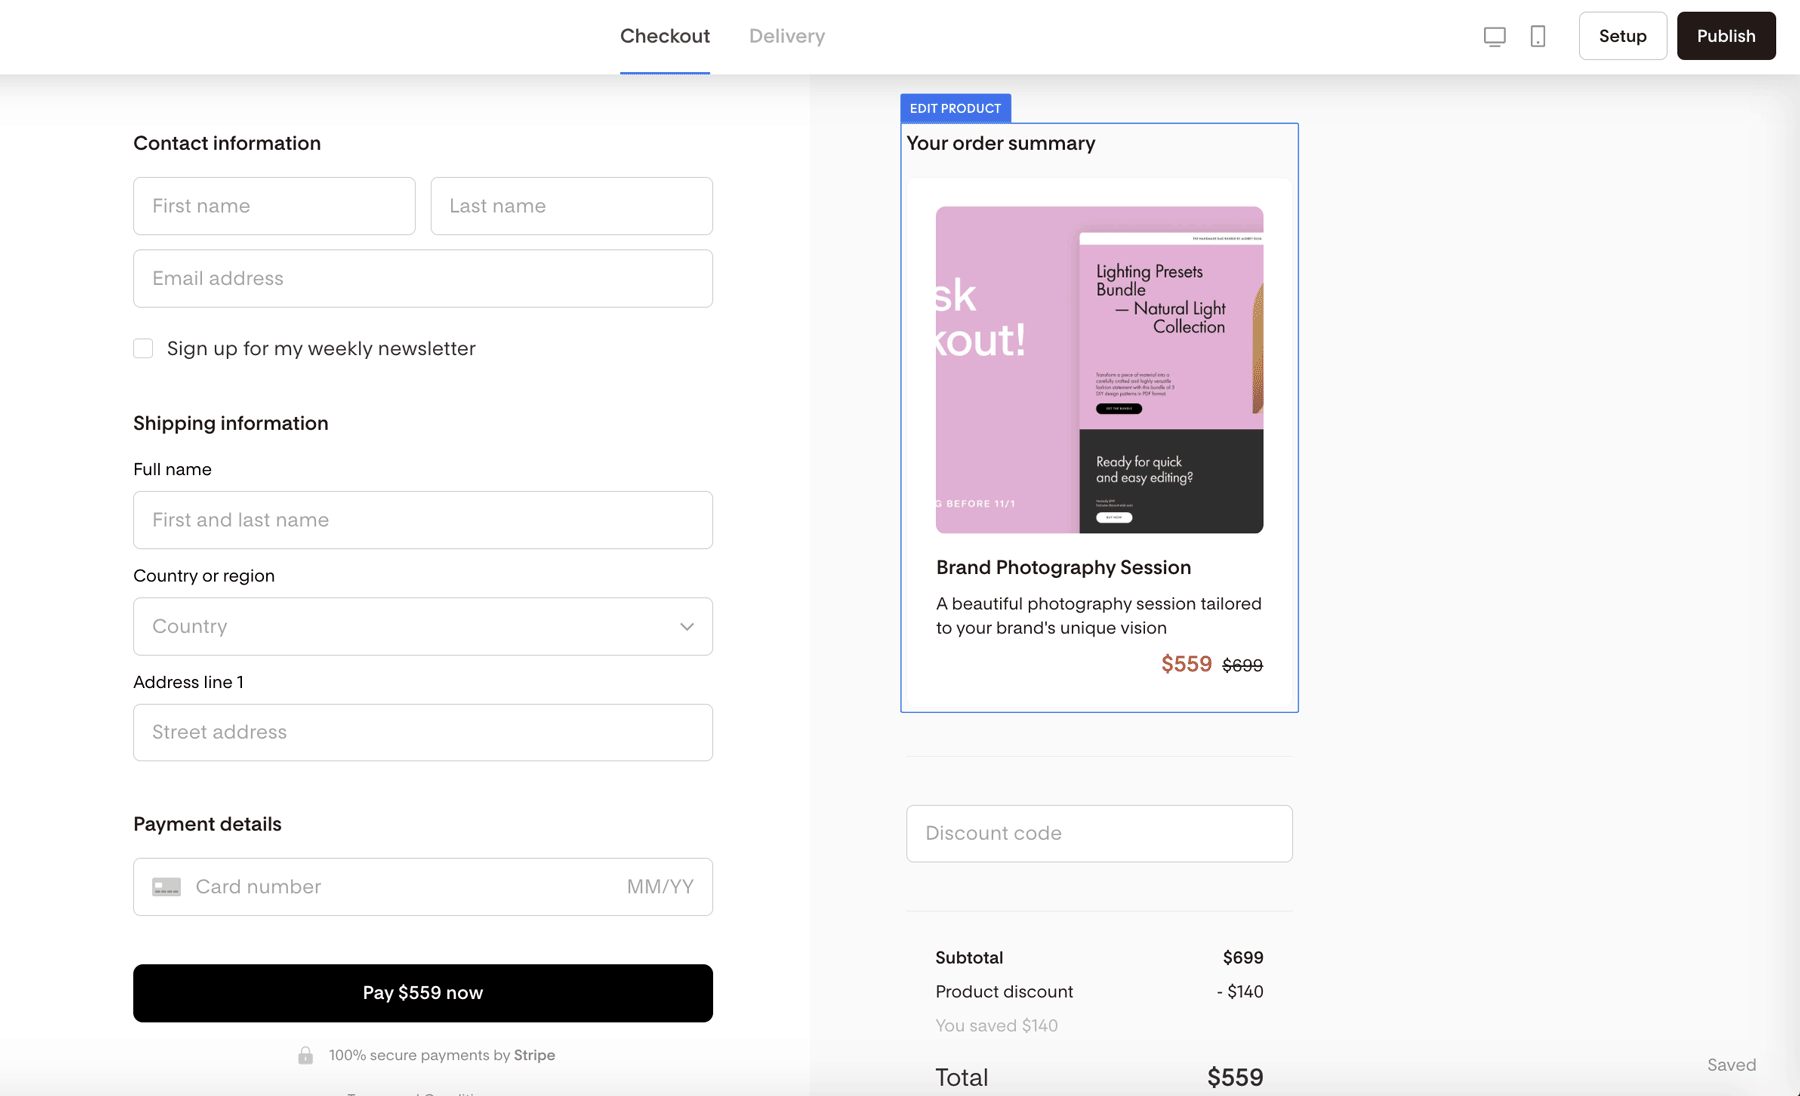
Once you have selected a Template and built your sales page, it's time to edit the checkout page and add your product details.
How to add your product details
On the Checkout page, click on the product block to start editing it.
In our example, it's the 'Brand Photography Session'.
How to edit information on the Product tab?
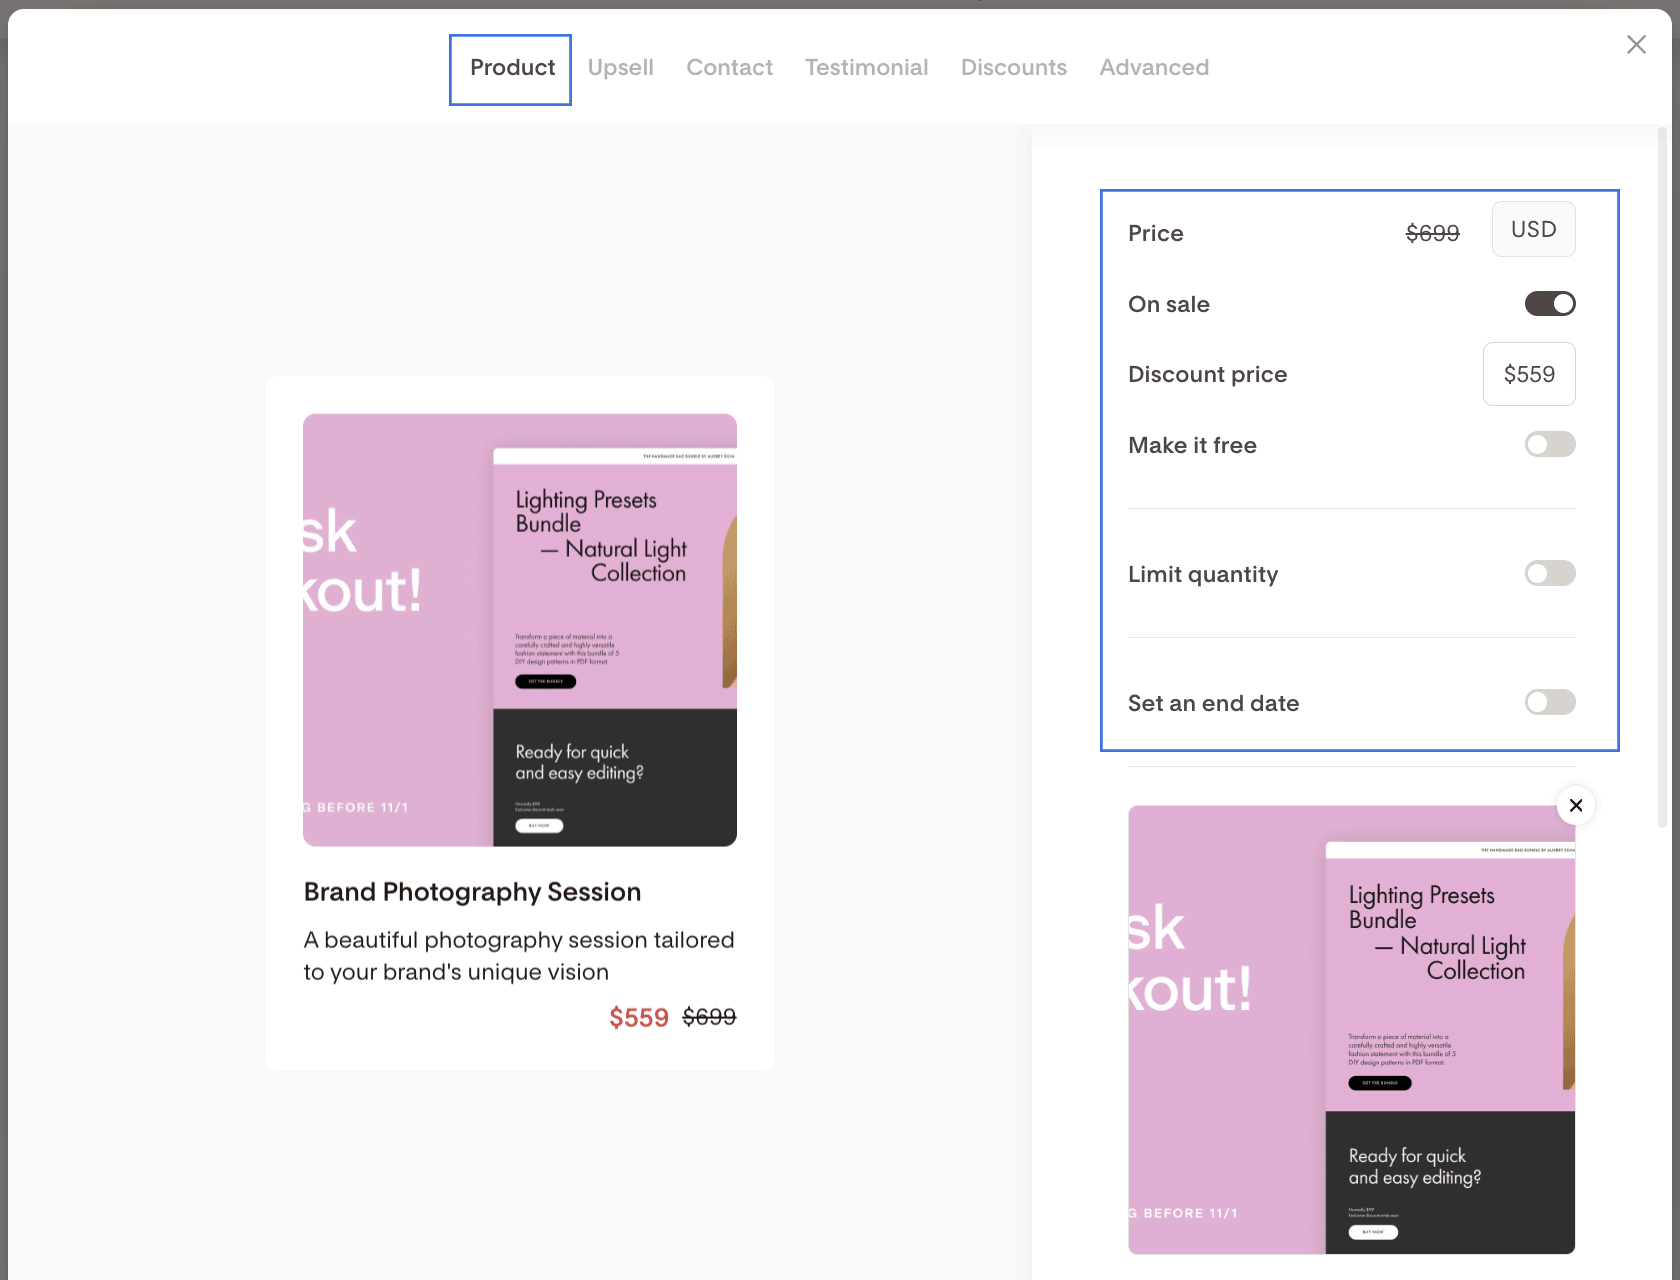
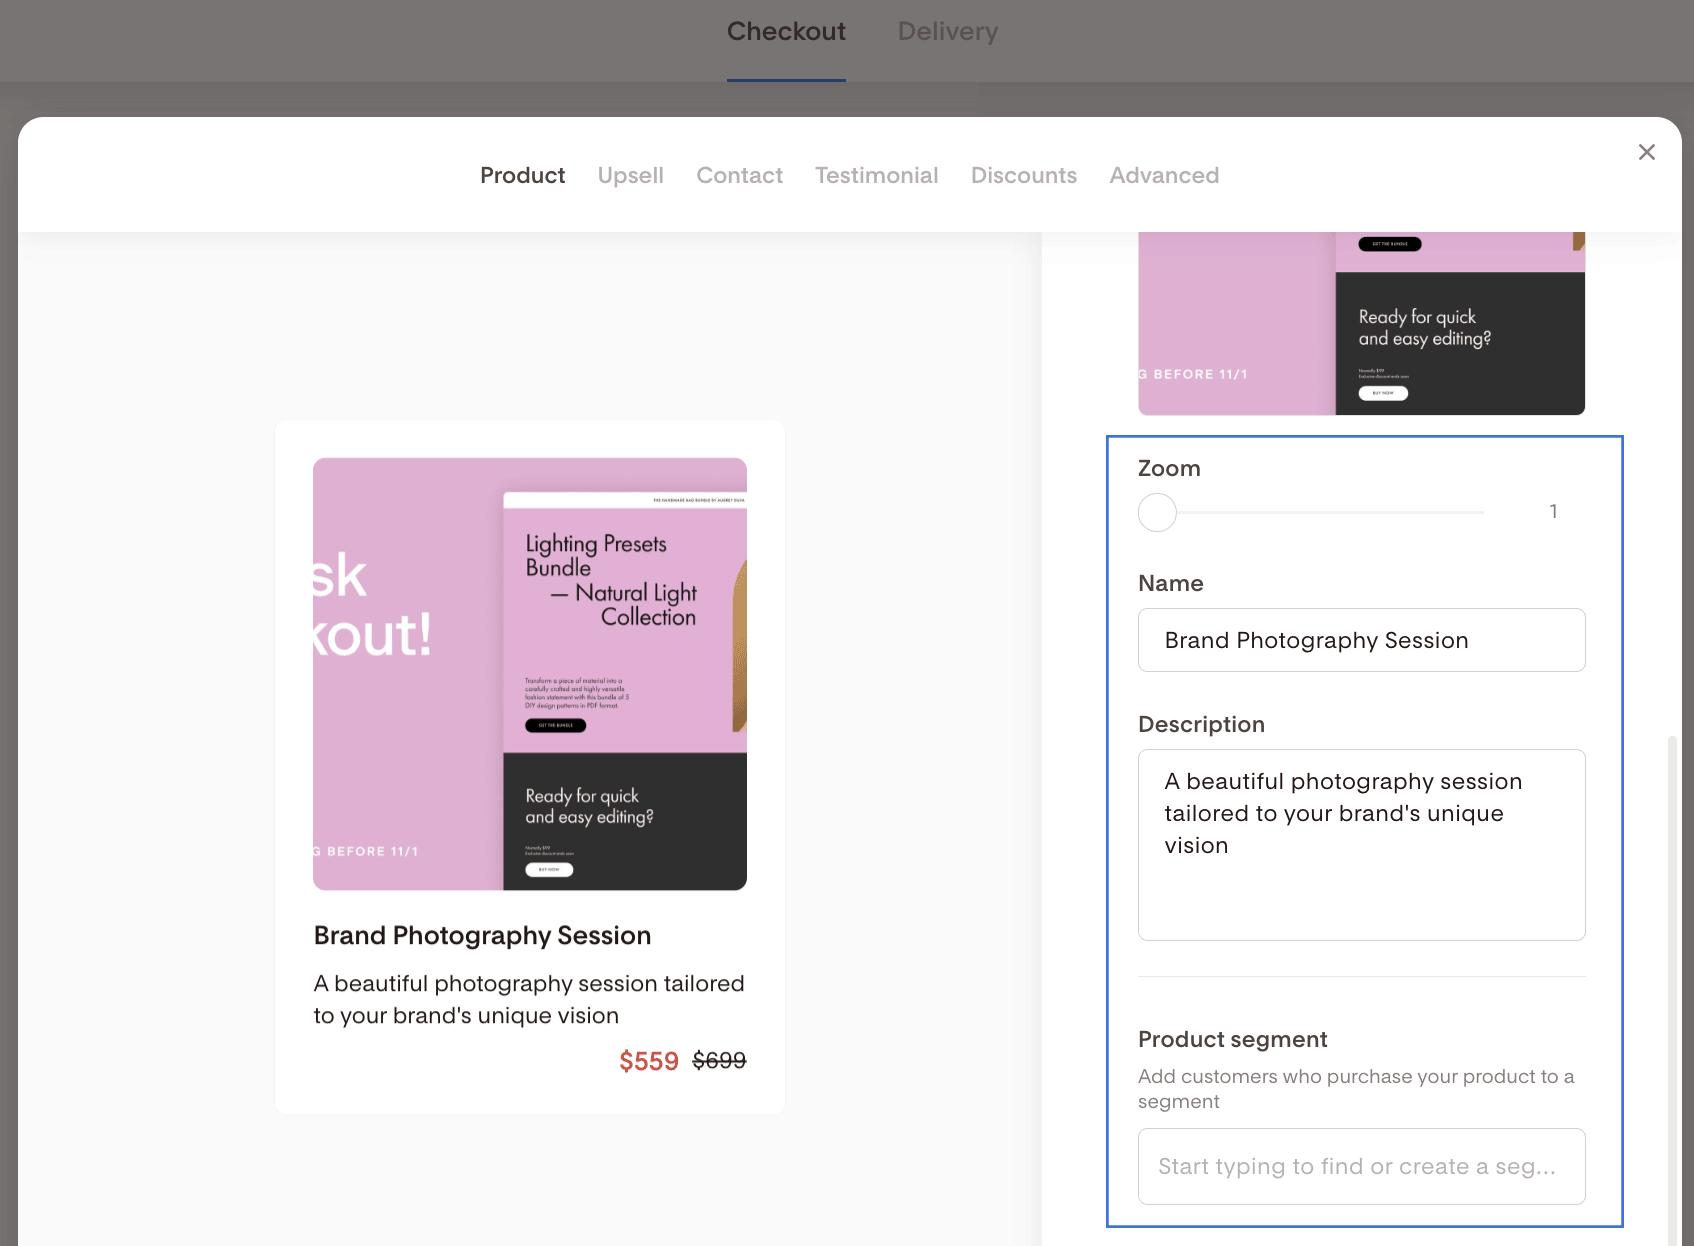
On the Product tab, you can
Adjust your offering’s price,
Mark it as “On sale,”
Make it free
Limit its quantity
Set an end date for the current offer
Upload a product image
Zoom in on the product image
Update the product name
Add a product description
Define a product segment where customers who purchase your product should be added
Make your offer even more appealing by adding a beautiful image, enticing description and clear name. All Checkout product images are standard 1:1 square ratios.
Reward customer loyalty by offering a discount price or making your product free. Or promote a sale or special offer.
To mark your product as on sale or to give it away for free, toggle the sliders next to On sale and Make it free text to the right.
Note: As you make changes in the tab, they’ll be reflected on the left side, automatically.
How to deliver the product to your customers
Once customers make a purchase, they are automatically sent to the built-in delivery page. On this page, you can share detailed information on how to access the product using the Instructions block.
If you're selling a digital product, you can add the product download link to the Download block on the delivery page.
Additionally, by adding a product segment as shown on the above screenshot example, you can add customers who purchase your product to a dedicated segment which, based on your setup, can trigger a workflow sending them the instructions and download link(s).
You can also use this product segment to send targeted emails to your customers based on their purchase history.
Summary
You can find the Product tab on the checkout page section.
It allows you to edit your product details, upload an image, add a product name and description and to set the price or make it complete free.
Also, you can define a segment where all customers of this product should be added, which allows you to send targeted emails and workflows to your customers.


