
How to Use the Exit Step in Your Flodesk Workflow
The Exit step lets you intentionally stop subscribers in a workflow and mark their journey as complete.
Use the Exit step when you want to:
Clearly end a workflow for a subscriber
Stop subscribers from rejoining the main workflow after a split branch (Yes/No or Multiple branch)
What Is the Exit Step?
The Exit step permanently ends a subscriber’s path in a workflow.
When a subscriber reaches an Exit step:
They are marked as Completed in the workflow
They will not receive any future steps, even if you add more later
This action cannot be undone
Important: if a workflow's main, central flow doesn't end in an Exit step, when the subscriber arrives at the empty step they'll become "ever-green" and wait in the final, empty step of the workflow. In this evergreen state (“hold” at the end of the workflow), the subscriber is not considered completed in the workflow (they are still active), therefore, cannot be added to the workflow again via the "Allow repeat subscribers" feature.
How to Add an Exit Step
Scroll to the end of a workflow or a split branch
Click the + icon
Select Exit
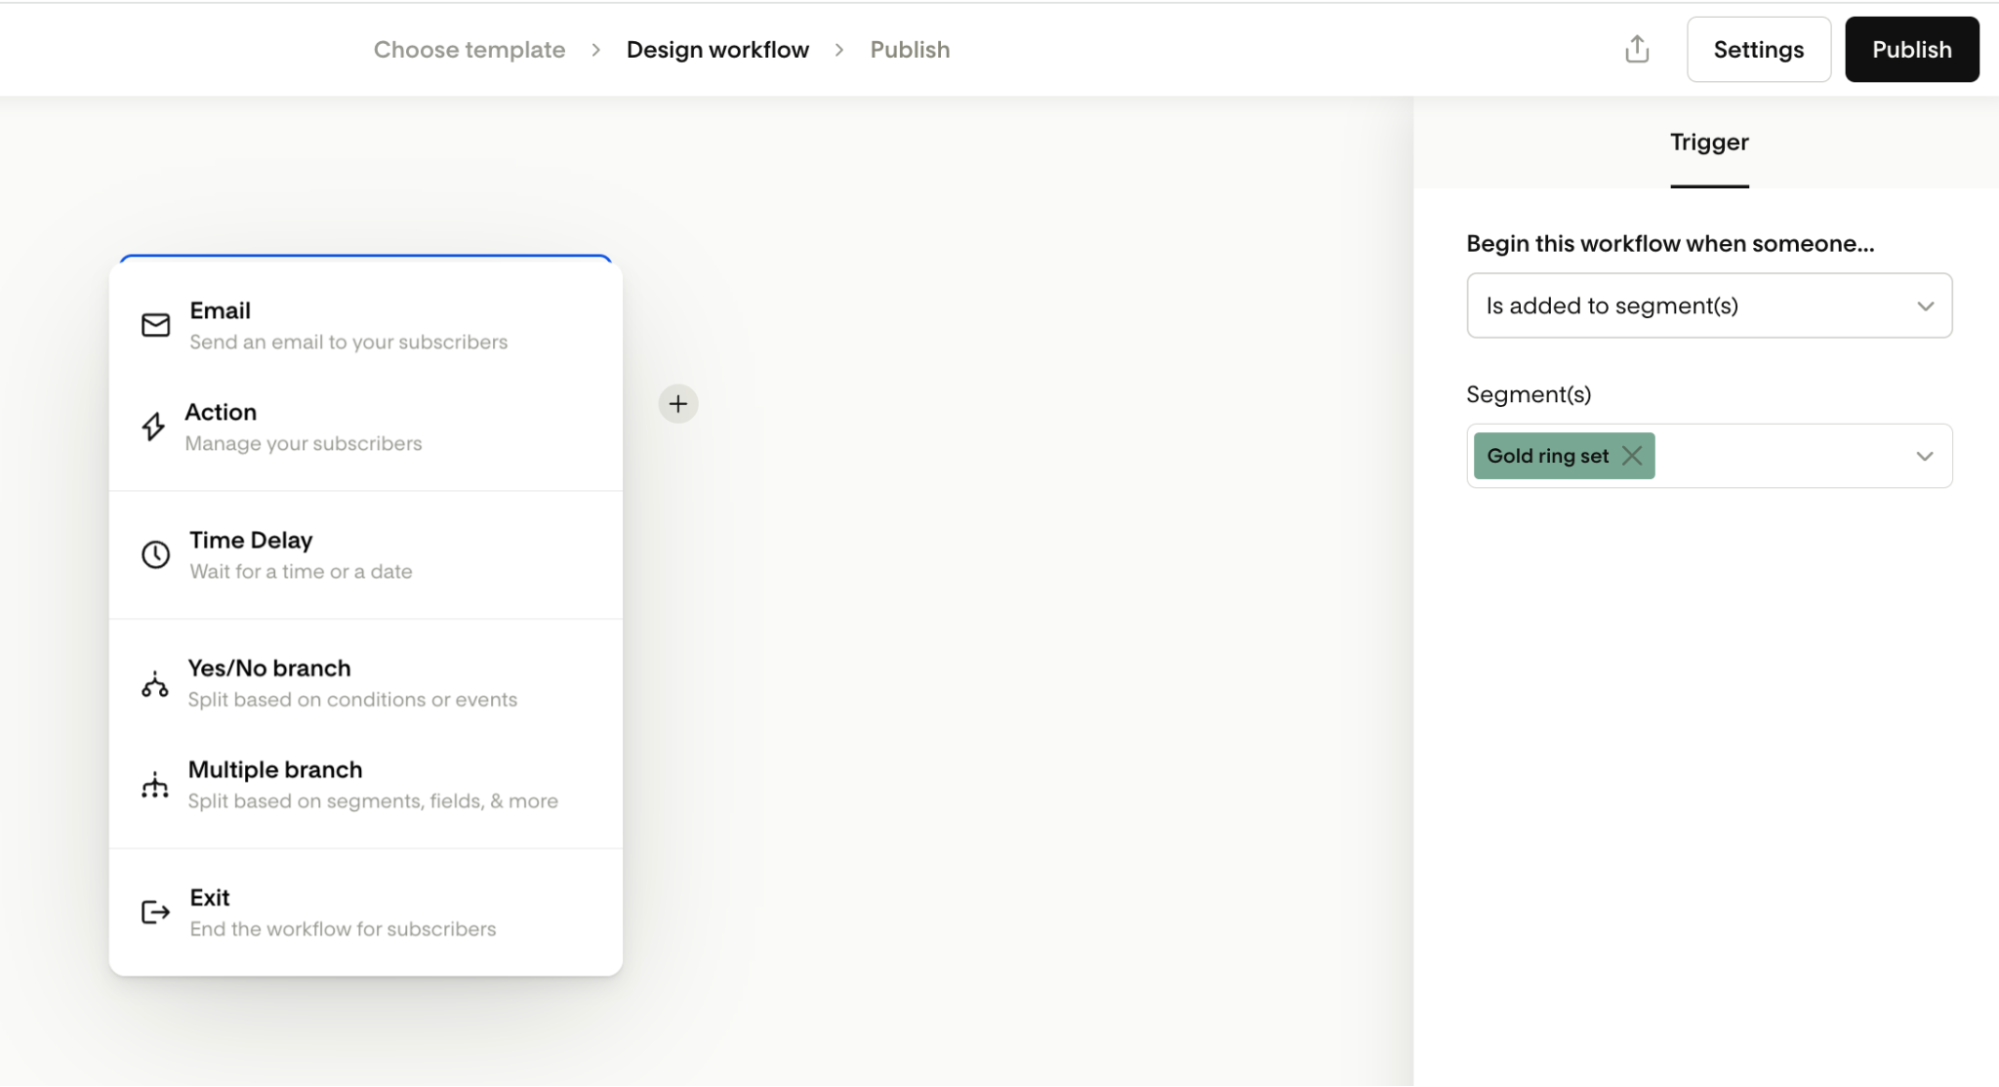
Once added, any subscriber who reaches this step will be marked as completed and won’t continue further.
Note: While exit steps can be added anywhere in a workflow except within trigger branches, if you add an exit step to a branch that has existing steps within that branch that come after the exit step, it triggers a warning modal. If you confirm, the exit step is added and the steps that occur after an exit step within that branch are removed.

Using Exit Steps Inside Branches (Important Update)
With auto re-join behavior, split branches now reconnect to the main workflow by default.
Add an Exit step inside a branch when you want to:
Stop subscribers after they reach a goal
Prevent them from rejoining the main flow
End their journey early without affecting others
Key behavior to know:
A branch with an Exit step will not rejoin the main workflow
If you remove the Exit step, that branch automatically reconnects to the main flow
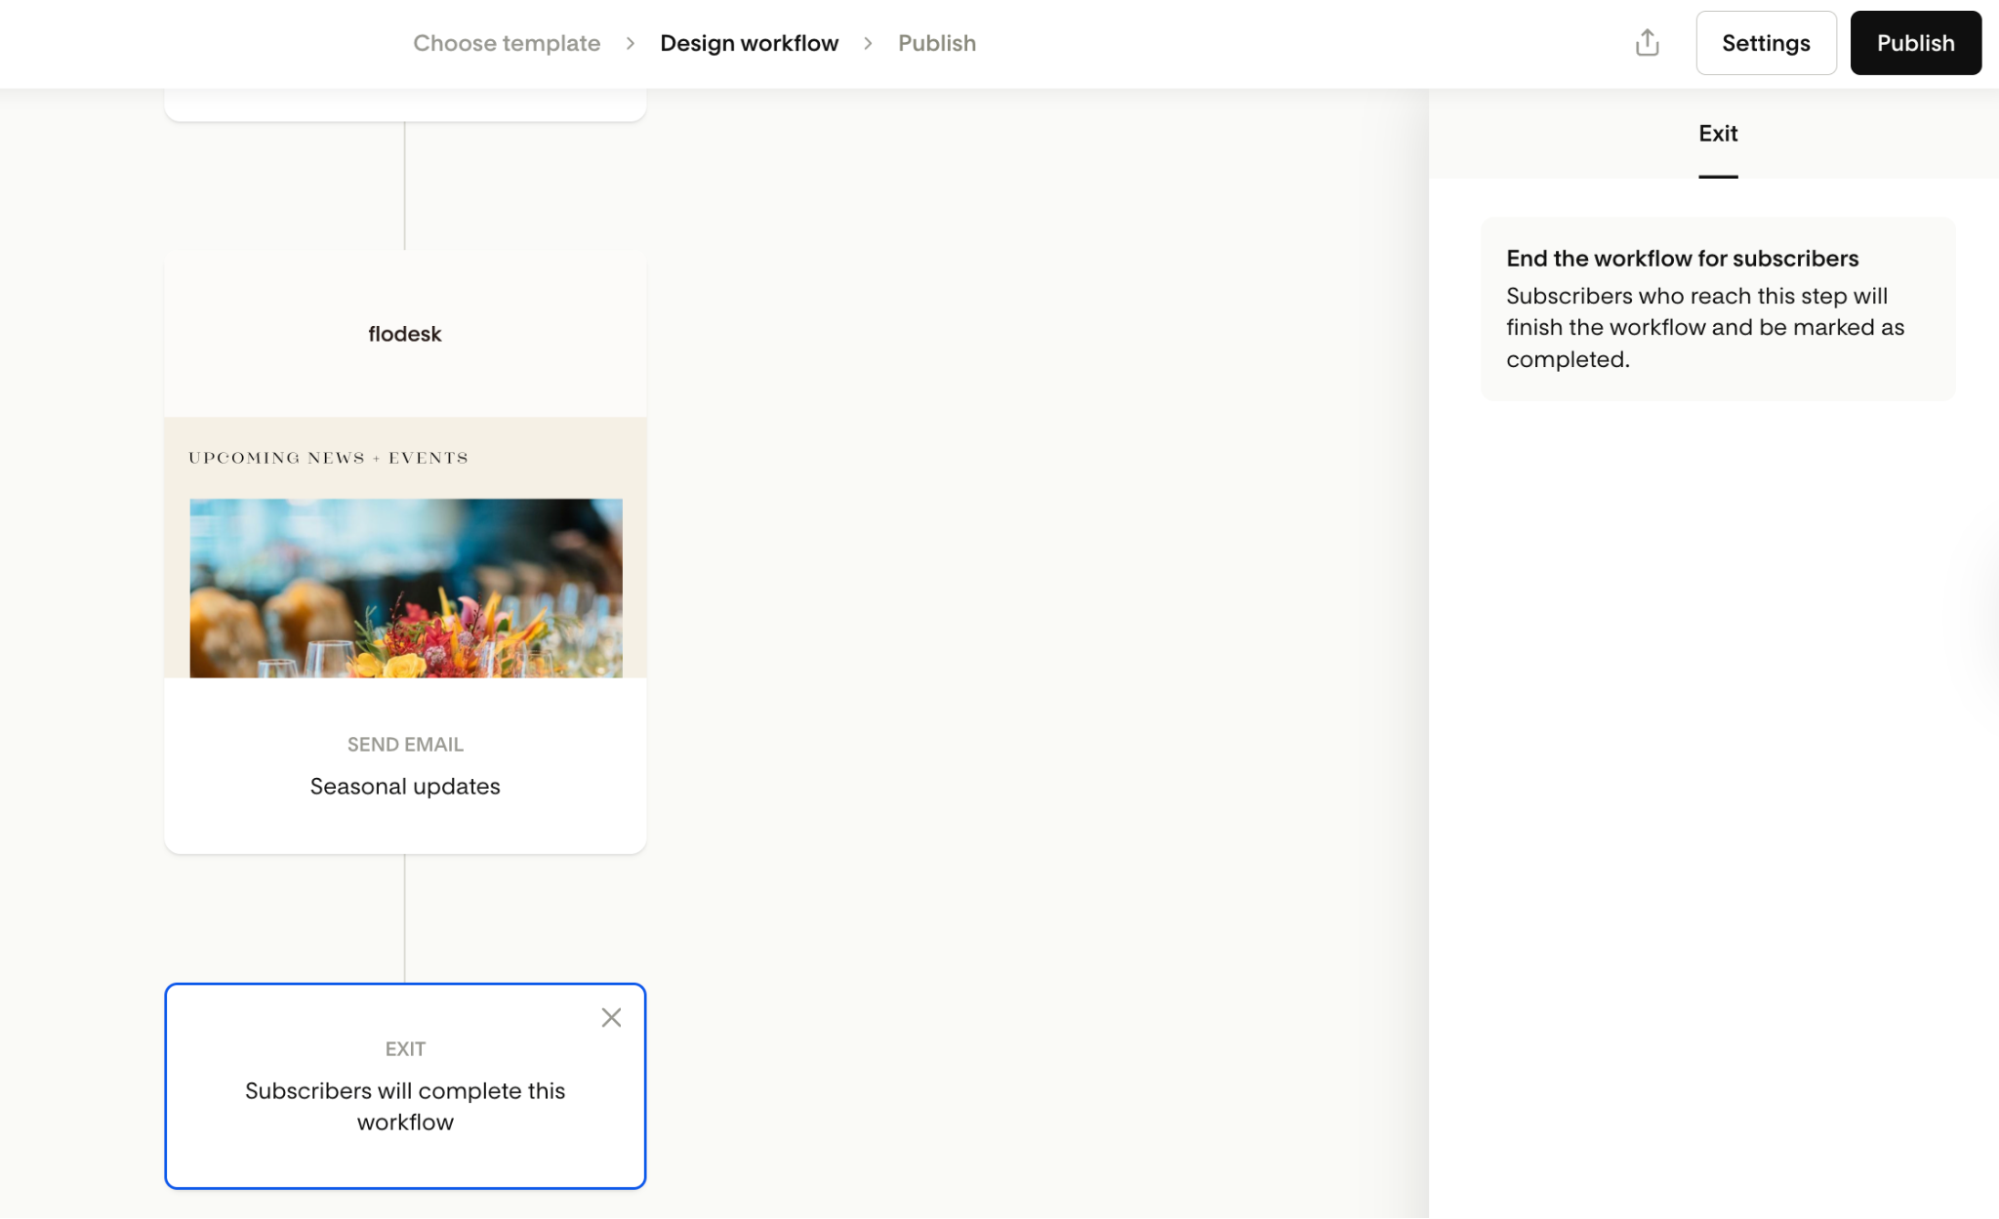
How to Remove the Exit Step
Want subscribers to pause at the end of the workflow and stay active while you build more steps?
Here’s how to remove the Exit step:
Hover over the Exit step.
Click the X icon in the top right corner.
Confirm deletion
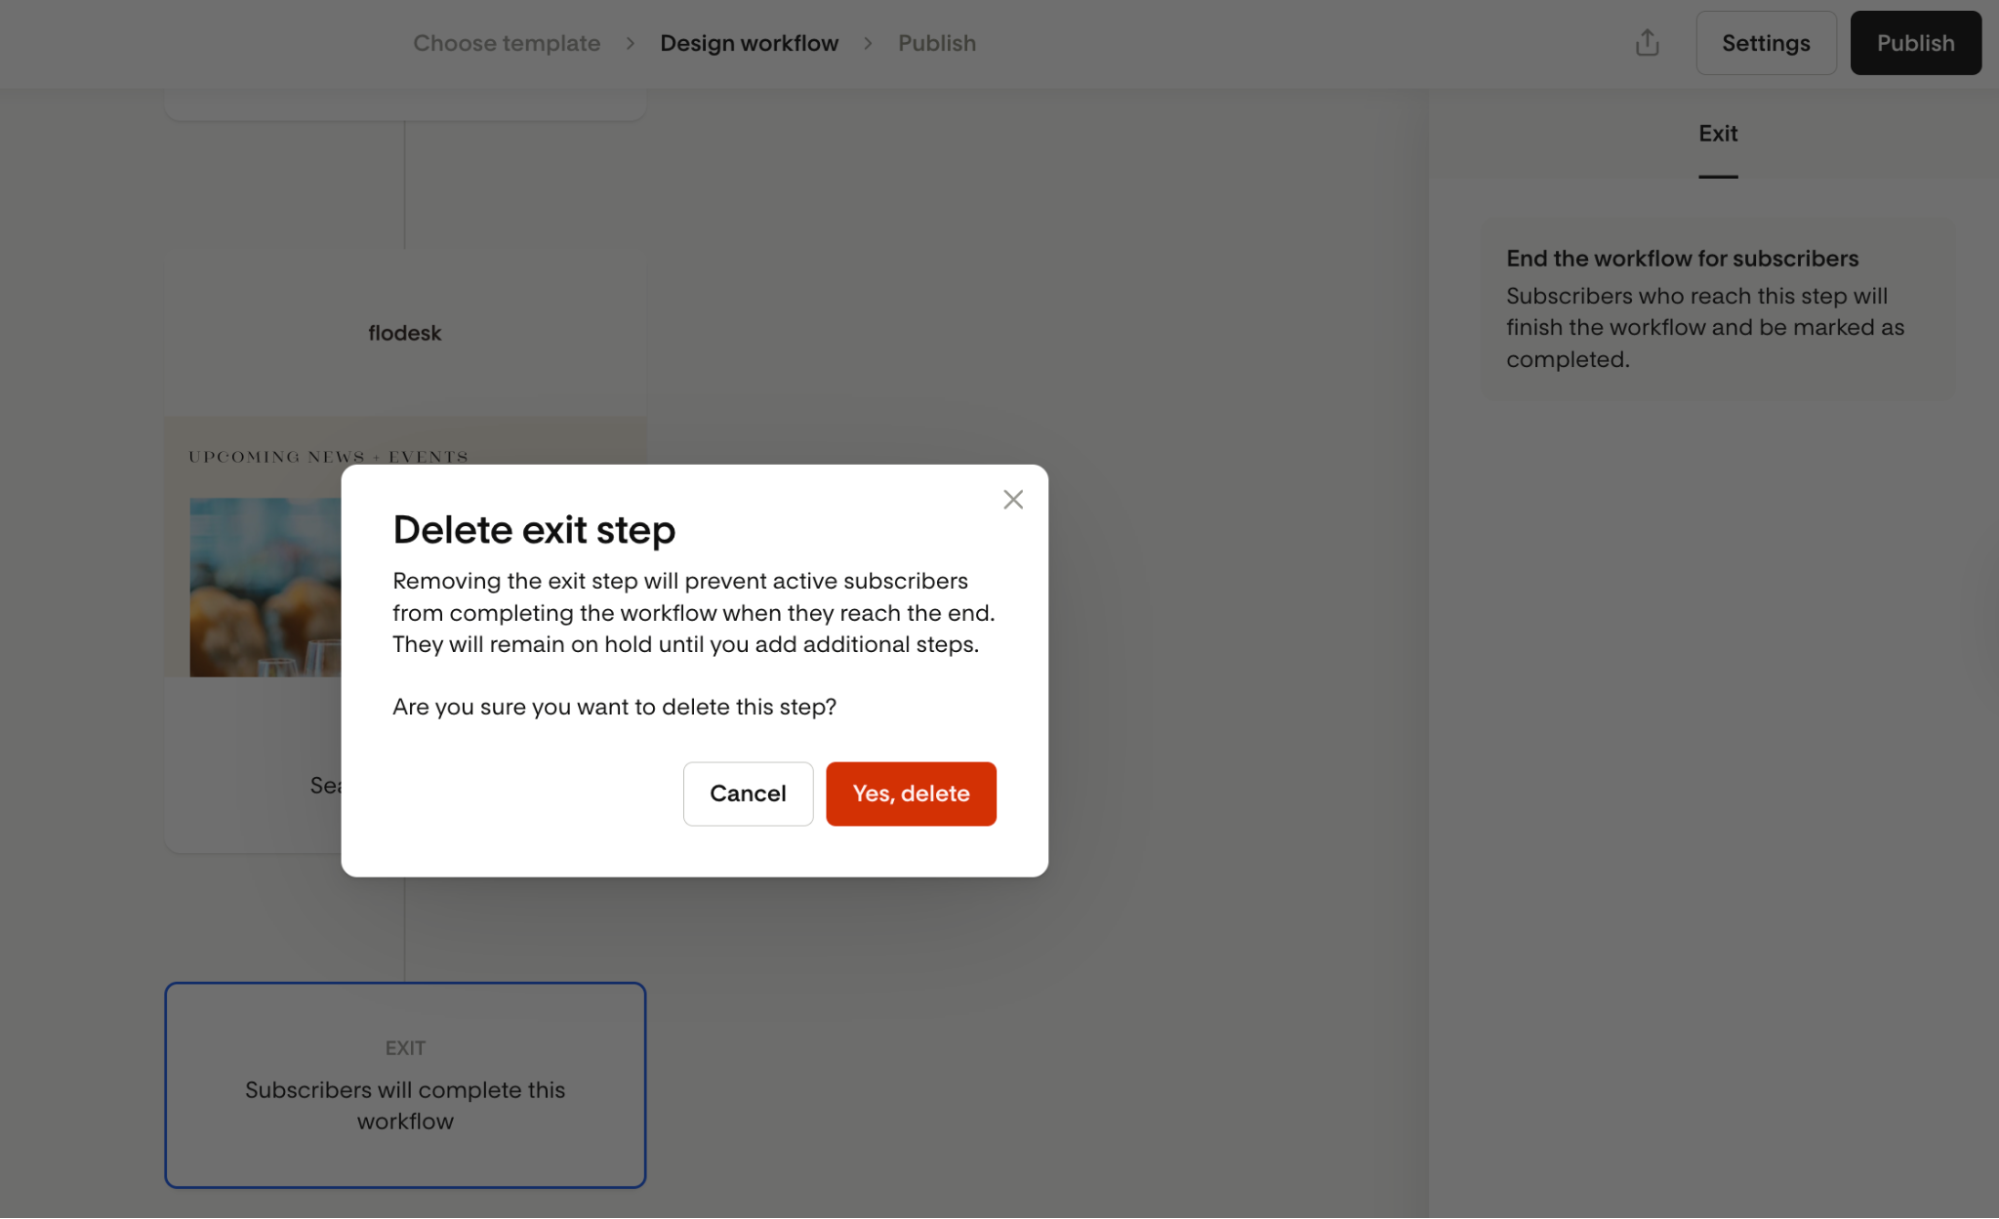
What happens next?
Subscribers remain active and on hold
They will continue automatically when you add new steps
Deleting an Exit step does not create an evergreen branch inside splits (Yes/No and Multiple branches). Instead, the path reconnects to the main workflow.
Exit Steps in Legacy (Older) Workflows
If your workflow was created before auto re-join:
Subscribers who already finished are shown as Completed
You can delete exit step at the end of your workflow to allow still-active subscribers to wait and continue later
Important limitations
Subscribers who already completed a workflow cannot be uncompleted
Existing evergreen branches in old workflows stay unchanged unless edited
Exit step in your Workflow Analytics
To track completions via Exit steps:
Open Workflow Analytics
Under Overview > At a glance check the "Completed" column
If you switch to the Details tab, you can see each individual step in the Workflow and its statistics—among them the Exit step.
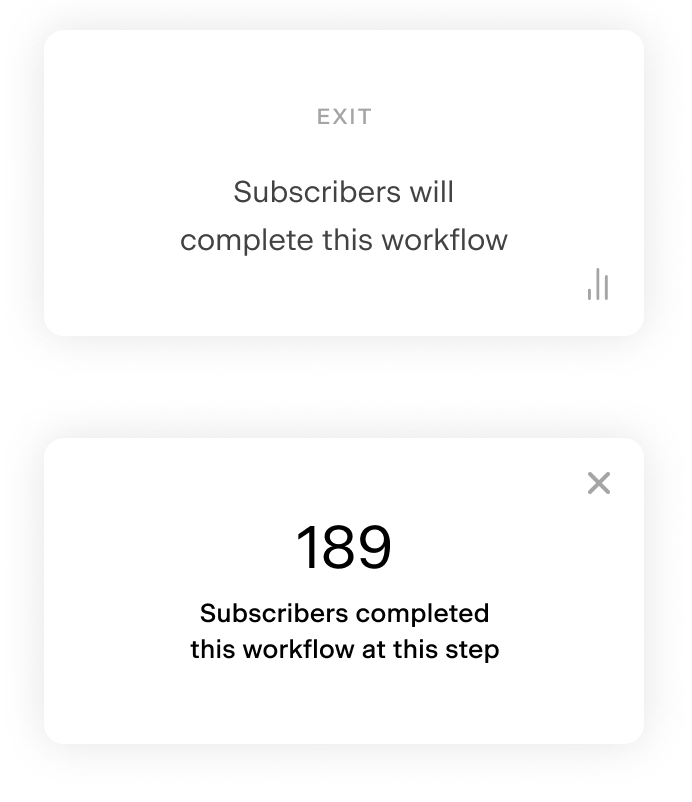
Click on the Exit step count (e.g., “189” in our example) to view subscriber details—such as who exited and when.

Note: Subscribers who unsubscribe, hard bounce or mark your workflow email as spam will be set as completed even if you don’t add an Exit step at the end of your Workflow.
Exit Step vs. Evergreen Hold
Scenario | What happens |
Subscriber reaches Exit step | Workflow completed |
No Exit step at end of main path | Subscriber waits (active) |
Exit step inside branch | Workflow completed, branch does not rejoin |
Exit step removed later from branch | Path reconnects to main flow |
New steps added | Only active subscribers continue |
Summary
Use an Exit step to permanently end a subscriber’s workflow
Omit or remove it if you want subscribers to wait and continue later
Branches rejoin automatically unless stopped with an Exit step
Exit steps provide clean, intentional workflow endings—no workarounds needed
FAQ
What does the Exit step do?
It marks a subscriber as completed and permanently ends their workflow journey.
When should I add an Exit step inside a branch?
When you want subscribers in that branch to stop and not rejoin the main workflow.
What happens if I delete an Exit step?
That path reconnects to the main workflow instead of waiting.
Can split branches (Yes/No branch or Multiple branch) end in a waiting (evergreen) state?
No. Branches always rejoin unless an Exit step is added.
Does deleting an Exit step affect completed subscribers?
No. Subscribers already marked as completed remain completed.