
How to authenticate your custom domain manually
Overview
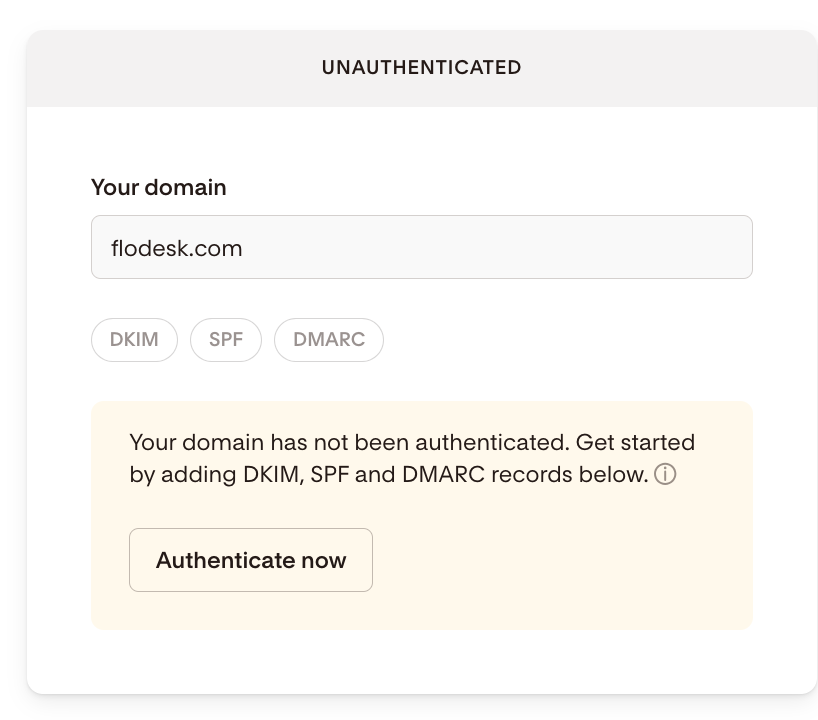
Starting in February 2024, major inbox providers like Gmail and Yahoo require bulk email senders to use a verified custom domain with three authentication protocols: DKIM, SPF, and DMARC.
If your custom domain email hasn't been authenticated yet, your emails may get filtered as spam or blocked before they even reach your subscribers. Authenticating your domain protects your sender reputation and keeps your emails landing where they belong: in the inbox.
You have two ways to do this:
Manual setup (covered in this article): Add the required DNS records directly through your domain provider.
Automatic setup: Use the Entri integration to authenticate your domain in just a few clicks. Learn how to automatically authenticate your domain.
What you'll need
Before getting started, make sure you have:
Access to your Flodesk account
Access to your domain provider's DNS management tool (this is usually in your domain provider's dashboard, sometimes called "DNS settings" or "DNS manager")
A custom domain email address, like you@yourdomain.com (free email addresses like Gmail or Yahoo won't work here)
How to manually authenticate your domain
Step 1: Go to domain settings in Flodesk
Log in to your Flodesk account
Navigate to My Account > Domain setup
Step 2: Start the authentication process
Click Authenticate now on your domain card
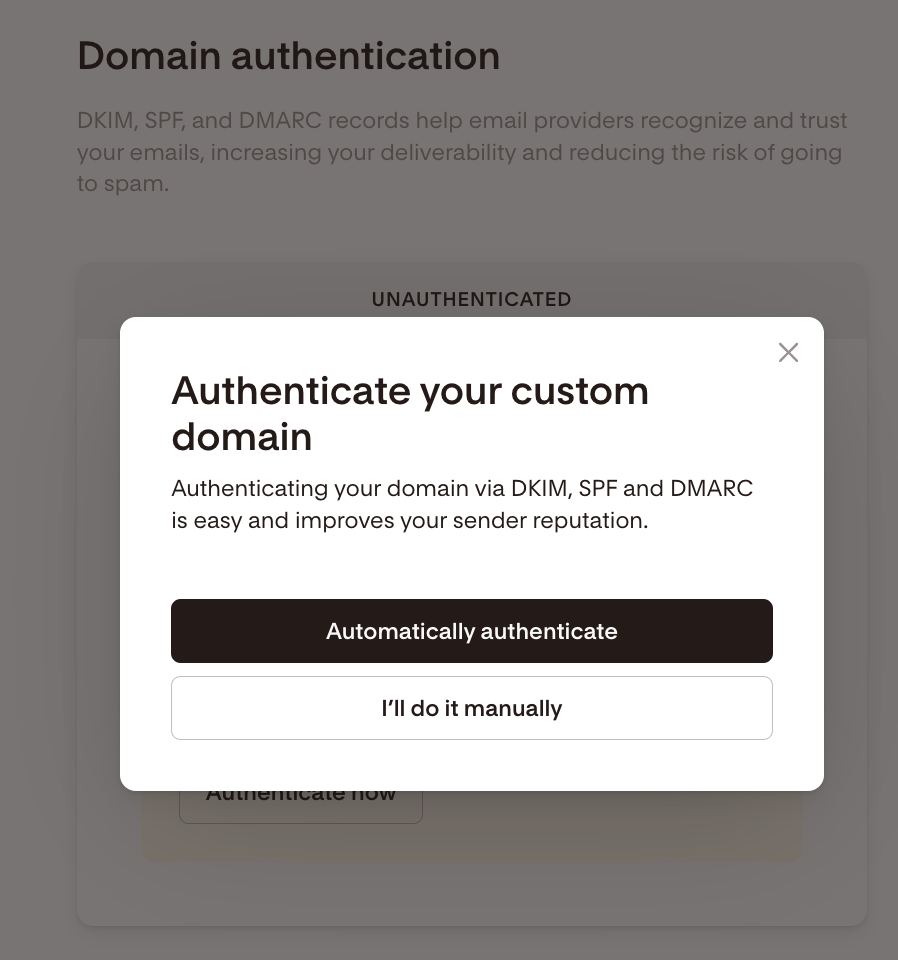
Select I’ll do it manually to open the manual setup wizard
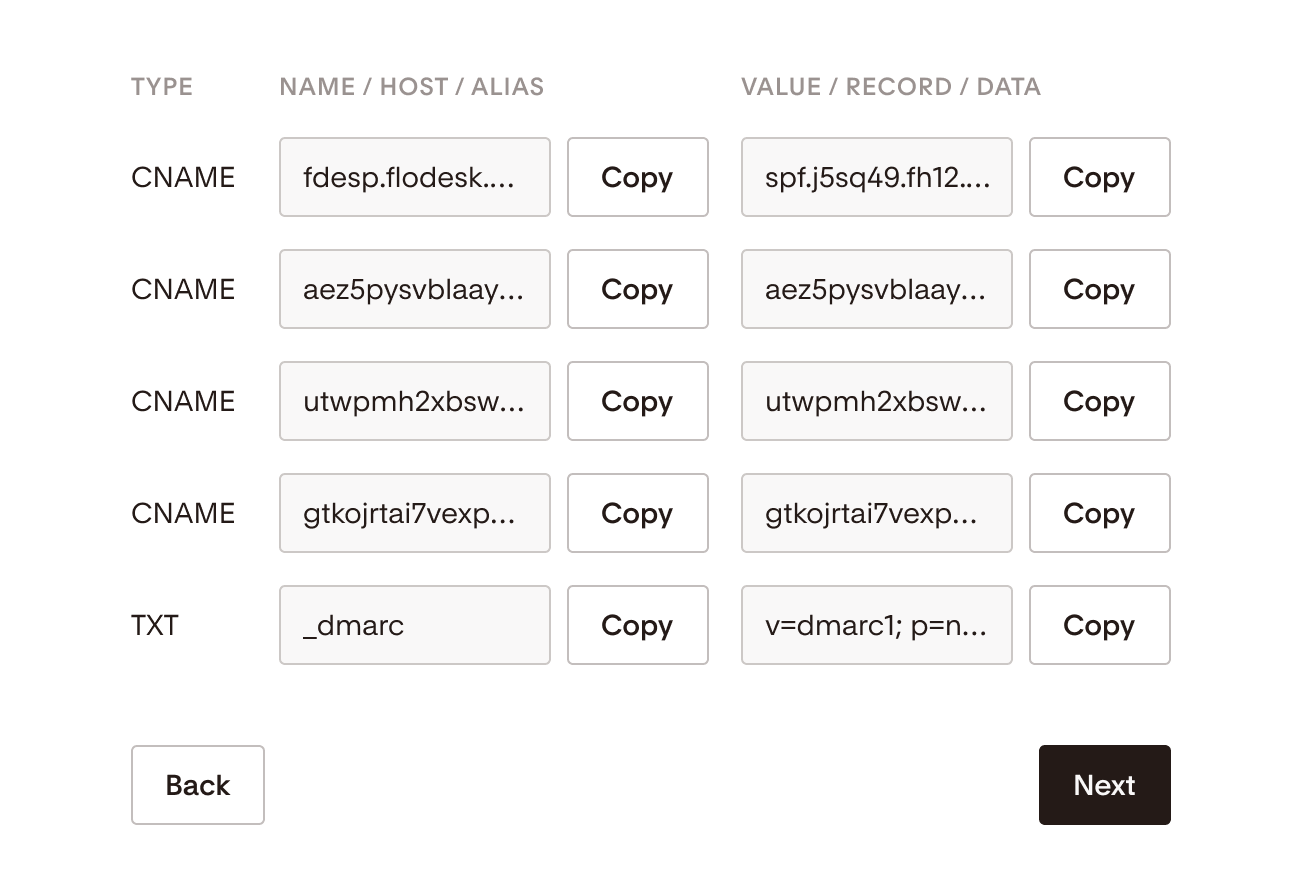
Step 3: Review your required DNS records
Flodesk will show you all the authentication records you need to add to your DNS settings. Depending on your account type, you'll see one of the following:
Option A: Five DNS records
One SPF record
Three DKIM records
One DMARC record
Option B: Three DNS records
One SPF record
One DKIM record
One DMARC record
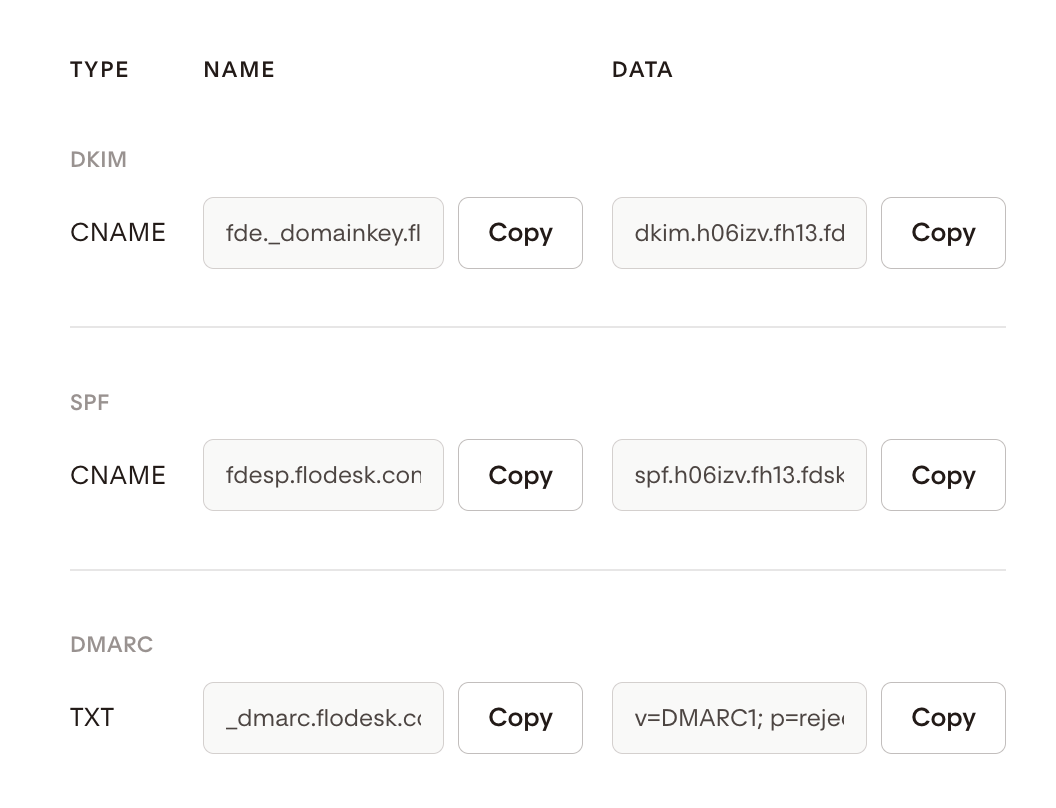
Each record has a Copy button so you can quickly transfer the values to your DNS provider. Here's how each record type gets added:
Record | Type to add in DNS |
|---|---|
SPF | CNAME |
DKIM | CNAME |
DMARC | TXT |
Step 4: Log in to your domain provider
Open a new browser tab and sign in to your domain provider's dashboard. Common providers include GoDaddy, Namecheap, Squarespace, and Shopify.
Step 5: Add your DNS records
In your DNS manager, add each record exactly as it appears in Flodesk:
Add the SPF and DKIM records as CNAME records.
Add the DMARC record as a TXT record, but only if you don't already have one. Your domain can only have one DMARC record. If a DMARC record already exists in your DNS settings, skip this one. The DMARC record shown in Flodesk is intended for members who haven't set up a DMARC policy yet.
Paste each value exactly as provided. Even a small typo can prevent verification.
Important: Flodesk provides CNAME SPF records, which are not the same as the TXT SPF records that other email service providers may give you. Always add the Flodesk-specific CNAME SPF record as a separate new DNS record. Do not combine it with any existing TXT SPF records.
Step 6: Return to Flodesk and finish up
Once you've added all the records in your domain provider, head back to Flodesk.
Click Next, then Done.
Flodesk will start monitoring your DNS records automatically.
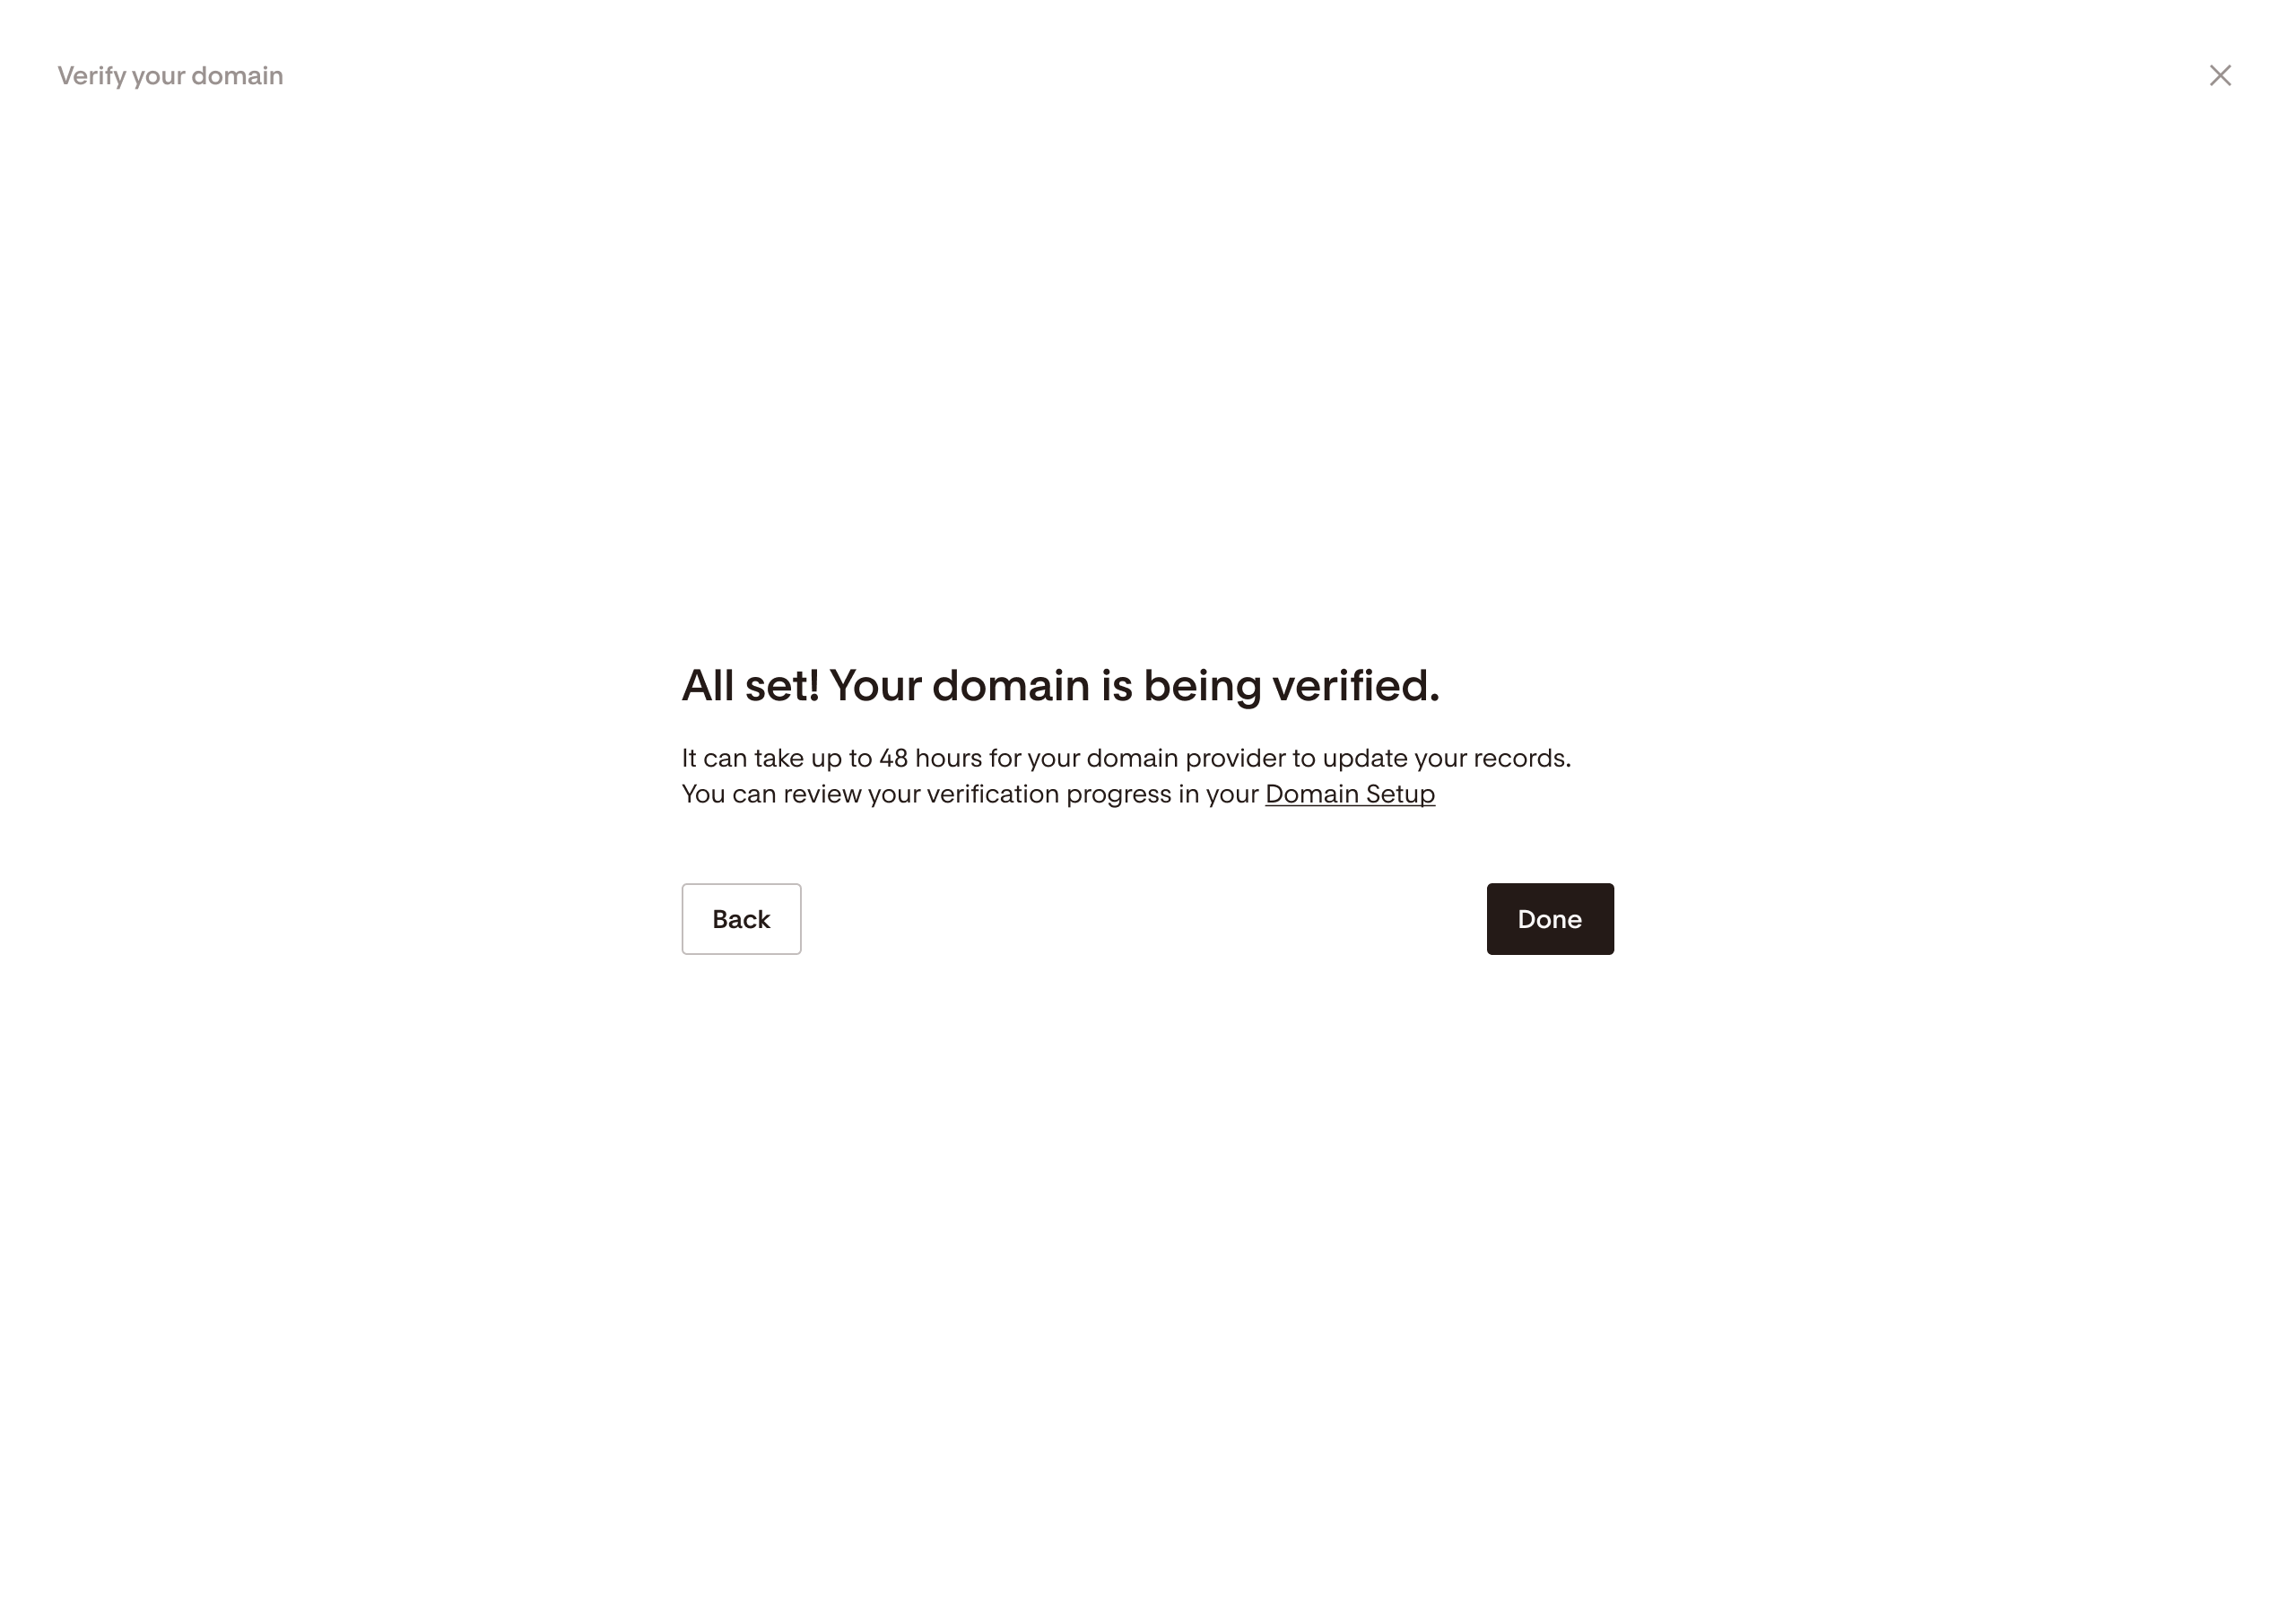
DNS propagation time
DNS changes don't take effect instantly. Here's what to expect:
It can take up to 48 hours for your domain to be fully verified.
During this time, your domain status will show as Pending.
It's completely normal to see partial verification (for example, DKIM and DMARC verified while SPF is still pending).
You don't need to re-enter your records or repeat any steps while propagation is in progress. Just give it time.
Platform-specific video tutorials
Need a hand finding your DNS settings? These video walkthroughs show you exactly where to go in the most common domain providers:
Video tutorial: GoDaddy
Video tutorial: Shopify
Video tutorial: Squarespace
Video tutorial: Namecheap
FAQ
Why do I need to authenticate my domain?
Gmail and Yahoo now require bulk email senders to use a verified custom domain with DKIM, SPF, and DMARC authentication. Without it, your emails are more likely to be filtered as spam or blocked entirely. Authenticating your domain protects your sender reputation and helps your emails reach your subscribers' inboxes.
What's the difference between DKIM, SPF, and DMARC?
Think of them as three layers of email security that inbox providers check before delivering your email:
SPF confirms your domain is authorized to send emails.
DKIM adds a digital signature to verify your emails haven't been tampered with.
DMARC tells inbox providers what to do if SPF or DKIM checks fail (for example, send to spam or reject entirely).
Flodesk gives you all the record values you need, so you don't have to generate them yourself.
Can I use a free email address like Gmail or Yahoo instead of a custom domain?
Not if you want your emails to reach inboxes reliably. Gmail and Yahoo both publish strict DMARC policies for their own domains, which means emails sent from a @gmail.com or @yahoo.com address through a third-party platform like Flodesk will fail authentication checks and are likely to be rejected or filtered as spam. A custom domain email (like you@yourdomain.com) is required to send through Flodesk with proper authentication in place.
Why does my domain still show as "Pending" after I added the records?
DNS changes can take up to 48 hours to fully propagate across the internet. This is normal and not a sign that anything went wrong. You don't need to re-enter your records. Just check back after 24 to 48 hours.
I can see some records are verified, but others are still pending. Is that okay?
Yes. Partial verification is completely normal during the propagation window. Once all records are confirmed, your domain status will update automatically.
What if I added the records, but something looks wrong?
Double-check that each record was entered exactly as shown in Flodesk, with no extra spaces or missing characters. If the issue persists after 48 hours, reach out to Flodesk support and we'll help you troubleshoot.
Do I need to redo authentication if I change domain providers?
Yes. Domain authentication relies on DNS records added through your domain provider, so if you switch providers, you'll need to add those records again with the new one.
Here's why: authentication works by verifying specific DNS records (like SPF and DKIM) that live with whoever hosts your domain's DNS. When you move to a new provider, those records don't carry over automatically, so Flodesk won't be able to verify your domain until you re-add them.
To get set up with your new provider, follow the same steps in this article to add the DNS records again. Once they're saved, authentication usually completes within a few hours (though it can take up to forty-eight, depending on your provider).
Can I use the Entri integration instead of doing this manually?
Absolutely. If you'd prefer a quicker setup, the Entri integration can authenticate your domain automatically without having to touch your DNS settings. Learn how to use automatic domain authentication.