
How to set up your product details in Flodesk Checkout
Learn how to update your product name, price, image, description, segment, and tax settings in Flodesk Checkout.
Flodesk Checkout makes it easy to sell a digital product, service, course, or other offer, even if you do not have a website yet.
After you choose a template and build your sales page, the next step is to set up the product details that appear on your checkout page.
What you can edit in the Product tab
When you click the product block on your checkout page, the Product tab lets you update important details for your offer, including:
Product name
Product description
Product image
Price
Sale price
Free offer setting
Quantity limit
Offer end date
Product segment
Additionally, you can turn on Sales Tax and edit the tax category of your offer.
Any changes you make in the Product tab will automatically update in the preview.
Before you start
Make sure you have:
Your product or offer details ready
A square product image, if you want to add one
Product images in Checkout use a 1:1 square ratio.
How to set up your product details in Flodesk Checkout
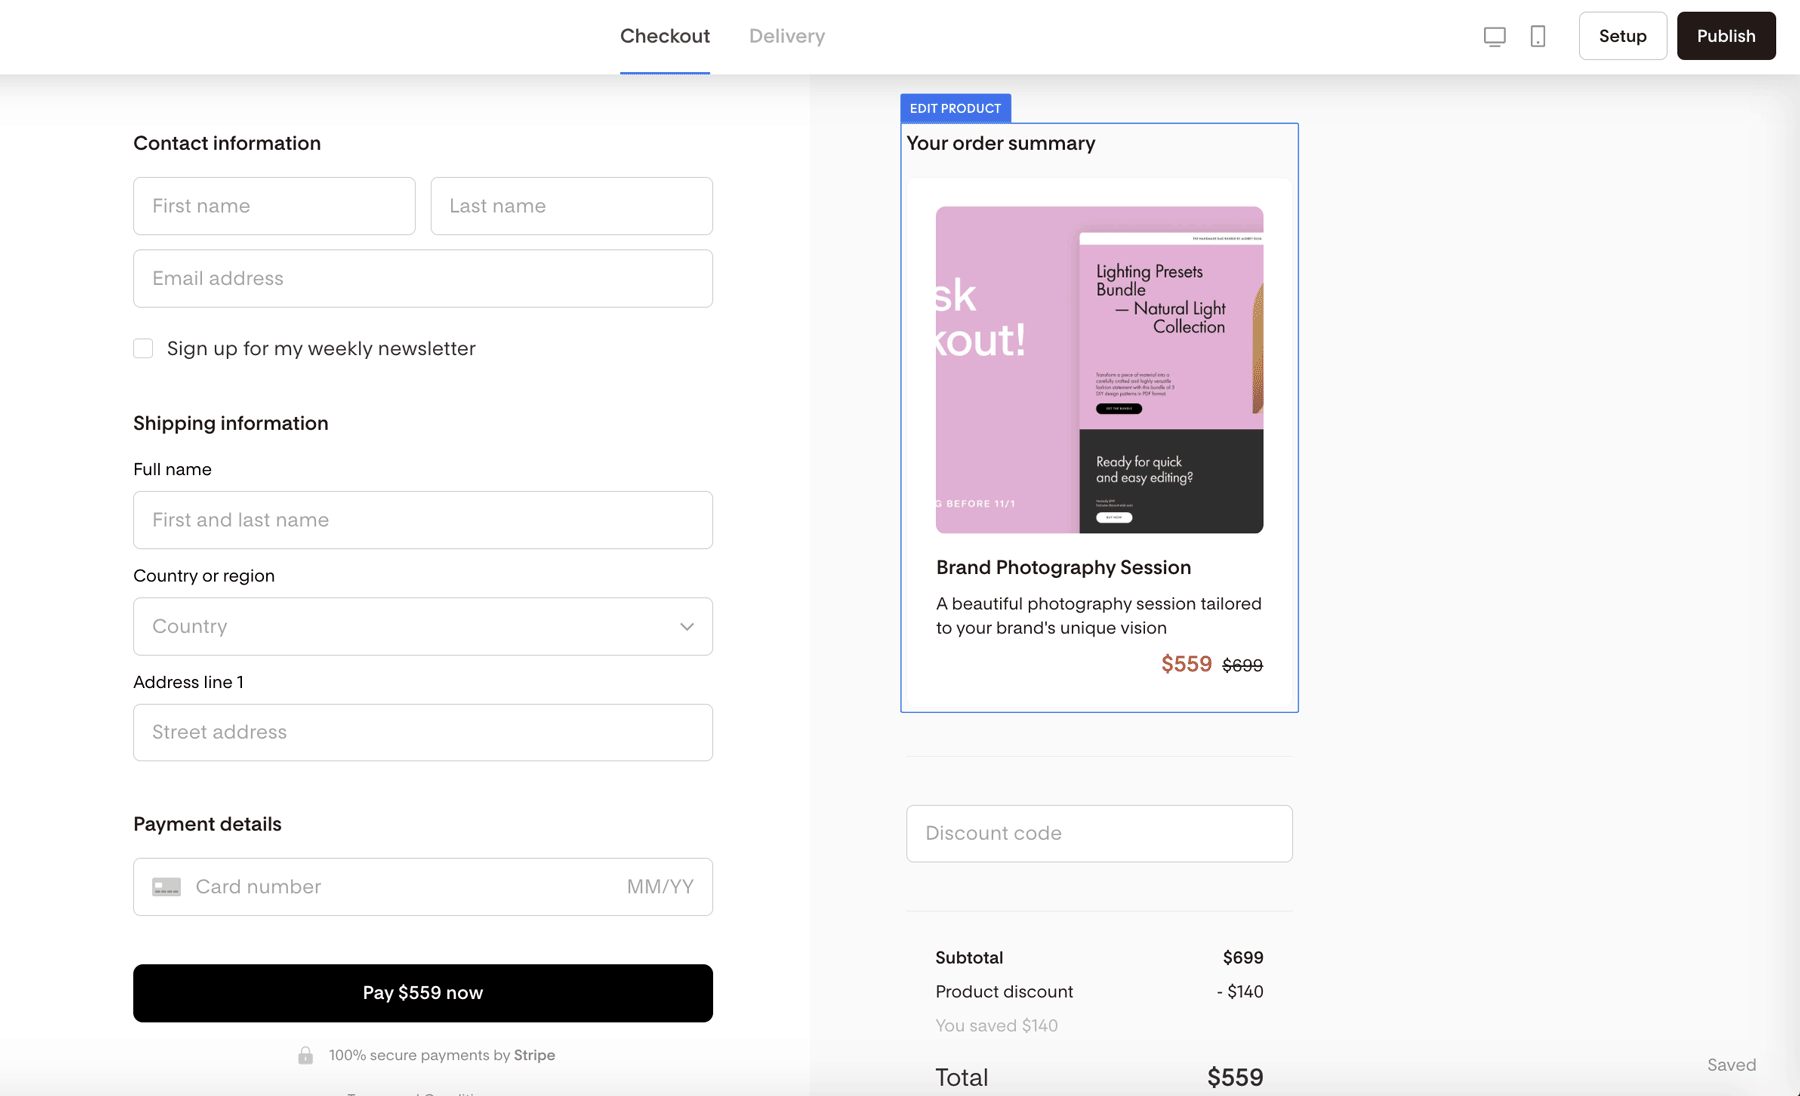
Step 1: Open your checkout page and click the product block
In Flodesk Checkout, open the checkout page you want to edit.
On the page preview, click the product block to open the Product tab. In our example, it's the 'Brand Photography Session'.
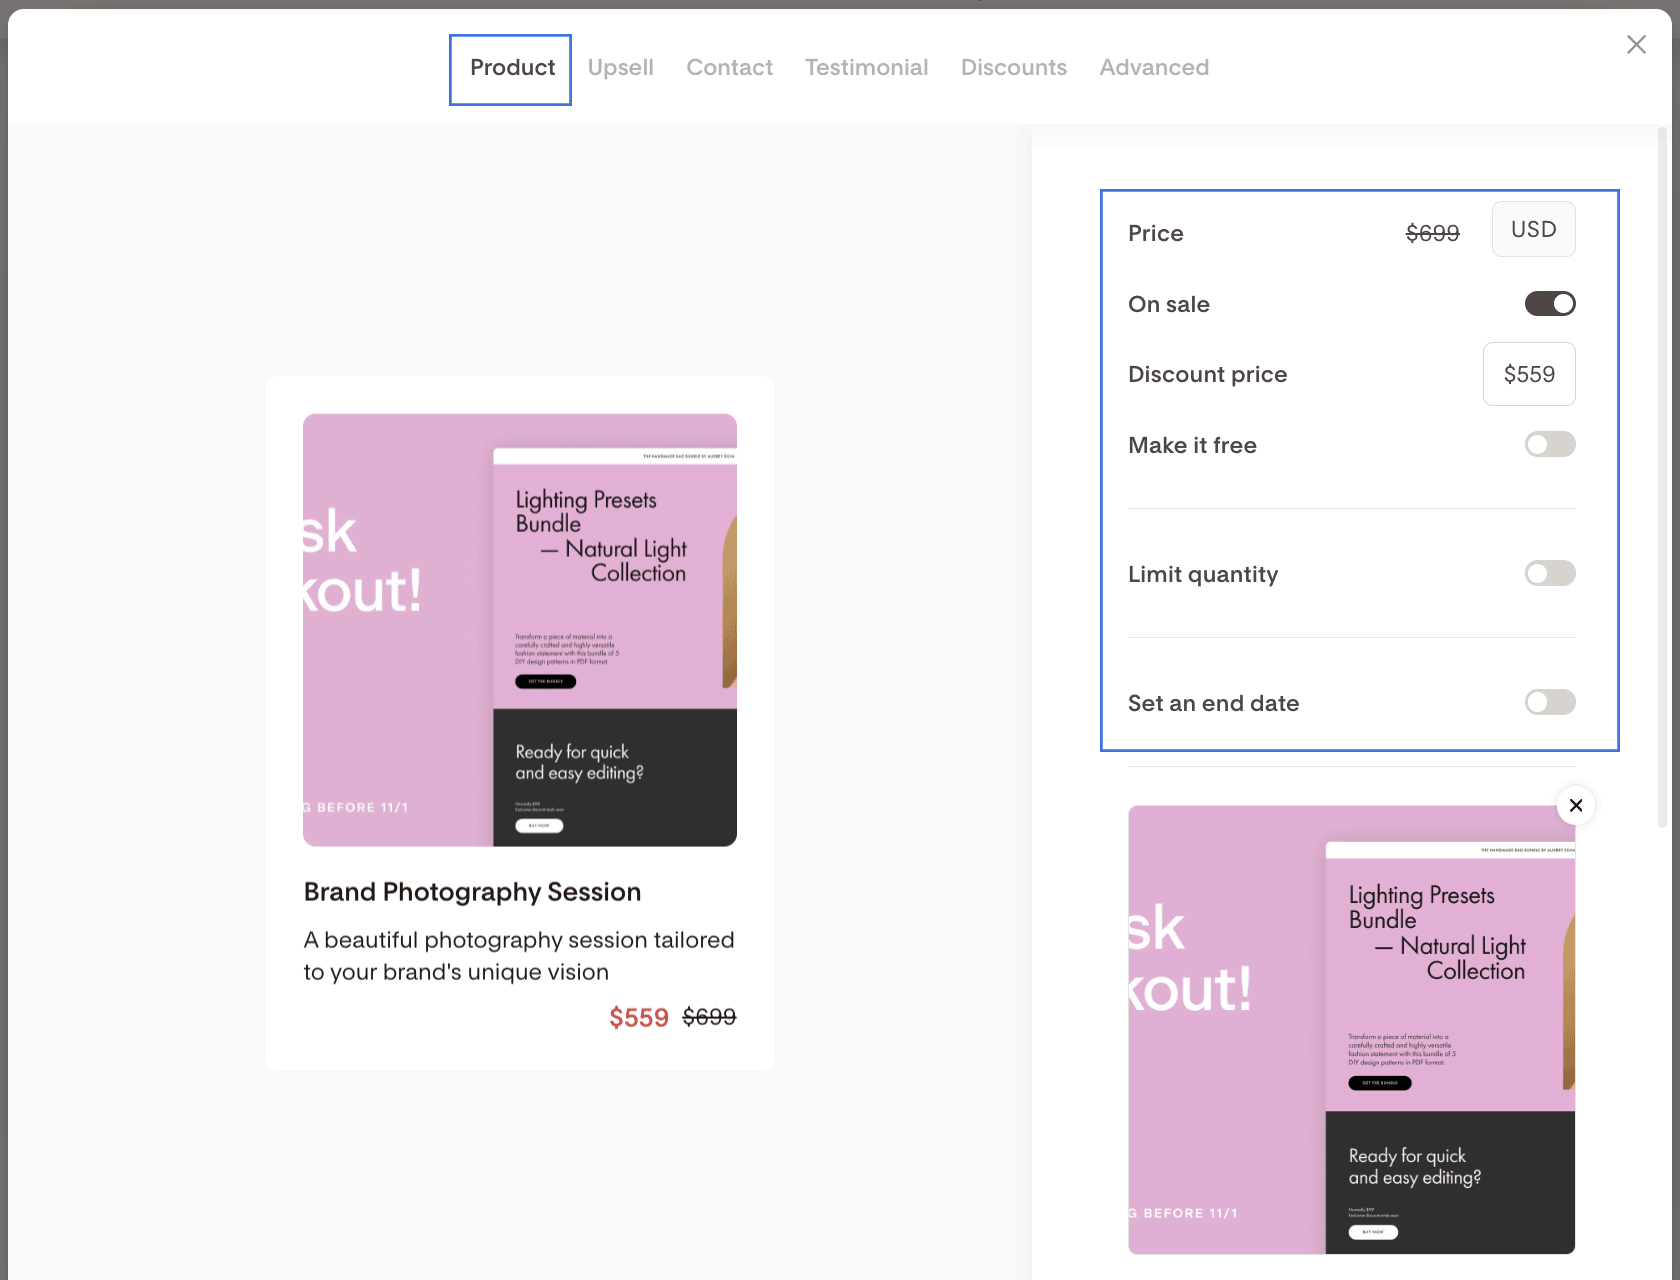
Step 2: Set your price
In the Product tab, enter the price for your offer.
You can also choose one of these pricing options:
Turn on On sale to show a discounted price
Turn on Make it free if you want to offer the product at no cost
This is helpful for promotions, special offers, or lead-generating freebies.
Step 3: Set quantity limits or an end date if needed
If your offer is limited, you can:
Set a quantity limit
Add an end date for the current offer
These settings are useful for limited-time promotions, launches, or offers with limited availability.
Step 4: Add a product image
Upload an image to help showcase your offer.
All Checkout product images use a square format, so your image should be sized in a 1:1 ratio for the best fit.
You can also zoom in on the image if needed.
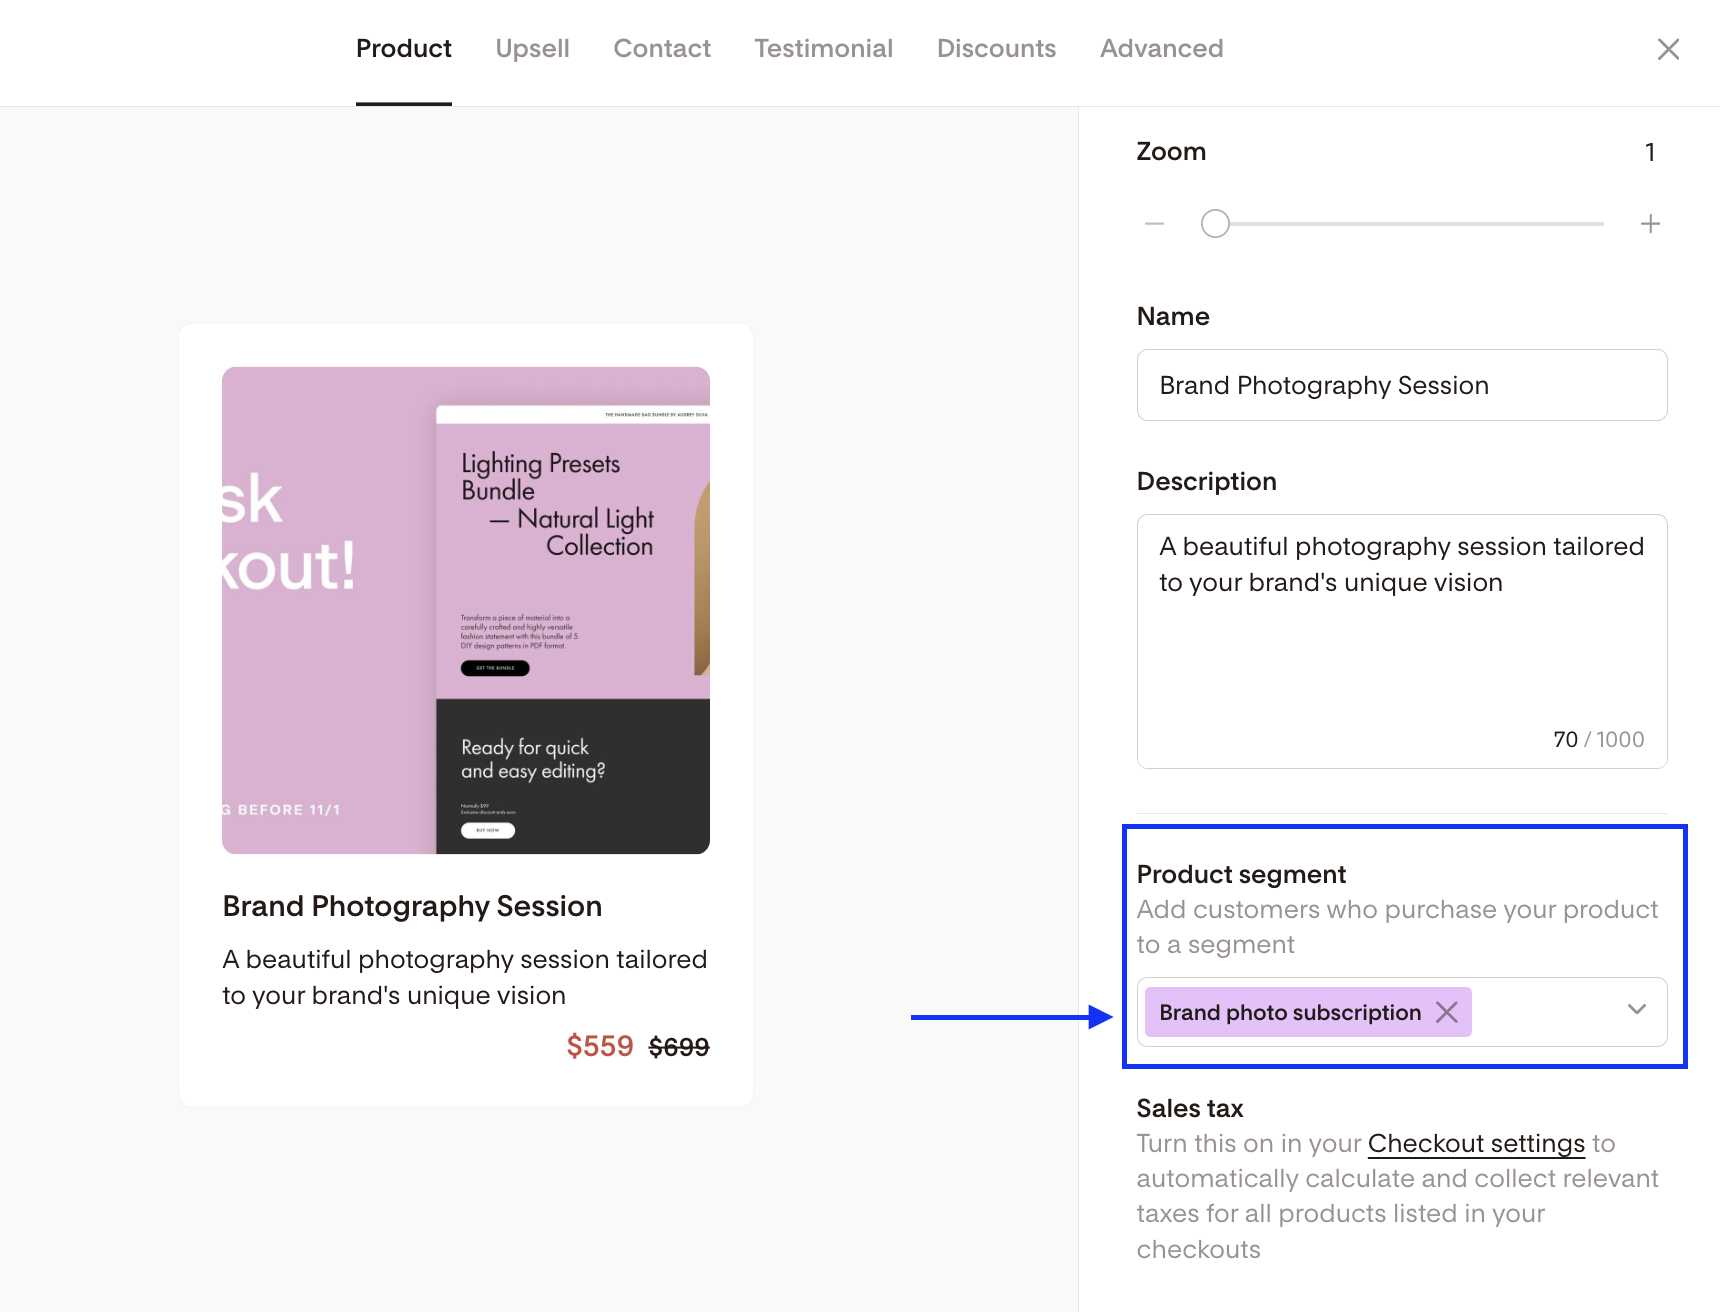
Step 5: Add or update your product name and description
Enter the name of your product or offer.
Then add a short description that tells customers what they are buying.
Keep this section clear and specific so customers know exactly what is included.
Step 6: Choose a product segment
Select a product segment to automatically organize customers who purchase this offer.
This can help you:
Send follow-up emails to buyers
Trigger a workflow after purchase
Keep customers grouped by what they bought
Using a product segment is especially helpful if you want to send product-specific instructions, bonuses, or download links later.
Step 7: Turn on sales tax if needed
If your product requires tax collection, turn on Sales Tax under Account settings > Checkout setup.
Once done, you can also choose the correct tax category for your offer under the Product tab.
Step 8: Review your changes
As you update the Product tab, your checkout page preview updates automatically.
Review everything carefully to make sure your:
Product name is correct
Description is clear
Price is accurate
Image looks good
Segment and tax settings are set the way you want
How customers receive the product after purchase
After a customer completes their purchase, they are automatically sent to the built-in delivery page.
On the delivery page, you can use the Instructions block to explain how to access the product.
If you are selling a digital product, you can also add a file or link using the Download block.
If you assigned a product segment, you can use that segment to send follow-up emails, delivery instructions, download links, or post-purchase workflows.
FAQ
Where do I edit product details in Flodesk Checkout?
Open your Checkout page, then click the product block on the checkout page preview. This opens the Product tab, where you can edit your product details.
Can I change the product name and description?
Yes. In the Product tab, you can update both the product name and description at any time.
Can I mark a product as on sale?
Yes. Turn on the On sale option in the Product tab to show a discounted offer.
Can I make a product free in Flodesk Checkout?
Yes. Turn on Make it free in the Product tab if you want to offer the product at no cost.
What size should my product image be?
Your product image should use a 1:1 square ratio so it displays properly in Checkout.
Can I limit how many times an offer is sold?
Yes. You can set a quantity limit in the Product tab.
Can I set an expiration date for my offer?
Yes. You can add an end date for the offer in the Product tab.
What does the product segment do?
A product segment automatically adds customers who purchase that product into a specific segment. You can use this segment for workflows, follow-up emails, and targeted campaigns.
How do I deliver a digital product after purchase?
Customers are sent to the built-in delivery page after checkout. You can add access details in the Instructions block and include a file or link in the Download block. Alternatively, create a workflow using the product segment as the trigger.
Can I charge sales tax in Flodesk Checkout?
Yes. You can turn on Sales Tax under Account settings > Checkout setup and choose the appropriate tax category for your offer in the Product tab.