
How to Create Workflows in Flodesk
A simplified guide to automation, step-by-step
Workflows (also called email sequences, email series, drip campaigns, or automations) help you send emails automatically based on subscriber behavior or key events. They help you grow your audience, deliver timely messages, and nurture relationships without manual effort.
Whether you’re welcoming new subscribers, sending freebie downloads, or following up on cart abandonment, Flodesk workflows give you full control.
What Is a Workflow?
A workflow is a series of connected steps that guide your subscribers through a journey.
Each step performs an action—like sending an email, waiting for a period of time, or branching subscribers based on their behavior or data.
Think of workflows like a smart email assistant that runs in the background, 24/7.
Workflow Building Blocks
You can build any workflow using the following steps:
Step | Purpose |
|---|---|
Trigger | Defines what starts the workflow. You can now have up to 6 trigger branches, each with its own source. |
Sends an email automatically when a subscriber reaches that step | |
Time delay | Waits for a time or a date |
Yes/No branch | Adds a yes and a no path to the workflow based on conditions or events |
Multiple-branch (new) | Splits subscribers into multiple paths at once, based on:
|
Action | Automatically adds or removes subscribers from segments |
Exit | Ends the workflow for that subscriber |
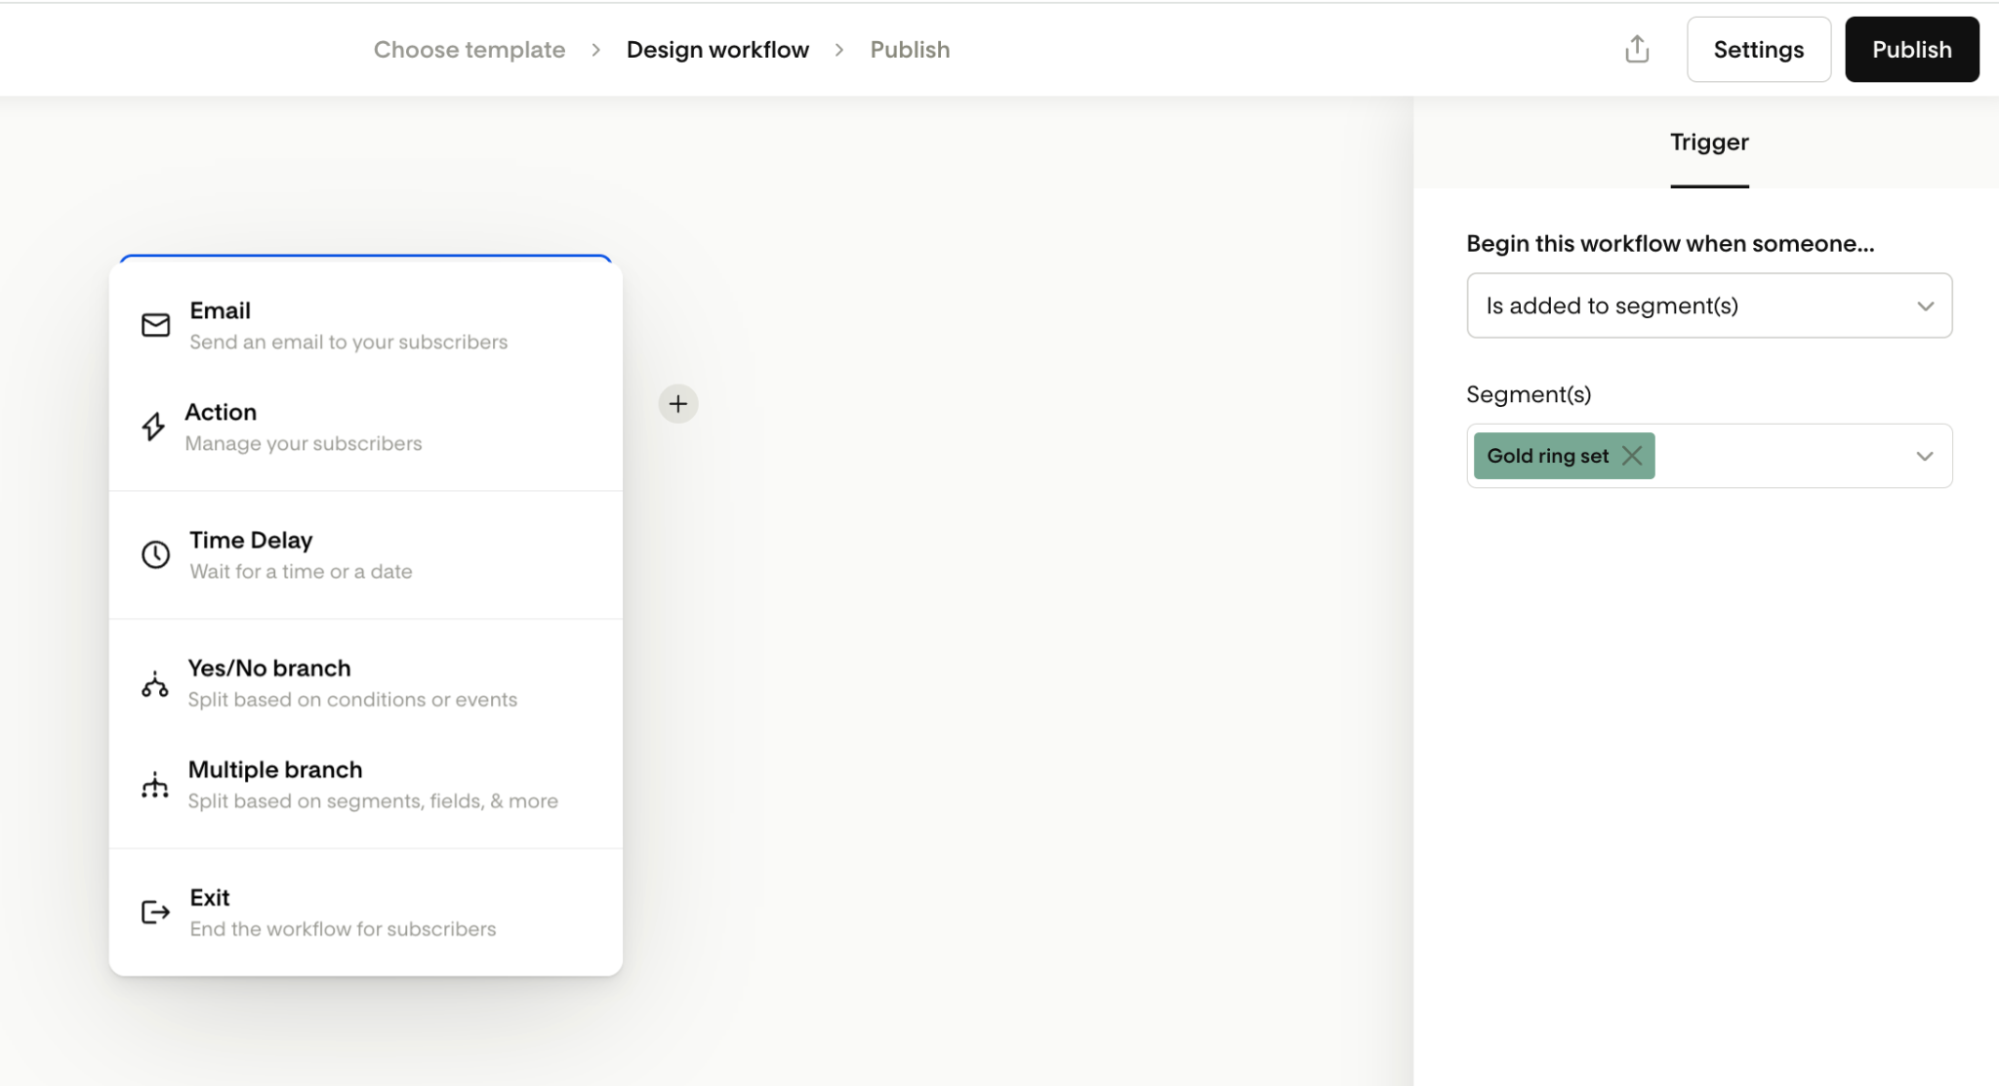
To add a step to your workflow
Hover over the connecting blue line between two steps and click the blue plus (+) icon
Select the type of step you’d like to add, including Email, Action, Time Delay, Yes/No branch, Multiple-branch
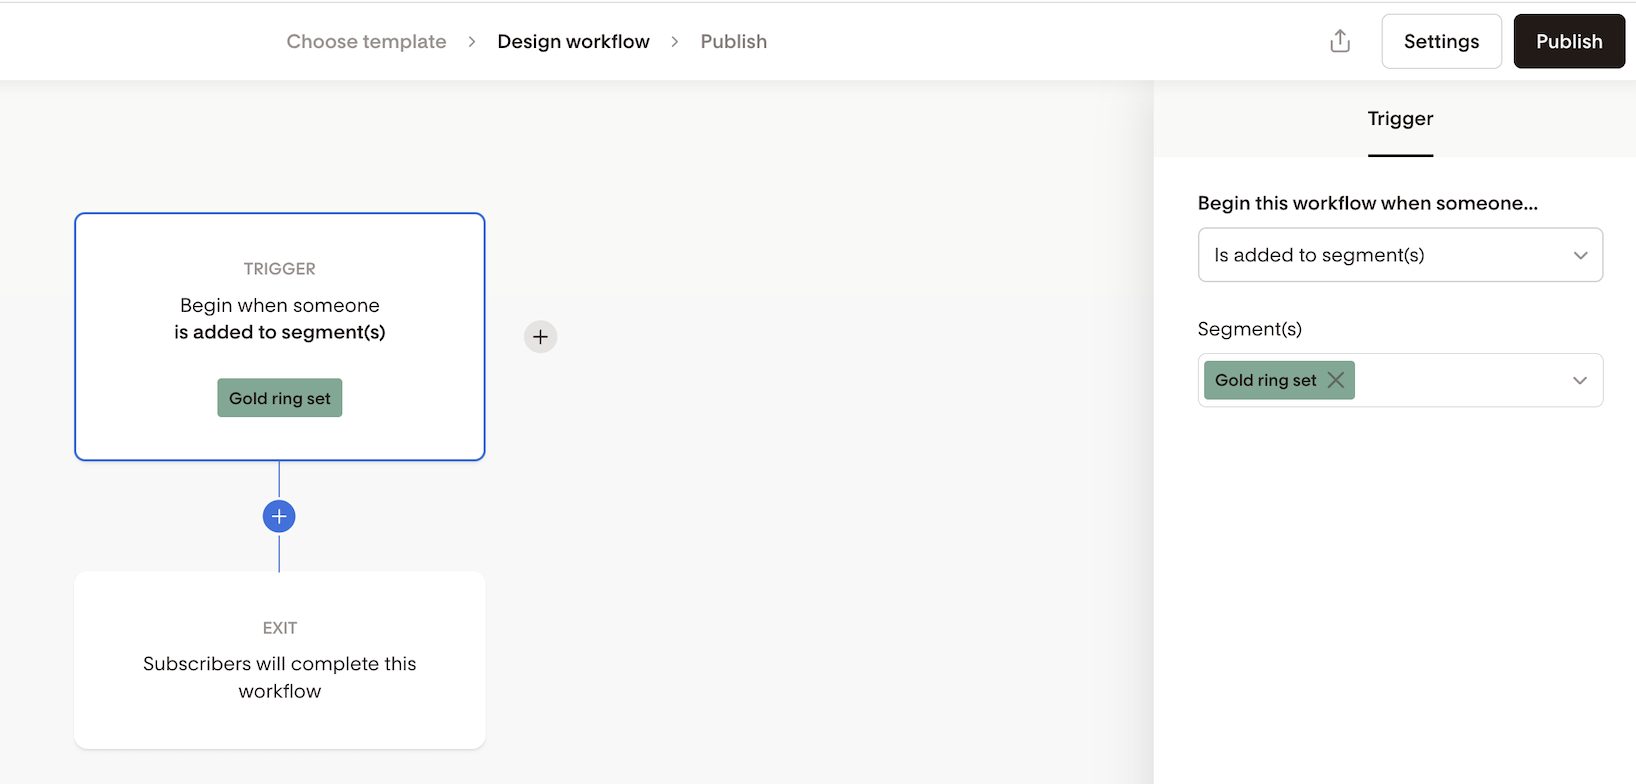
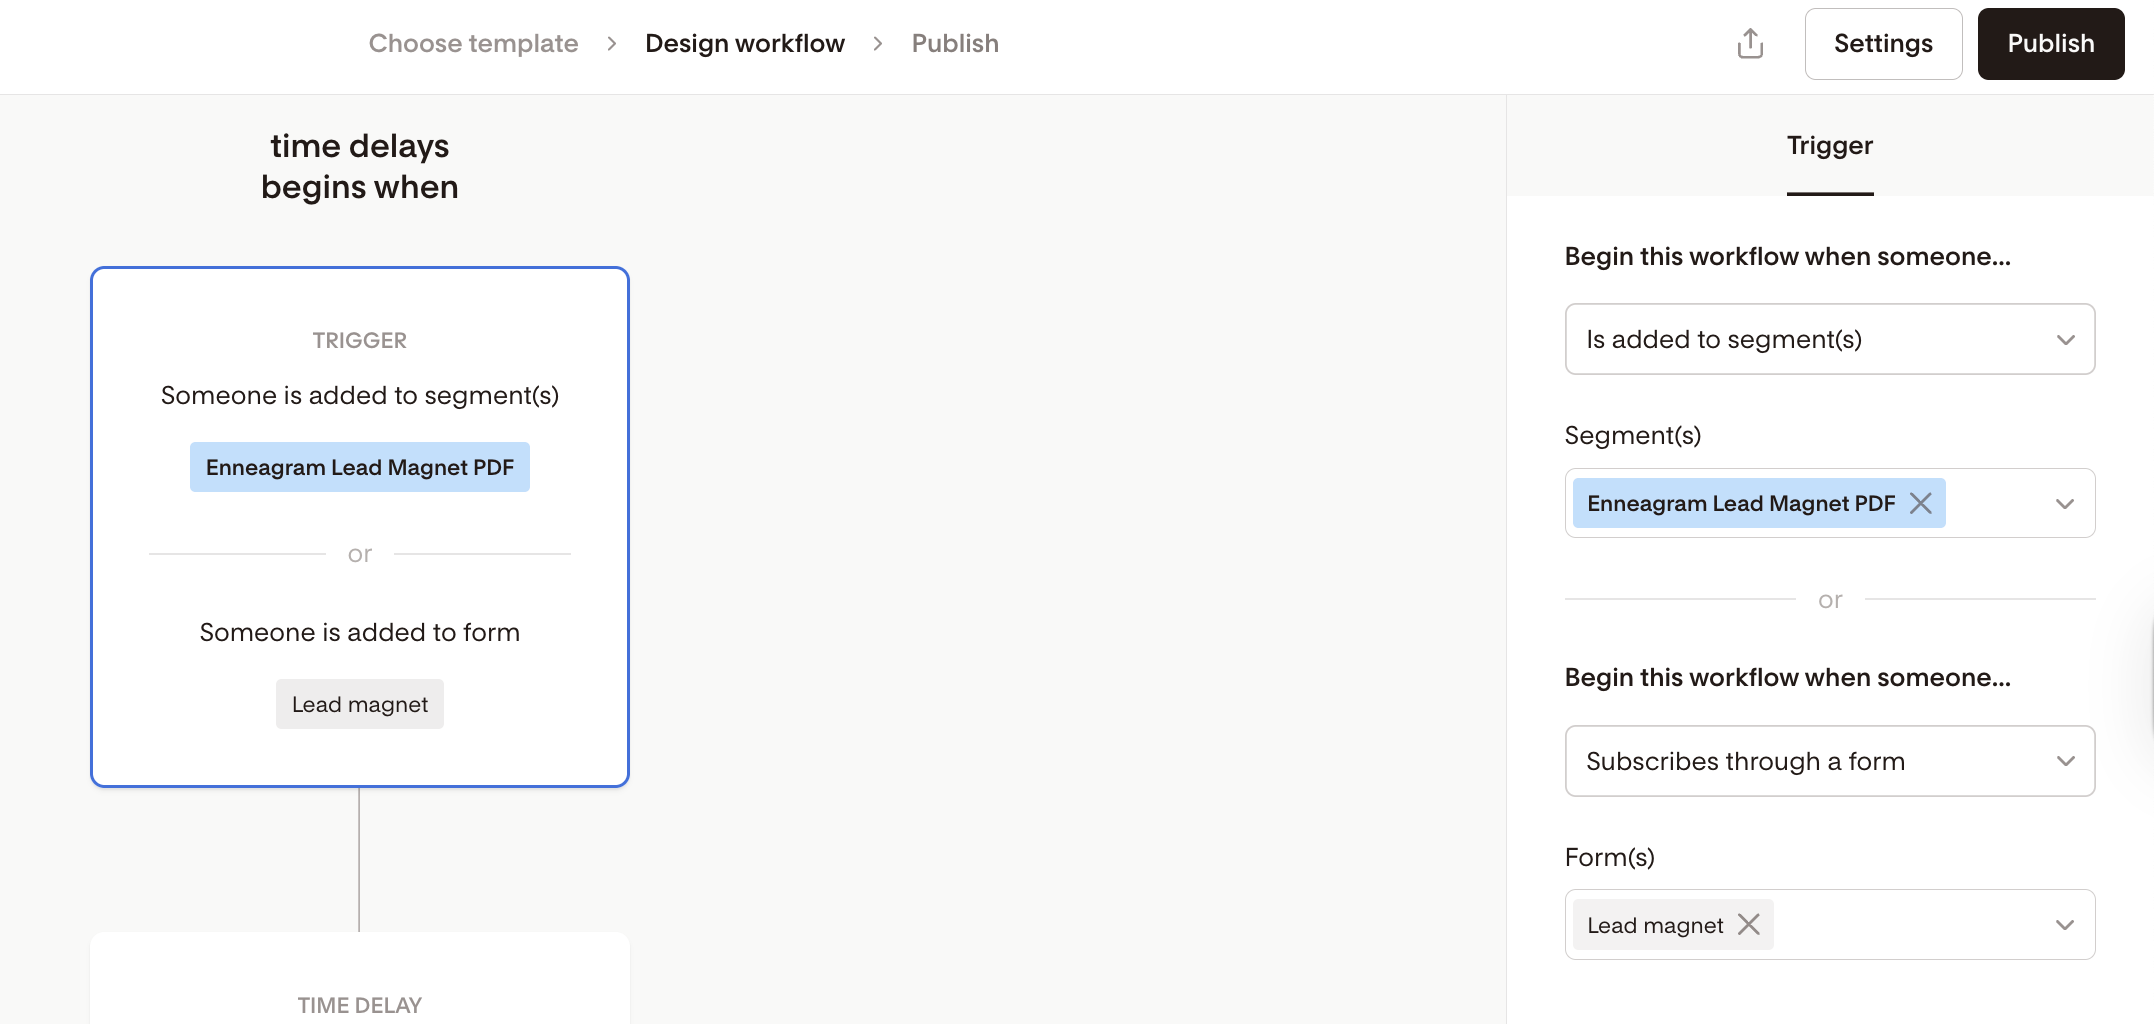
Trigger Step: What Starts the Workflow?
Every workflow begins with a trigger—this is what tells Flodesk “Start the journey!”
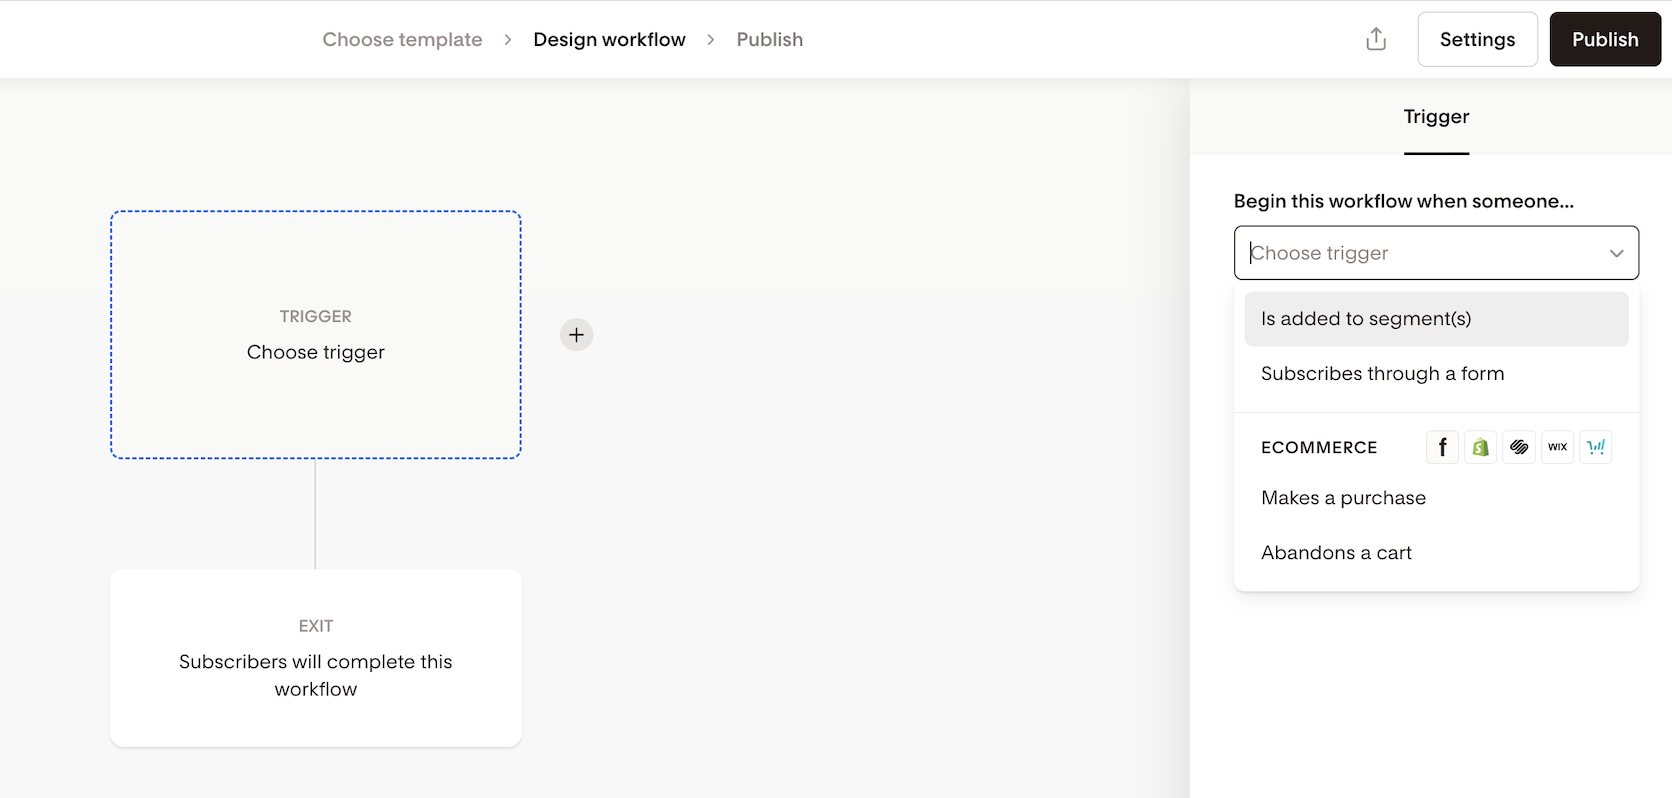
You can trigger a workflow when:
A subscriber is added to a segment
Someone submits a specific opt-in form
A purchase is made in Flodesk Checkout or a connected Shopify, Squarespace, Wix, or Thrivecart store
A cart is abandoned in Flodesk Checkout or in a connected Shopify, Wix, or Thrivecart store
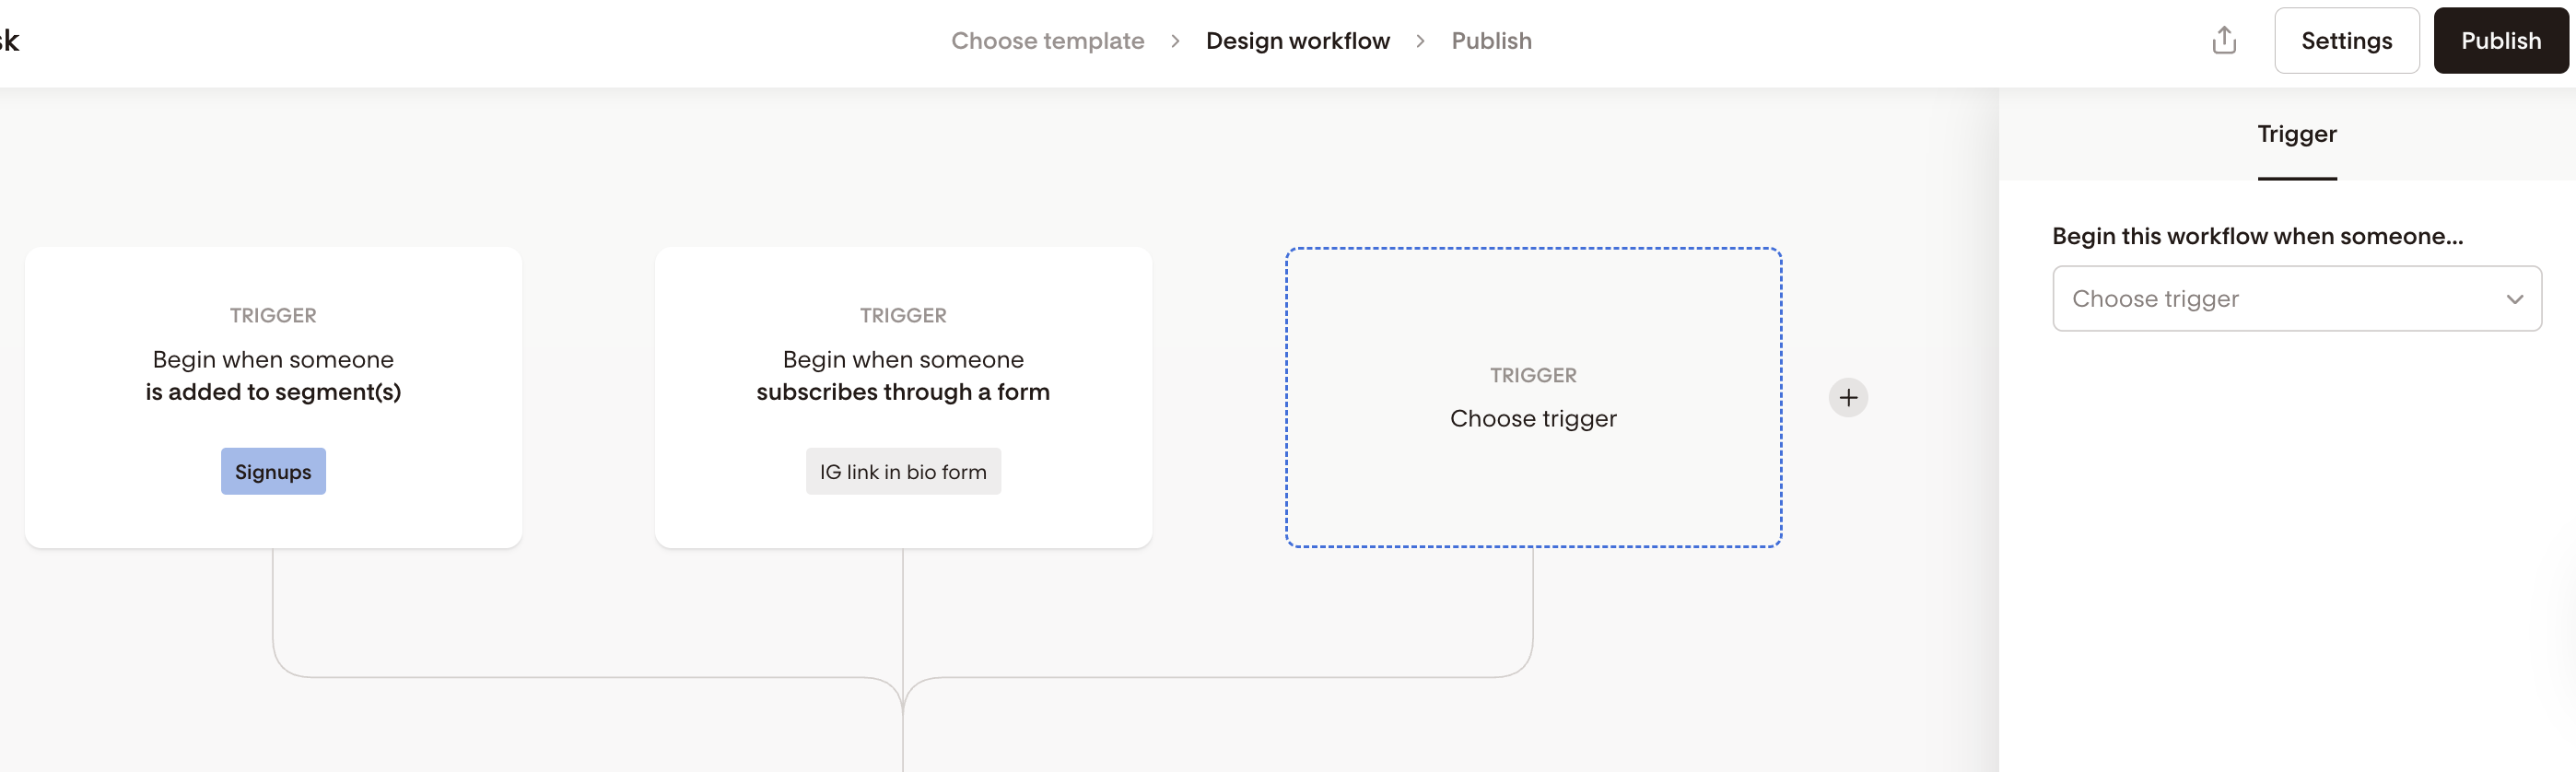
A workflow must have at least one trigger but you can add more trigger branches (optional) as follows:
Click the + icon next to the trigger step to add up to five additional branches (maximum six total).
Each trigger branch can have its own first few steps—like a custom welcome email or short delay—before automatically merging back into the main path.
Only one trigger type can be selected per branch.
Note: Abandoned cart triggers cannot be combined with other trigger types, but you can add multiple abandoned cart triggers (e.g., for different stores) in the same workflow
You can also add subscribers to a trigger segment via:
Bulk actions
Link clicks in emails
Preferences
Integrations (e.g. Zapier)
Learn more about the Trigger step in Flodesk workflows here.
Email Step: Send an Email Automatically
The Email step sends an email to a subscriber exactly when they hit that step in your workflow. Use this to:
Welcome new subscribers
Send a free download
Follow up after a cart is abandoned
Pitch an offer
Learn more about how to add emails to your workflow here.
Time Delay Step: Add a Pause
The Time delay step tells Flodesk to wait before moving to the next step. You can delay by:
A certain amount of time (e.g., 1 hour, 3 days)
A certain day of the week (e.g., Monday)
A certain time of day (e.g. 10:00 AM)
A specific day of year (e.g. June 24 at 10:00 AM)
Useful for spacing out emails in a sequence.
For example, if you have three emails in your sales workflow and want them sent 3 days apart, you would add a Time delay step of “Wait 3 days” between each Email step.
Learn more about these various Time delay steps you can add to your workflow here.
Yes/No Branch Logic (simple decision paths)
The Yes/No branch step creates two paths—YES or NO—based on conditions or events. Use it when you only need two outcomes. Note: All branches rejoin the main workflow unless you add an Exit step.
For example:
“Did they open the last email?”
“Did they click the product link?”
“Is their custom field ‘Wedding month’ set to May?”
“Are they in a specific segment?”
Learn more about how to use Yes/No branch steps in Flodesk workflows here.
Multiple branch steps: advanced branching (new)
Use Multiple branch steps when you need more than two paths.
Multi-branch lets you:
Route subscribers in groups based on segments or data fields
Split traffic by percentages for testing
Automatically rejoin subscribers into the main workflow
This keeps workflows clean and prevents endless branching.
Learn more about: How Multiple branch workflows work
Action Step: Automatically Organize Subscribers
The Action step helps you:
Add subscribers to a new segment
Remove them from a segment
Great for segmenting customers, creating follow-up lists, or enrolling them in new workflows.
Example: When a subscriber completes your welcome series, use an action step to move them into your newsletter segment.
Learn more about how to use the action step here.
Exit Step: End the Workflow
Use the Exit step when you want to stop subscribers from rejoining the main workflow after a branch (Yes/No or Multiple branch) or want them to finish the workflow and be marked as Completed.
If you remove the Exit step from the end of the workflow’s main path, subscribers will hold at the end and remain active in the workflow—useful if you plan to add more steps later.
If you remove the Exit step from a split branch (Yes/No or Multiple branch), it will rejoin into the main workflow path.
Learn more about the Exit step here.
Quick Steps to Create Your First Workflow
Go to the Workflows tab
Click + New workflow
Choose your trigger (at least one, and a maximum of six)
Add emails, delays, branches and actions
Add an Exit step if you want subscribers to complete the workflow
Click Publish
FAQs: Creating Workflows in Flodesk
What is a workflow?
A workflow is an automated series of steps—like emails, time delays, or actions—that run based on subscriber behaviour or events.
What can trigger a workflow to start?
You can start a workflow when:
Someone joins a segment
Someone submits a form
A purchase is made (Flodesk Checkout, Shopify, Squarespace, Wix, ThriveCart)
A cart is abandoned (Flodesk Checkout, Shopify, Wix, ThriveCart)
Can I add more than one trigger to a workflow?
Yes. You can now create multiple trigger branches—up to six total. Each branch can have unique first steps (like a welcome email) and then merge into the main workflow.
Are there limits on triggers?
You can add up to six total trigger branches.
If your workflow includes an older “dual trigger” (segment + form), you can add up to four additional new triggers.
Can I use abandoned cart triggers with other trigger types?
No. Abandoned cart triggers can’t be mixed with others, but you can have multiple abandoned cart triggers for different stores in the same workflow.
What types of steps can I add to a workflow?
Email: Sends an automated message
Time delay: Waits a specific duration before moving on
Yes/No branch: Splits subscribers into two paths based on conditions or events (e.g., “Did they click a workflow link?”)
Multiple branch: Splits subscribers into multiple paths at once, based on: Segments, Data fields, Percentages
Action: Moves or removes subscribers from segments
Exit: Marks the subscriber as finished with the workflow
What’s the difference between Yes/No and Multi-branch?
Yes/No = two paths, including advanced filtering conditions
Multi-branch = multiple paths at once (segments, data fields, or percentages)
Do Multi-branch and Yes/No paths reconnect automatically?
Yes. All branches rejoin the main workflow unless you add an Exit step.
Can I add steps to each trigger branch?
Yes. Each branch can include Email, Time delay, or Action steps before it rejoins the main workflow.
Do I need an Exit step?
Yes, if you want subscribers to complete the workflow. Without an Exit step, they remain active and can continue if you add more steps later.
Can I reuse a workflow for another audience?
Yes. You can duplicate an existing workflow and update the triggers, segments, or emails to fit the new audience.
What if my workflow doesn’t start?
Check that:
All triggers are connected to valid segments, forms, or stores
The workflow is Published (not Draft or Paused)
Subscribers meet the trigger condition after publishing
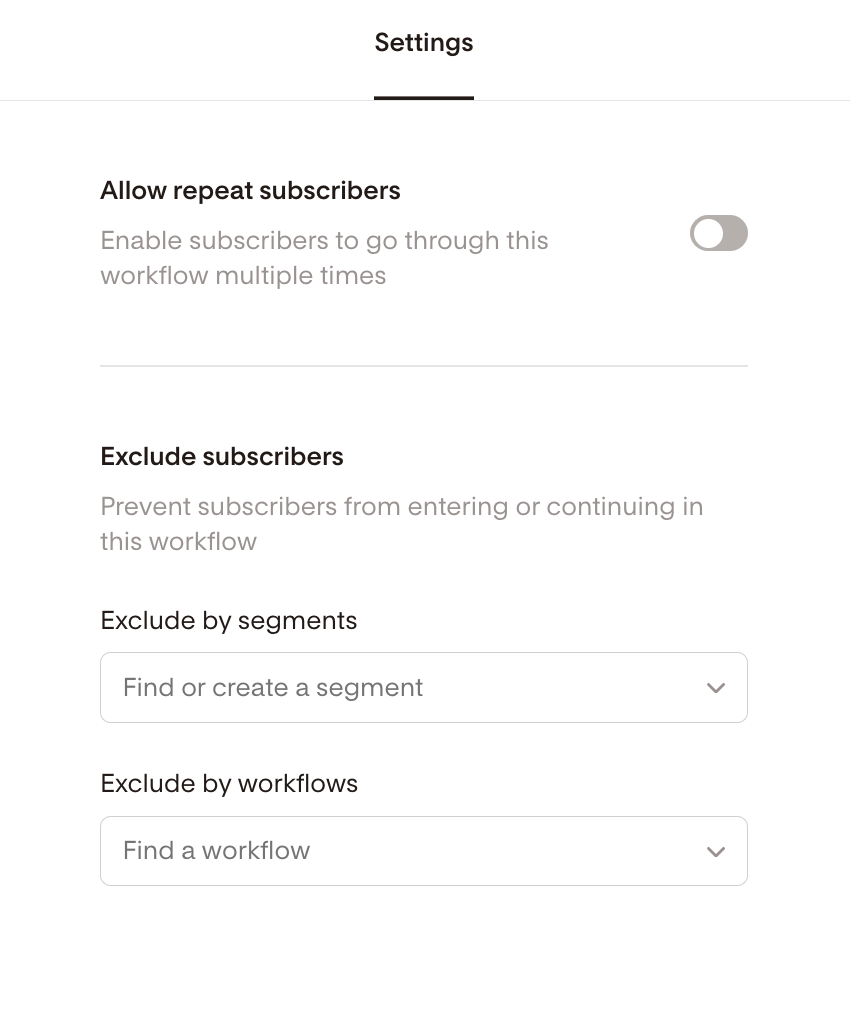
You didn’t exclude the trigger segment under the Workflow settings
What’s Next?
Ready to put it into practice?
Follow this tutorial to build your first freebie delivery workflow
It’s one of the easiest and most powerful ways to grow your email list and start automating right away.