
How to create, save, and publish a product
Overview
This article walks you through building a product in Flodesk’s new Products feature, from filling out the details to setting your price, adding optional selling tools, and publishing it (or saving it as a draft to finish later). Whether you're selling an e-book, a course, a coaching call, a template, or something else entirely, you'll find everything you need to get it live here.
Note: this feature is being released in batches. Right now, Products is available to new members who haven't created a checkout before. If you’re an existing Flodesk member who has existing checkouts, you'll be invited to try Products soon, and switching will always be your choice, nothing will be migrated automatically.
Plan limits for creating and publishing products
Lite plan: you can create and save draft products, but you can't publish them.
Pro plan and legacy Unlimited Email plans: you can create and publish unlimited products, but they can't include recurring payments or payment plans.
Everything plan: unlimited products, including recurring payments and payment plans.
For a full breakdown, see What's included in Products on each plan.
You'll also need a connected Stripe account to publish a product, though you can save a draft without one.
How to create a product
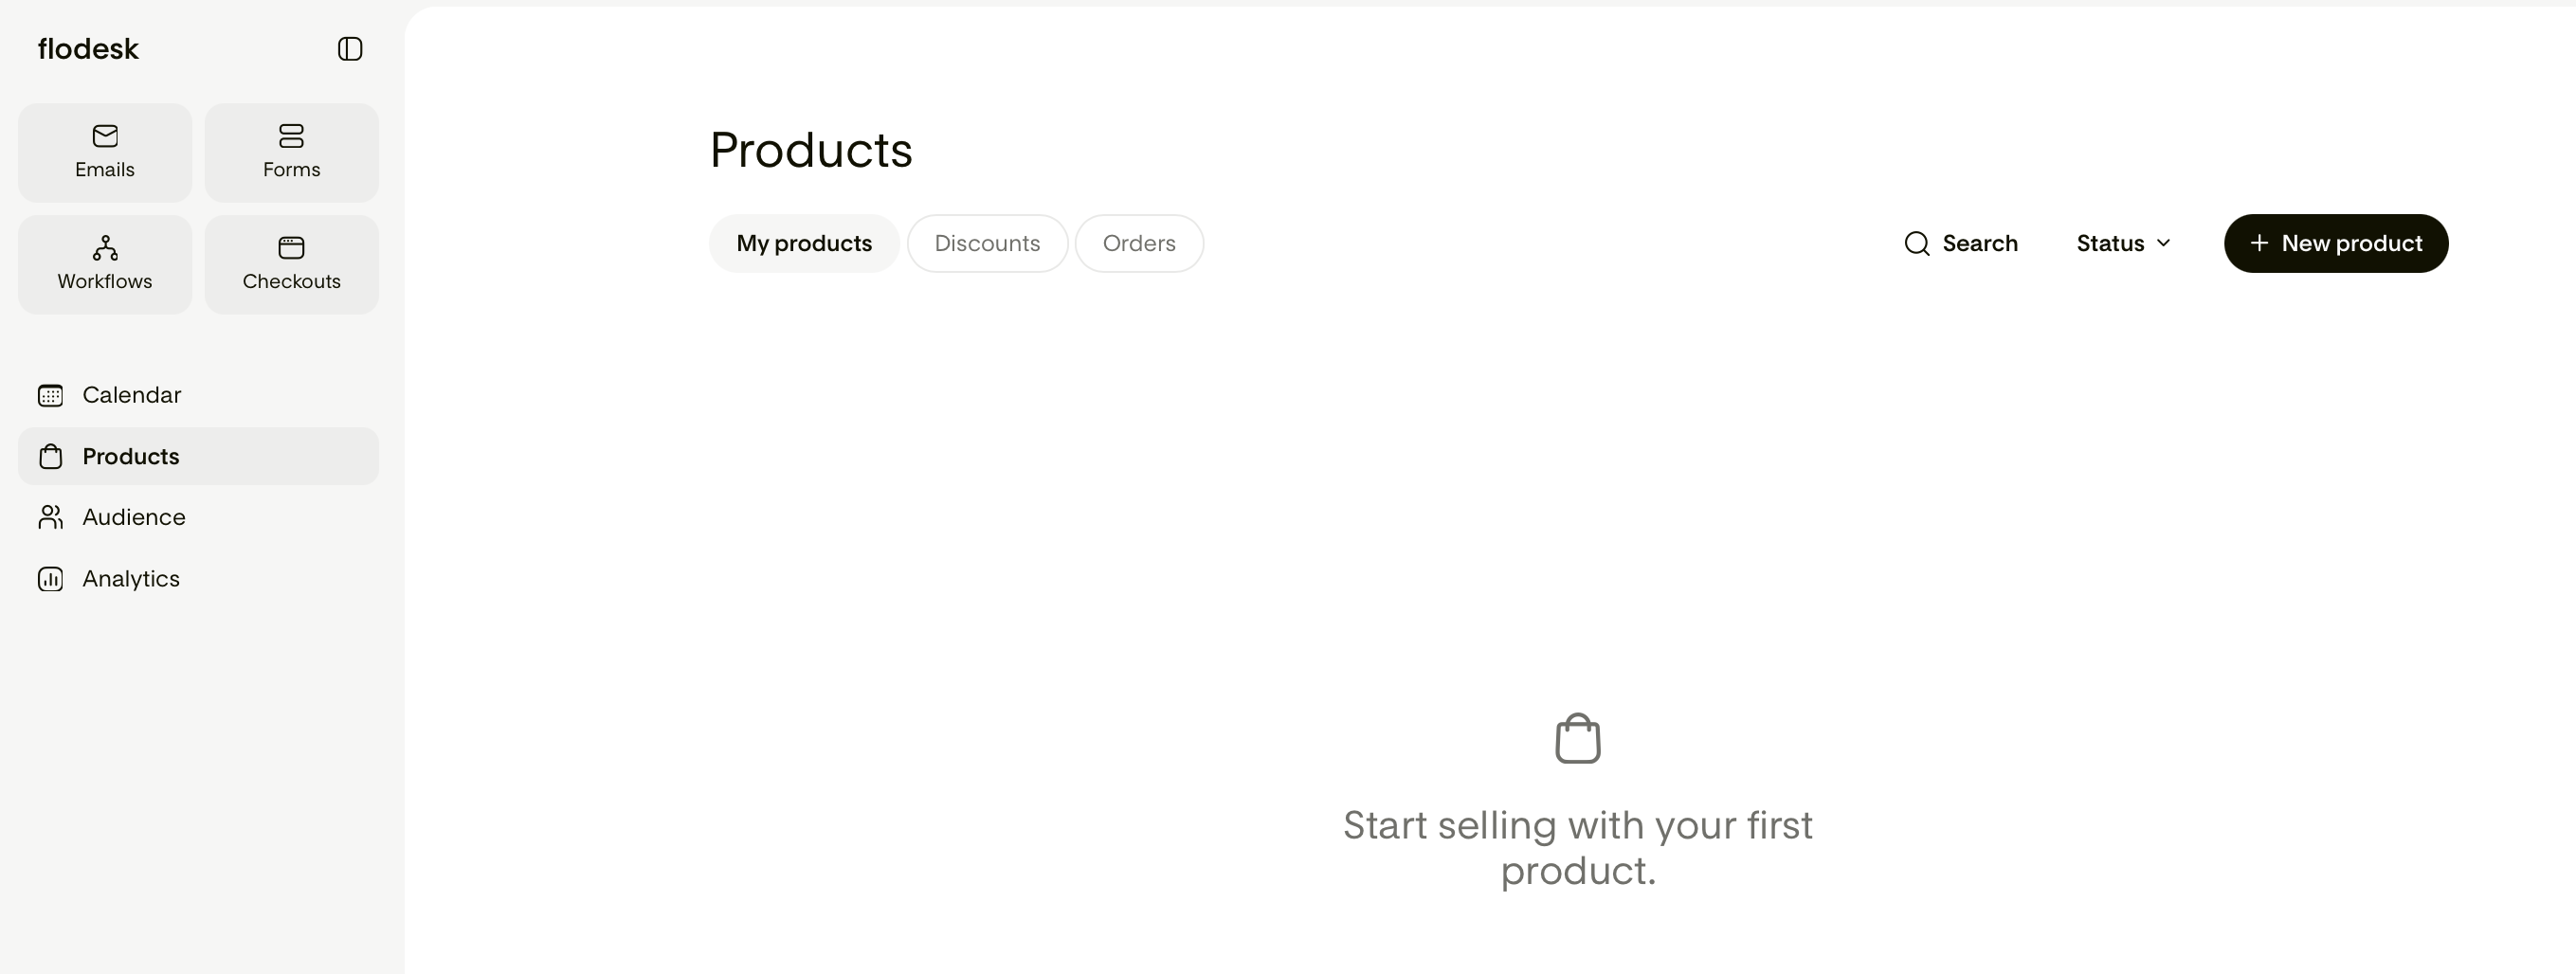
On your Products dashboard, click +New product
Fill in your product details (see each section below)
When you're ready, click Save as draft to save your progress, or Publish to make your product live
Important: there's no autosave in the product creation flow. Your changes stay in progress until you explicitly save a draft or publish. If you navigate away without saving, you'll be prompted to save as a draft, discard your changes, or cancel.
Product details
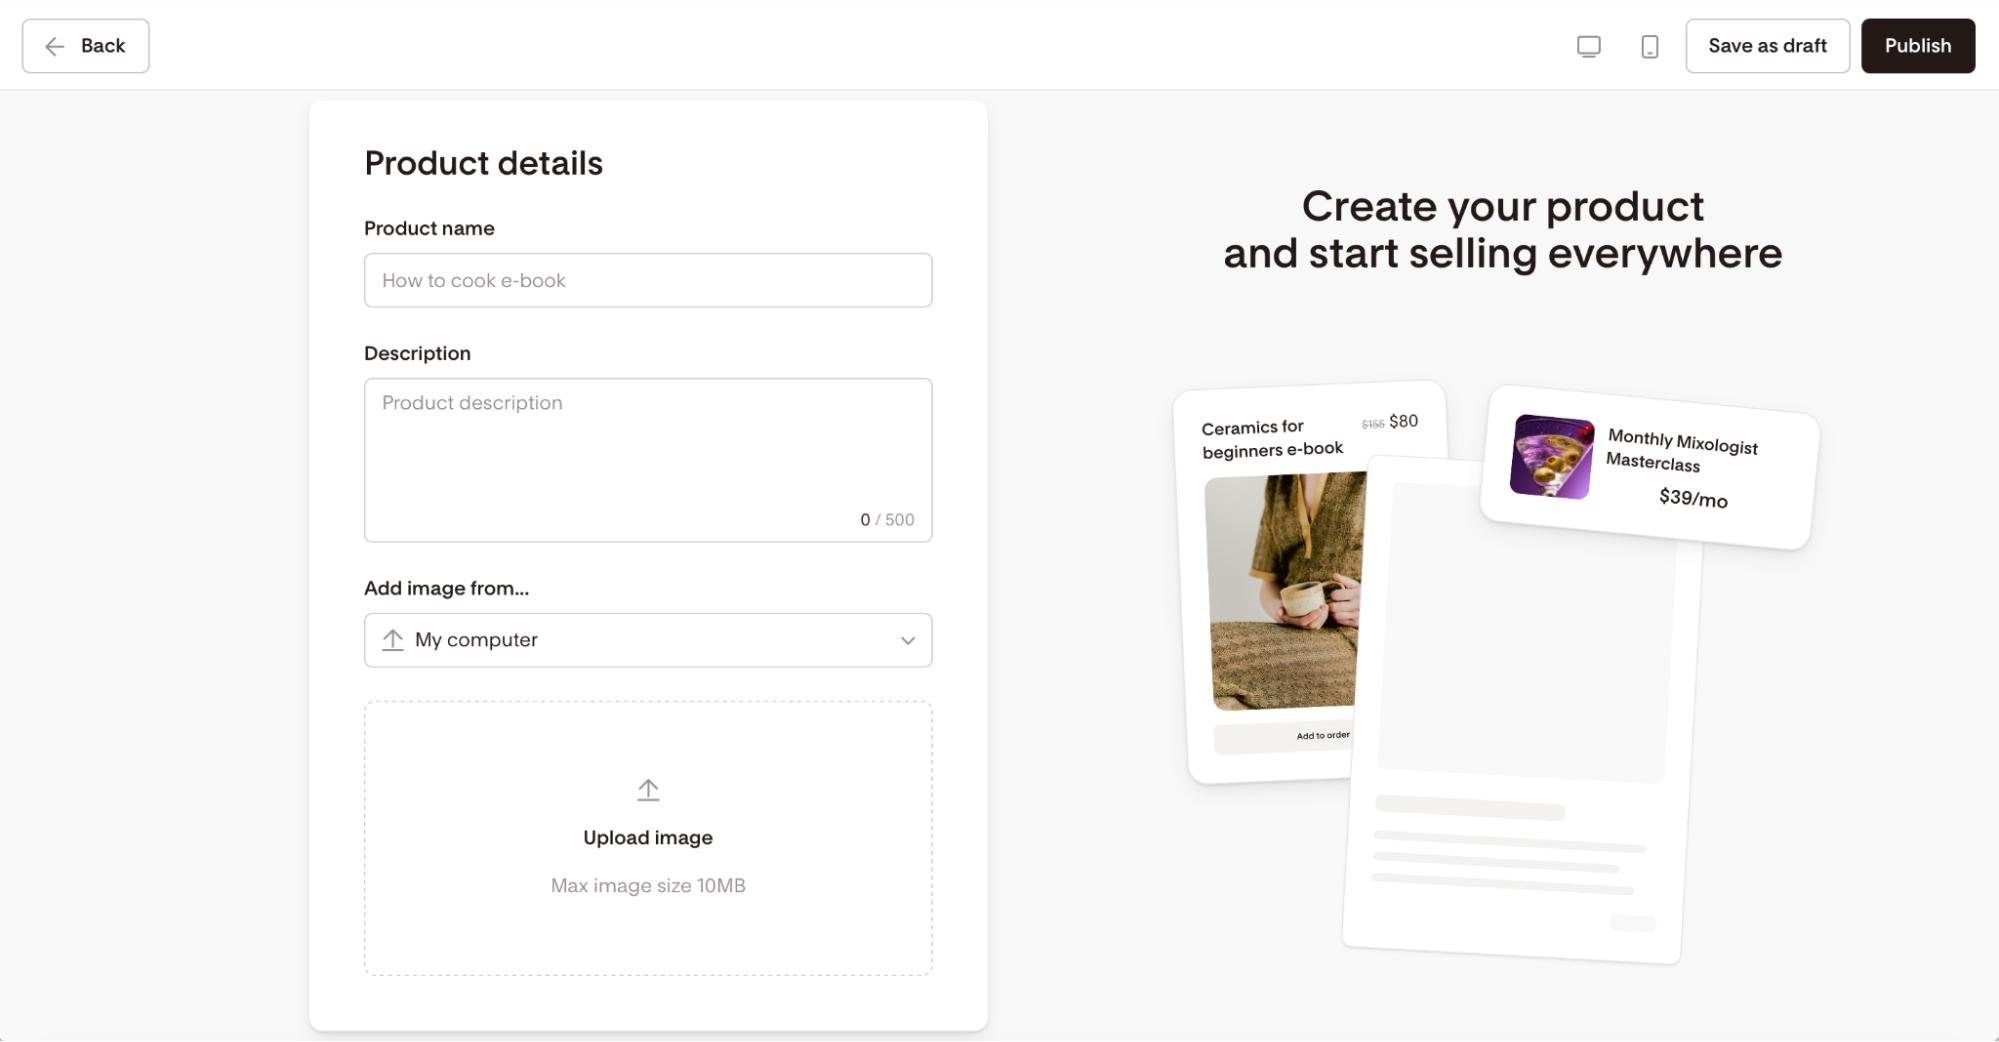
This is where you set the core information buyers will see.
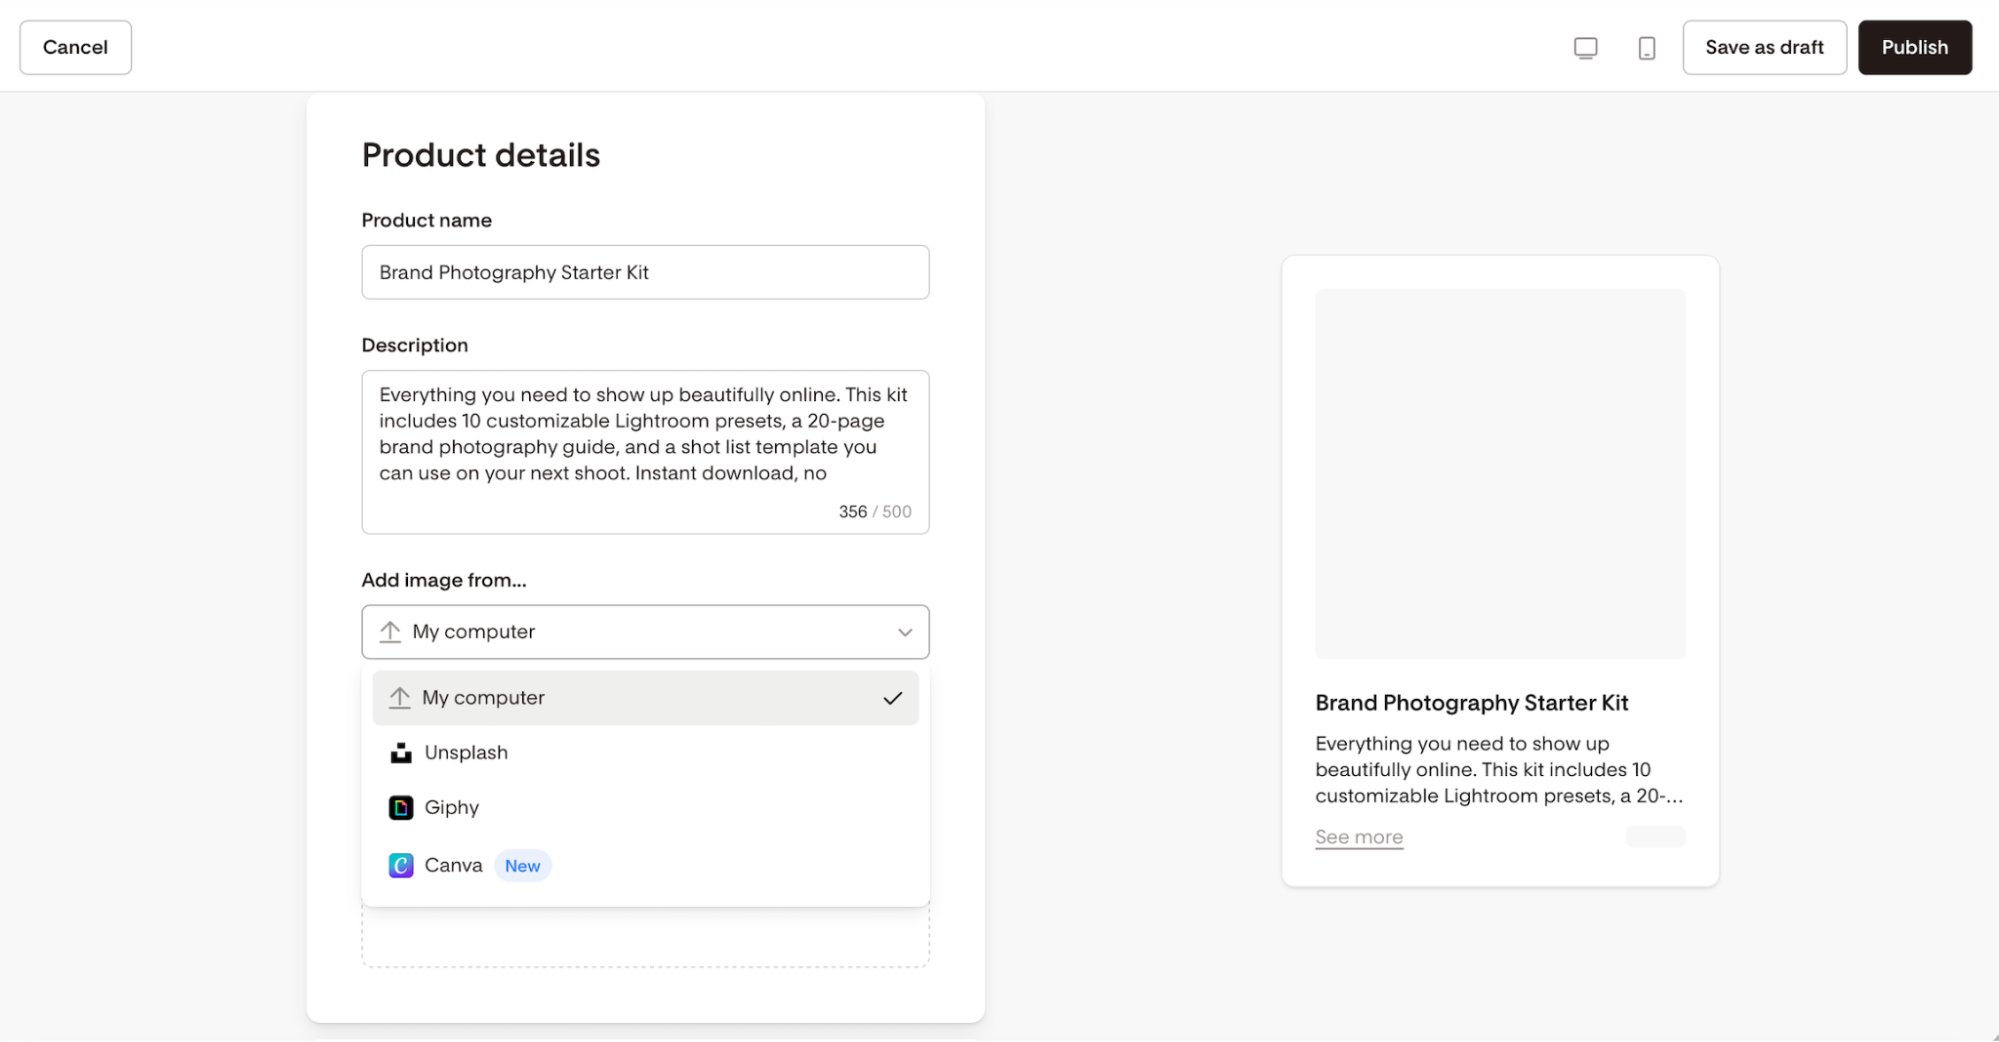
Product name: required to publish. Maximum fifty characters. This displays to buyers on the checkout page.
Description: describe what buyers are getting. Maximum 500 characters.
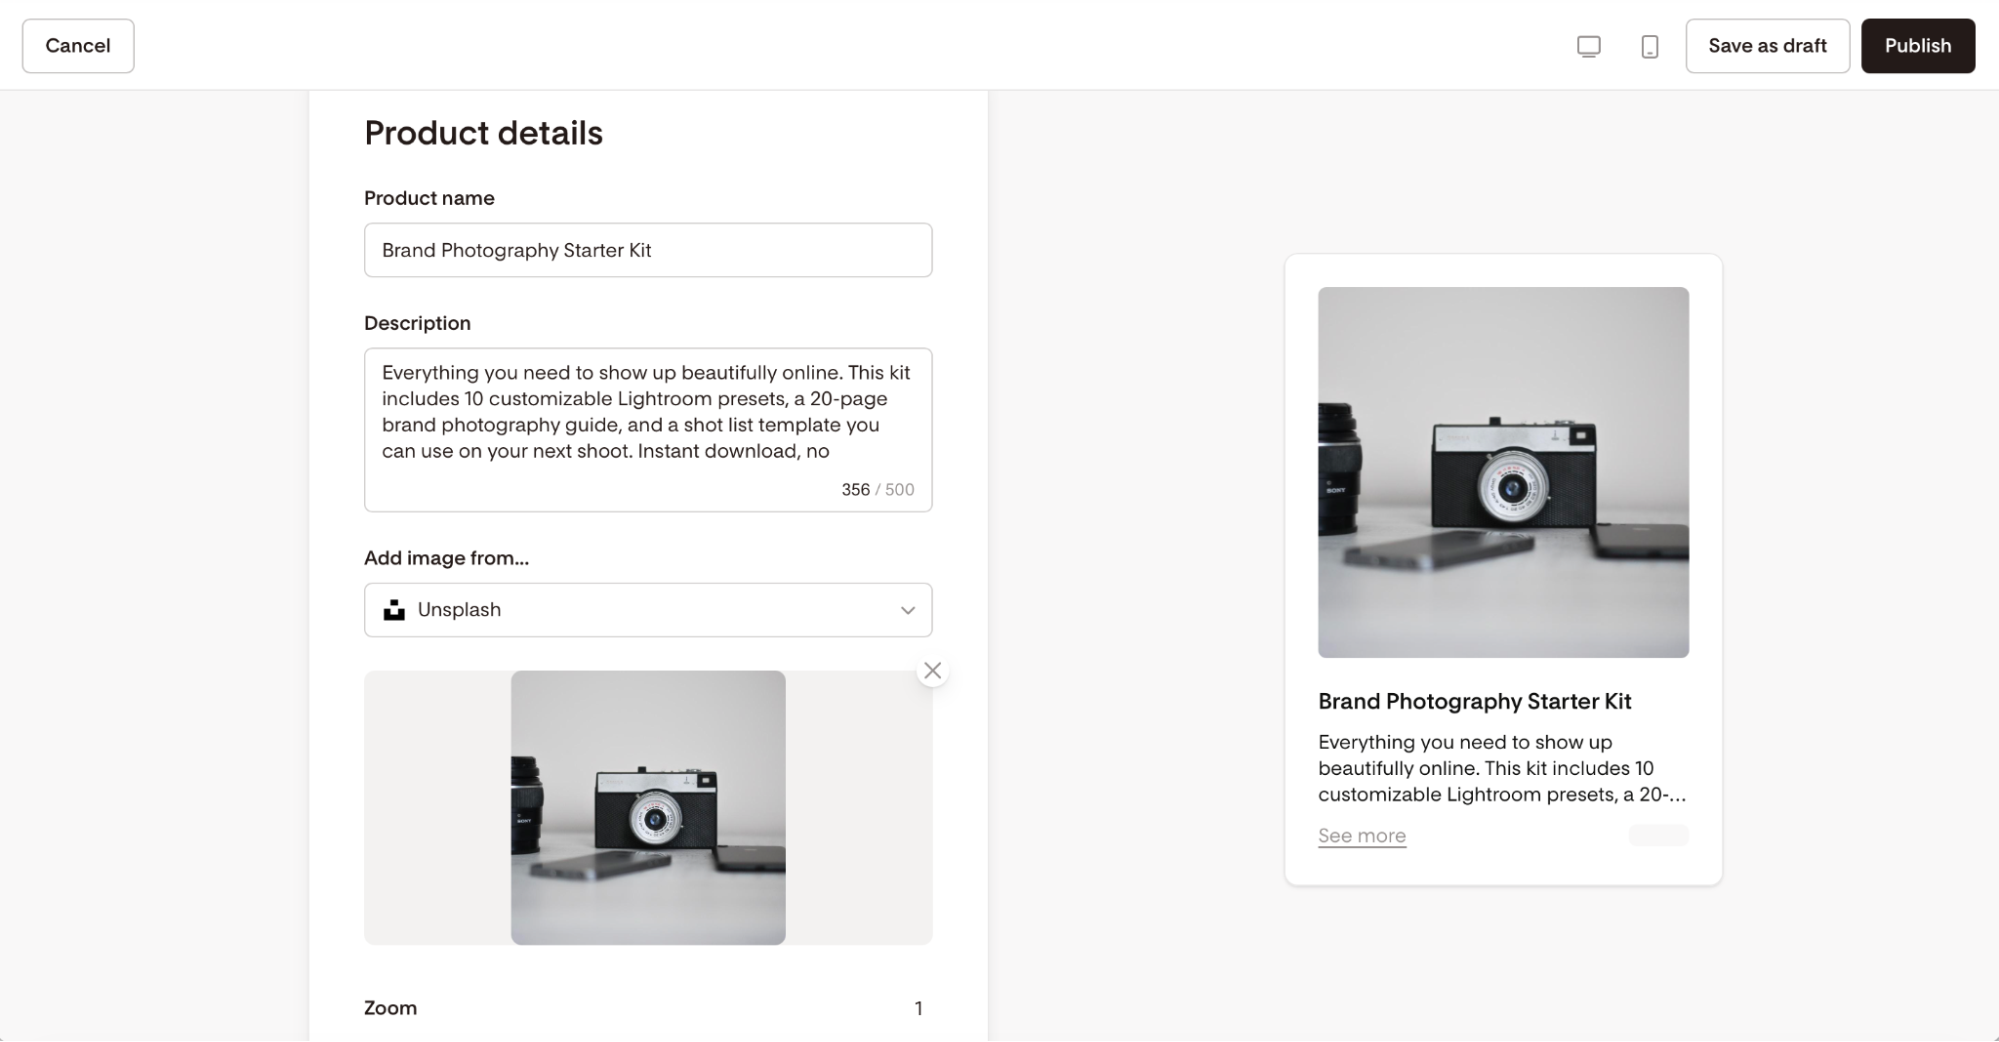
Product image: required to publish. Upload a JPG, PNG, GIF, or WEBP file up to 10MB. You can add an image from your computer, Unsplash, Giphy, or your connected Canva account. The product image will display in a 1:1 ratio.
Pricing
Payment type
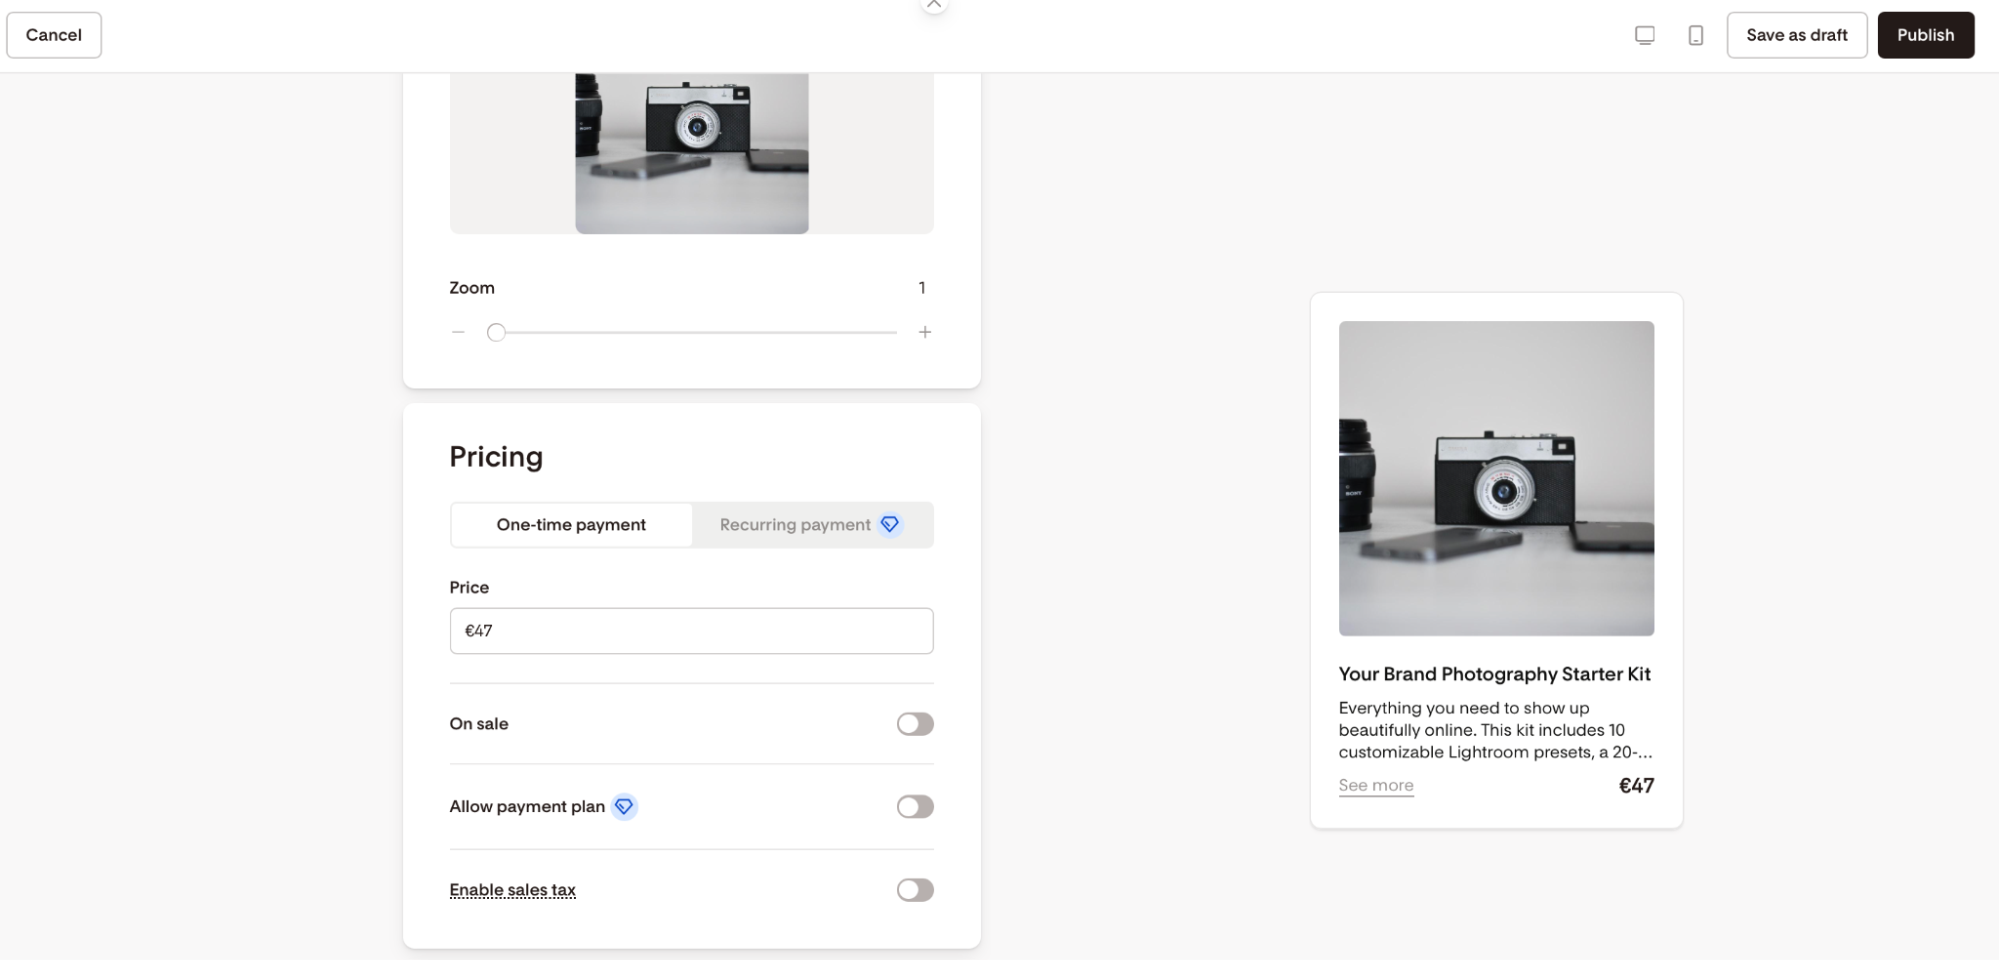
Choose how buyers will pay for this product. You can select one of three options:
One-time payment: buyers pay a single amount at checkout. This is the default.
Payment plan: buyers pay in installments over time. Only available on the current and legacy Everything plans.
Recurring payment (subscription): buyers are charged on a recurring schedule. Only available on the current and legacy Everything plans.
Your payment type is set at the product level and applies to every checkout session where this product is the primary product.
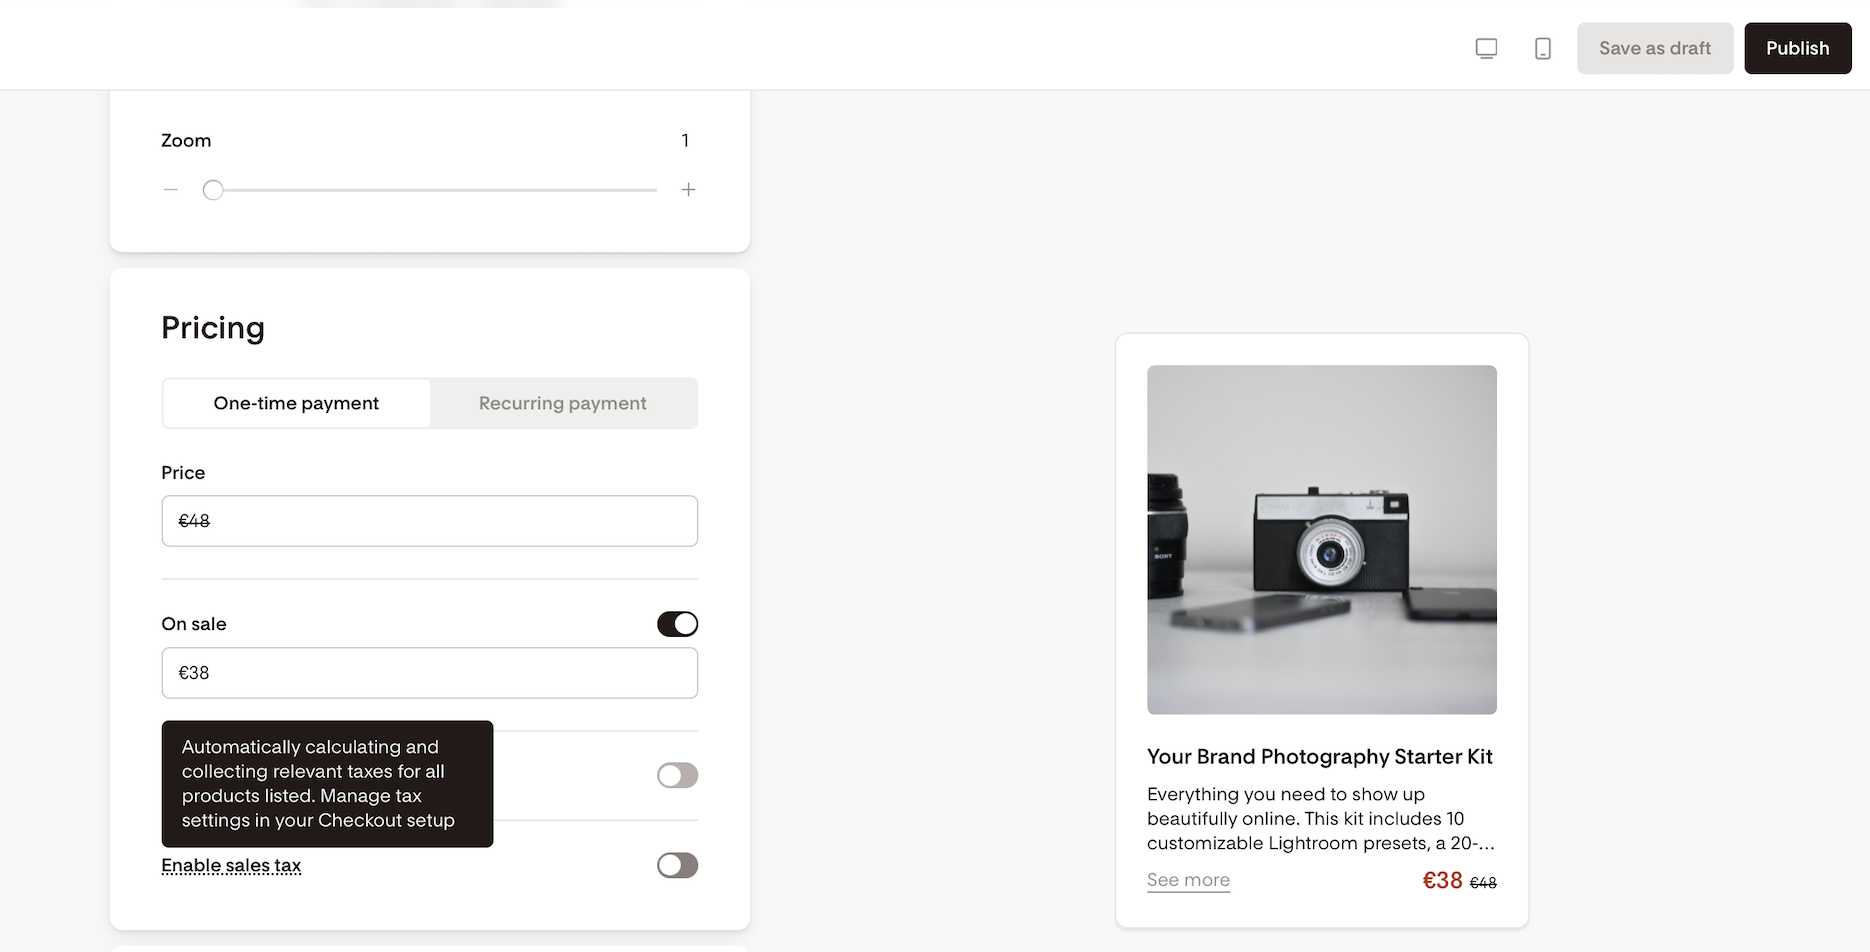
Price
Enter the amount you want to charge. A price is required to publish.
For one-time payment products, you can set the price to $0.00 to offer something for free. Payment plan and subscription products must have a price greater than $0.
Sale price
Toggle on On sale to offer a discounted amount. The original price will appear as strikethrough on buyer-facing pages. The sale price must be less than the regular price. This option isn't available for free ($0) products.
Payment plan options
When you toggle on Allow payment plan as your payment type, you'll configure:
Total price: the full amount to collect across all installments.
Number of installments: minimum of two.
Frequency: weekly or monthly.
A summary displays automatically, for example: "Buyer will pay €15.67 per month for three months, €47 total."
Note: if you add a bump offer to a payment plan product, the upsell is charged as a one-time payment at the time of the first installment, not split across the plan.
Subscription options
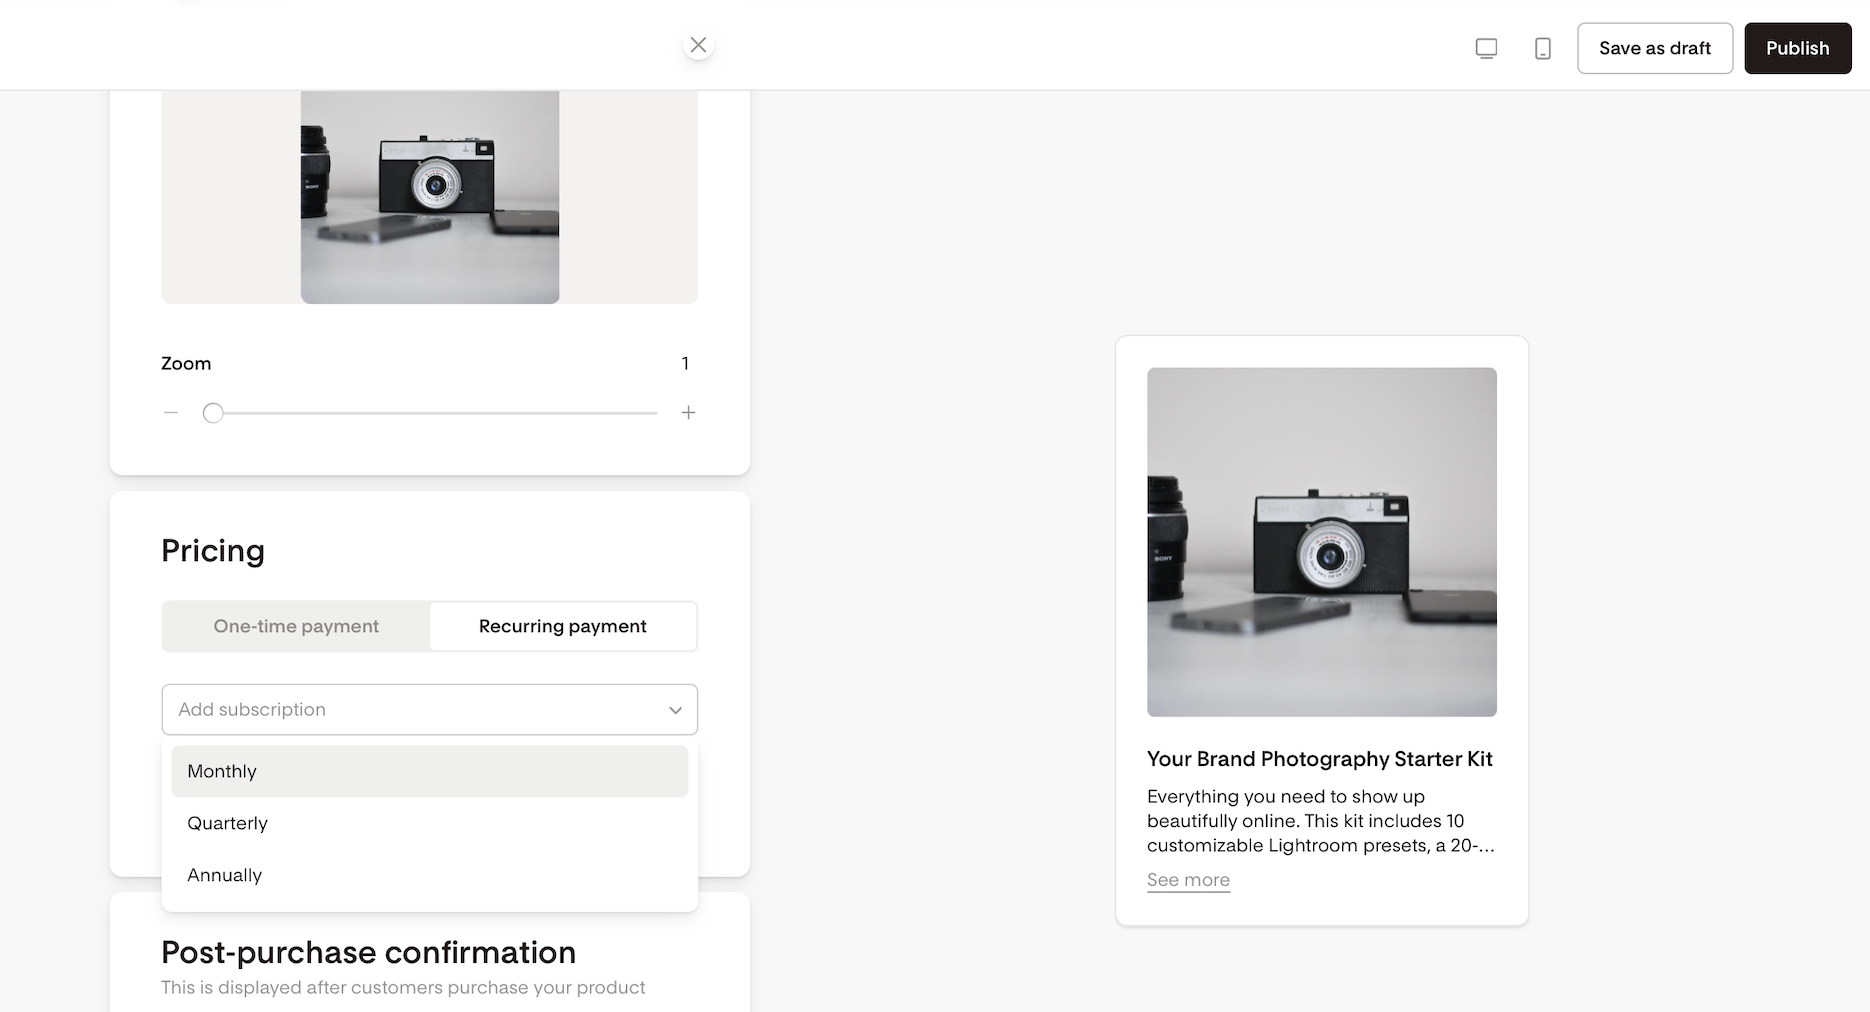
When you select Recurring payment (subscription), you'll set up one or more subscription tiers. Each tier has its own billing interval (monthly, quarterly, or annually) and price. You can add multiple tiers to give buyers a choice.
Sales tax
Toggle on Enable sales tax to apply automatic tax calculation at checkout via Stripe. A tax category editor will appear so you can choose the right category for your product.
Order and payment notifications
Flodesk automatically sends email notifications to keep you and your buyers informed about orders and payments.
Notification | Sent to |
Order paid | Seller and buyer |
Subscription canceled | Seller |
Subscription payment failed | Seller and buyer |
Payment plan payment failed | Seller and buyer |
Annual subscription renewal reminder | Buyer |
Post-purchase confirmation
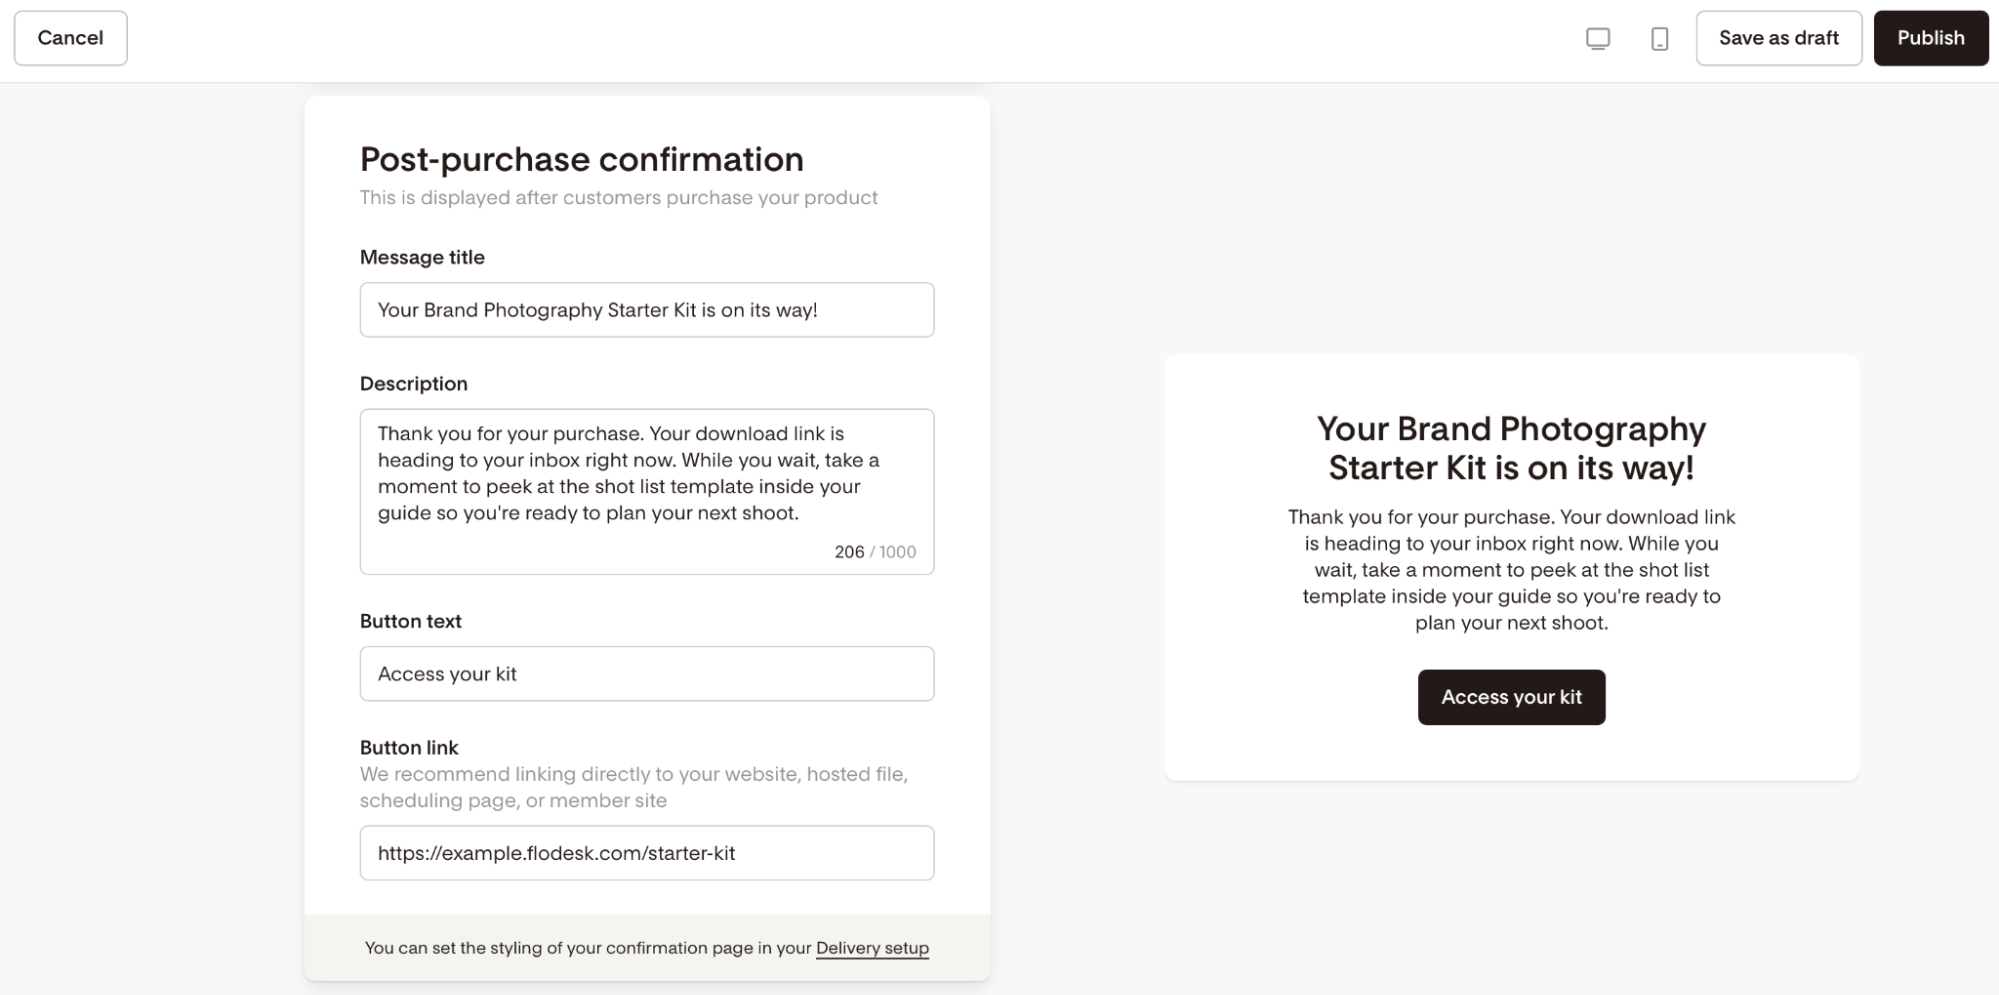
After a buyer completes their purchase, they'll land on the Flodesk-hosted post-purchase confirmation page (the delivery page). The page template is set at the account level in Account Settings > Commerce Setup > Branding. Your product's name, description, and any delivery page content you add below populate that template automatically.
Post-purchase confirmation page content
These fields populate your product's section of the delivery page template:
Message title: for example, "Your Brand Photography Starter Kit is on its way!"
Description: add instructions for how buyers will get the product.
Button text: for example, "Access your kit."
Button link: link to the download or the external page where the files are hosted.
As you fill in the details, you'll see a live preview on the right side of the page. What you see is the default styling. You can change the styling of this confirmation page in your Delivery setup.
Additional information
These optional toggles let you add controls to your product. Each one expands to reveal its settings when switched on.
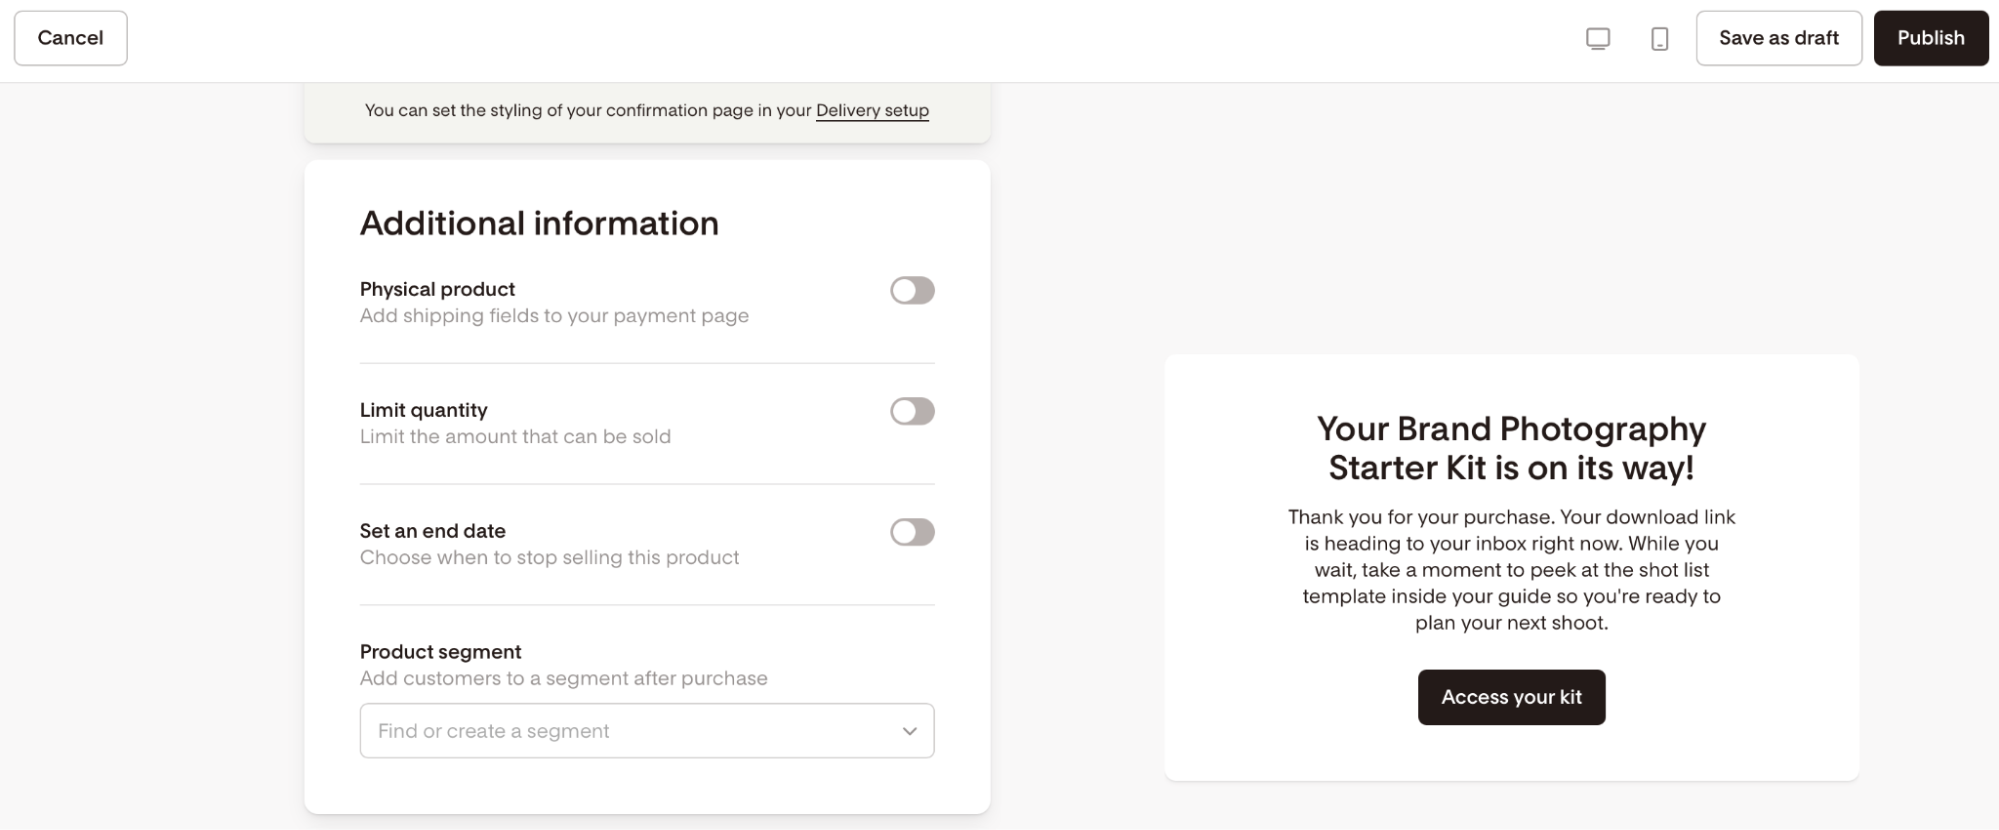
Physical product: marks this product as a physical item and adds shipping fields to your payment page. Digital delivery options are disabled when this is on.
Limit quantity: set a maximum number of units available. When inventory reaches zero, the product is automatically marked as sold out. When you turn on Limit quantity, you can also enable Allow waitlist, so buyers see a waitlist form instead of the checkout once the product sells out. Choose a Flodesk segment to add waitlisted buyers to.
Set an end date: choose a date when the product will automatically expire. After that date, the product is no longer purchasable. When you turn on Set an end date, you can also enable Allow waitlist, so buyers see a waitlist form instead of the checkout after the end date passes. Choose a Flodesk segment to add waitlisted buyers to.
Product segment: select a Flodesk segment. Buyers who purchase this product are automatically added to that segment. (This is not the same as the segment for your Allow waitlist.)
Note: if you delete a segment after linking it to a product, the product will keep selling, but buyers won't be added to any segment. You'll see a warning in the product editor if this happens.
Selling tools
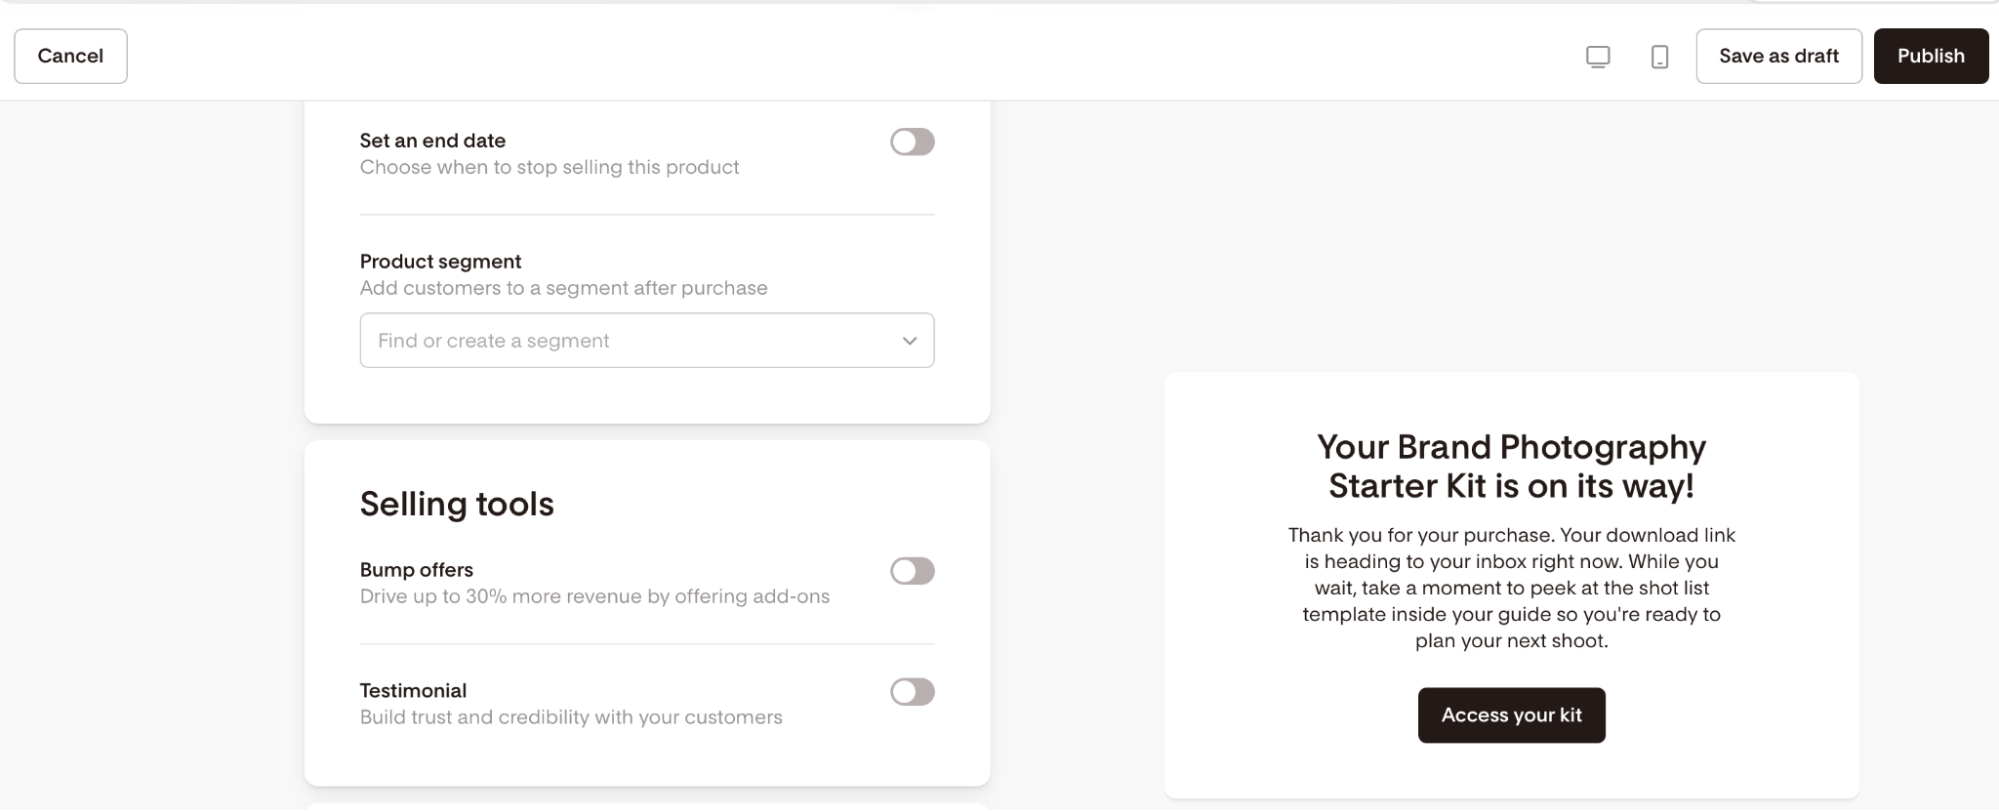
Bump offers
A bump offer (upsell) is an additional product offered to buyers after they complete their primary purchase. It's a full product from your catalog, with its own pricing, presented at a specific point in the checkout flow.
To add a bump offer:
In the Selling tools section, toggle on Bump offers.
Search for and select a published product from your catalog.
Add an Offer title to display to buyers during the upsell step.
A few things to know about bump offers:
You can add more than one bump offer per product.
Only published products are eligible. Draft products won't appear in the selector.
Subscription products can't be added as upsells.
A product can't be set as its own bump offer.
If your primary product is on a payment plan, your upsell will be charged as a one-time payment at the time of the first installment.
Testimonial
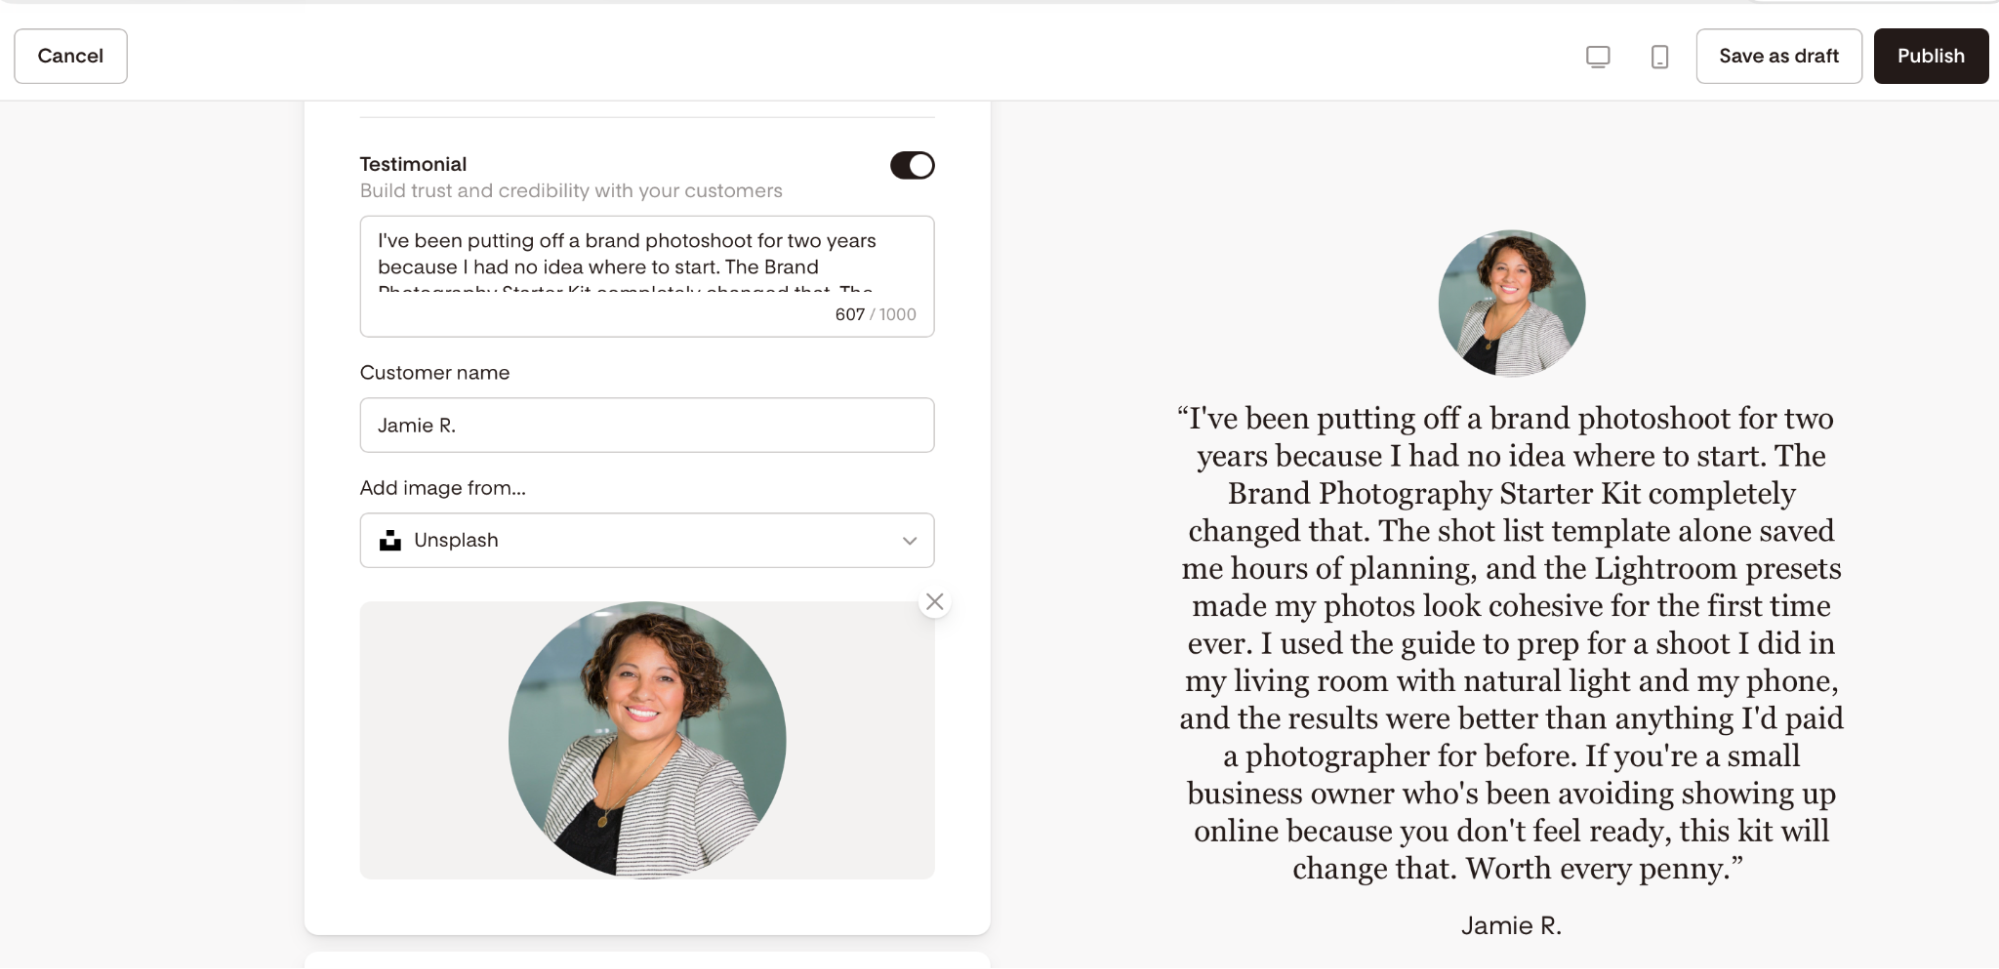
To build trust and credibility with your customers, toggle on Testimonial and fill in:
Testimonial text: an optional quote to display on the delivery page.
Customer name: the name of the person quoted.
Testimonial author image: a circular avatar image. Same file requirements as the product image (10MB max, JPG, PNG, GIF, or WEBP). You can add it from your computer, Unsplash, Giphy, or your connected Canva account.
The testimonial will appear on the checkout page.
Advanced settings
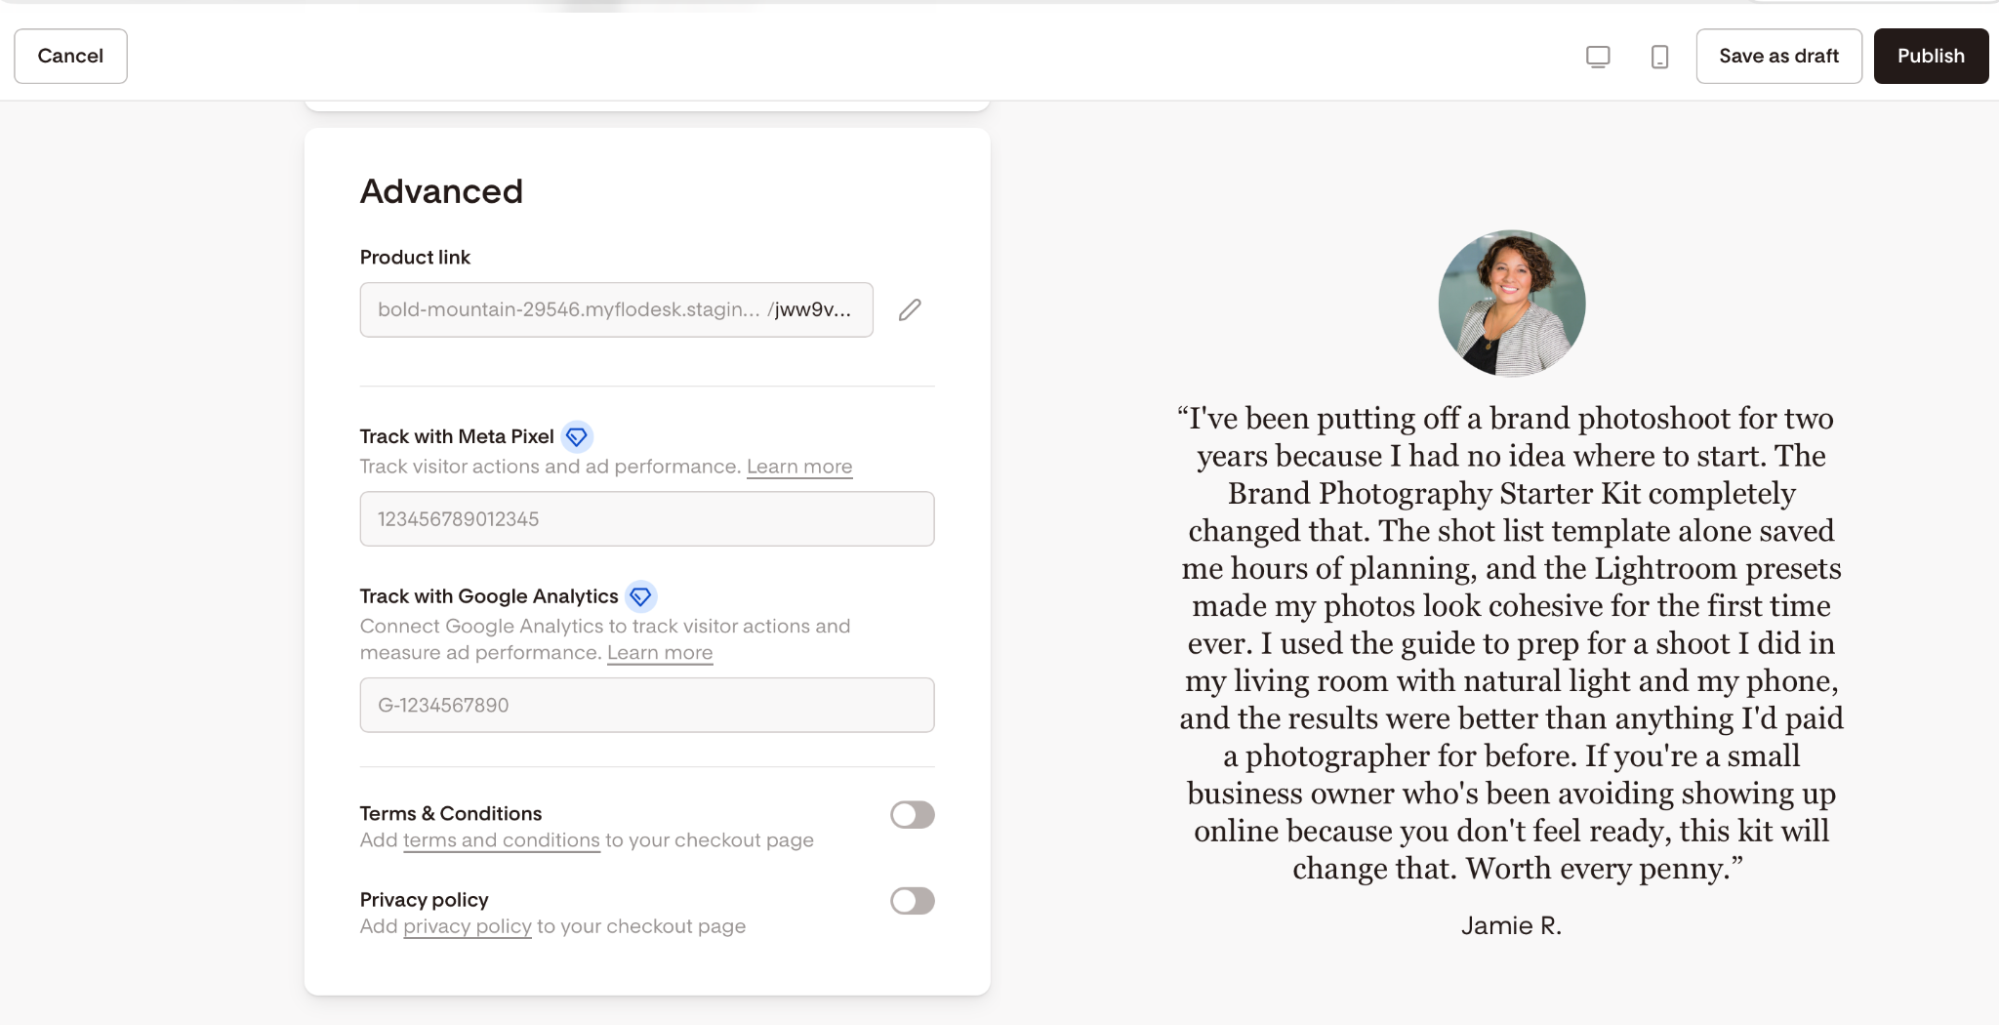
Under Advanced settings, you can:
Edit your product link by clicking the pencil icon and editing the last part of the slug.
Add your Meta Pixel ID or Google Analytics tracking code.
Add Terms & Conditions and a privacy policy to your checkout page.
How to save and publish your product
Save as draft
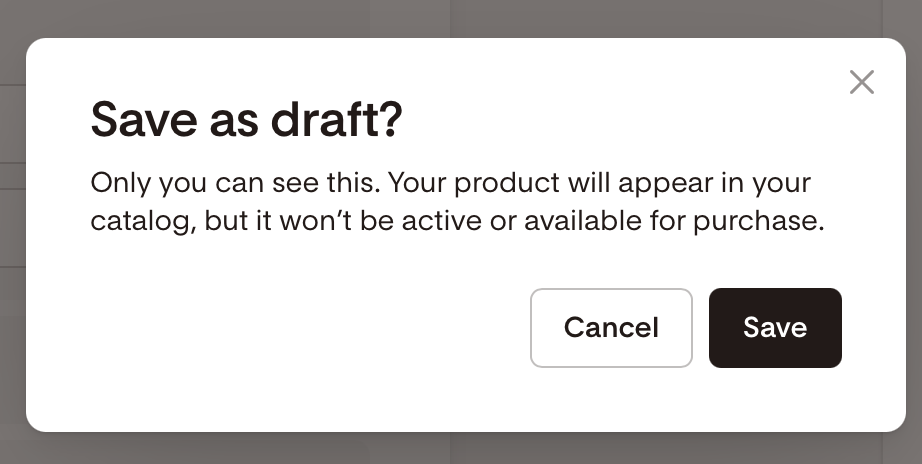
Saving as a draft stores your product in your catalog without making it live. Buyers can't purchase a draft product, and it won't appear on published sales pages. No validation is required to save a draft, so you can save at any point and come back to finish setting it up later.
Publish
Publishing makes your product live and purchasable. Before publishing, Flodesk checks that:
Your product has a name.
A price is set (it can be $0.00 for one-time products only).
All required fields for your chosen payment type are complete.
If you've enabled Limit quantity, the quantity is a valid number greater than zero.
If you've enabled Set an end date, the date is in the future.
Your plan allows publishing. See What's included in Products on each plan for a full breakdown.
Any validation issues appear inline next to the relevant field.
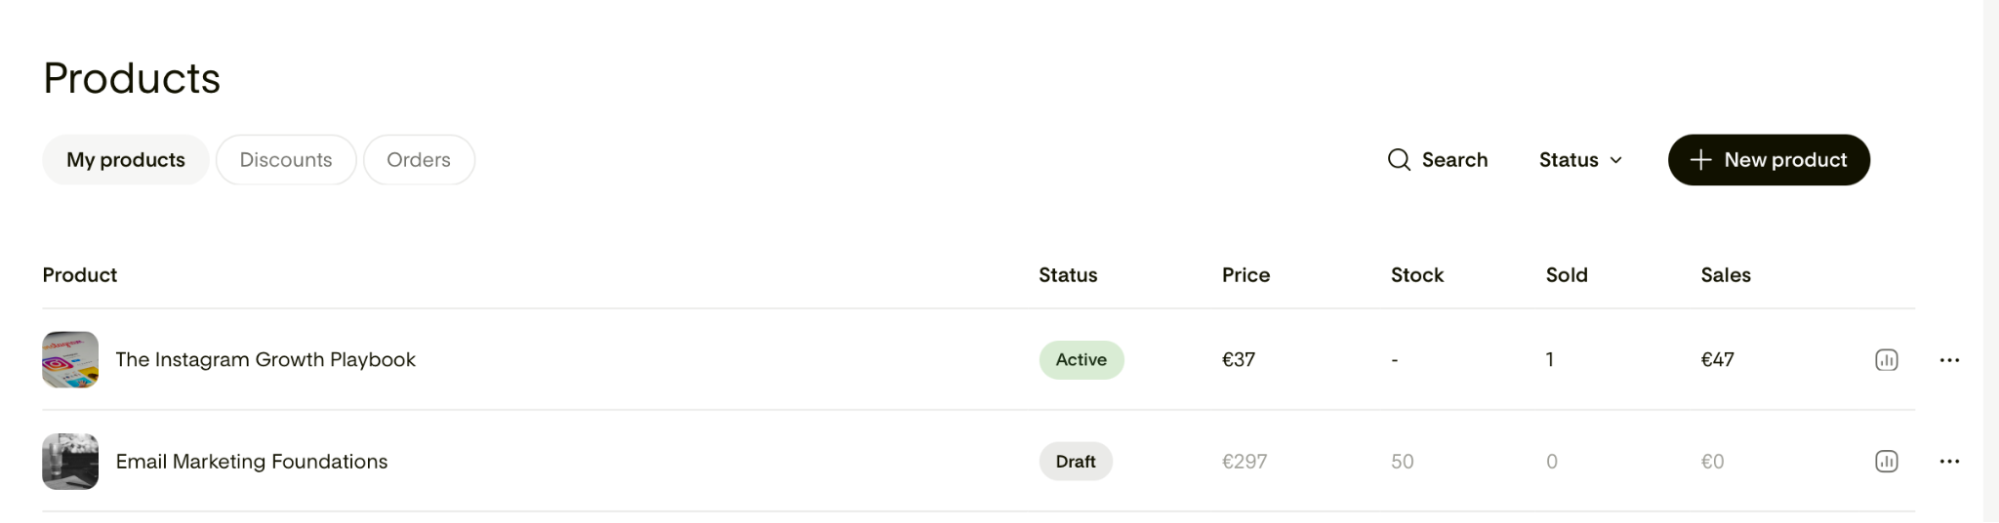
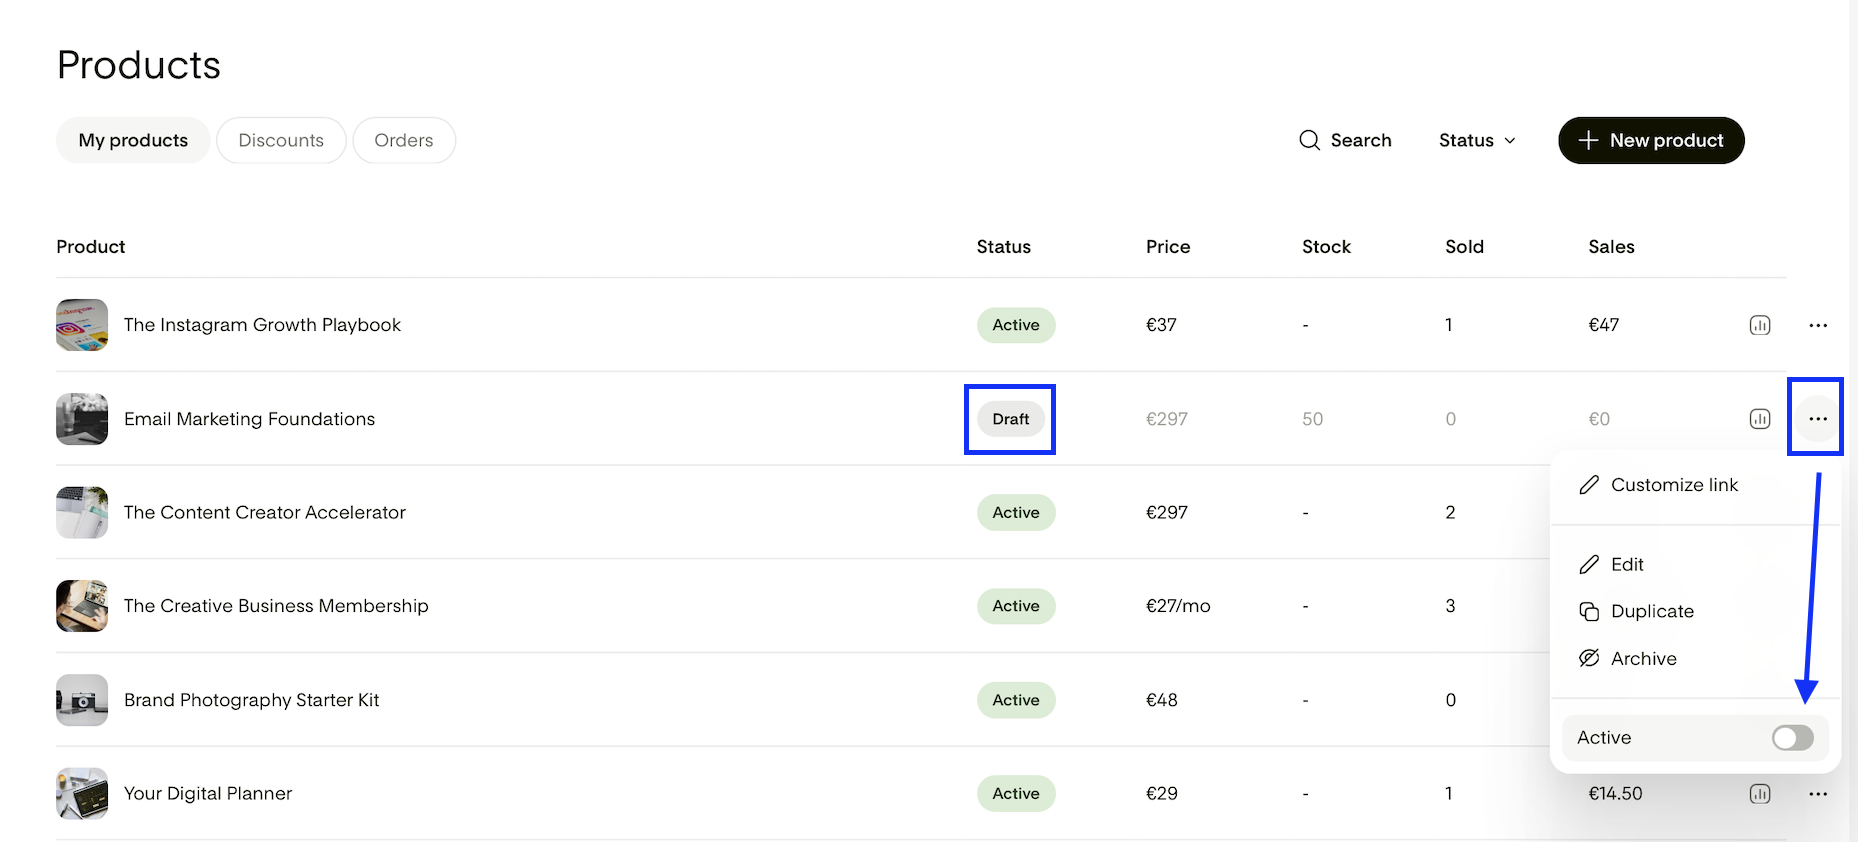
You can publish from the product creation flow by clicking Publish in the top right corner of the screen. Alternatively, click the three dots (...) menu next to your product and toggle on Active, then confirm you want to publish.
FAQ
Can I publish a product without an image?
No. You need to upload a product image to publish. You can save it as a draft without one.
Can I use a draft product as a bump offer?
No. Only published products can be selected as upsells.
Can I have more than one bump offer?
Yes, you can add more than one upsell per product.
Can I set up a free product?
Yes. Set your price to $0.00 with a one-time payment type. No payment information is collected from buyers, and a confirmation email is still sent. Discount codes, bump offers, and delivery all work the same as paid products.
Can I sell a product that comes in different variants, like sizes or colors?
Flodesk doesn't support variants, where a buyer picks a version of the same product (like a t-shirt in S, M, or L) from a single checkout page.
The workaround is to create a separate product for each variant, then add them all to the same sales page. Buyers can browse the options and choose the one they want. To learn how, see Adding products to your sales page.
What happens if I delete a segment linked to my product?
Your product keeps selling without interruption. Buyers simply won't be added to a segment on purchase. You'll see a warning in the product editor letting you know the linked segment no longer exists.
What happens if a buyer is in the middle of checkout when my inventory runs out?
No need to worry about a buyer getting charged for something that's no longer available. If your last unit sells while someone else is checking out, their checkout will stop before any payment goes through, and they'll see this message: "Sorry, this product just sold out. Please refresh this page for further options.”