
How to add a Meta Pixel ID to your forms and checkouts in Flodesk
Overview
The Meta Pixel (formerly Facebook Pixel) is a small piece of code that helps you track activity on your forms and checkouts. It connects Flodesk with your Facebook Business dashboard so you can measure, optimize, and build audiences for your ads.
With Meta Pixel, you can:
See who viewed your form or checkout.
Track when someone subscribes through a form.
Track when someone completes a purchase through a checkout.
Use this data to run targeted Facebook and Instagram ads.
Important: Meta Pixel and the cookie banner feature are only available on paid Flodesk plans.
How Meta Pixel works
Flodesk injects the Meta Pixel script tied to the ID you provide.
It tracks:
PageView events: when someone loads your form
Lead events: when someone submits your form
ViewSalesPage: when someone lands on the sales page
ViewCheckout: when someone lands on the checkout page
Join waitlist events: when someone joins a waitlist from your checkout
Purchase event: when someone makes a checkout purchase
This means you’ll know exactly which ads are driving signups or sales.
How to add a Meta Pixel ID to a form
You can add a Meta Pixel ID to Full page forms and Link in bio forms.
From the form builder
Open the form you want to edit
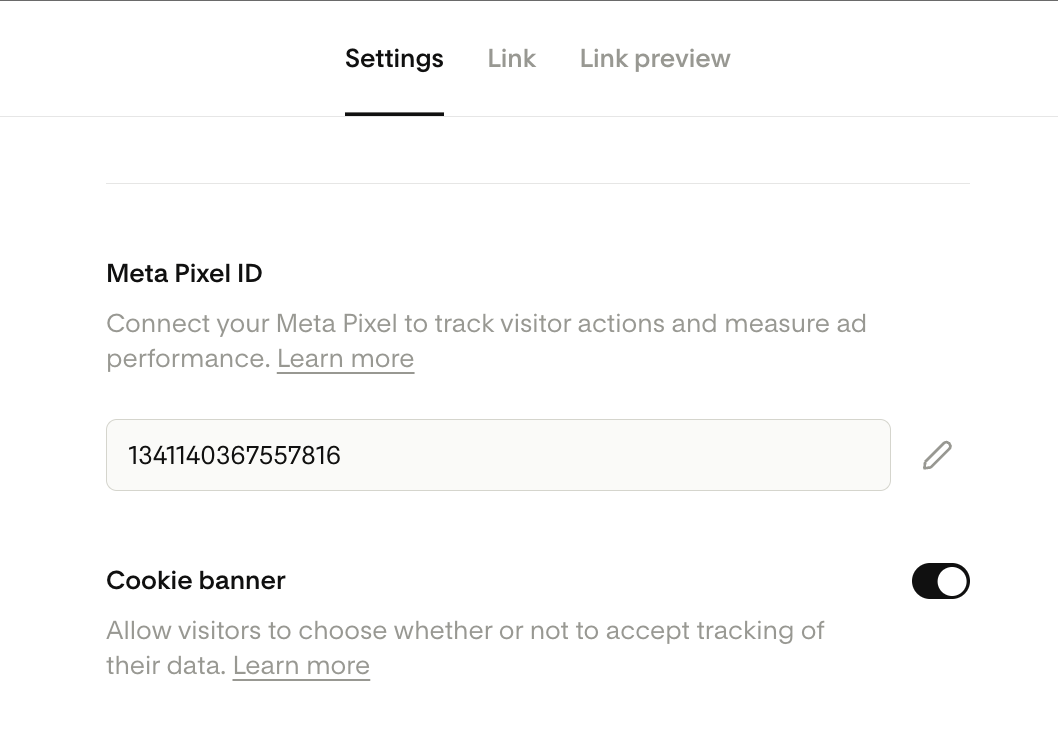
Go to Settings
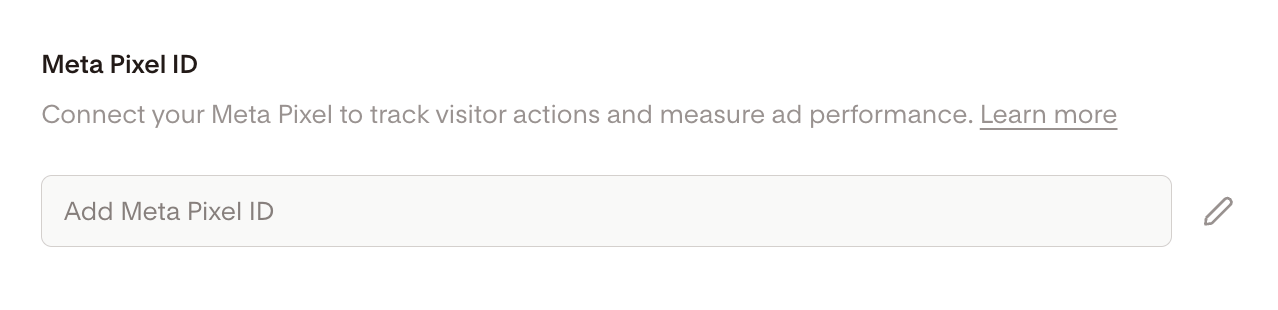
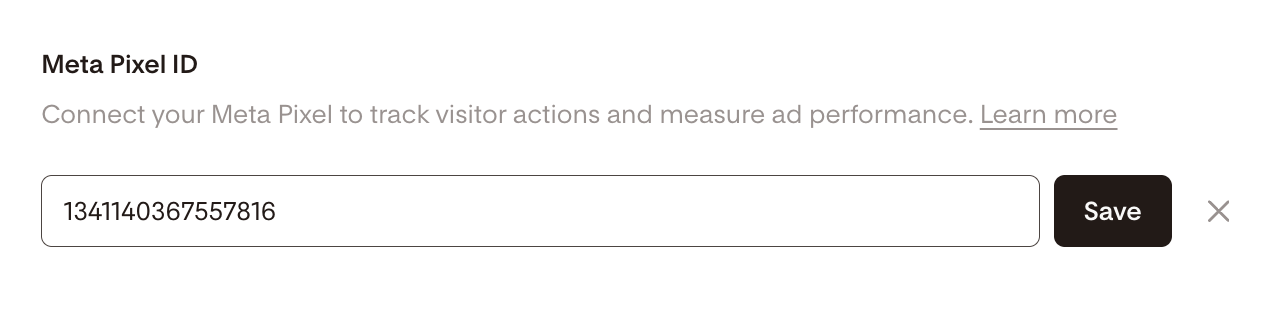
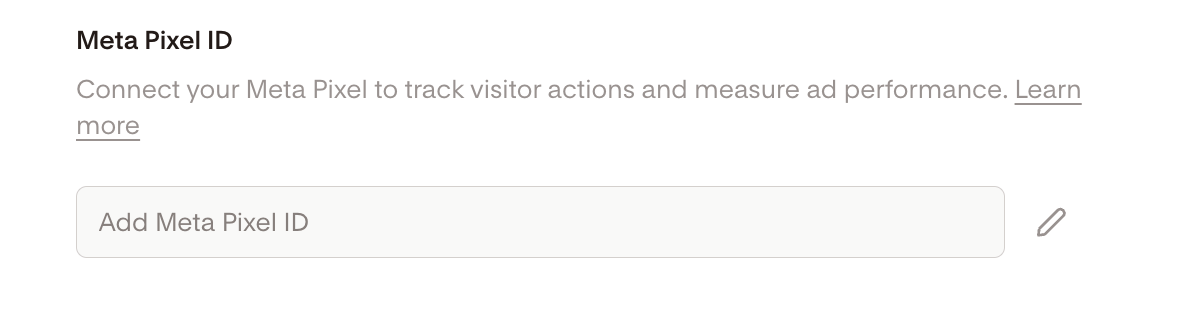
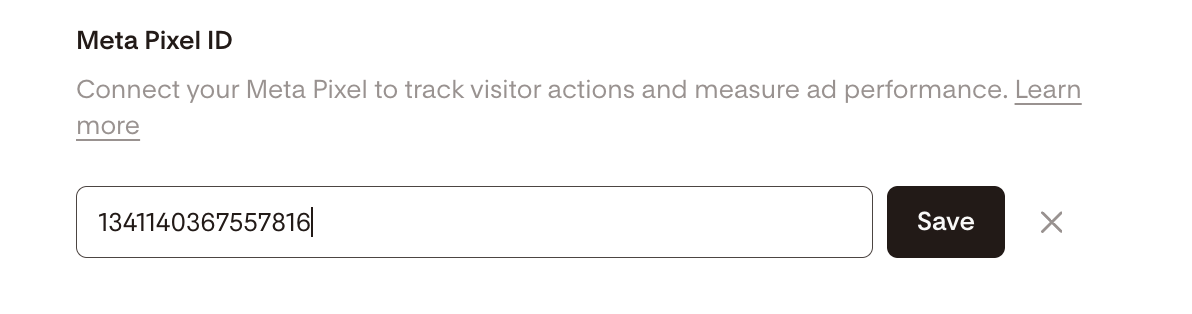
Find the Meta Pixel ID field, click the pencil icon to edit it and enter your Meta Pixel ID. Save your changes.
(Optional) Toggle on the Cookie banner. When the cookie banner is toggled ON, you give visitors the chance to opt out of being tracked by the Meta Pixel. You may see less data appear in your Meta dashboard as a result.

Publish your changes
From the Forms dashboard
Go to your Forms dashboard
Hover over the form’s card, click the three dots (...) menu and select “Settings”
In Settings, find the Meta Pixel ID field, click the pencil icon to edit it and enter your Meta Pixel ID.
(Optional) Toggle on the Cookie banner
Save and publish
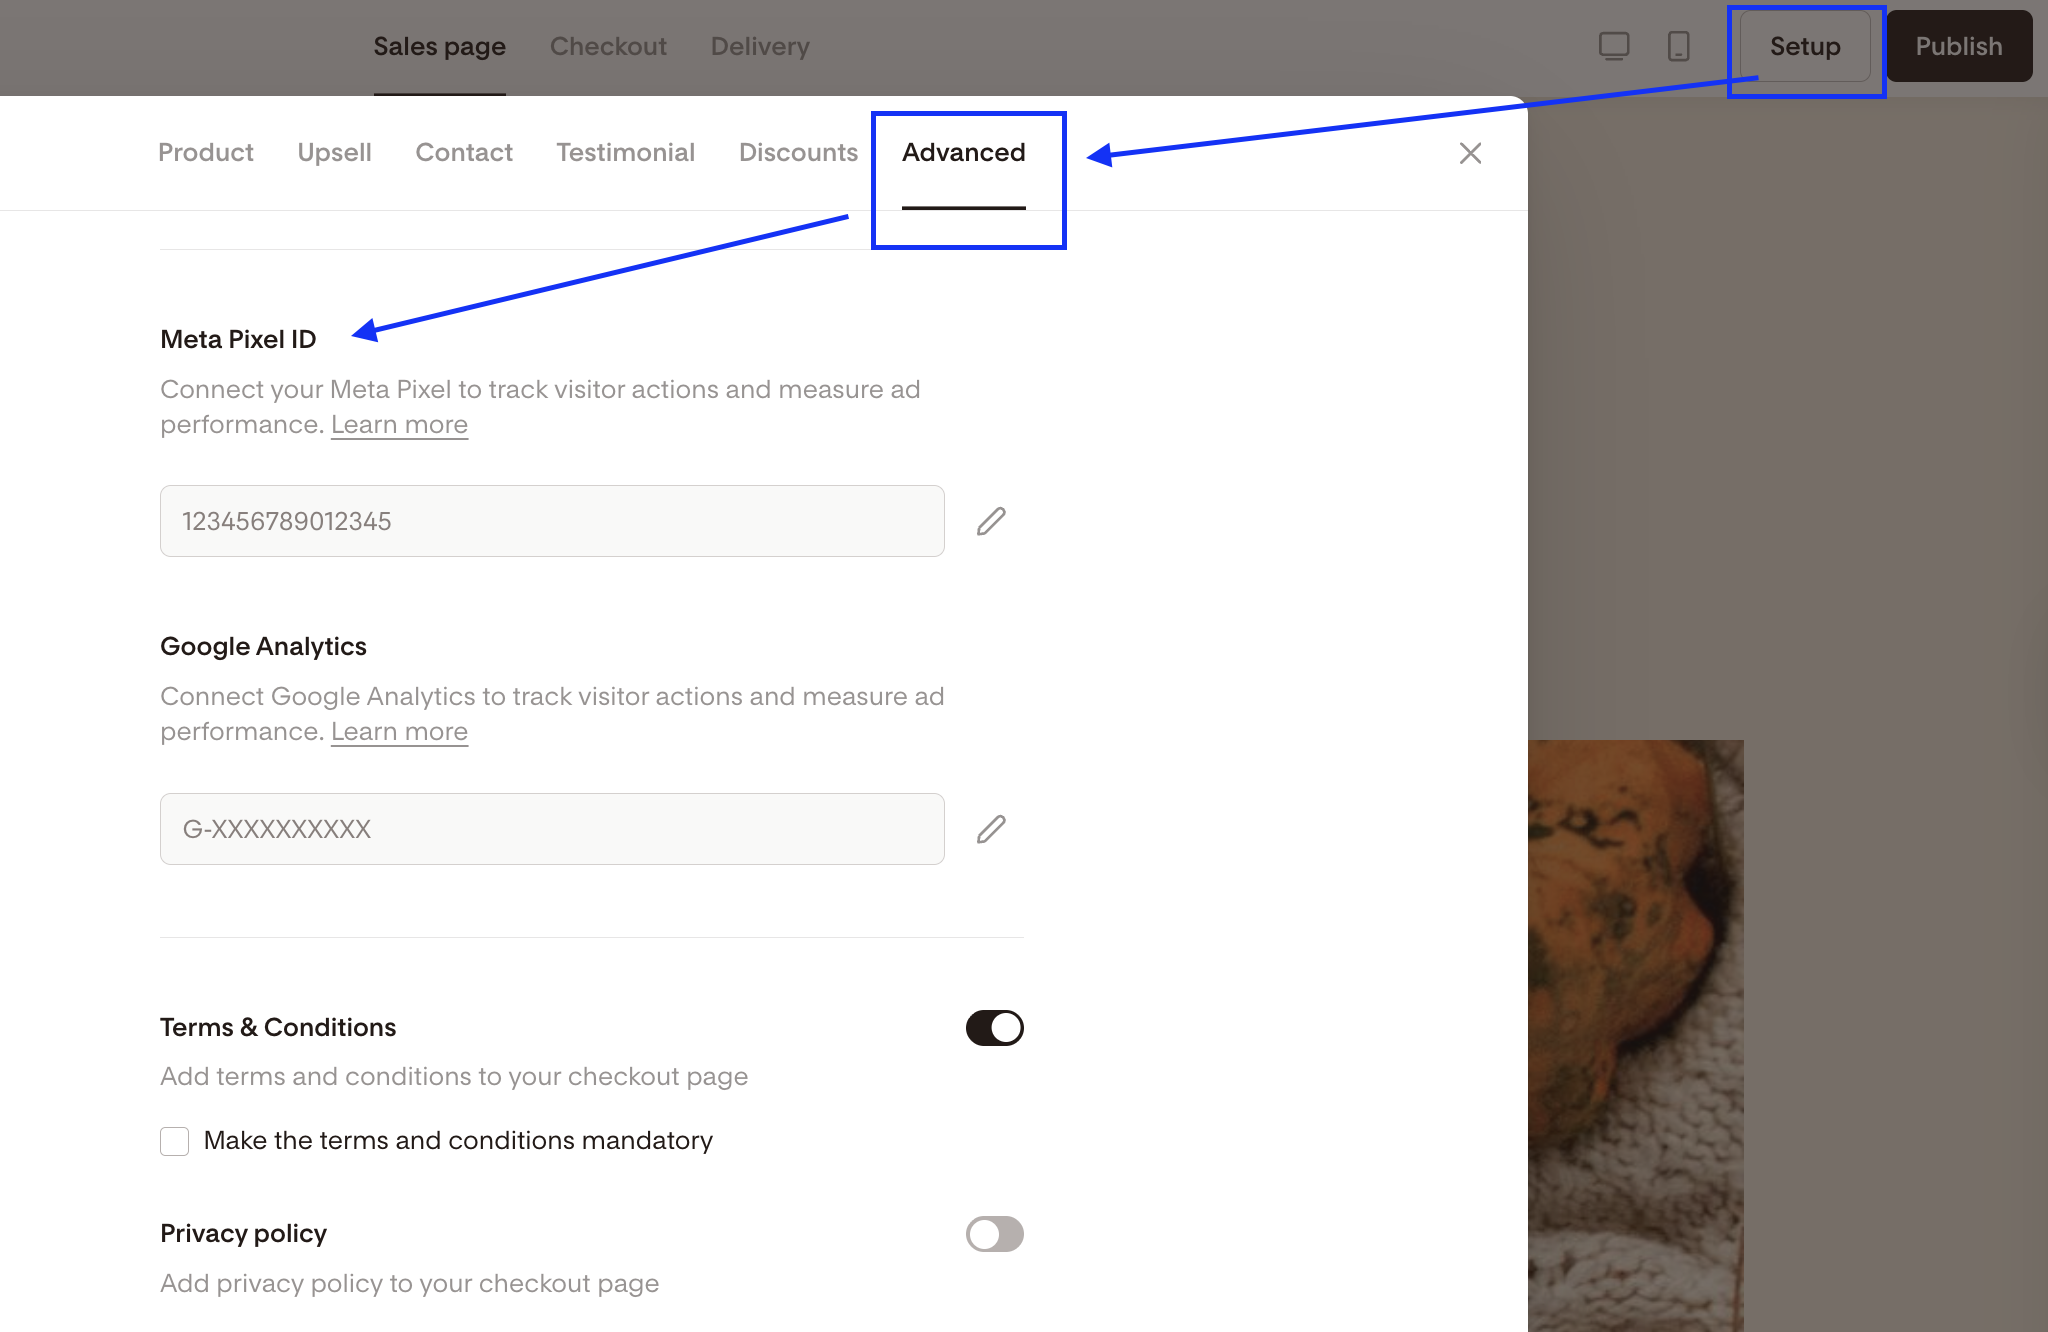
How to add a Meta Pixel ID to a checkout
Open the checkout page you want to edit
Go to Setup > Advanced
Find the Meta Pixel ID field, click the pencil icon to edit it and enter your Meta Pixel ID. Save your changes.
(Optional) Toggle on the Cookie banner. When the cookie banner is toggled ON, you give visitors the chance to opt out of being tracked by the Meta Pixel. You may see less data appear in your Meta dashboard as a result.

Publish your checkout.
Cookie banner (data privacy)
If you’re using the Meta Pixel, you may need to display a cookie banner to comply with data privacy regulations. Please confirm this with your attorney.
How it works
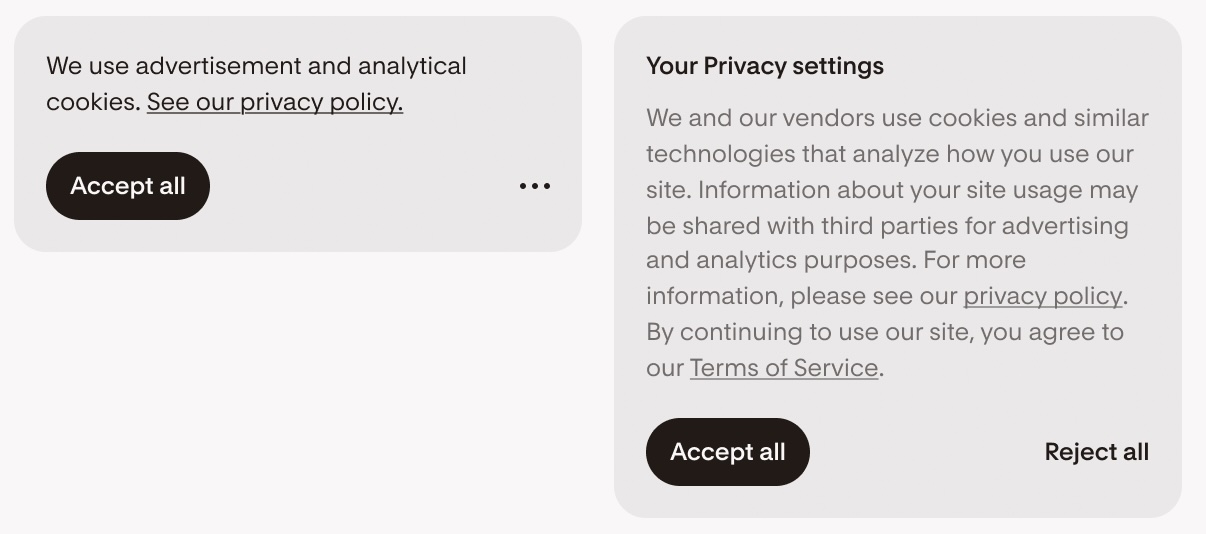
If the cookie banner is turned on, the Meta Pixel does not fire until a visitor makes a choice:
If a visitor accepts, tracking begins
If a visitor rejects, no data is tracked. You may see less data appear in your Meta dashboard as a result.
Visitors can also view your Privacy Policy and Terms of Service directly from the banner
How to turn on the cookie banner
Add a Meta Pixel ID to your form (Full page or Link in Bio) or checkout
In the same settings panel, toggle the Cookie banner ON
The banner design and text are automatically applied and cannot be edited.
The link to the “Privacy policy” on the cookie banner will link to the privacy policy associated with your Flodesk account
The link to the “Terms of Service” on the cookie banner will link to the Terms and Conditions associated with your Flodesk account.
Things to know
Meta Pixel IDs and cookie banner settings carry over when you duplicate a form or checkout
Meta Pixel IDs and cookie banner settings do not carry over when you use a shared template
Available only on paid plans
Meta Pixel ID and Cookie banner – FAQ
What is the Meta Pixel?
A small code that tracks views, signups, and purchases on your Flodesk forms and checkouts, sending data to your Facebook Business dashboard.
Which Flodesk forms support Meta Pixel ID?
Full page and Link in bio forms. Inline and popup forms are not supported.
Do I need a paid plan?
Yes. Meta Pixel and cookie banners are only available on paid plans.
What events are tracked?
PageView (default)
Lead (form submission)
ViewSalesPage (lands on the sales page)
ViewCheckout (lands on the checkout page)
Purchase (checkout purchase)
JoinWaitlist (checkout waitlist)
Note: Events can take 15-20 mins to appear in your Meta dashboard after they fire. This delay is normal and does not indicate a problem. If certain events aren’t showing up after you set up and test your dataset, they may just need approval. Meta requires you to review and approve some custom events before they can be used in ads. Visit the overview page on your meta pixel dataset.
What if I enter an invalid Pixel ID?
An error message will appear if the ID is incorrectly formatted. The page won’t save until the issue is fixed.
Does the pixel fire immediately?
If the cookie banner is enabled, tracking only starts once a visitor accepts.
What is the cookie banner?
A banner that asks visitors to accept or reject tracking before the Meta Pixel fires. You may need to display a cookie banner to comply with data privacy regulations. Please confirm this with your attorney.
When does the cookie banner appear?
The banner appears only when a Meta Pixel ID is added and the Cookie Banner toggle is turned ON. It is OFF by default.
How long is consent stored?
Consent is stored in a browser cookie for up to 12 months. It does not persist across browsers or incognito sessions.
Can I edit the cookie banner text?
No. The text and design are standardized for compliance.
What if a visitor has Global Privacy Control enabled?
If GPC is detected, tracking is automatically rejected, and the Meta Pixel never fires, regardless of banner interaction.
What happens when I duplicate or share a form or checkout?
Duplicate: The Meta Pixel ID is copied to the new version.
Shared template import: The Meta Pixel ID is not copied to maintain data privacy and prevent unwanted cross-account tracking.
What happens if a paid member downgrades to the free plan?
When a member transitions from a paid plan to a free tier, all existing Meta Pixel IDs are automatically removed from their forms and checkouts.
If I’m using Team seats to add team members to my account, what can they access?
Under Forms:
Admin | Manager | Editor | |
Add Meta Pixel ID | ✅ | ✅ | ❌ |
Toggle on/off cookie banner | ✅ | ✅ | ❌ |
Edit Privacy policy | ✅ | ❌ | ❌ |
Toggle on/off Privacy policy | ✅ | ✅ | ❌ |
Make Privacy policy required | ✅ | ✅ | ❌ |
Under Checkouts:
Admin | Manager | Editor | |
Add Meta Pixel ID | ✅ | ✅ | ❌ |
Toggle on/off cookie banner | ✅ | ✅ | ❌ |
Edit Privacy policy | ✅ | ❌ | ❌ |
Toggle on/off Privacy policy | ✅ | ✅ | ❌ |
Make Privacy policy required | ✅ | ✅ | ❌ |