
How to add a personalized countdown timer to your Flodesk email
Create urgency with a countdown timer that’s unique for every subscriber.
Overview
A personalized countdown timer helps you create urgency by giving each subscriber their own deadline. Instead of counting down to a fixed date, the timer starts the moment someone opens your email for the first time.
Looking for a countdown that ends at the same exact time for everyone?
Check out How to add a fixed countdown timer to your Flodesk email instead.
What is a personalized countdown timer?
A personalized countdown timer lets you choose how many days, hours, minutes, and seconds the timer should run per subscriber.
Here’s how it works:
The countdown starts the first time a subscriber opens the email
Each subscriber gets their own unique deadline
If they reopen the email later (or on another device), the timer continues where it left off
Important limits to know upfront
Each time unit (days, hours, minutes, seconds) can show up to two digits
This means the maximum countdown you can set is 99 days
How to add a personalized countdown timer to your email
Step 1: Open your email
In your Flodesk account, create a new email or open an existing email you want to edit.
Step 2: Add the countdown block
In the email builder:
Hover over an existing block until you see the plus sign (+)
Click it and select Countdown
(It’s the fourth block in the third row)
Step 3: Choose a layout
In the right sidebar under the Layout tab, select a countdown timer design and adjust it to match your brand’s look and feel.
How to customize your personalized countdown timer
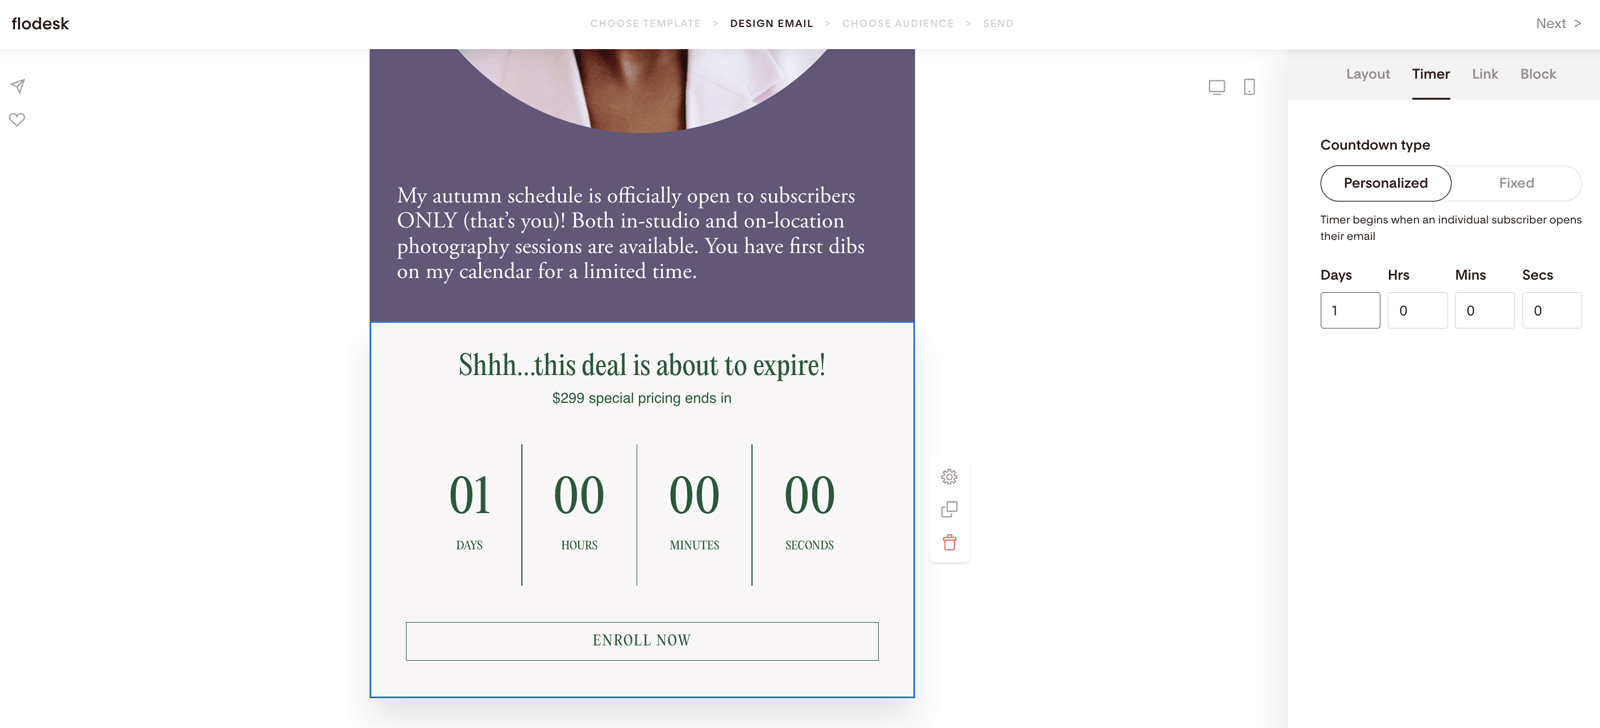
Step 1: Select the timer type
Click on the countdown timer block, then open the Timer tab.
You’ll see two options:
Fixed – Counts down to a specific date and time
Personalized – Starts counting down when the subscriber opens the email
Select Personalized.

Step 2: Set the countdown duration
Use the input fields to decide how much time subscribers get after opening the email.
Example
If you set the timer to 1 day:
A subscriber who opens at 9:00 AM gets until 9:00 AM the next day
A subscriber who opens at 12:00 PM gets until 12:00 PM the next day
Each subscriber sees a timer that’s perfectly synced to their open time.
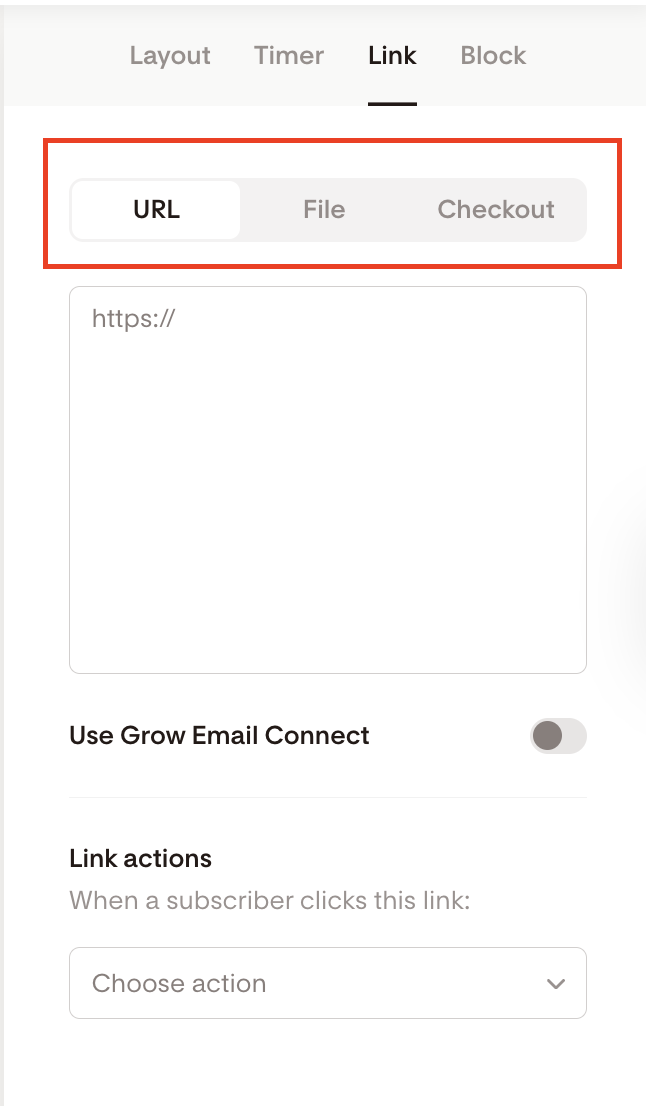
Step 3: Add your link
Under the Link tab, enter the URL where subscribers should go when they click—like:
Your website
A sales page
A Flodesk Checkout page
Optional: Use link actions for smarter targeting
You can assign actions to your link so that when someone clicks, they can automatically be:
Added to or removed from segments
Added to or removed from workflows
Tagged with a custom field
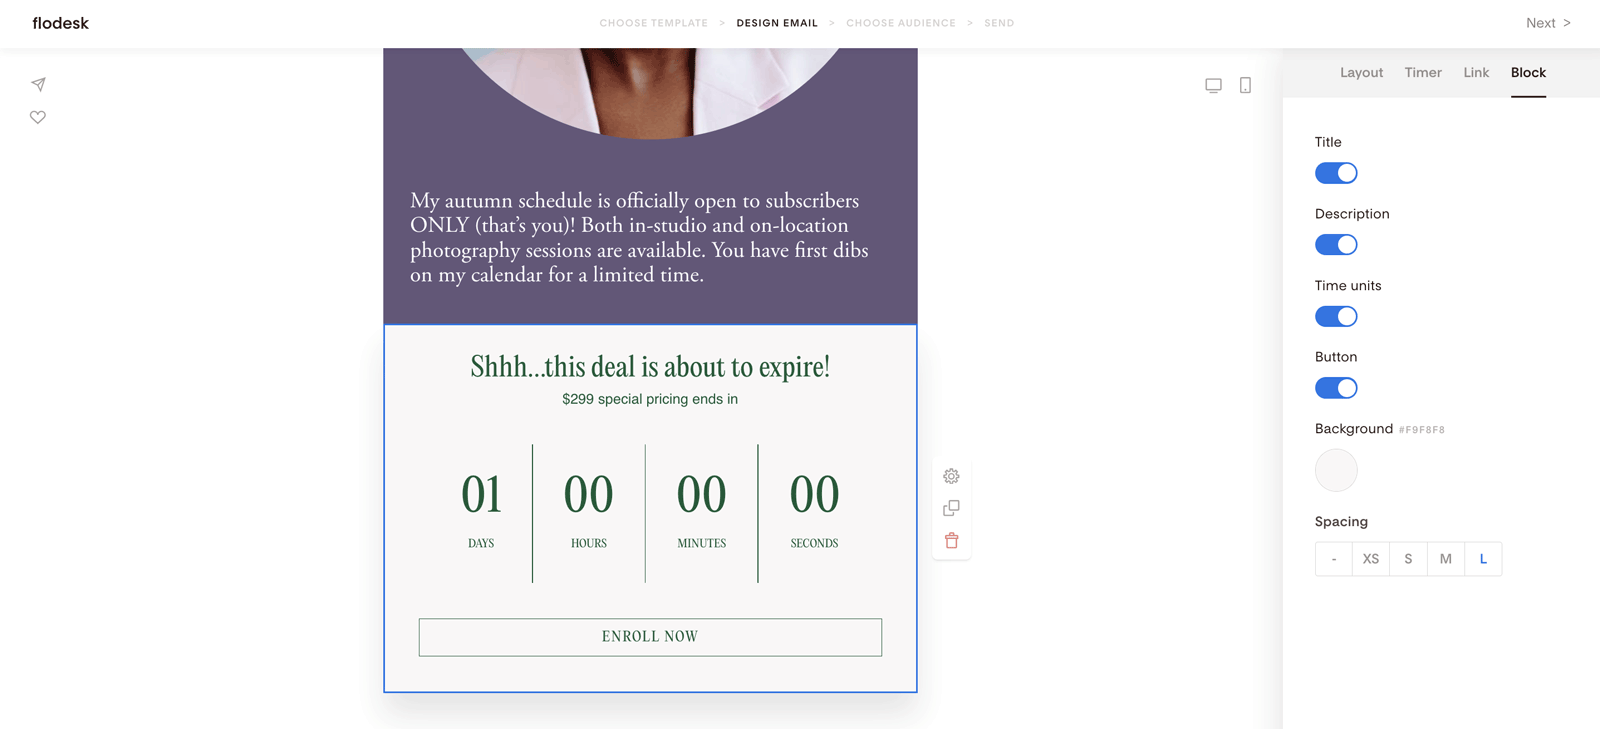
Step 4: Control what appears in the block
Under the Block tab, you can toggle these elements on or off:
Title
Description
Time units
Button
You can also adjust background color and spacing here.
Step 5: Style the text and timer
Click on any text element to edit:
Font
Size
Color
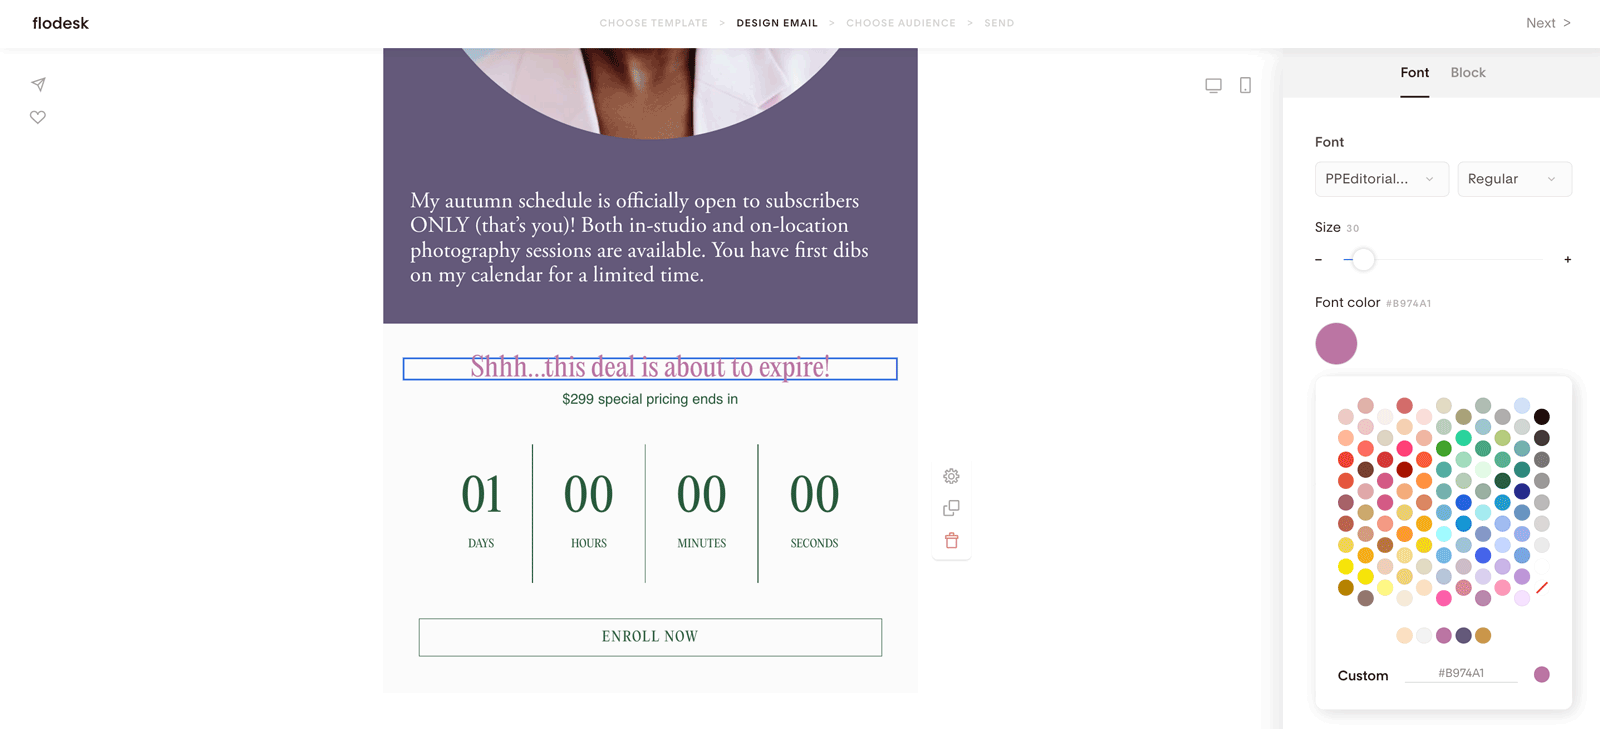
Pro tip:
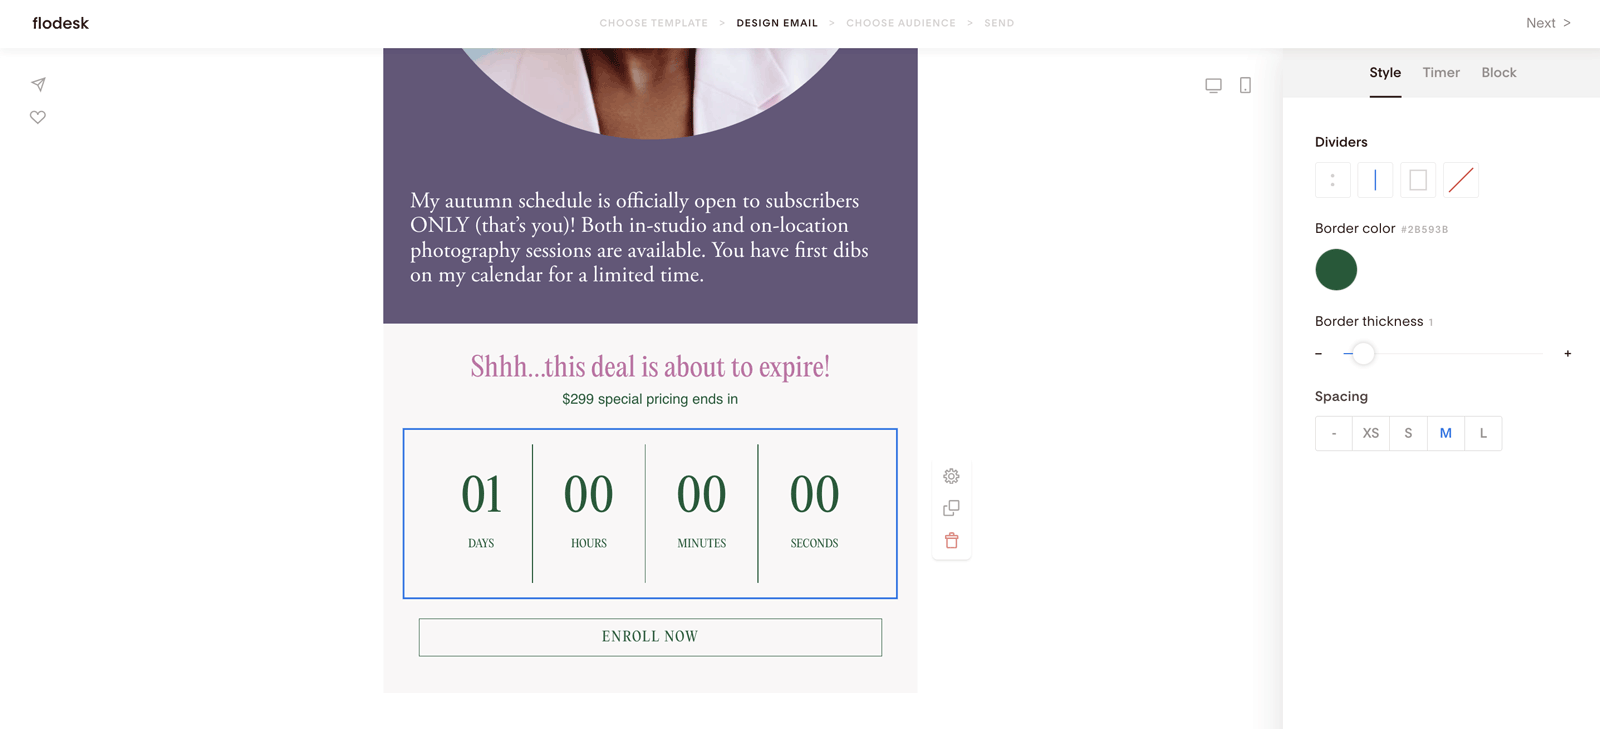
Click directly on the countdown boxes to unlock extra divider styling options.
Finish customizing your email, hit send, and let urgency do the heavy lifting.
Summary
To add a personalized countdown timer that’s unique for every subscriber:
Add a Countdown block to your email
Select Personalized under the Timer tab
Set how long the countdown should last after the first open
Add your link and customize the design to match your brand
FAQ
When does the personalized countdown timer start?
It starts the first time a subscriber opens the email.
Will the timer reset if someone opens the email again?
No. Once the timer starts, it continues counting down—even if the subscriber reopens the email later or uses a different device.
Can I set a personalized countdown longer than 99 days?
No. Because each time unit displays only two digits, the maximum countdown length is 99 days.
Can different subscribers see different end times?
Yes. Each subscriber’s end time depends on when they first opened the email.
What happens if someone never opens the email?
The countdown never starts for that subscriber.
Can I use a personalized countdown timer with Flodesk Checkout?
Yes! You can link the timer button directly to a Flodesk Checkout page or any other URL.