
How to connect Interact and Flodesk
Overview
Interact is a tool for creating online quizzes that collect leads and segment your audience based on their responses. With the direct Flodesk integration, quiz participants can be automatically added to specific Flodesk segments based on their quiz results, without needing Zapier or Pabbly Connect.
This article walks you through connecting your Interact quiz to Flodesk, mapping quiz results to segments, and configuring your opt-in settings.
What you'll need before you start
An active Interact account with at least one published quiz
An active Flodesk account
At least one segment created in Flodesk (one per quiz result, if you plan to segment by result)
Create your segments in Flodesk before starting the setup. They need to exist before they'll appear in the Interact dropdown menus.
How to connect Interact and Flodesk
Step 1: Create your segments in Flodesk
Go to Audience > Segments in Flodesk and create the segments you want to use for your quiz participants. If you're planning to add participants to different segments based on their quiz result, create a separate segment for each result now.
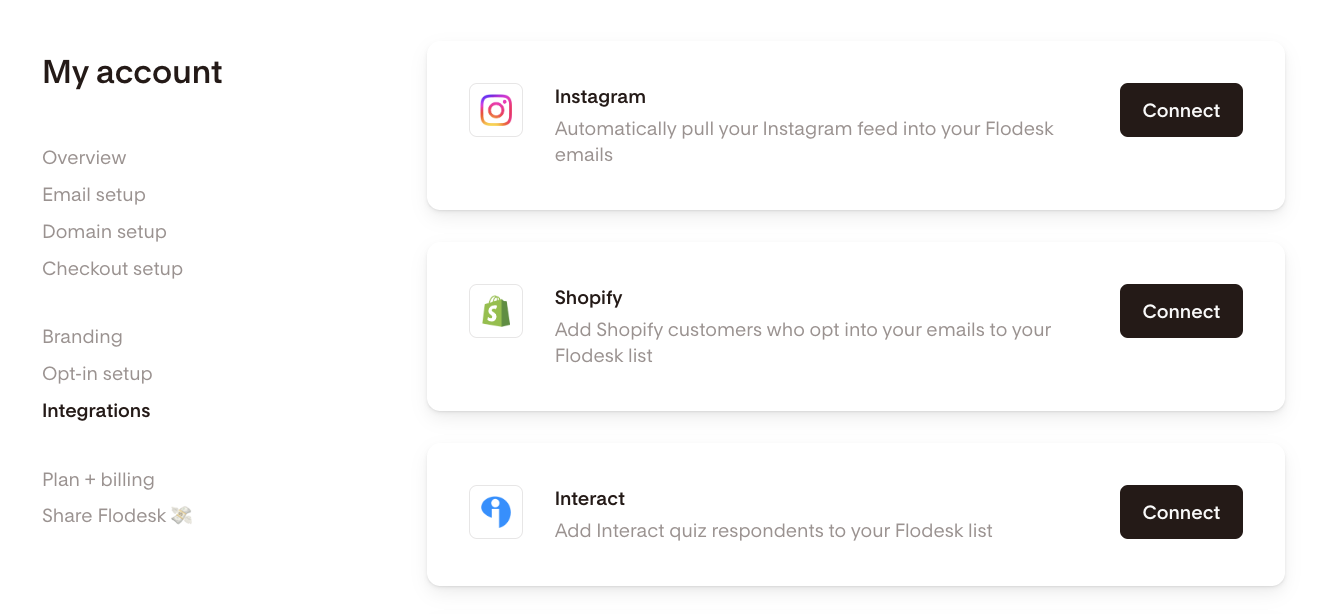
Step 2: Go to Integrations in Flodesk
In your Flodesk account, go to My Account > Integrations and click Connect on the Interact card.
Step 3: Log in to Interact
If you already have an Interact account, sign in. If not, you can start a free trial at this step.
Step 4: Create or open a quiz
In Interact, create a new quiz or open an existing one to edit.
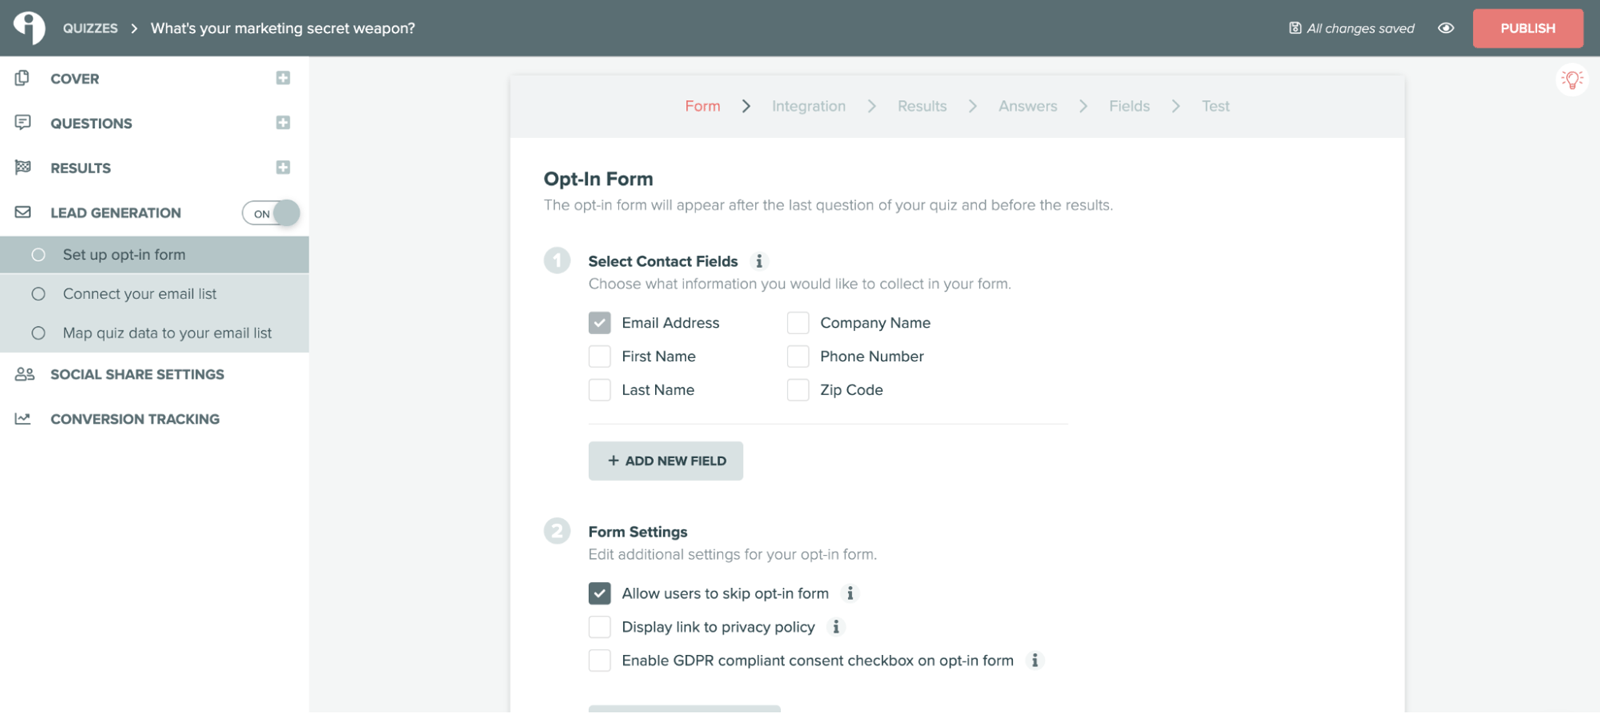
Step 5: Enable lead generation
In the Interact quiz builder, toggle on Lead Generation and set up your opt-in form. Click Save & Continue when done.
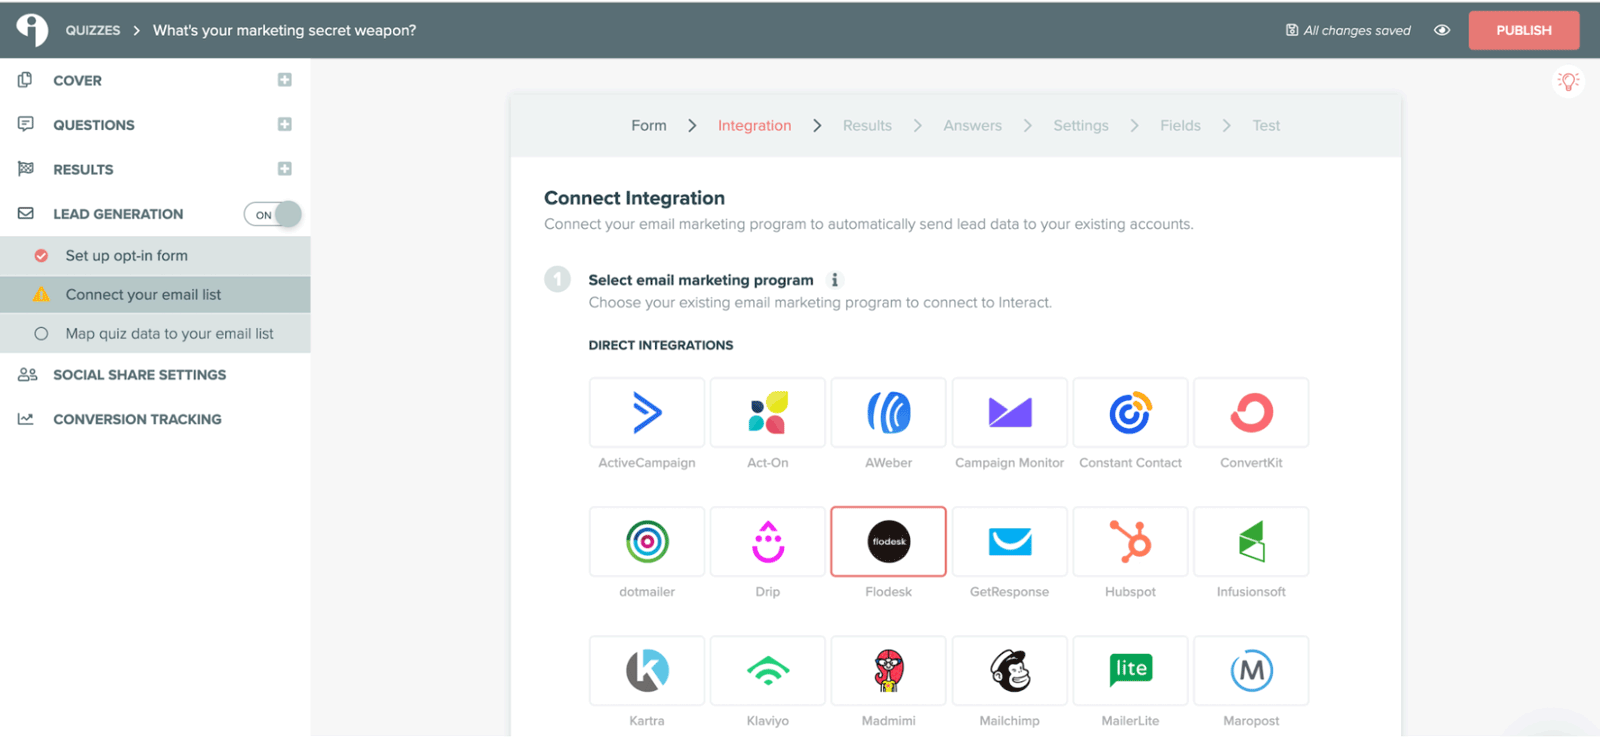
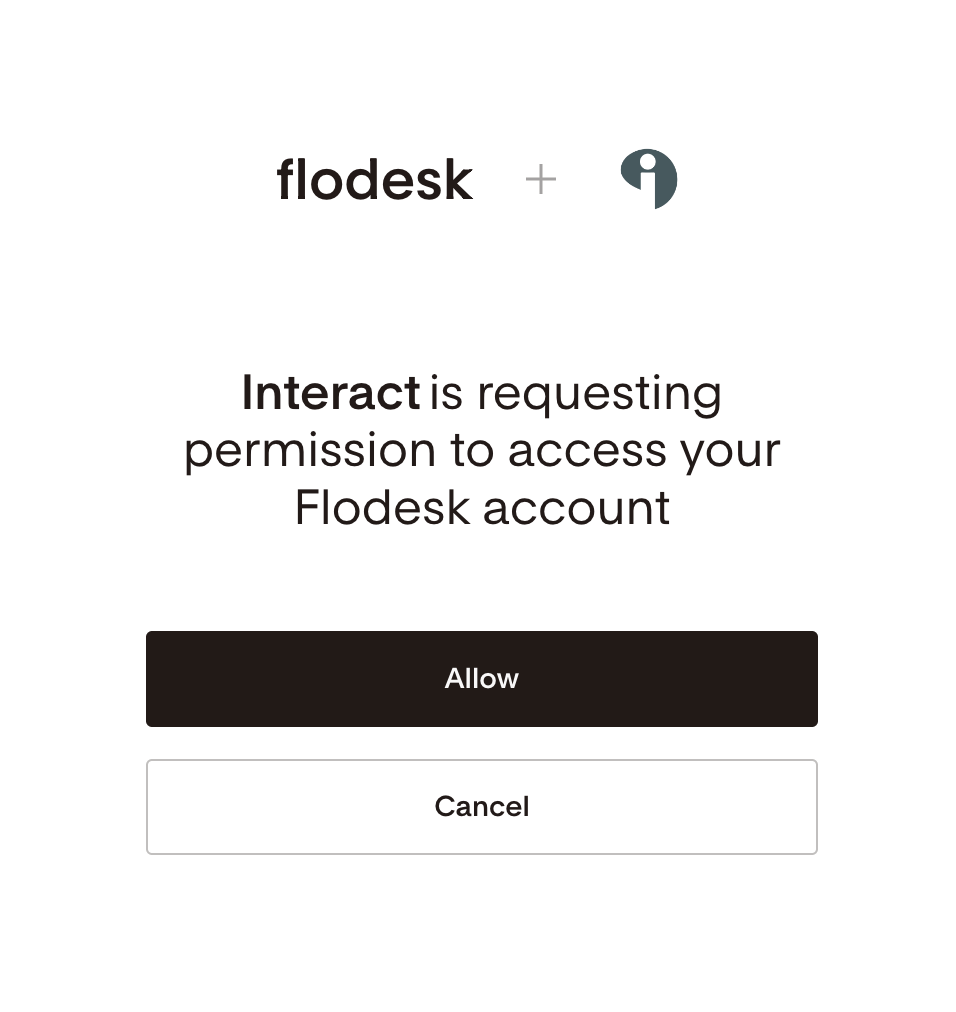
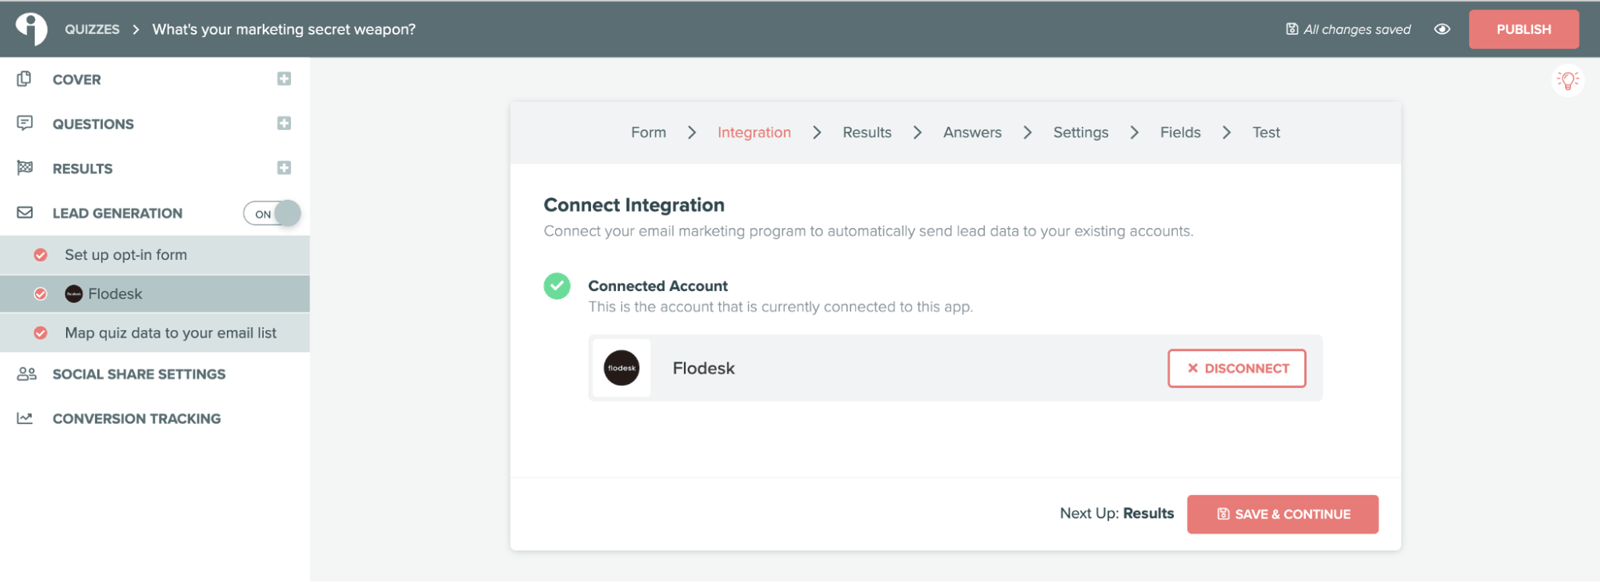
Step 6: Connect Flodesk
On the next page, select Flodesk from the list of available email marketing platforms. Enter your Flodesk credentials and click Allow to authorize Interact to access your Flodesk account.
How to map quiz results to Flodesk segments
Once Flodesk is connected, you'll map each quiz result to the Flodesk segment and custom fields you want to use.
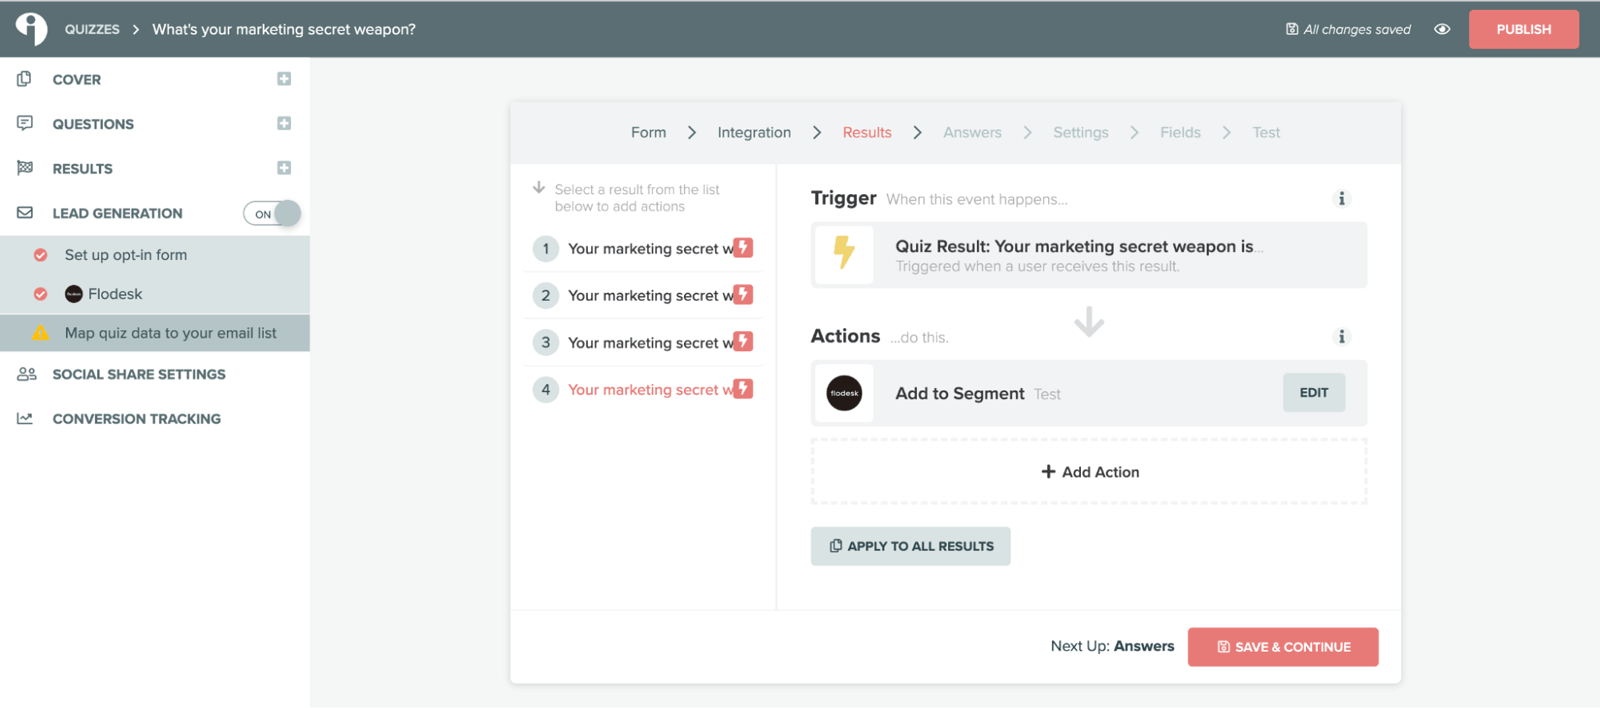
Step 7: Open the Results tab
Click the Results tab in the Interact builder, then click Add Action on the result you want to configure.
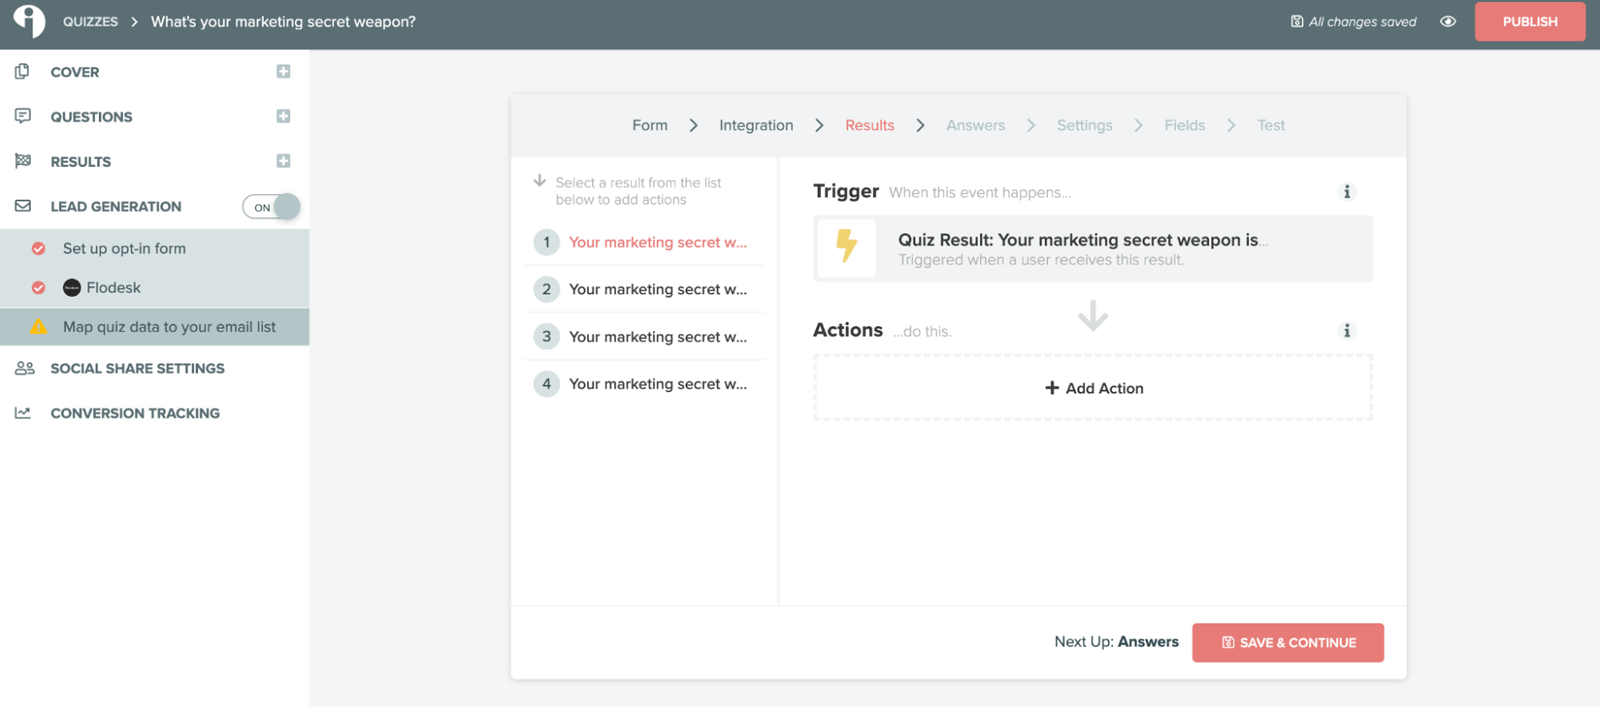
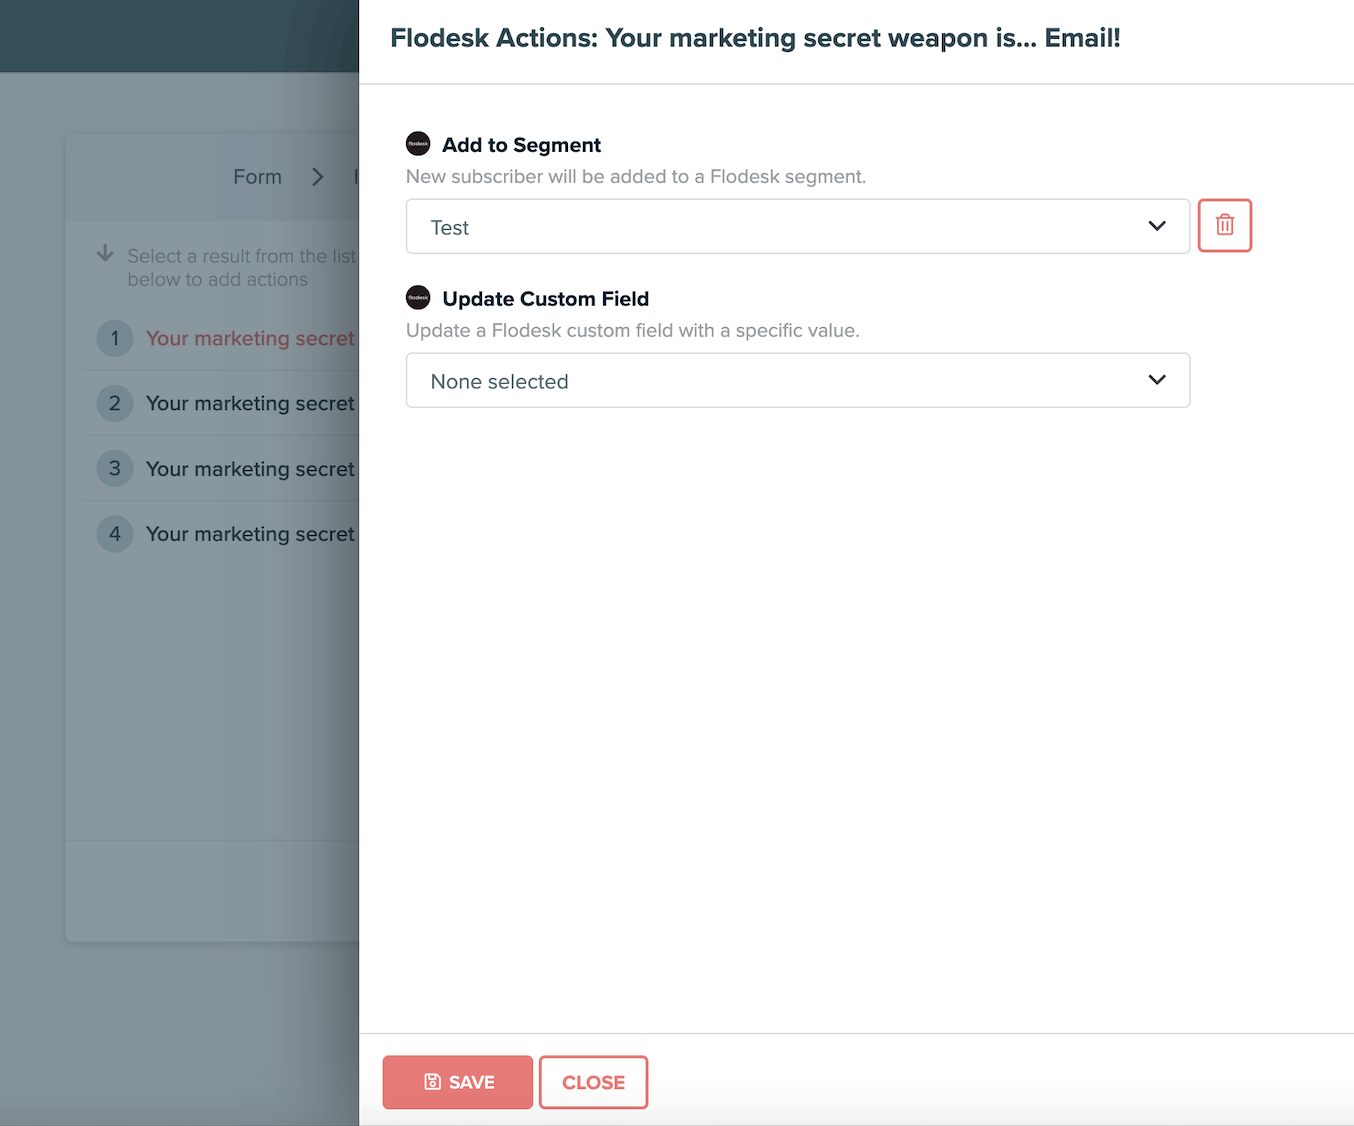
Step 8: Set up the segment and custom field actions
In the slide-out menu, configure the following:
Add to segment: choose the Flodesk segment you want participants who get this result to be added to. For example, if your quiz has three results, you can map each result to a different Flodesk segment so participants receive targeted follow-up emails based on their outcome.
Update custom field (optional): if you want to personalize your emails with the quiz result name, select a Flodesk custom field to populate with the result name. For example, create a custom field called "Quiz result" and set the value for each result individually.
Click Save when done.
Step 9: Repeat for each result
Repeat step 8 for each remaining quiz result. If you want the same actions to apply to all results, select Apply to all results. When all results are configured, click Save & Continue.
How to segment by quiz answers (optional)
Step 10: Configure answer-based segmentation
On the Answers tab, you can add actions based on specific answers participants select, not just their overall result. This lets you create more precise audience segments for hyper-personalized follow-ups.
If you don't need this level of segmentation, click Save & Continue to skip to the next step.

How to configure double opt-in and field mapping
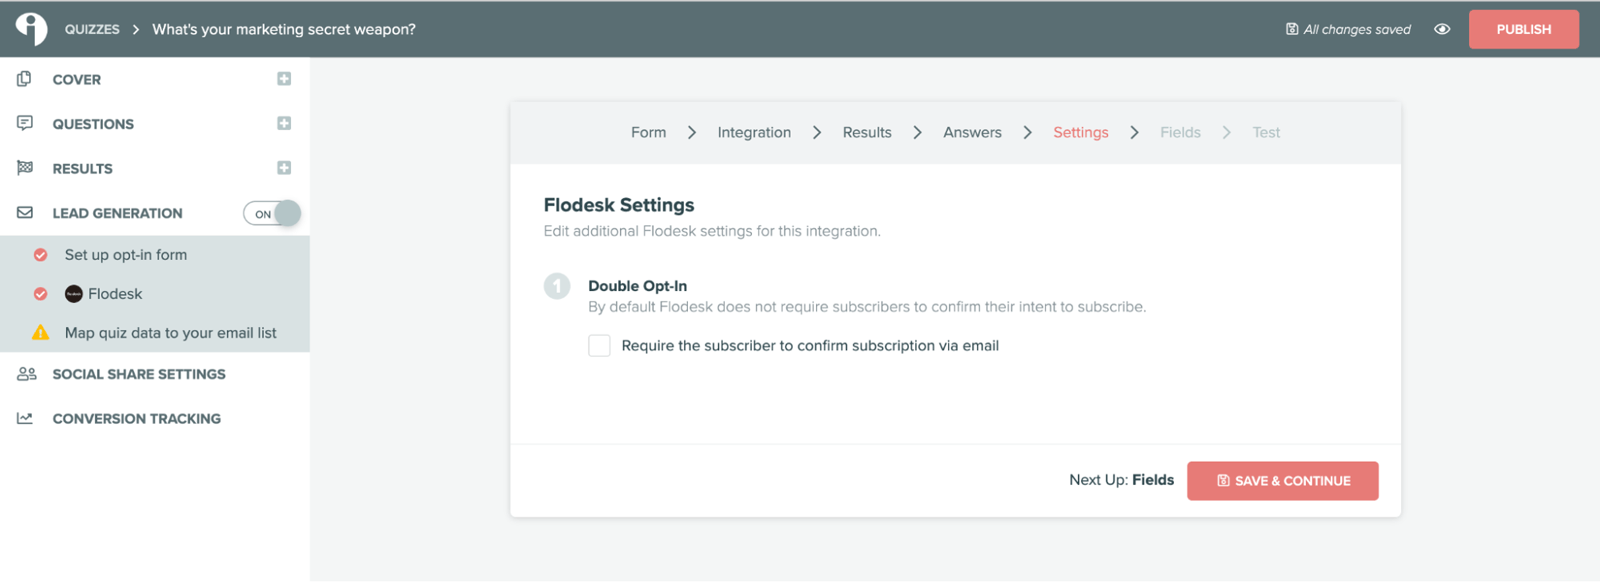
Step 11: Set up double opt-in
Under the Settings tab, you can enable double opt-in by checking the relevant checkbox. This requires quiz participants to confirm their subscription via email before being added to your list.
If you turn on double opt-in in Interact, make sure to edit and customize the double opt-in confirmation email and thank you page in Flodesk so it matches your brand.
Click Save & Continue.
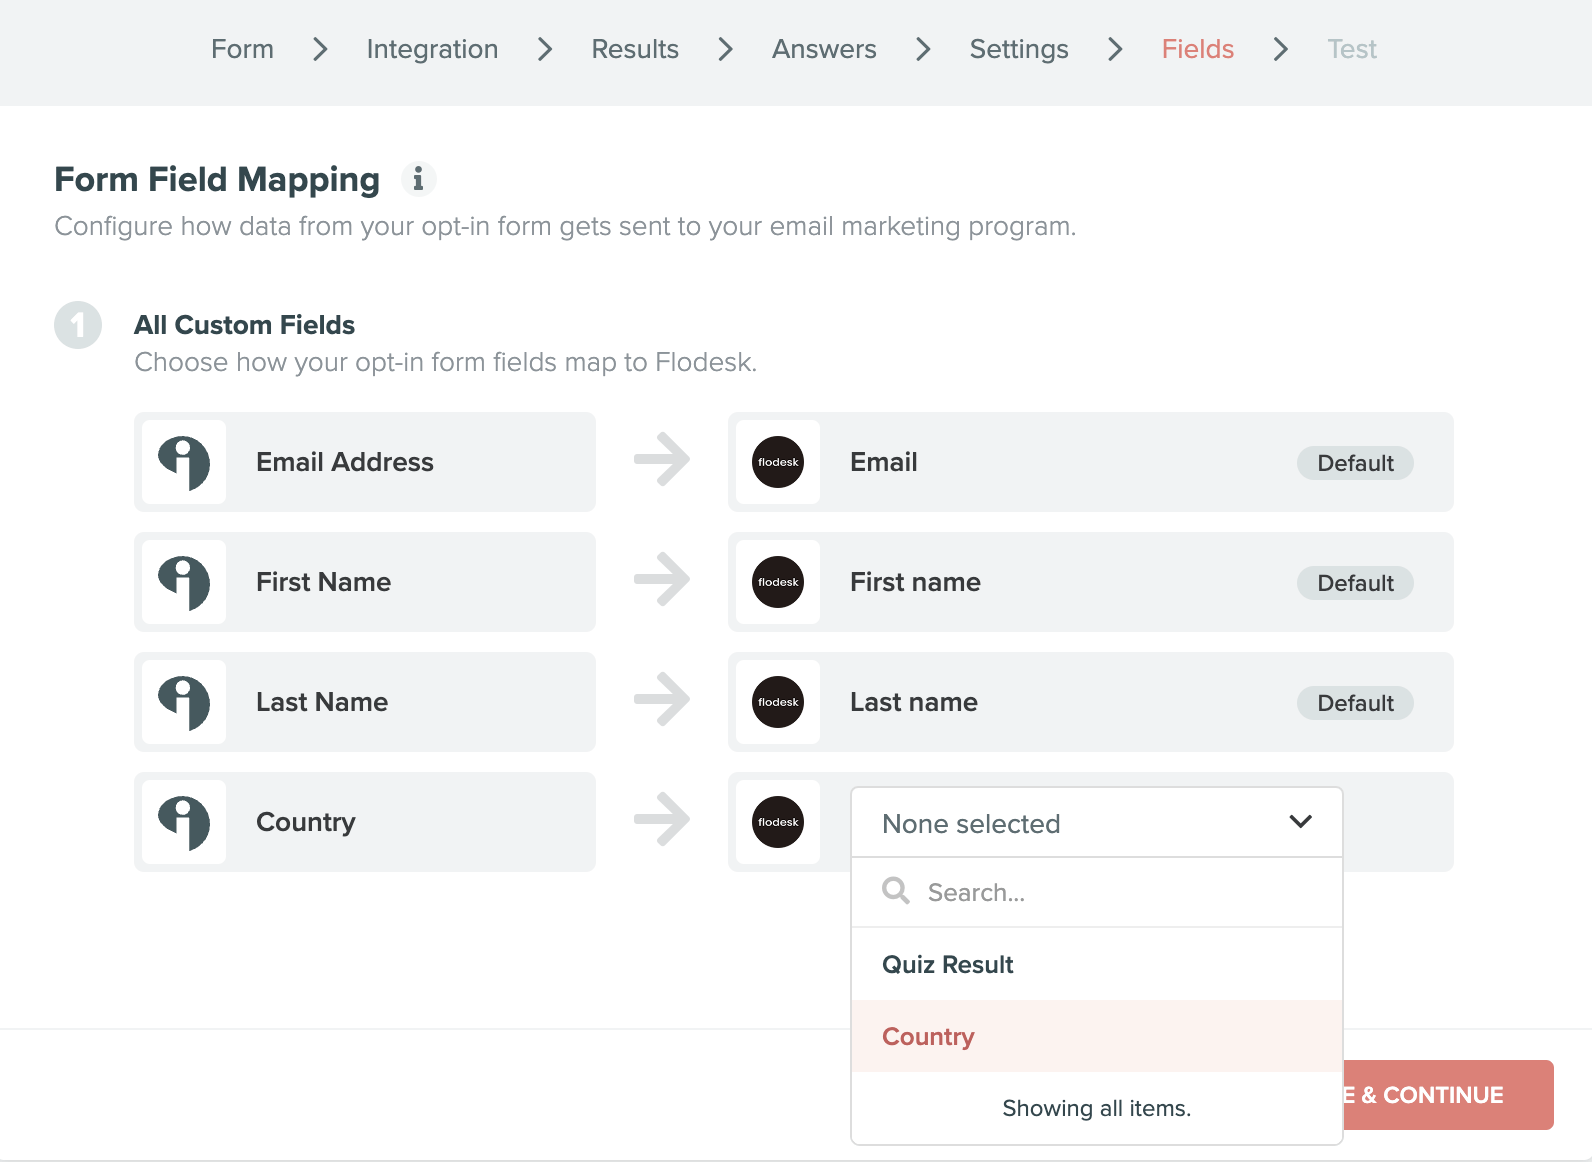
Step 12: Map your form fields
Under Form field mapping, configure how data from your Interact opt-in form maps to your Flodesk fields. For example, mapping the "Country" field in Interact to the "Country" custom field in Flodesk ensures that data carries over correctly for each new subscriber.
Double-check that all fields are mapped to the right Flodesk custom fields, then click Save & Continue.
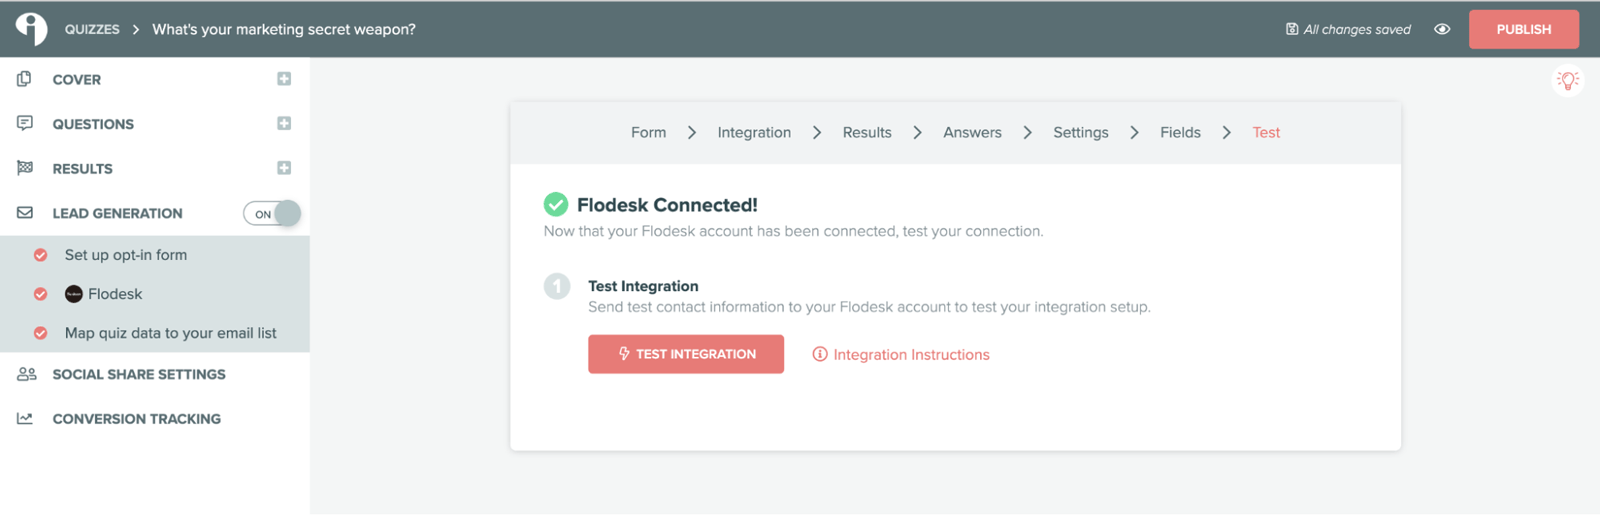
Step 13: Test the integration (optional)
Before publishing, you can test the integration to confirm everything is working as expected. You can edit your integration settings at any time.
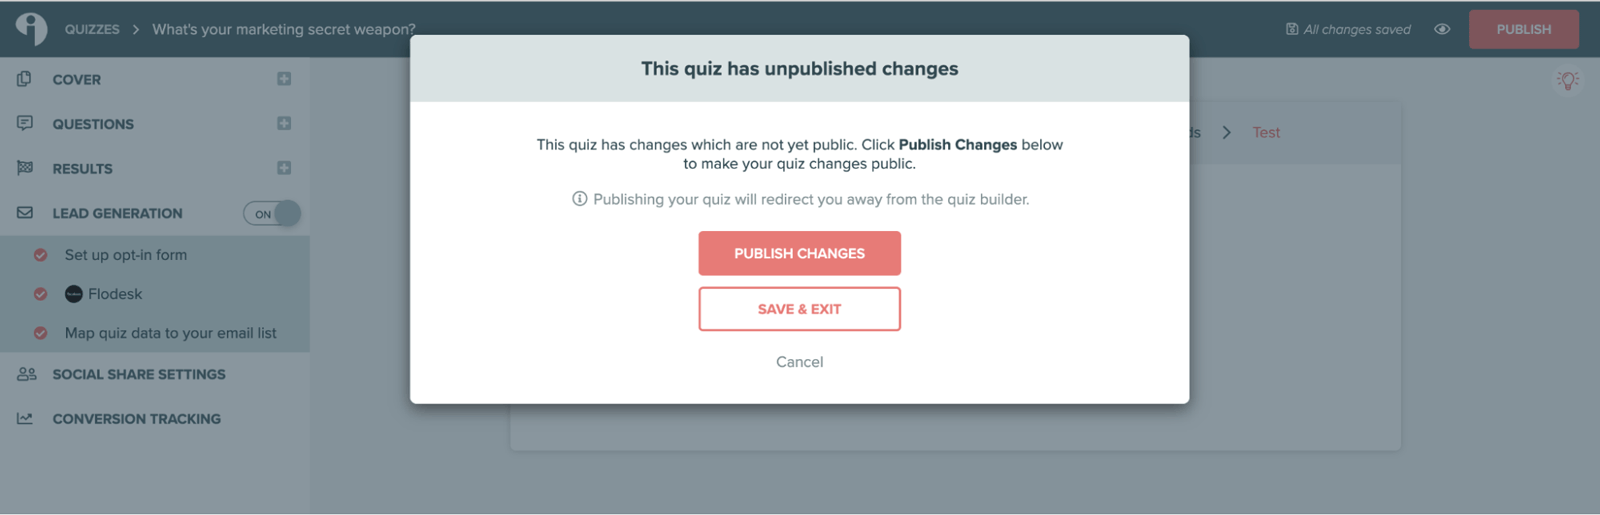
Step 14: Publish your quiz
Click Publish in the builder header, then click Publish changes. Your quiz will automatically update everywhere it's published or embedded whenever you republish it.
A note on consent
Whenever you add leads from Interact to your Flodesk audience, make sure your quiz clearly discloses that providing an email address opts participants in to receive email marketing from you.
FAQ
How do I connect Interact to Flodesk?
In your Flodesk account, go to My Account > Integrations and click Connect on the Interact card. Then in Interact, open your quiz builder, toggle on Lead Generation, set up your opt-in form, and select Flodesk from the available email platforms. Log in to Flodesk and click Allow to authorize the connection.
Do I need Zapier to connect Interact and Flodesk?
No. Interact and Flodesk have a direct integration, so you don't need Zapier or Pabbly Connect to connect them.
Can I add quiz participants to different Flodesk segments based on their result?
Yes. In the Interact quiz builder, go to the Results tab and click Add Action for each result. Select the Flodesk segment you want participants with that result to be added to. You can assign a different segment to each quiz result.
Can I segment participants based on specific quiz answers, not just their overall result?
Yes. In the Answers tab of the Interact builder, you can add actions based on individual answers participants select. This lets you create more precise segments beyond just the final result.
Do I need to create my Flodesk segments before setting up the integration?
Yes. Your Flodesk segments need to exist before they'll appear in the dropdown menus in Interact. Create all the segments you need in Flodesk first, then come back to configure the integration.
Should I enable double opt-in when connecting Interact to Flodesk?
Yes. Double opt-in adds a confirmation step so only participants who confirm they want to join your list are added to Flodesk. If you turn it on in Interact, make sure to customize the double opt-in confirmation email and thank you page in Flodesk so it matches your brand.
Can I use custom fields to personalize emails with quiz result names?
Yes. When mapping actions for each quiz result in Interact, you can select a Flodesk custom field (such as "Quiz result") and populate it with the name of that result. You can then use that custom field to personalize your follow-up emails based on what each subscriber received.
What happens if I make changes to my quiz after publishing it?
Republish the quiz in Interact to apply your changes. Your quiz will automatically update everywhere it's published or embedded.
Do I need to get permission before adding Interact quiz participants to my Flodesk audience?
Yes. Your quiz should clearly disclose that providing an email address opts participants in to receive email marketing from you. This is important for both legal compliance and list quality.