
How to Use the Checkout Only Template in Flodesk Checkout
Want to skip the sales page and get straight to getting paid?
The Checkout only template in Flodesk Checkout lets you share a direct checkout link—so buyers can complete their purchase in just a few clicks.
This option is ideal when you've already explained your offer elsewhere (like your website, emails, or social media) and simply need a clean, high-converting checkout experience.
What is the Checkout Only template?
The Checkout-only template removes the sales page and takes customers straight to checkout. It includes everything needed to collect payment and deliver your product automatically.
With this template, you get:
A ready-to-use checkout page
A customizable delivery page after purchase
Optional upsells, discounts, and email opt-in
Built-in order tracking and customer segments
When should you use the Checkout Only template?
Use this template if:
You already have a sales page, website, or landing page
You’re selling through emails or social media
You want a fast, no-friction buying experience
You don’t need a long-form sales page inside Flodesk
If you want Flodesk to host your full sales page content, a different checkout template may be a better fit.
Where to find the Checkout Only template
Log into your Flodesk account
Go to Checkouts
Click + New checkout
Scroll through the templates and select Checkout only
Click View details to preview it on desktop and mobile
Click Customize to start editing
How to edit the Checkout Only page
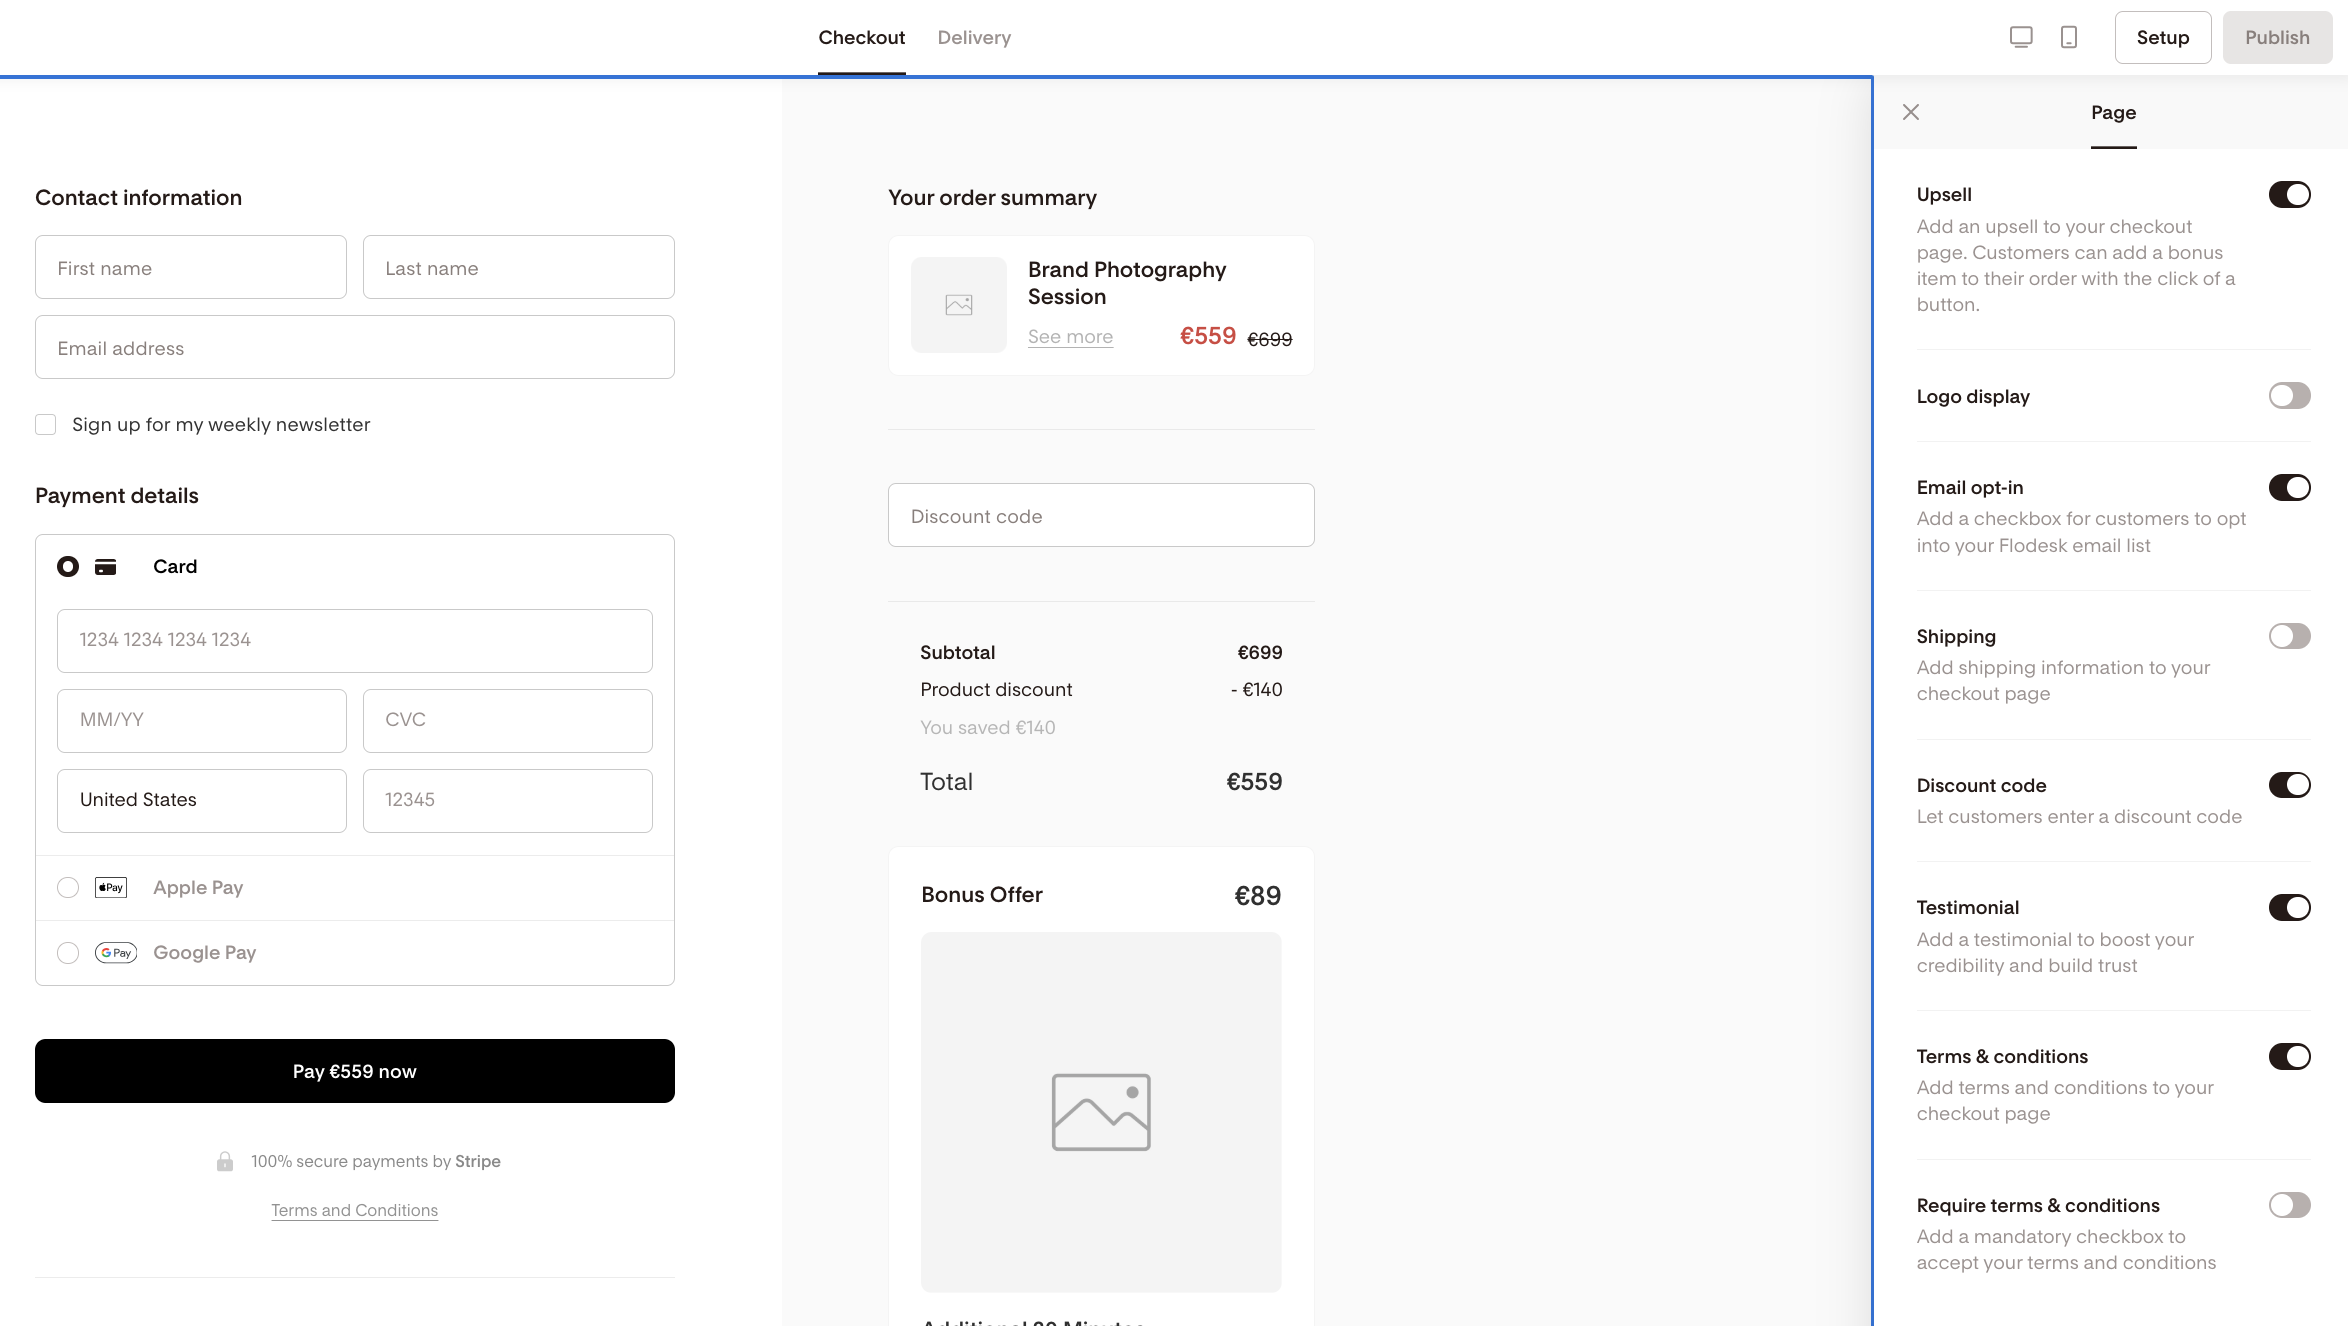
The checkout page comes with several built-in blocks. Some of them can be turned on or off depending on your needs.
Available checkout blocks
Product block
Set your price, upload a product image, and choose whether it’s paid, free, or on sale. Set a product segment to deliver your product via a connected workflow. You can also enable Sales tax or VAT collection for your offer.Contact block
Collect the buyer’s name and email address. You can also set a segment for email list opt-ins.Terms & Conditions
Add a required checkbox for legal agreements or policies. This block can be turned off.Testimonial block
Share social proof to build trust at checkout. This block can be turned off.Upsell block
Offer an additional product or upgrade after the main purchase. This block can be turned off.Discount block
Create one or more discount codes for promotions. This block can be turned off.
Page settings
By clicking on the background of the page, you can:
Add or remove your logo
Enable shipping details (if needed)
Show or hide specific elements (upsell, logo, email opt-in checkbox, shipping fields, discount codes, testimonial, terms & conditions)
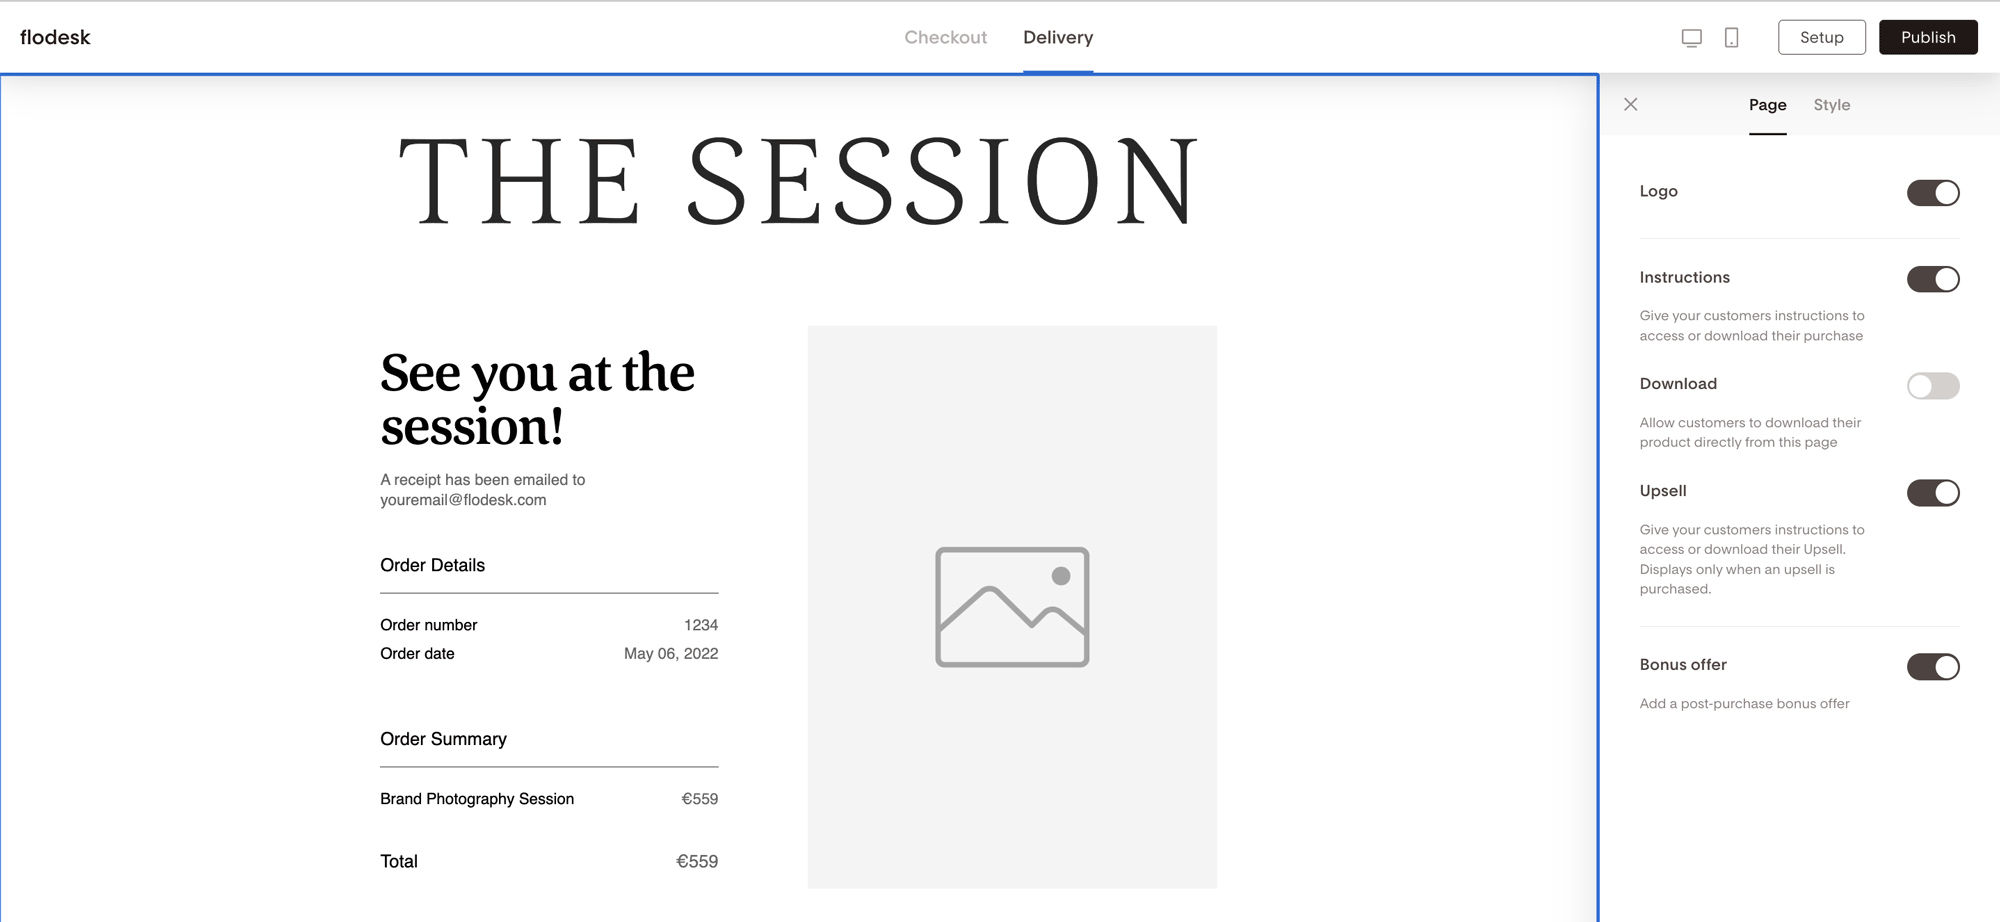
How to edit the Delivery page
After checkout, customers are sent to the Delivery page. This is where they receive access to what they purchased.
You can include:
Your logo
Instructions or next steps
Download links
Bonus content
An upsell offer
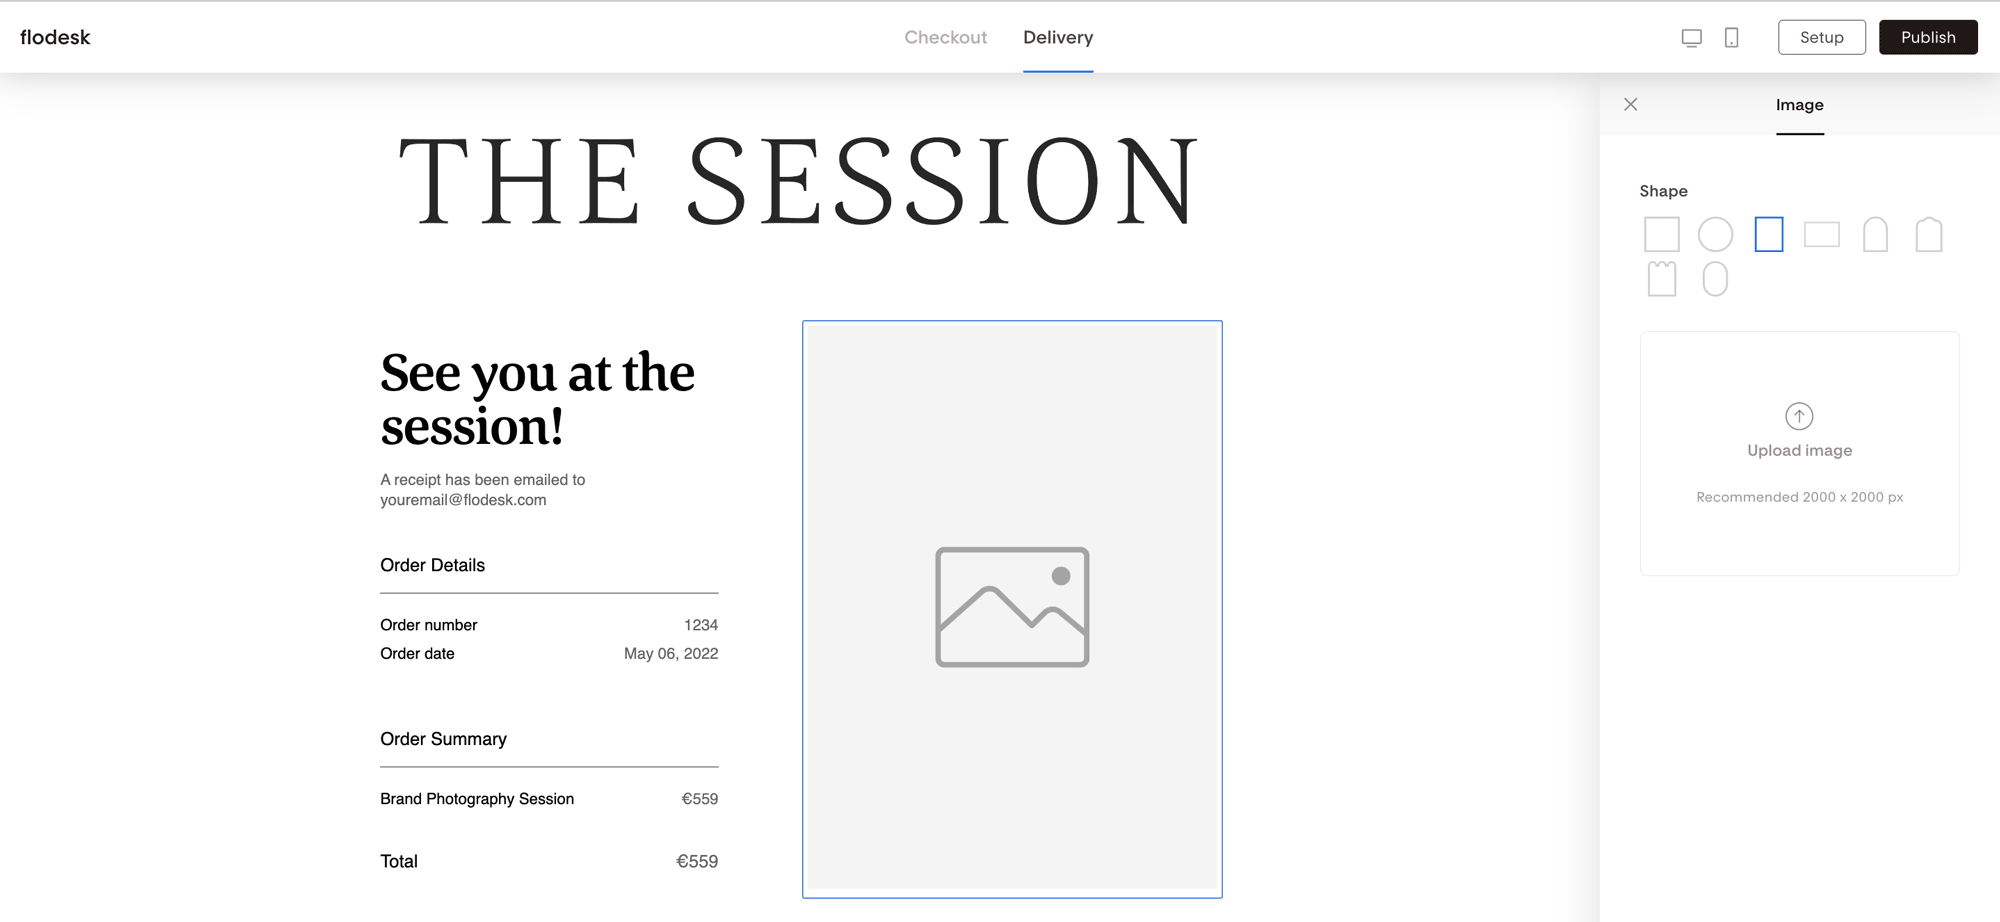
To edit the delivery page:
Click on any block to change its content
Click the page background to toggle blocks on or off in the sidebar
For a full walkthrough, see How to customize the delivery page in Flodesk Checkout.
Where to use your Checkout Only link
Once your checkout is published, Flodesk generates a shareable checkout link. You can use it in multiple places:
On your website
Link your existing sales page button directly to the Flodesk checkout.
In emails
Add the checkout link to an e-commerce block, a button or text link in your promotional emails.
On social media
Use the link in your Instagram bio, link-in-bio tool, pinned post, or swipe-up feature.
Summary
The Checkout only template is perfect when you want to:
Send buyers straight to checkout
Skip building a sales page inside Flodesk
Collect payments quickly
Automatically deliver digital products
Track orders and segment customers with ease
You can set it up in just a few minutes and start selling right away.
To get started, go to Checkouts > + New checkout and choose Checkout only.
FAQ
Do I need a sales page to use the Checkout Only template?
No. You can link directly to the checkout from anywhere. However, you should explain your offer clearly wherever you’re sending traffic from (like your website or emails).
Can I customize what shows on the checkout page?
Yes. Most blocks can be shown or hidden, including testimonials, upsells, discounts, and shipping details.
Does the Checkout Only template include a delivery page?
Yes. Every checkout includes a delivery page where customers receive access to their purchase.
Can I collect email addresses with this checkout?
Yes. The Contact block allows you to collect email addresses and optionally add buyers to your email list.
Can I offer upsells or discount codes?
Yes. You can add both upsells and discount codes directly inside the checkout flow.
What types of products work best with this template?
It works well for digital products, courses, services, memberships, and eBooks—especially when you already promote them elsewhere.