
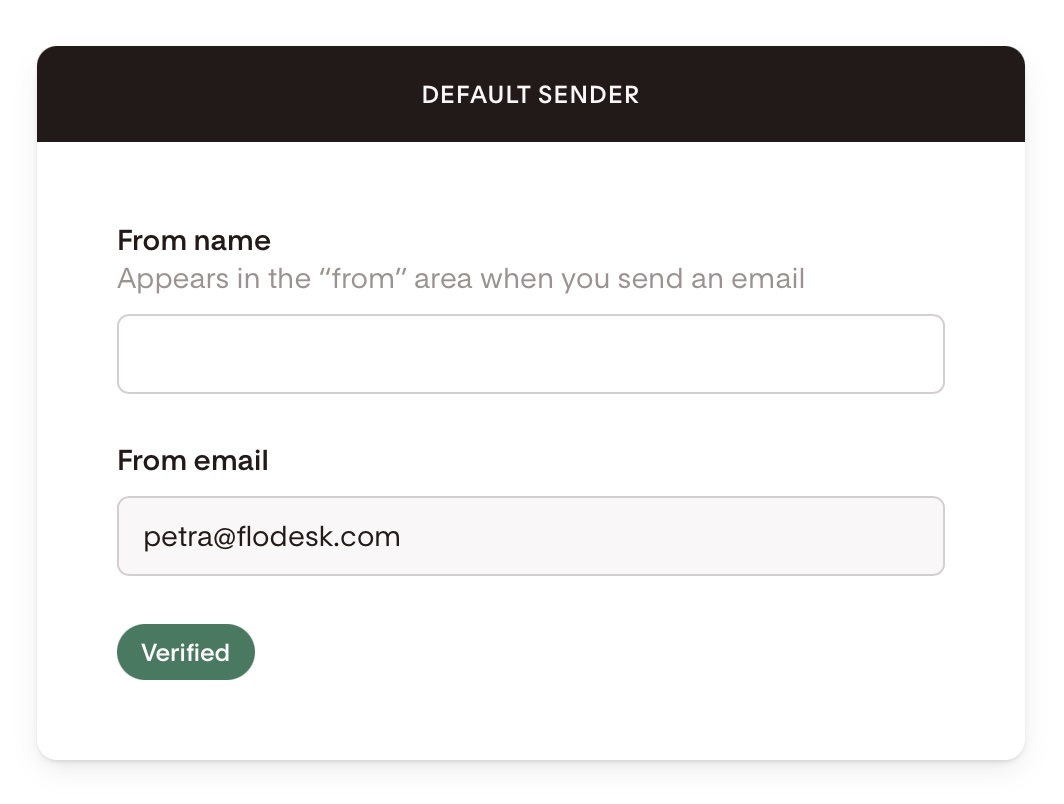
Set your sending From name and email address
Overview
Your subscribers are more likely to open your emails if they recognize who they’re from. In Flodesk, you can customize both your From name (the sender name that appears in inboxes) and your From email address (the email used to send campaigns).
You can have two sending email addresses in one Flodesk account. Follow the steps below to add and edit your default sender email or add a second sender.
Important: Do not use the Team seats feature to add a second sender to your Flodesk account. Team seats are different in that they allow you to invite someone else to access your account without using your personal login.
Customize your From name
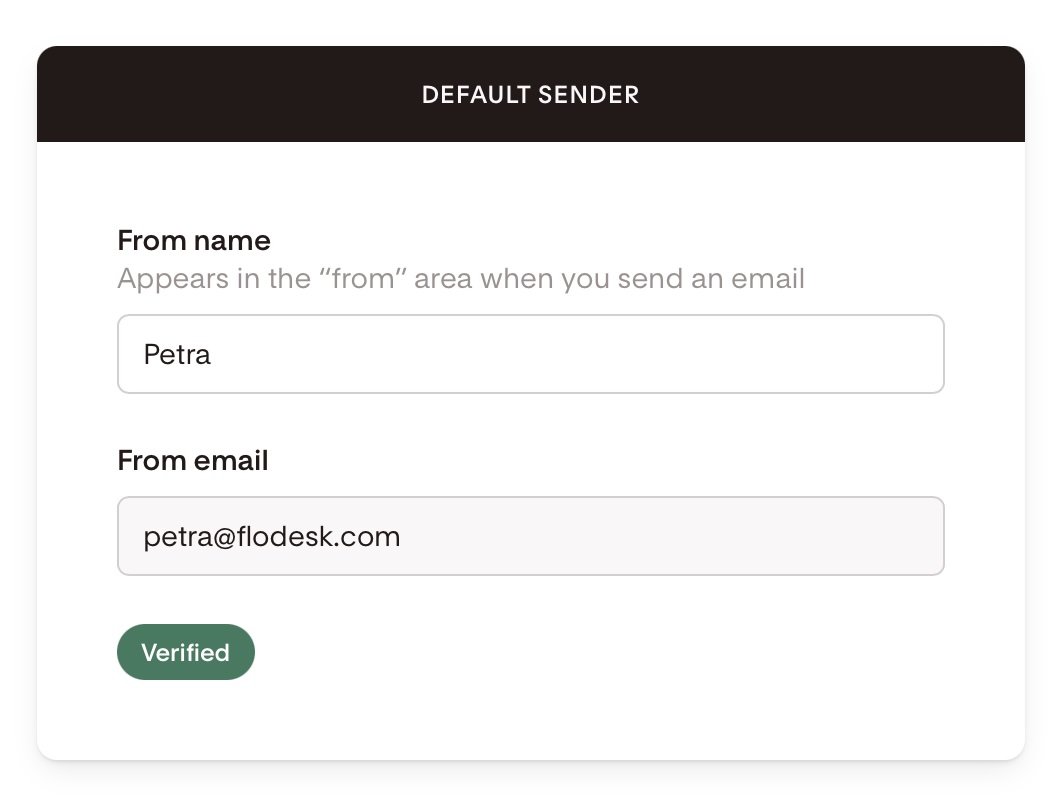
Enter your From name
Pro tip: Combine your name and brand for higher engagement. Examples:
Petra from Flodesk
Petra Molnar | Flodesk
Flodesk Team
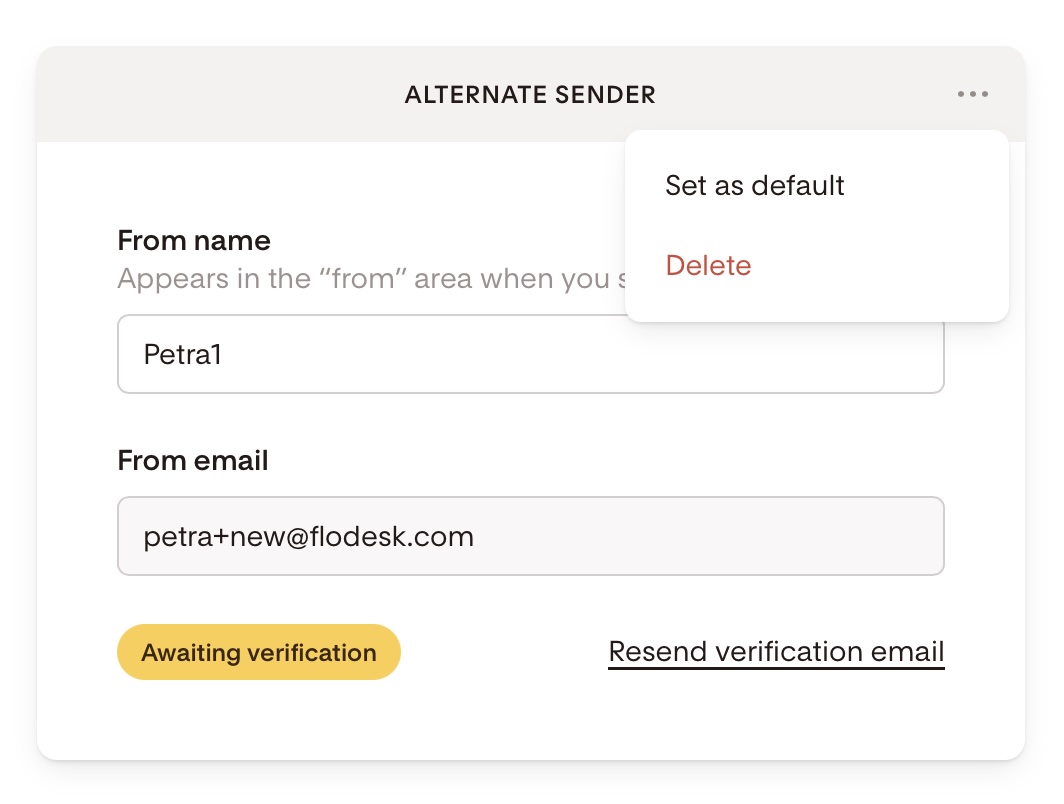
Add a new sending email address (second sender, alternate sender)
By default, your Flodesk login email is used as your sending address. If you want to send from another email:
Click + Add sender at the bottom of your Default sender card.
Enter a new From name and From email address, then click Save.
Look for the verification email sent to your new address.
Didn’t get it? Check promotions/spam or add help@flodesk.com to your contacts.
You can click Resend verification email in your account.
Set your default sending address
Hover over the sender card and click the three dots (...).
Select Set as default.
Note: Each Flodesk account can have up to two sending addresses. To add another, delete one first.
Change or delete your default sender email address
Your default sender email address can't be edited or deleted directly. You can only delete an alternate sender. To change your default, you'll first need to make it the alternate, then delete it from there.
How you do this depends on how many sending addresses you currently have.
If you already have two sender email addresses set up:
On your current alternate sender card, click the three dots (...) and select Set as default.
Now that your original sender email became the alternate, click the three dots on that email card and select Delete.
If you only have one sender email address (your default):
Go to Account settings > Email setup and click + Add sender.
Enter a new From name and From email address, then verify it (even if this is temporary).
Hover over the new sender card, click the three dots (...), and select Set as default.
Now that your original email address became the alternate, click the three dots on that email card, and select Delete.
Summary
From name: Edit under Account settings > Email setup.
New sending email: Add a sender, verify it, and set it as default if desired.
A clear From name + verified email increases trust and improves open rates.
Sending name & email FAQs
How do I change my From name?
Go to Account settings > Email setup and edit the From name field.
How do I add a new sending email (second sender)?
In Email setup, click + Add sender, enter details, then verify via email.
Can I have more than one sending address?
Yes, up to two per account.
Can I set a default sending address?
Yes—hover over the sender card, click the three dots, and select Set as default.
Can I edit or delete my default sender email address?
Not directly. You'll need to set it as the alternate sender first, then delete it from there.
I only have one sending email address. How do I change it?
Add a second sender email address (even temporarily), set it as your default, then delete the original address, which is now the alternate.
Why didn’t I get the verification email?
Check spam/promotions, add help@flodesk.com to contacts, then resend.
Does changing my From name affect my subscribers?
Yes—this is the name they’ll see in their inbox. Use a recognizable, friendly format.
Can I change my login email and sending email separately?
Yes. Your login email is for account access; your sending email is what subscribers see.