
How to set up product limits in Flodesk Checkout
A step-by-step guide on how to limit product inventory by quantity, time or both
Whether you host ticketed events, sell physical merchandise, or want to cap attendee numbers for your upcoming workshop class, you can easily manage product inventory and limit your product’s availability in Flodesk Checkout by quantity, time or both!
How to set up product limits
Click on the Product block on the Checkout page to start editing it.
In our example, it's the 'Brand Photography Session'.
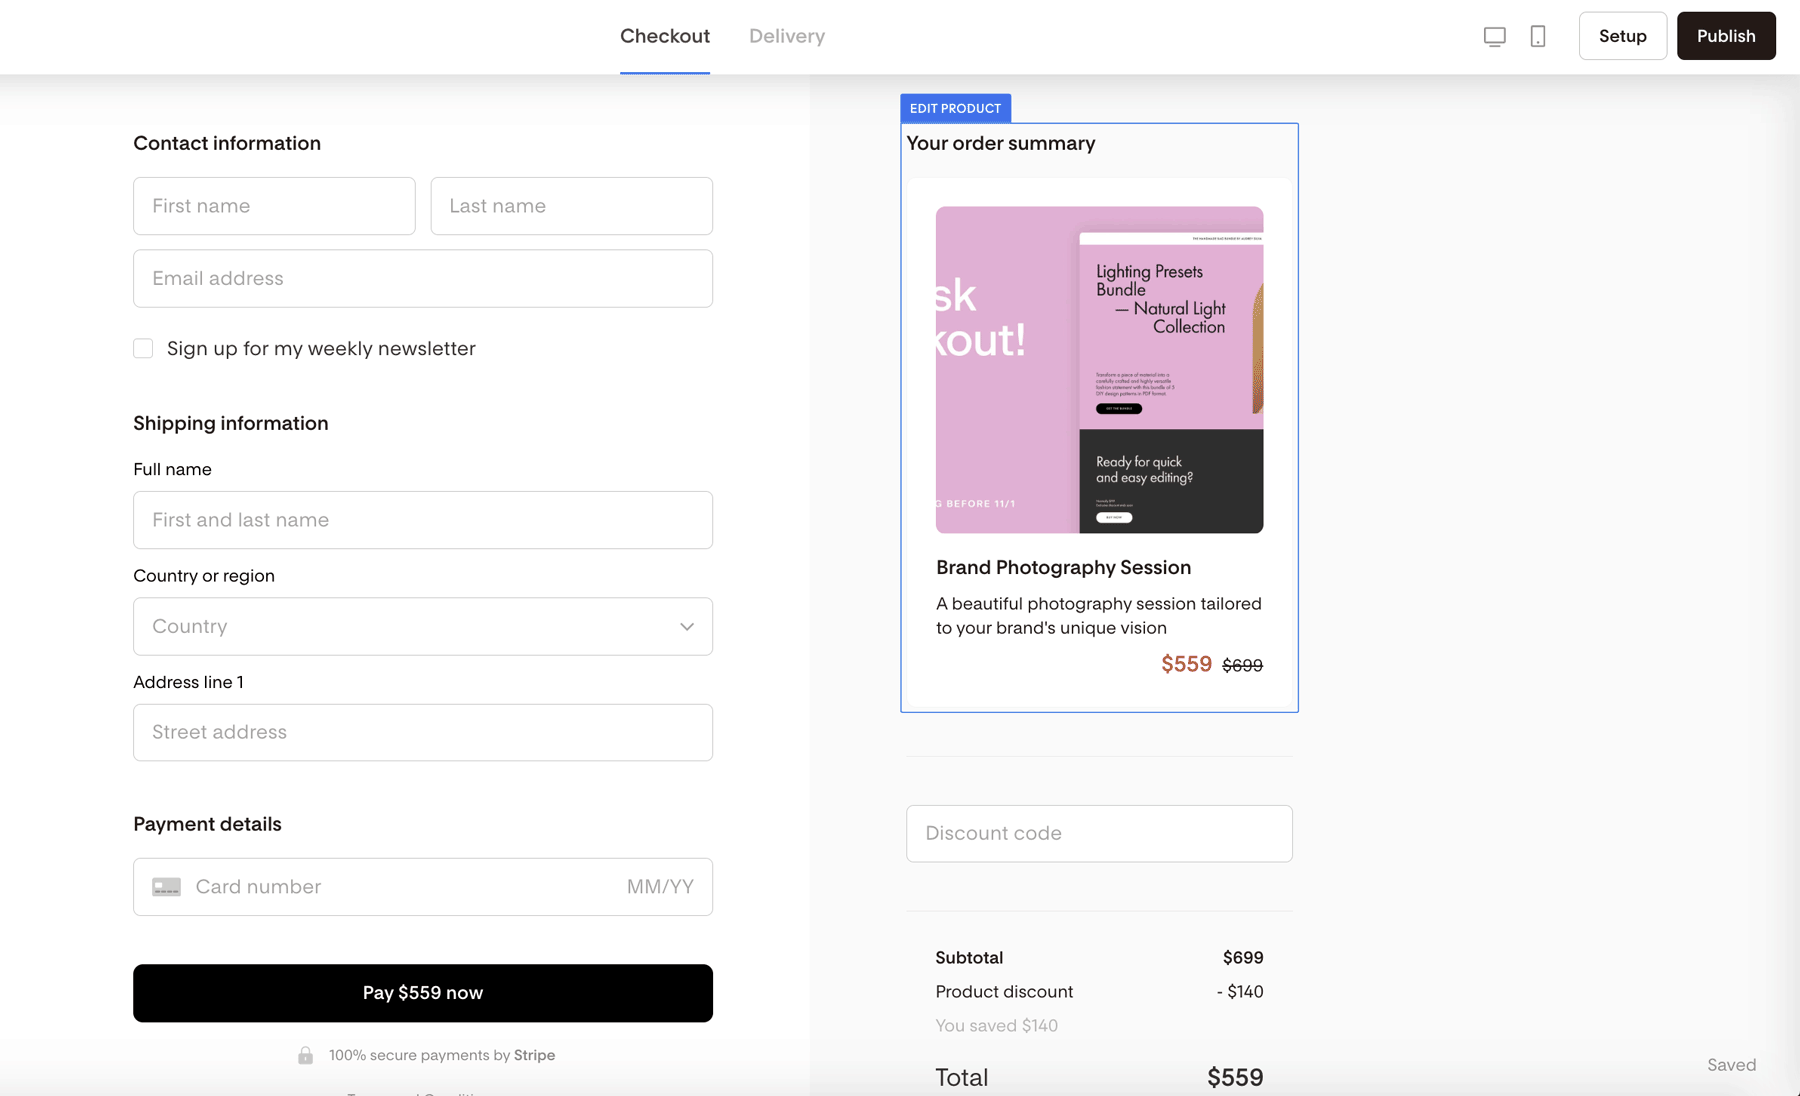
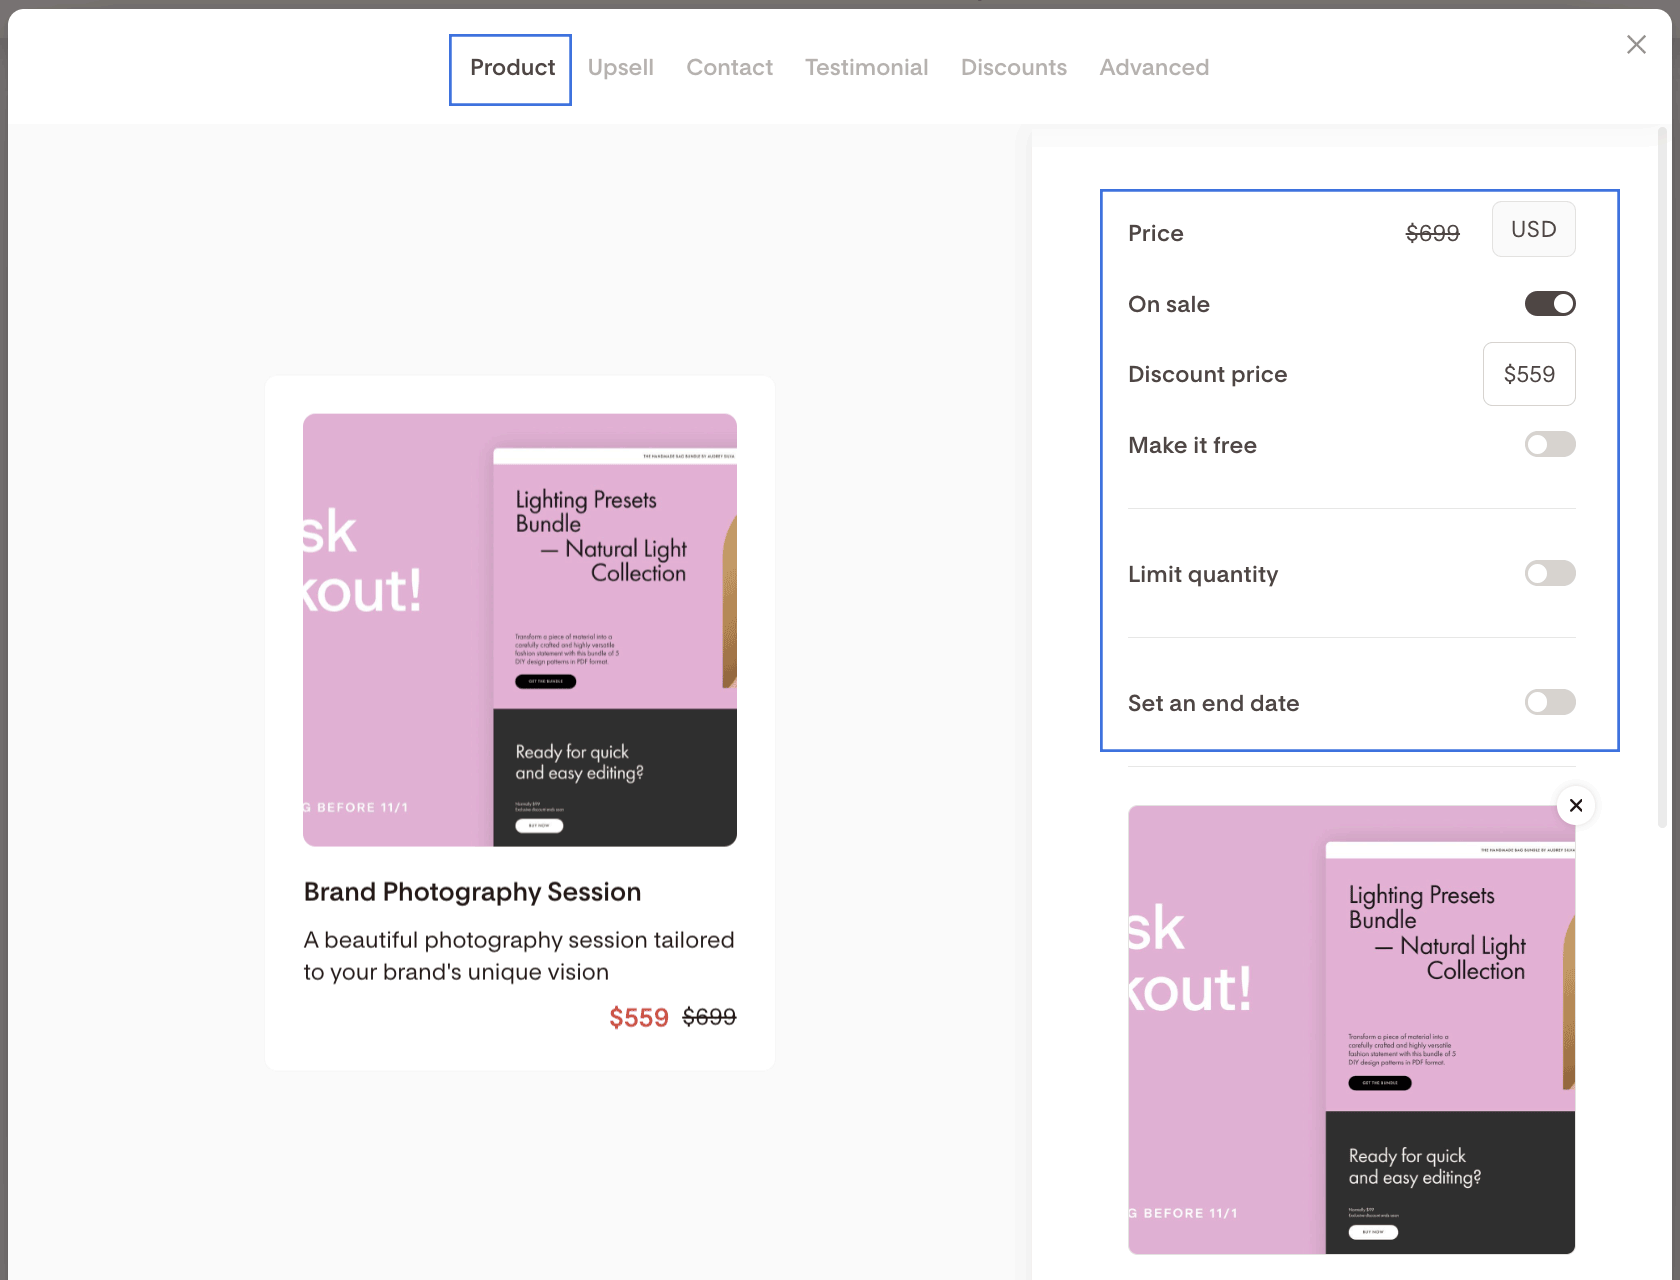
On the Product tab, you can
Adjust your offering’s price,
Mark it as “On sale,”
Make it free
Limit its quantity
Set an end date for the current offer
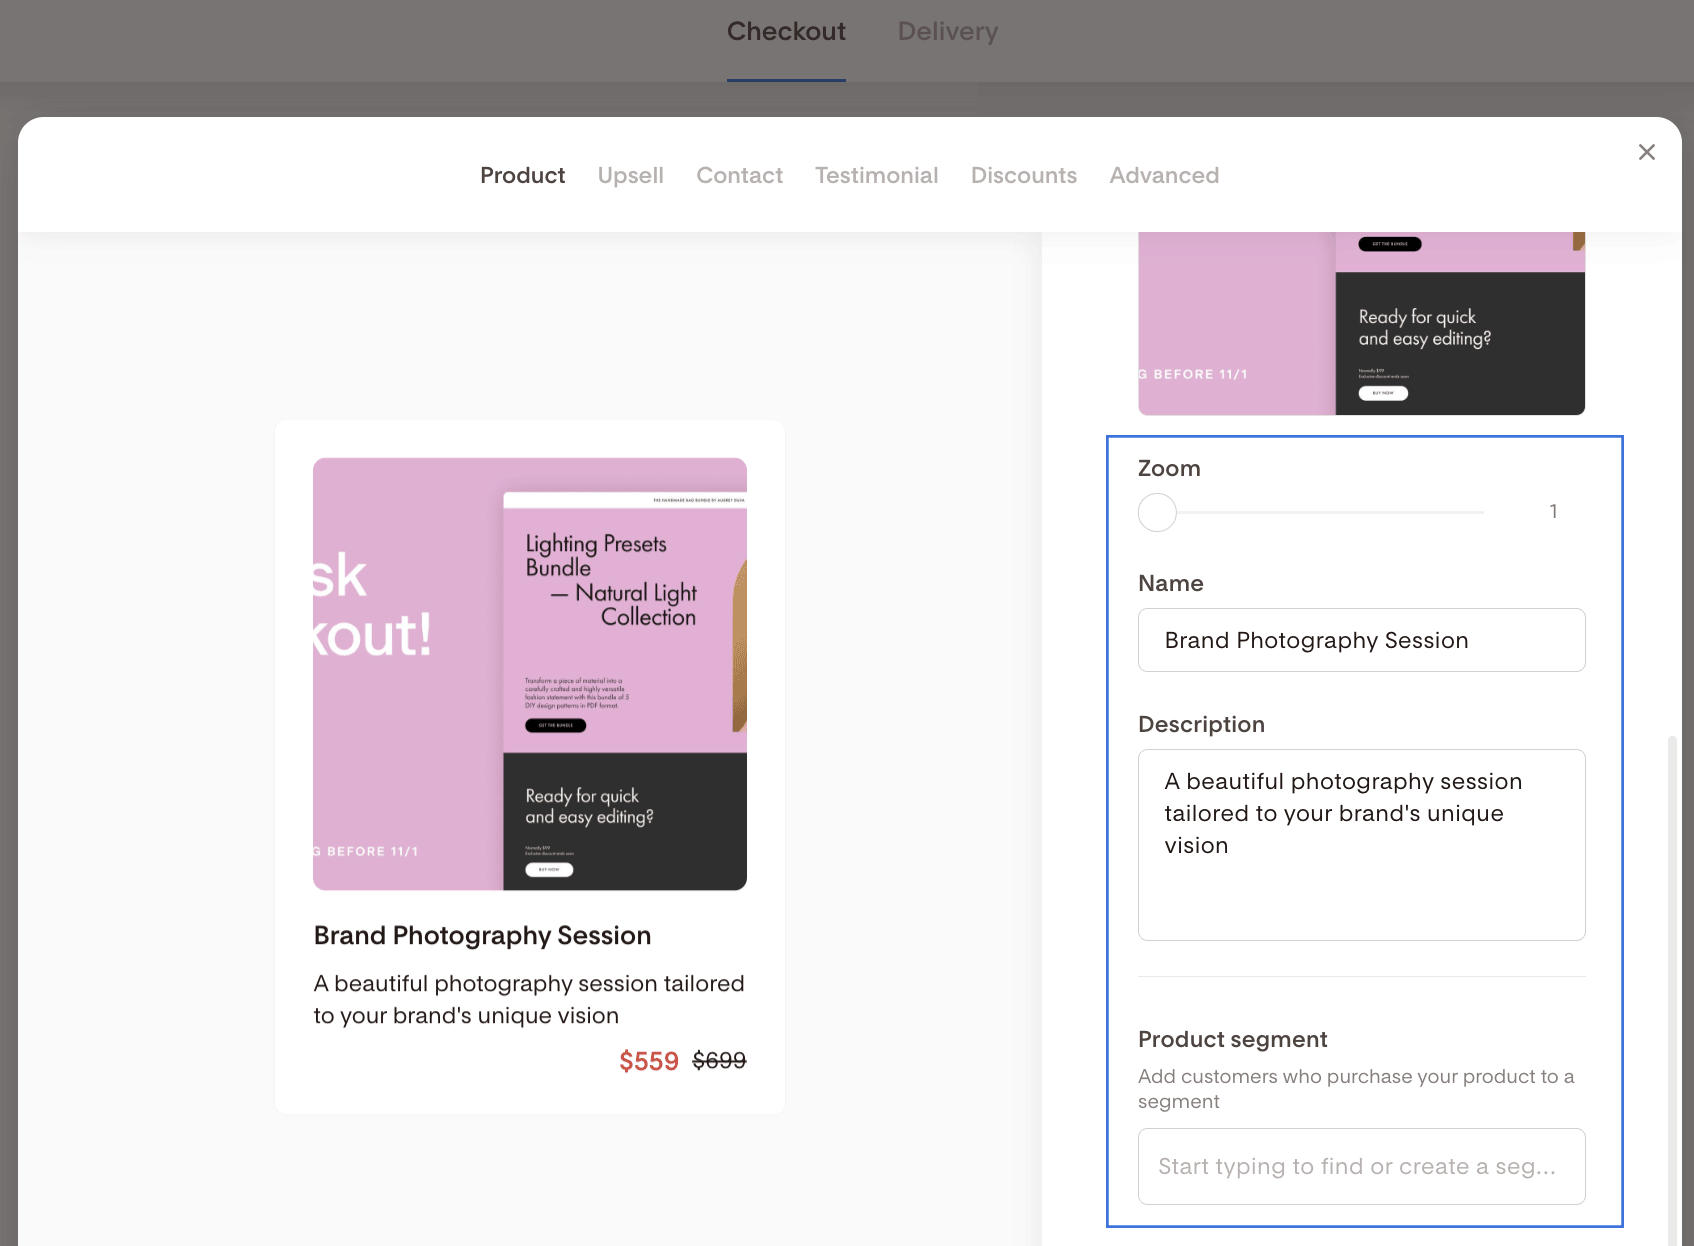
Upload a product image
Zoom in on the product image
Update the product name
Add a product description
Define a product segment where customers who purchase your product should be added
Turn on Sales Tax and edit the tax category of your offer
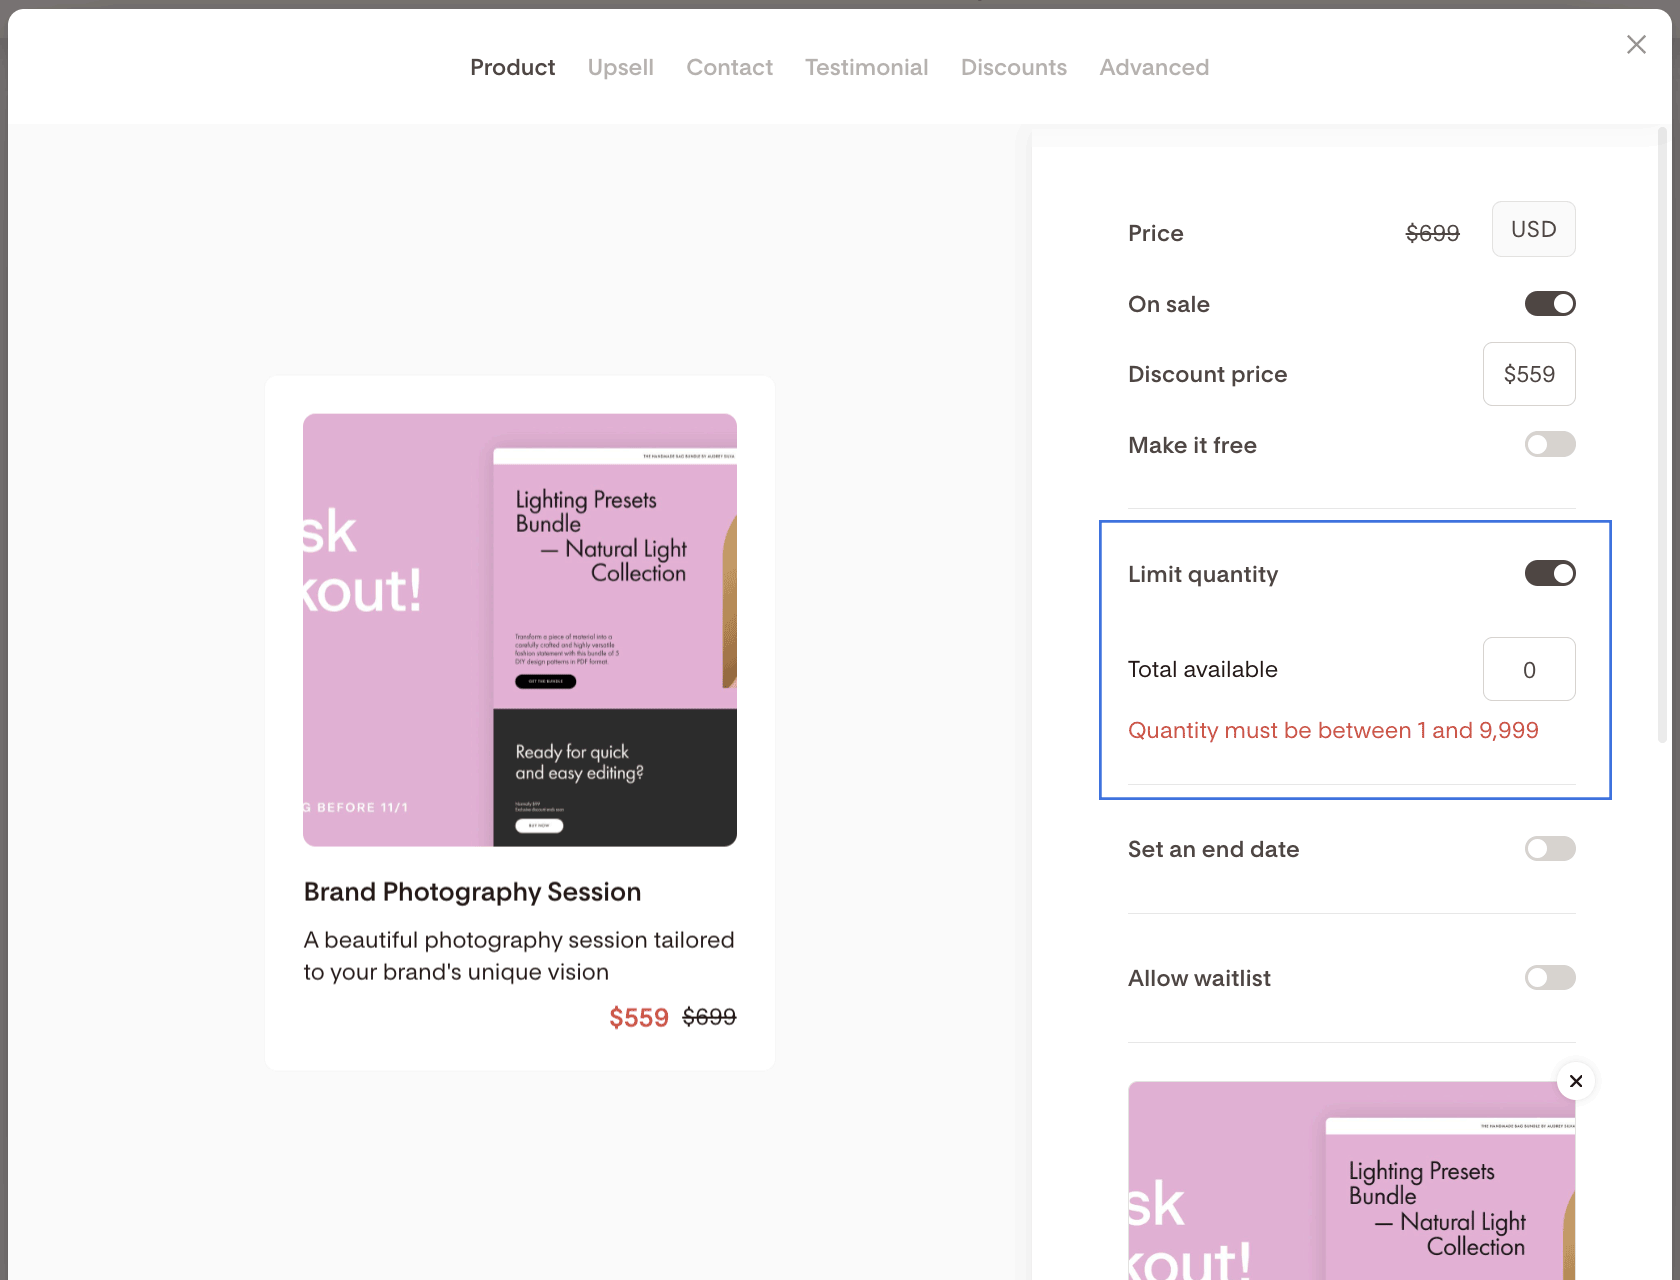
Limit quantity
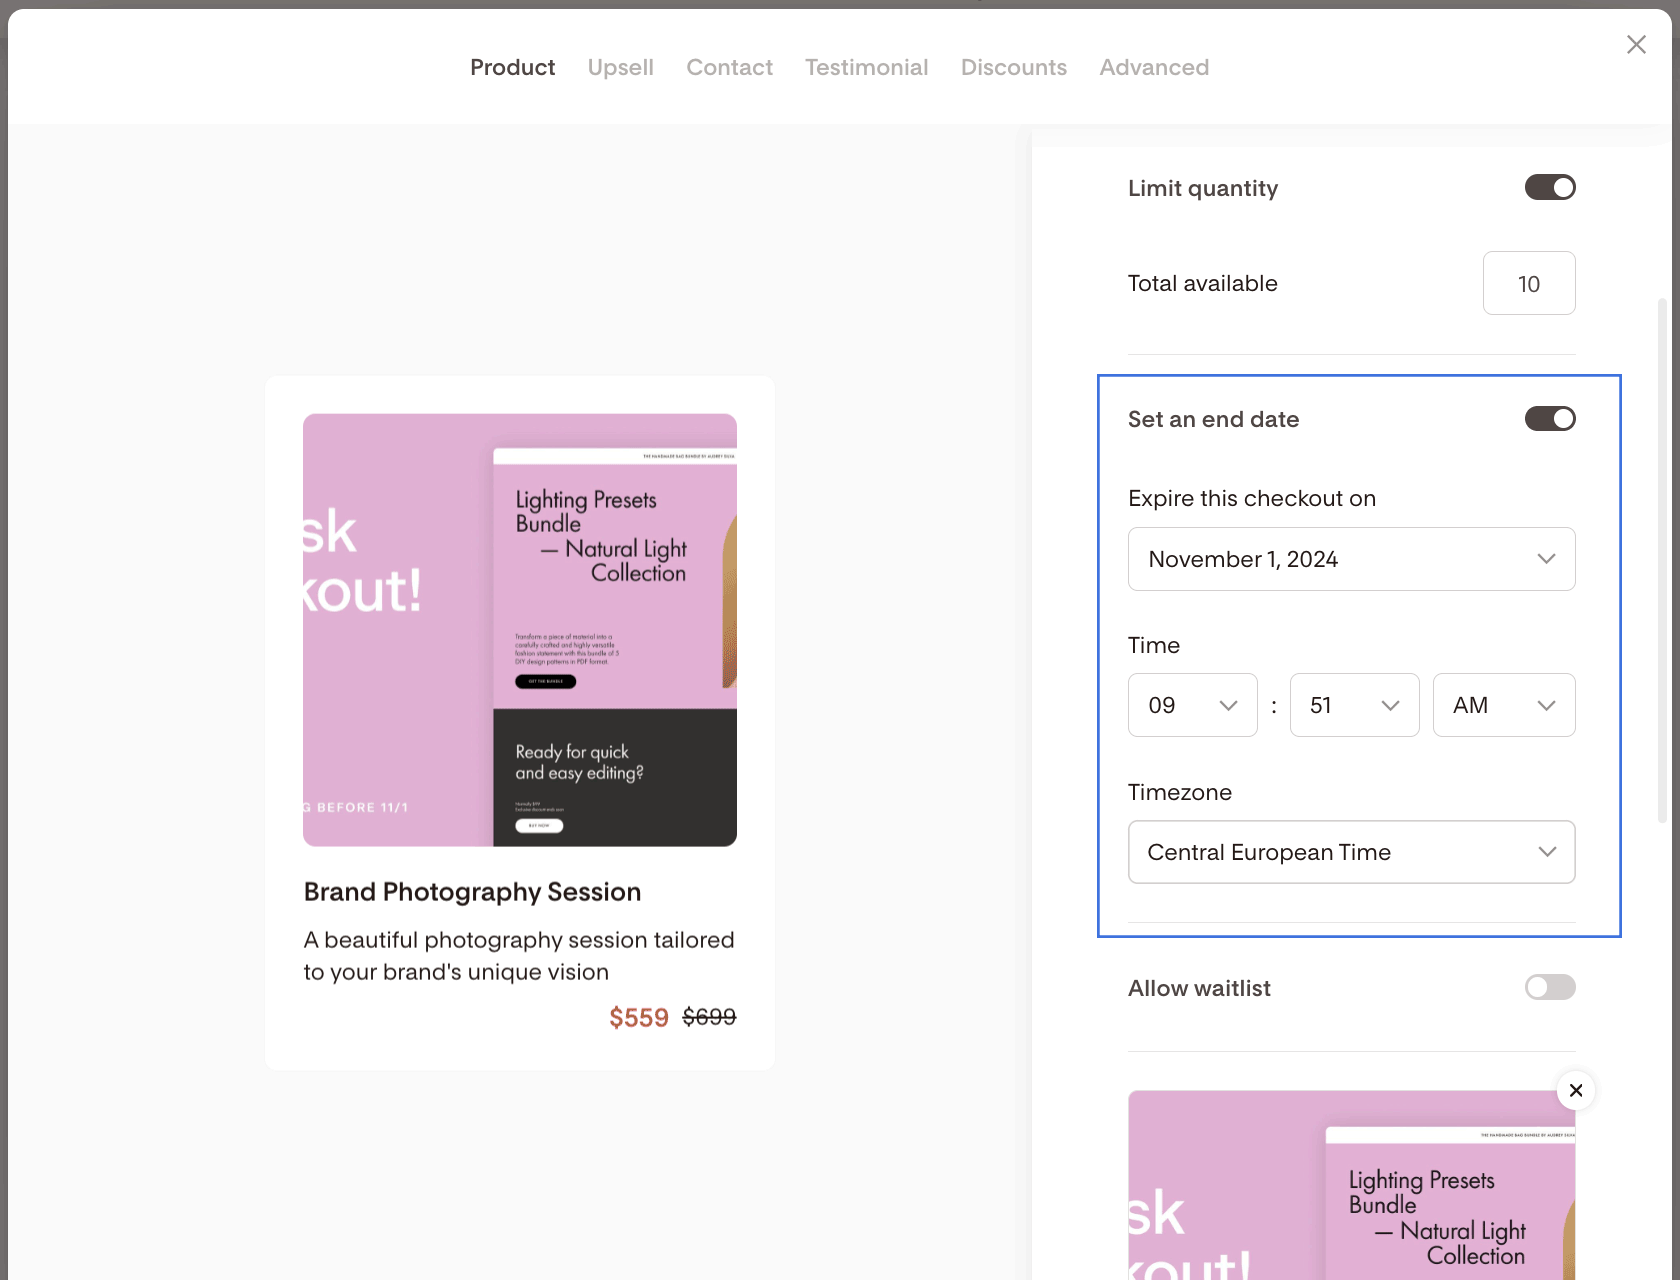
To limit the number of items available, toggle on Limit quantity and set the relevant quantity number. In the example below, we put the maximum number of available sessions for purchase to 10.
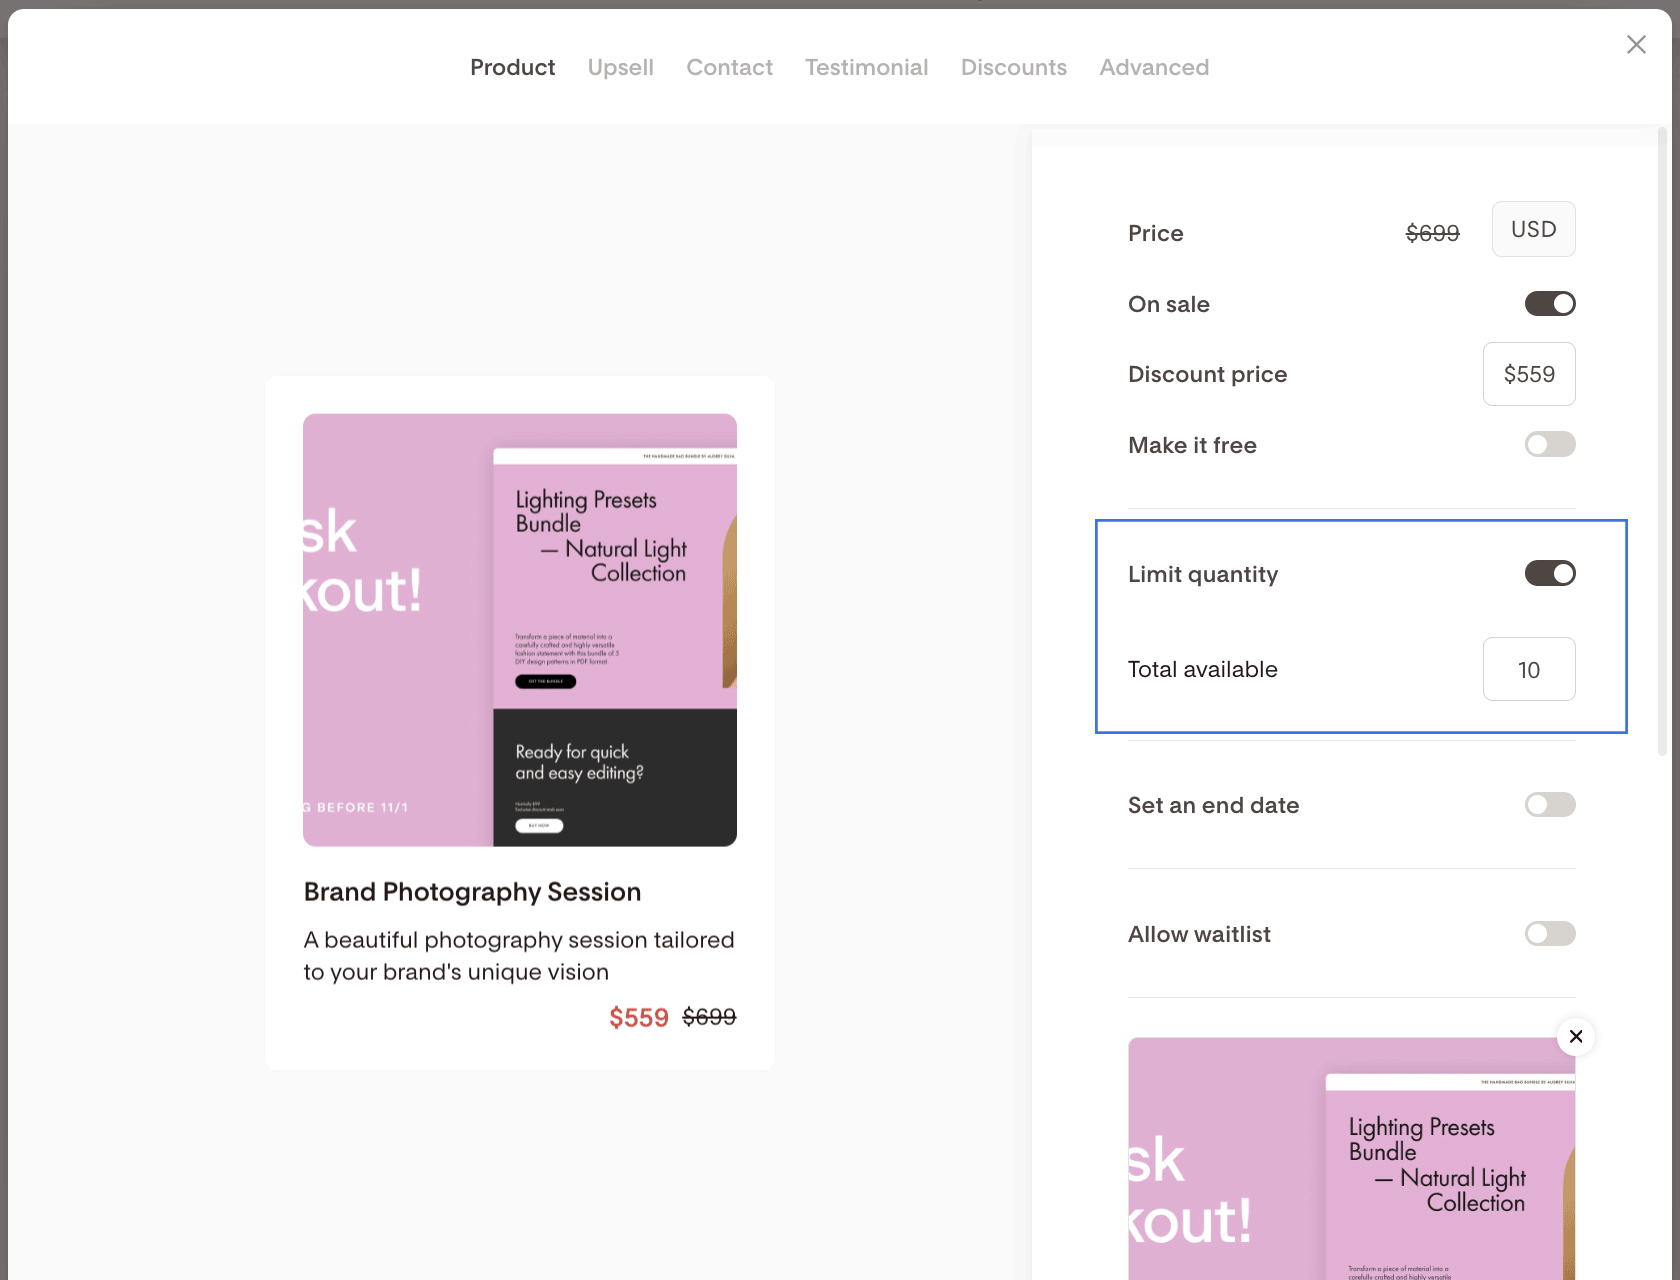
Note: If you turn on Limit quantity, you must provide a value between 1 and 9,999.
The product quantity will automatically save once you click away from the input field.
Important: your changes will only be effective when you publish the Checkout!
Set an end date
Additionally, you can set an end date for your sale. When you toggle on Set an end date, you can define the date, time, and timezone when your offer should end.
Note: You can toggle on Set an end date without setting any product quantity limits.
The sale end date will automatically save once you click away from the input field.
Important: your changes will only be effective when you publish the Checkout!
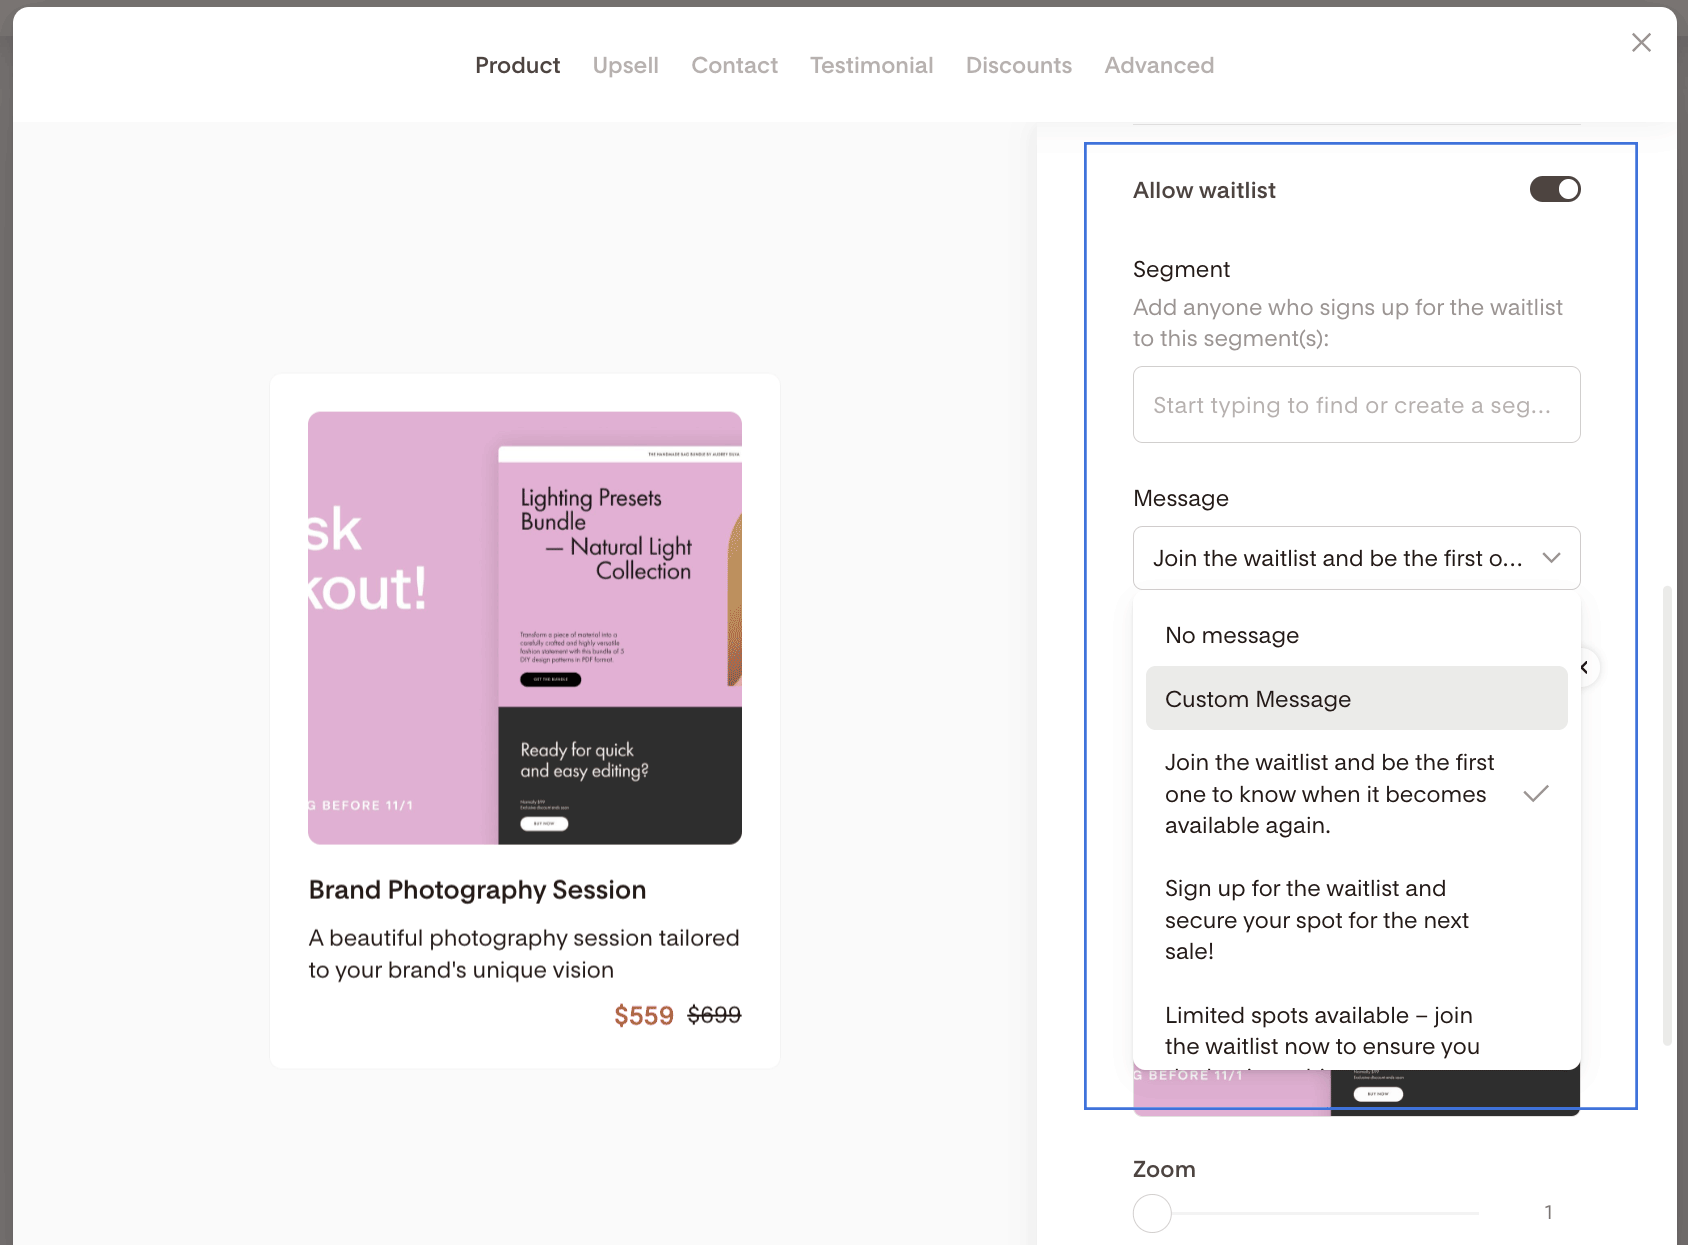
Allow waitlist
When you toggle on either Limit quantity or Set an end date, you can create a waitlist by toggling on Allow waitlist. This waitlist will be displayed when the product limit is reached (sold out) or the sale end date expires. Visitors who missed your offer can sign up for your waitlist and will be added to the Waitlist segment you specified here.
Additionally, you can display a Waitlist message that visitors will see when the checkout has reached its set product limit (quantity or time). If you select the Custom message option, you can type your own, but note that it has a maximum limit of 100 characters.
What happens if I duplicate a Checkout that has Product Limits?
When you choose to duplicate a Checkout with Product Limits, we will copy the following settings.
Limit quantity:
Toggle - the current toggle status will be copied
Total available amount - the current Total available number will be copied
Set an end Date:
Toggle - the current toggle status will be copied
Default Date & Time:
Set default: 1 month from current Date & Time
Default ‘timezone’ from your account settings
Allow Waitlist:
Toggle - the current toggle status will be copied
Segment - the selected segment will be copied
Message - the current waitlist message will be copied
What happens when my product is sold out, or the sale end date expires?
(1) In general, when your product is sold out, or the sale end date is reached
The Product price will show a strikethrough, and "Sold out" will be displayed to the left of it. The original price will be shown, not the discount amount, and the Upsell card will disappear.
The Product Card will be “expanded”, showing additional Product information
The payment fields and the Terms & Conditions Checkbox will disappear
The Terms & Conditions link will remain
Additionally,
(2) When your product is sold out/sale end date expires and you didn't allow a waitlist
The “Pay” button will change to a gray button with “Sold Out”. This button will have no action associated.
No waitlist message will be displayed.
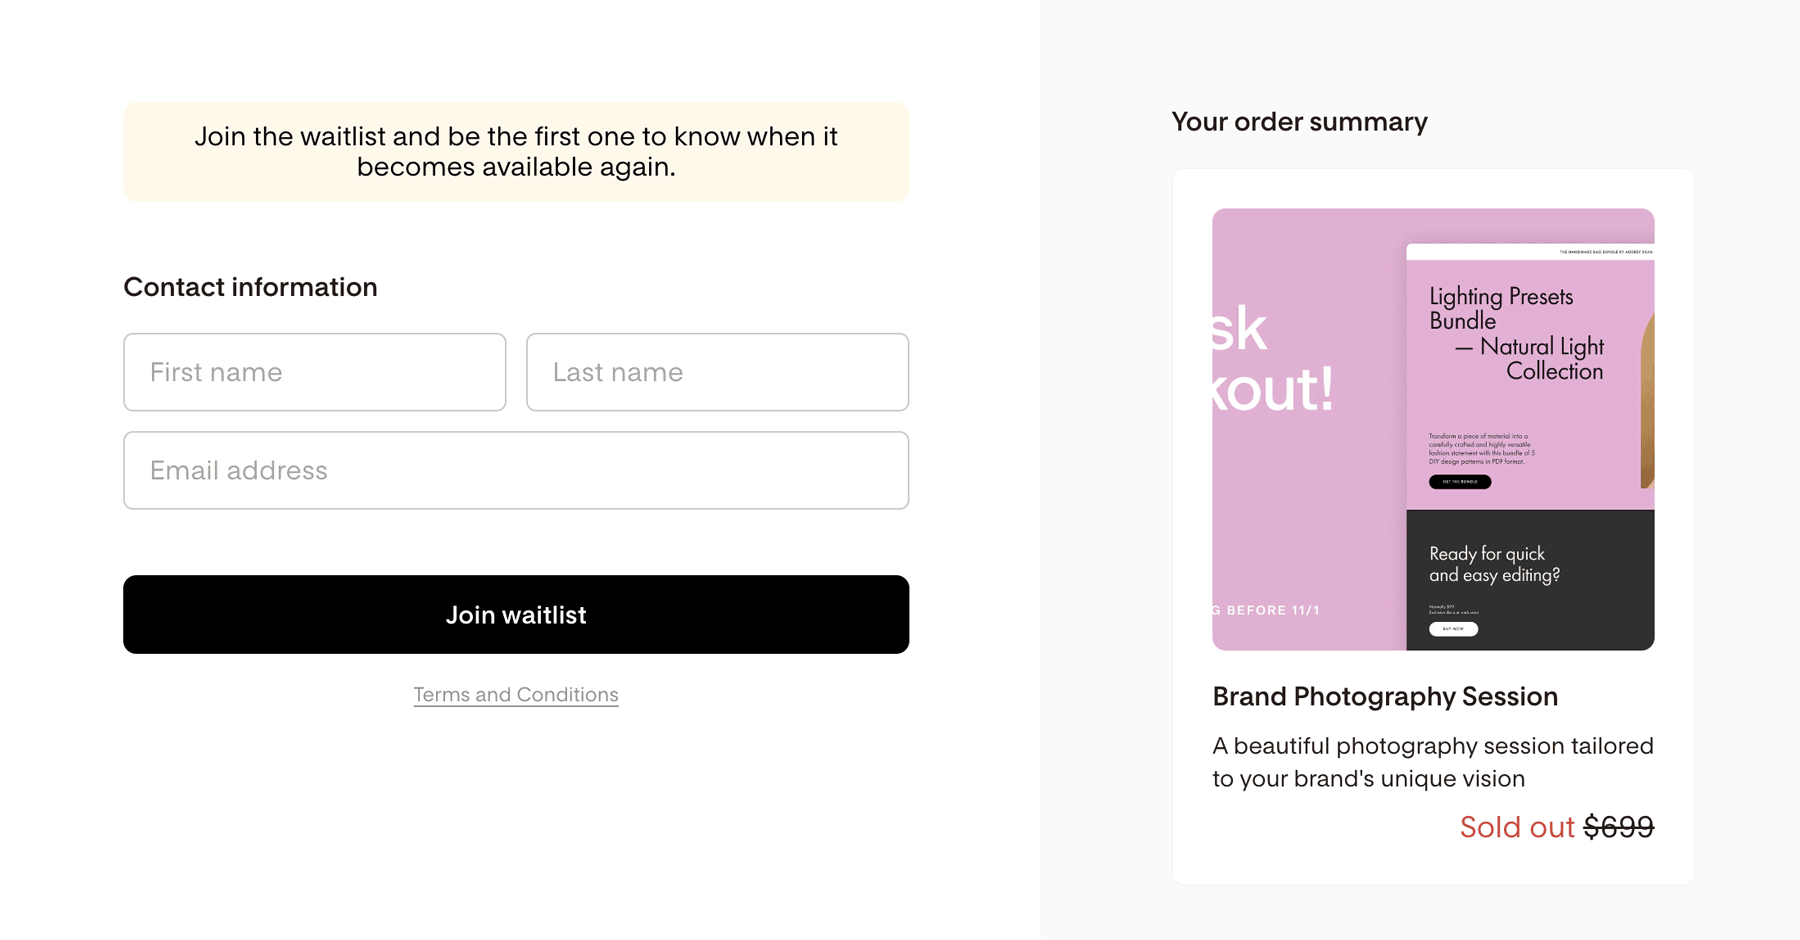
(3) When your product is sold out /sale end date reached and you allowed a waitlist
The "Pay" button will change to the "Join waitlist" button
When applicable, the waitlist message will be displayed above the Contact information section
When your checkout visitor completes their information and clicks “Join Waitlist”, they get added to the Waitlist segment you specified. If you didn’t specify a waitlist segment, the subscriber email address will be added to the system-default “All Subscribers” segment.
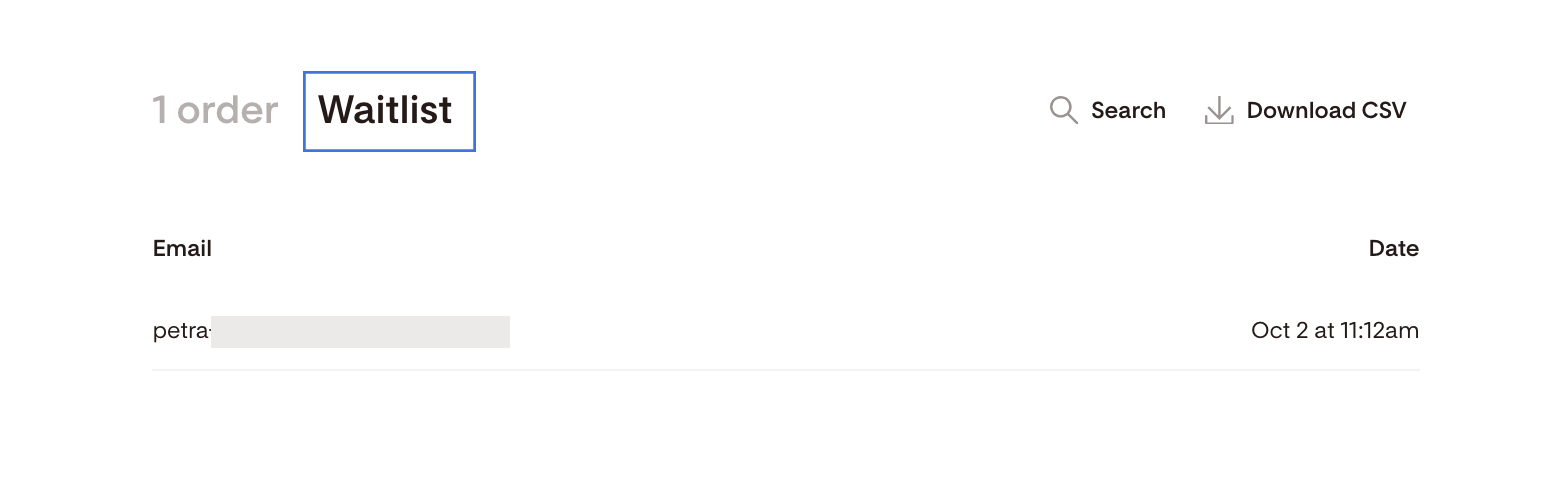
Under the individual Checkout report page, they will be listed on the “Waitlist” tab
After clicking "Join waitlist", the Contact information block will change to a blank block with "Thanks for joining the waitlist."
What happens when there’s only one product left?
Suppose only (1) product remains and two buyers attempt to purchase at the "same" time. In that case, we will present an error message to the buyer with the later payment attempt:
"Sorry, this product just sold out. Please refresh this page for further options."
Depending on your setup, they can join the waitlist instead.
Summary
You can set up product limits by quantity, time or both in your Checkout by
Navigating to the Product tab
Toggling on Limit quantity and/or Set an end date
Additionally, you can let visitors sign up for a Waitlist segment if they missed your offer (sold out or the sale end date expired).