How to add a countdown timer to your Flodesk Checkout Sales Page
A step-by-step guide on adding and customizing a countdown timer to Flodesk Sales Pages
Do you want to create urgency and fuel FOMO so that your sales page visitors are compelled to “Buy Now”? Meet the most customizable countdown timer on the market—where robust functionality meets full creative control.
In this help article, we’ll go through the steps of adding and customizing a fixed countdown timer to a Flodesk Checkout Sales Page.
How to add a countdown timer block to your Sales page
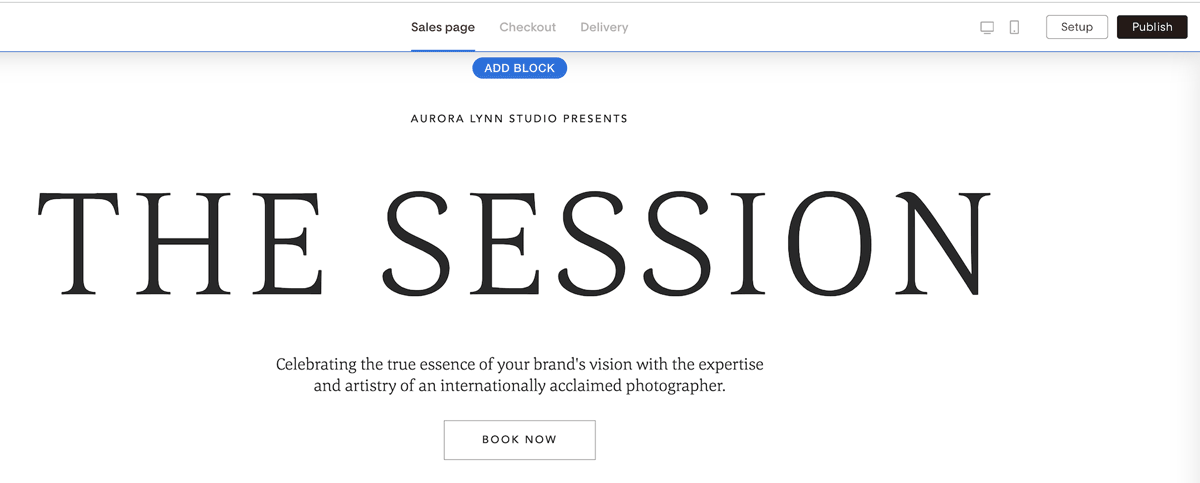
Step 1. In your Flodesk account, create a new Checkout or open an existing one to edit it
Step 2. In the sales page builder, click the Add block button
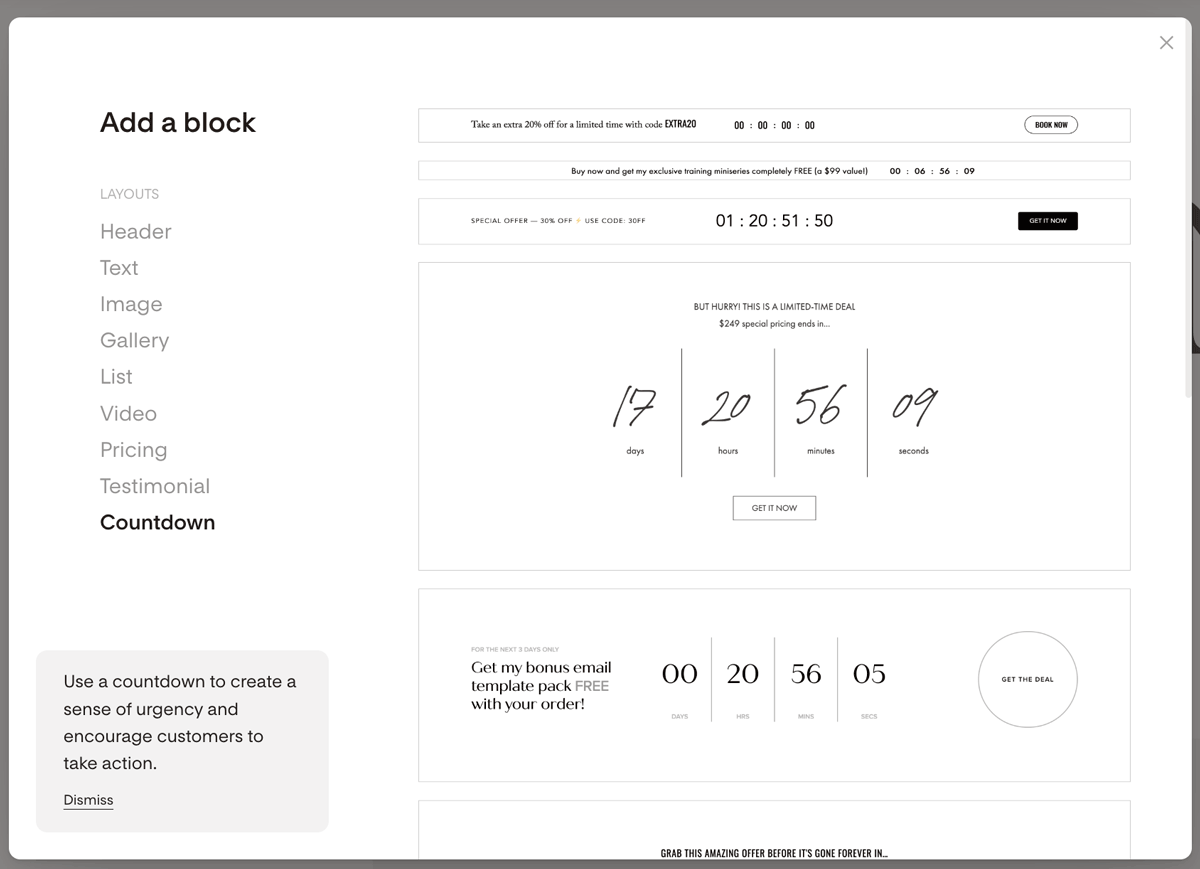
Step 2. On the Add a block modal, click the Countdown category, and select one of the countdown timer block templates (banner style or standard).
How to customize your fixed countdown timer
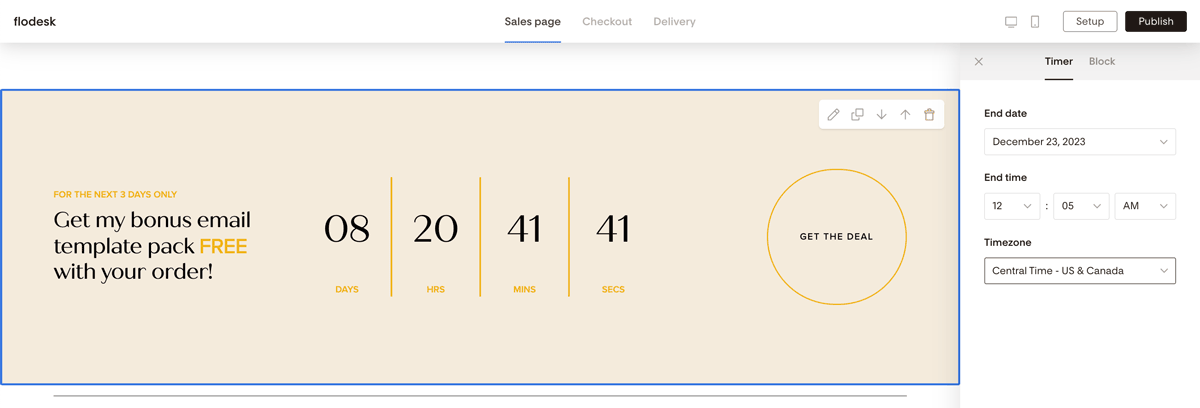
Step 1. Once you selected the countdown timer you want to use, click on the Timer tab. Use the dropdowns to specify the end date, end time, and timezone your timer should countdown to.
Note: The countdown timer can display only two digits for days, hours, minutes, and seconds, which means the maximum limit you can set will be 99 days in the future.
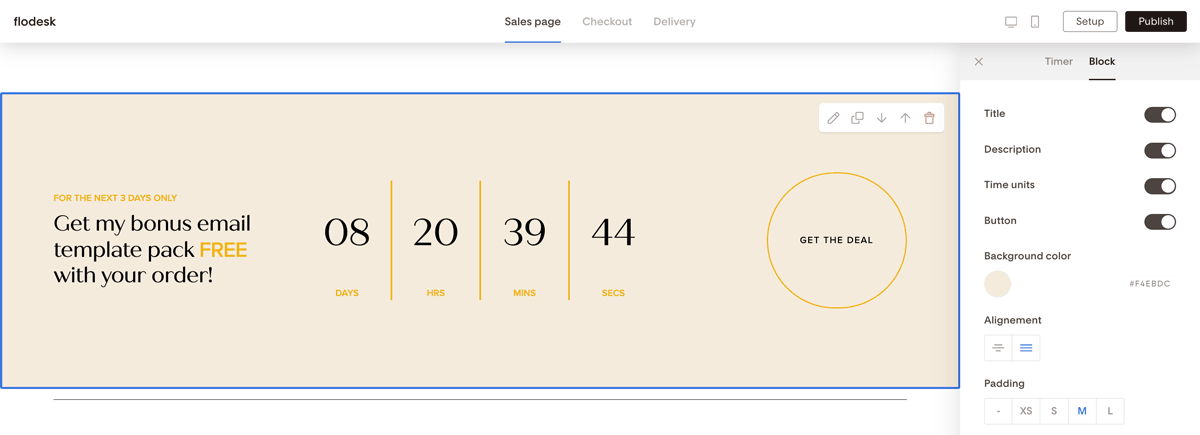
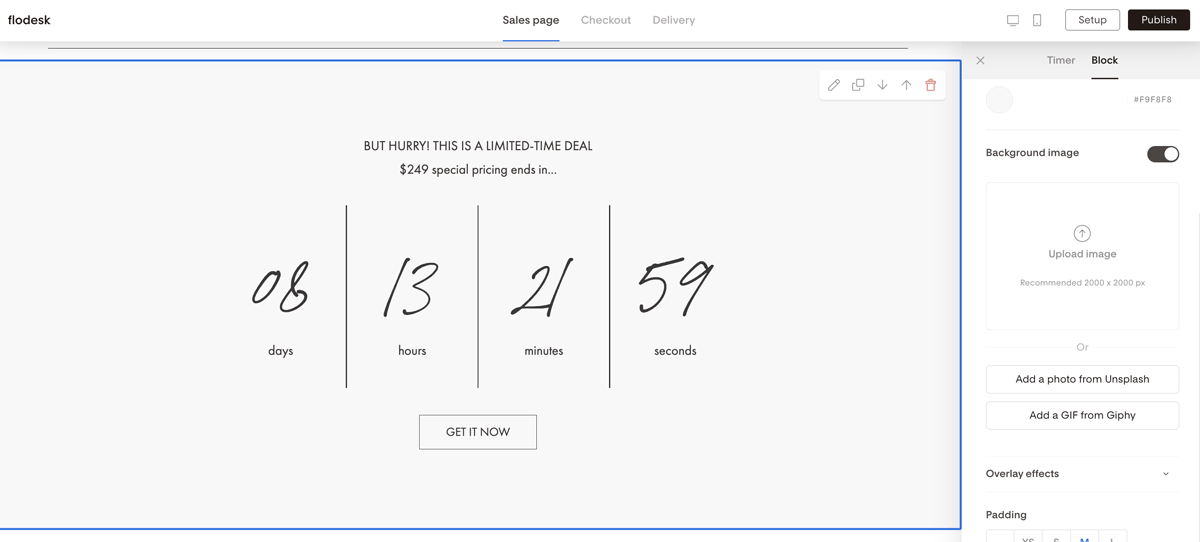
Step 2. Under the Block tab, you can control what parts of the Countdown timer block you want to show in the email by toggling the following sections on/off:
Title
Description
Time units
Button
You can also use the controls to change the block’s background and spacing settings.
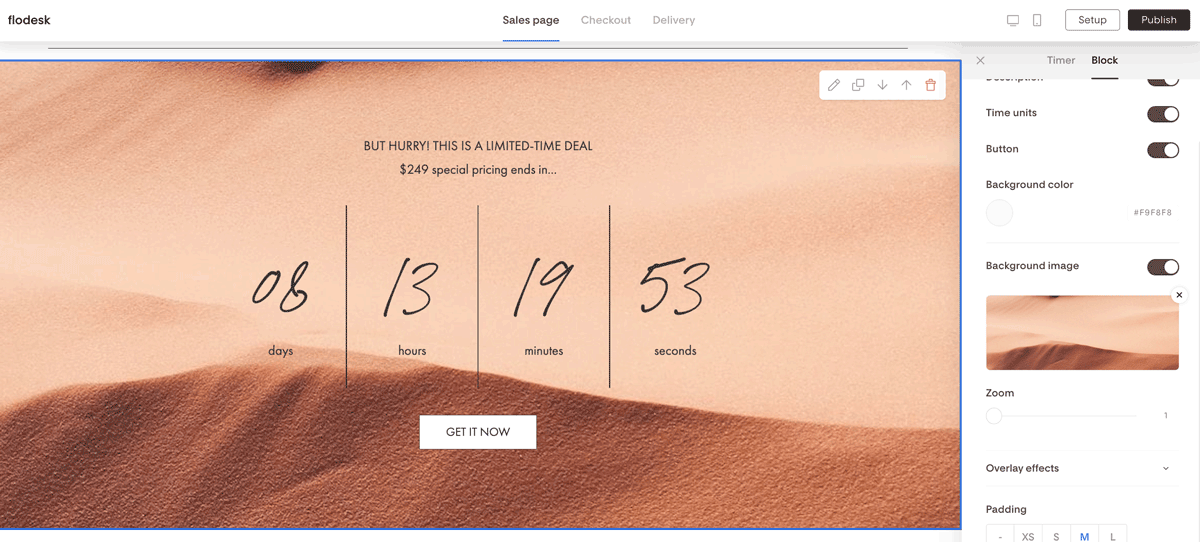
Note: some countdown templates also support adding a background image. You can upload your own image file or grab one from Unsplash or Giphy.
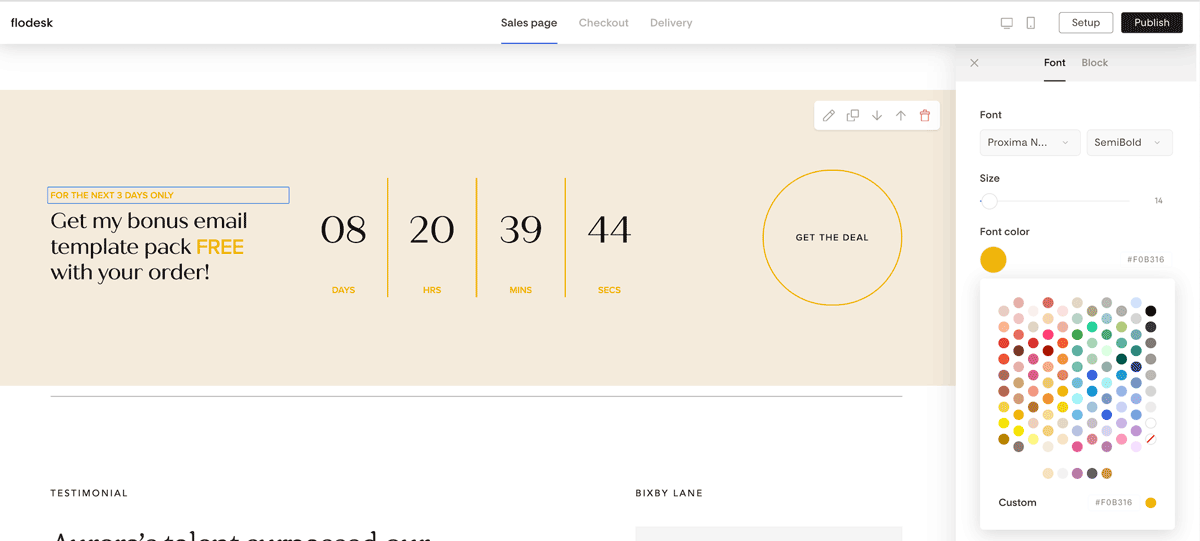
Step 3. To edit the font type, size, color of your countdown timer, click on any of the text elements to access the font editing options.
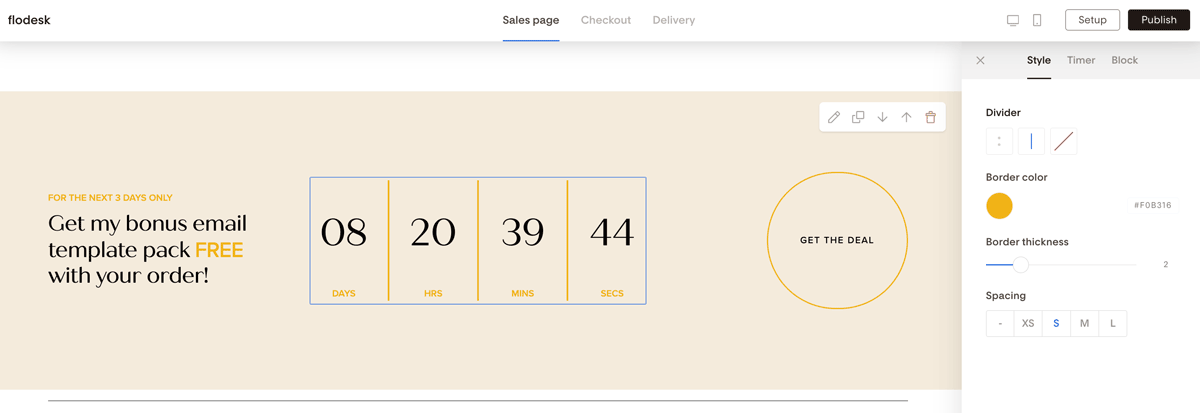
Pro tip: If you click the countdown box itself, you’ll see additional options to style the divider. There’s no stopping what you can create.
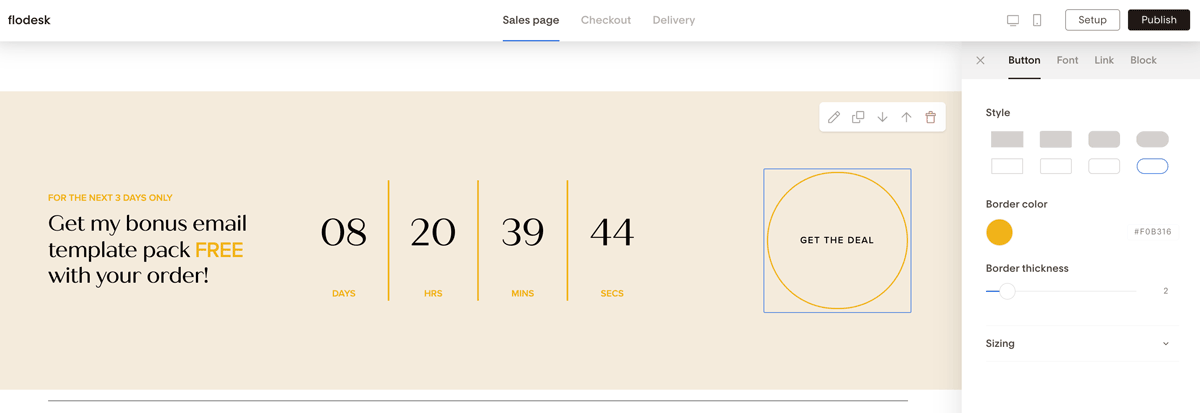
Step 4. Click the button element to style the button shape, fill color, border color, border thickness, and to edit the button font type, size, color.
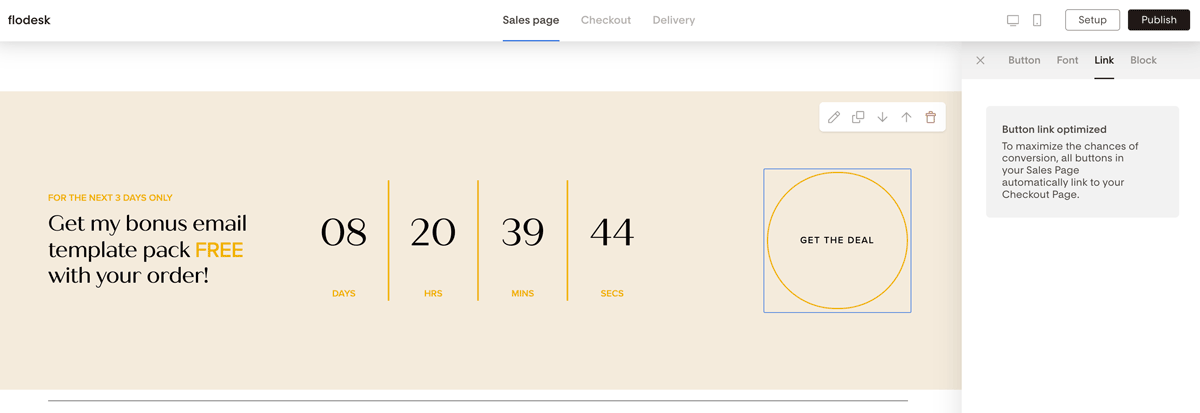
Note: You can't edit the countdown timer button link. To maximize the chances of conversion, all buttons on your Sales Page (including the countdown timer button) automatically link to your Checkout Page.
And that’s it! 🙌
Customize the rest of your Sales page, and experience the difference a countdown timer makes in boosting sales for your limited-time offers.
Summary
To add a countdown timer to your Sales page that counts down to a specific date and time, do the following:
In the Sales page builder, click the Add block button and pick a countdown timer under the Countdown block category
Under the Timer tab, set the end date, end time, and timezone for your countdown timer
Customize the rest of the countdown block with your brand colors, fonts, shapes, and more!

