
All about Link in bio Forms
Learn what Link in bio Forms are, where to find them, and how to customize them to match your brand.
What is a Link in bio Form?
A Link in bio Form is a standalone, shareable page you can add to your social media bio (like Instagram or TikTok).
It helps you:
Collect email subscribers
Share important links
Showcase your brand in one simple page
Turn social followers into email subscribers
Instead of sending people to multiple links, you can send them to one beautiful page that:
Captures email addresses
Shares your offers
Highlights your content
Grows your audience (that you own)
This means you’re not relying only on social media algorithms. You’re building an email list you control.
Link in bio Forms can also replace tools like Linktree — but with built-in email capture and segmentation.
Where to find Link in bio Forms
Log into your Flodesk account
Go to Forms
Click + New form
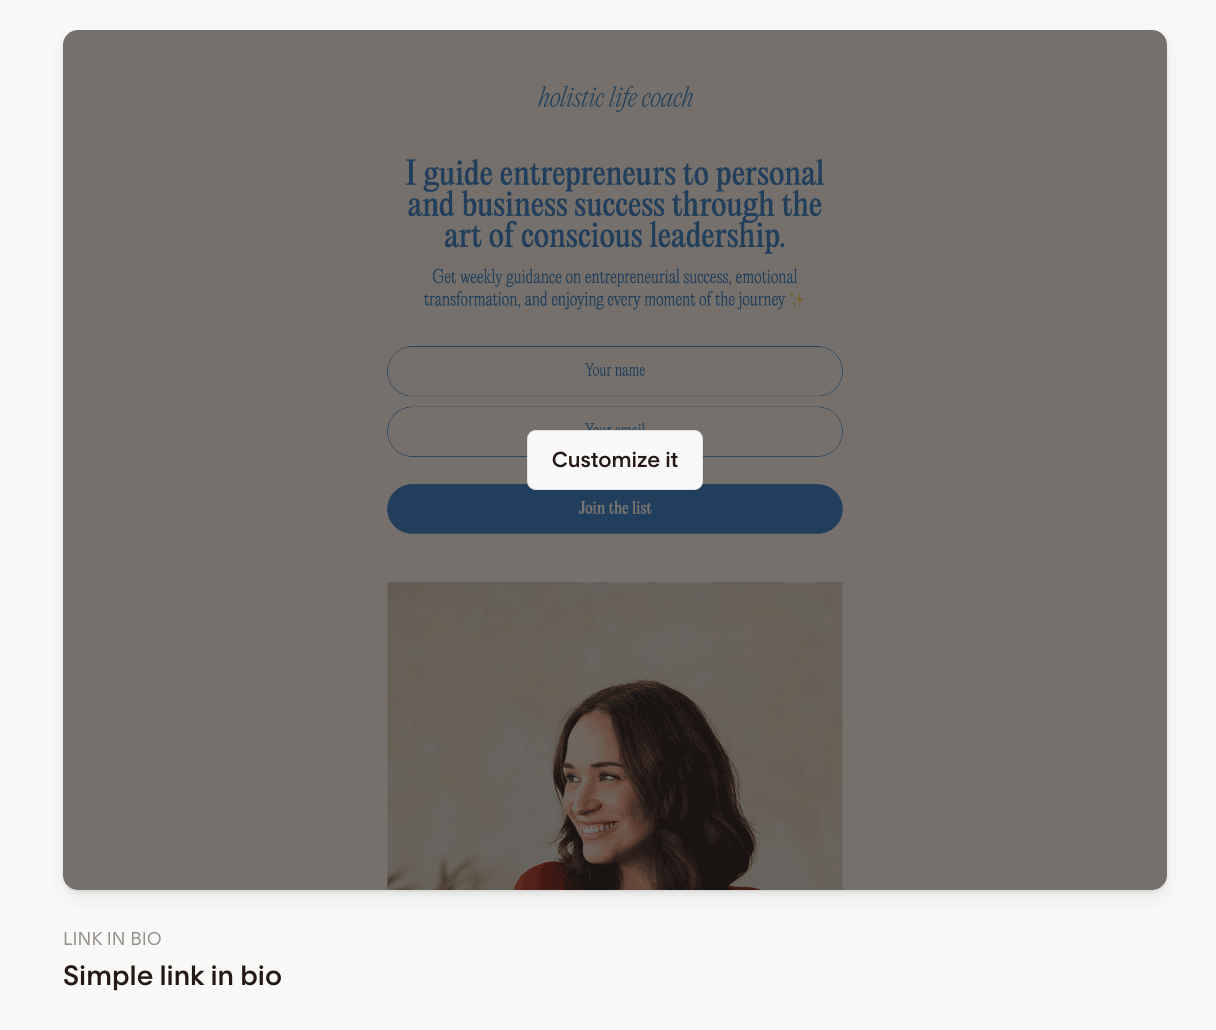
Select Link in bio from the template gallery
Choose a template you like and click Customize it to start editing.
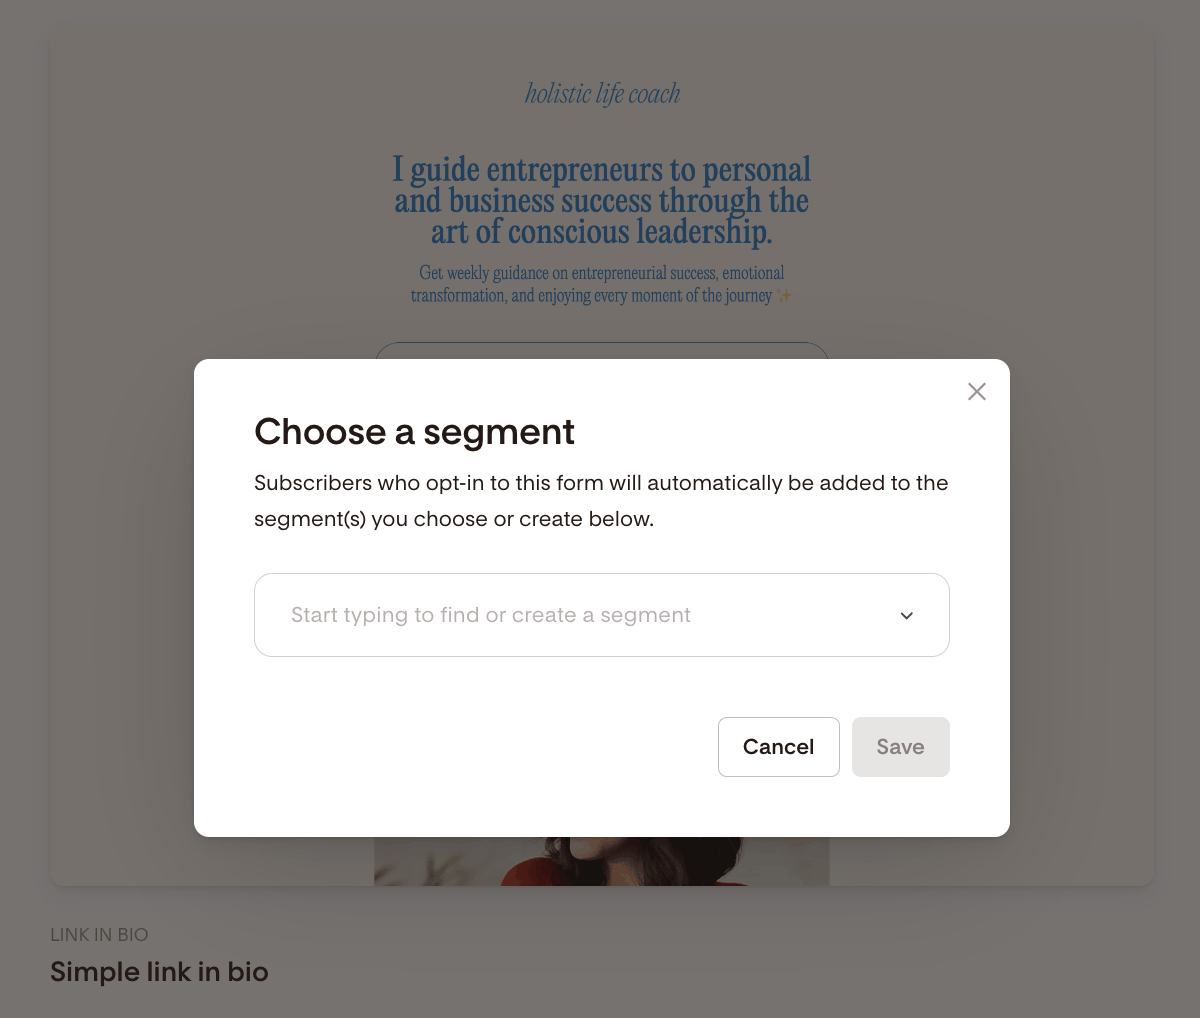
Before you design: Choose a segment
The first step is choosing a segment.
Subscribers who sign up through this form will automatically be added to the segment(s) you select.
You can:
Choose an existing segment
Create a new one
This helps you stay organized and send targeted emails later.
How to customize your Link in bio Form
Click anywhere outside the form preview, then use the right sidebar under the Form tab to turn sections on or off.
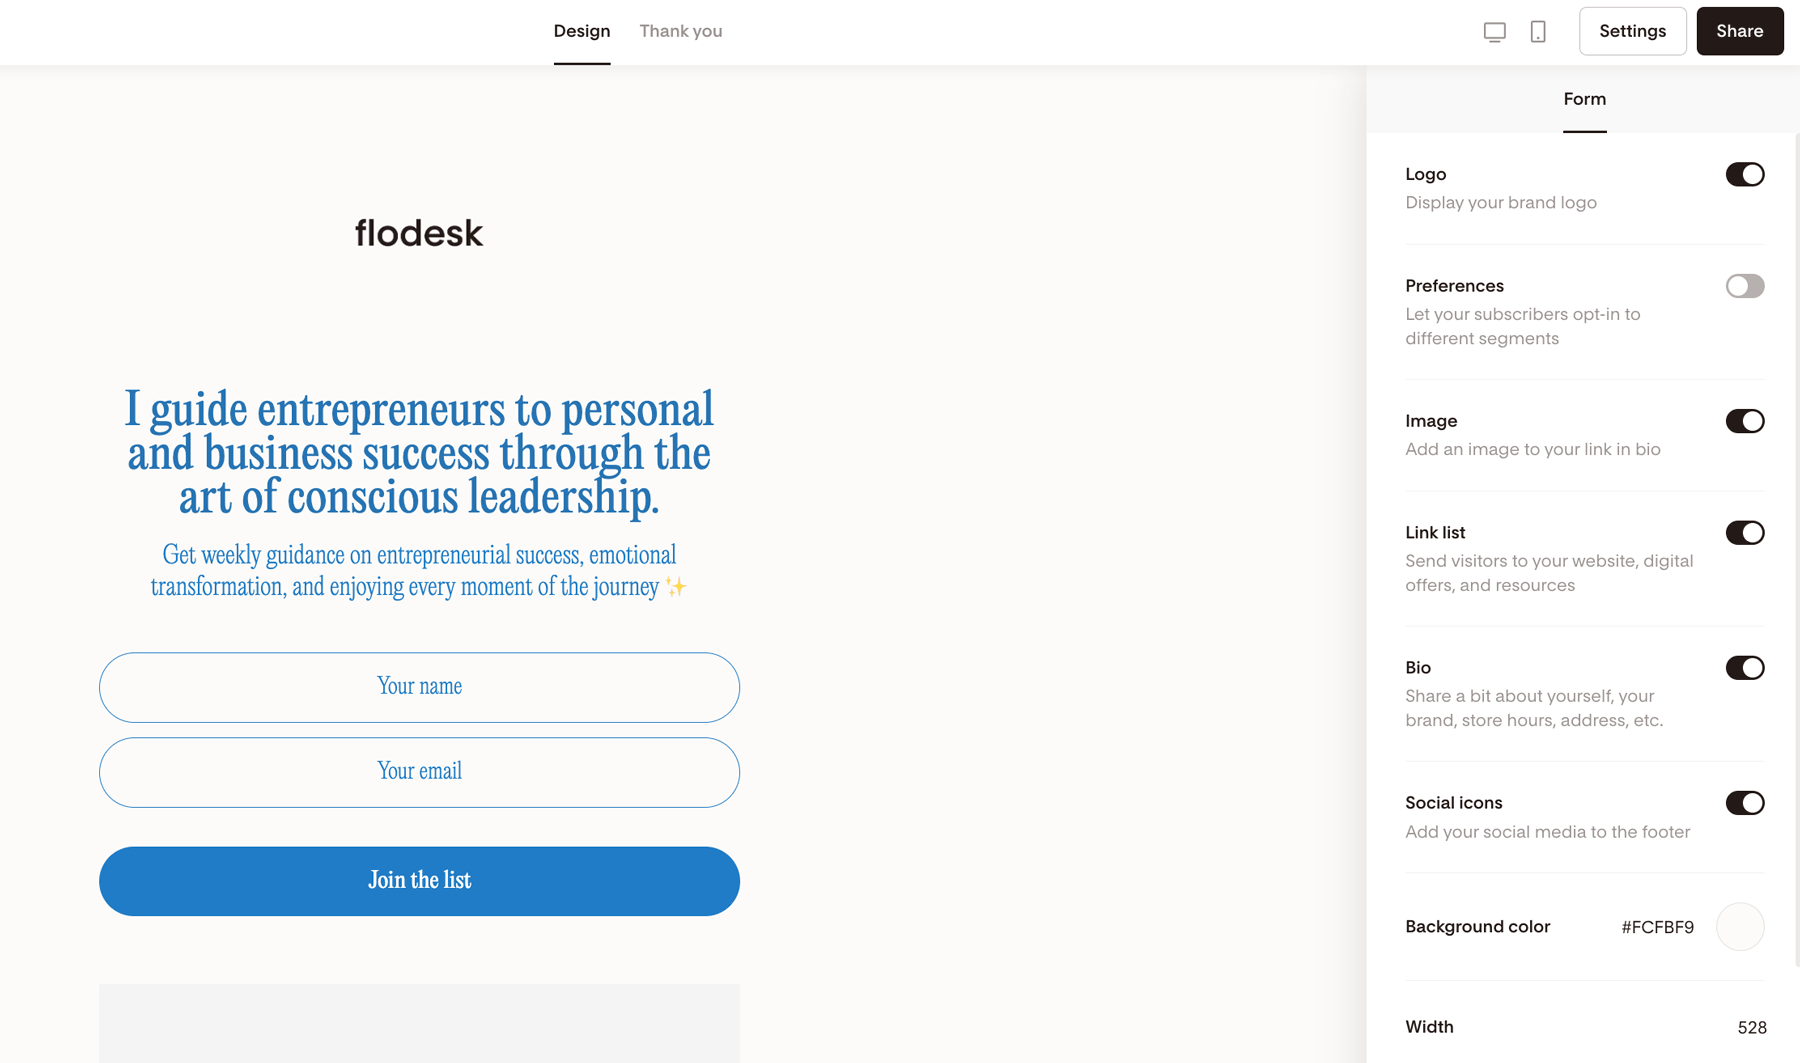
Here’s what you can customize:
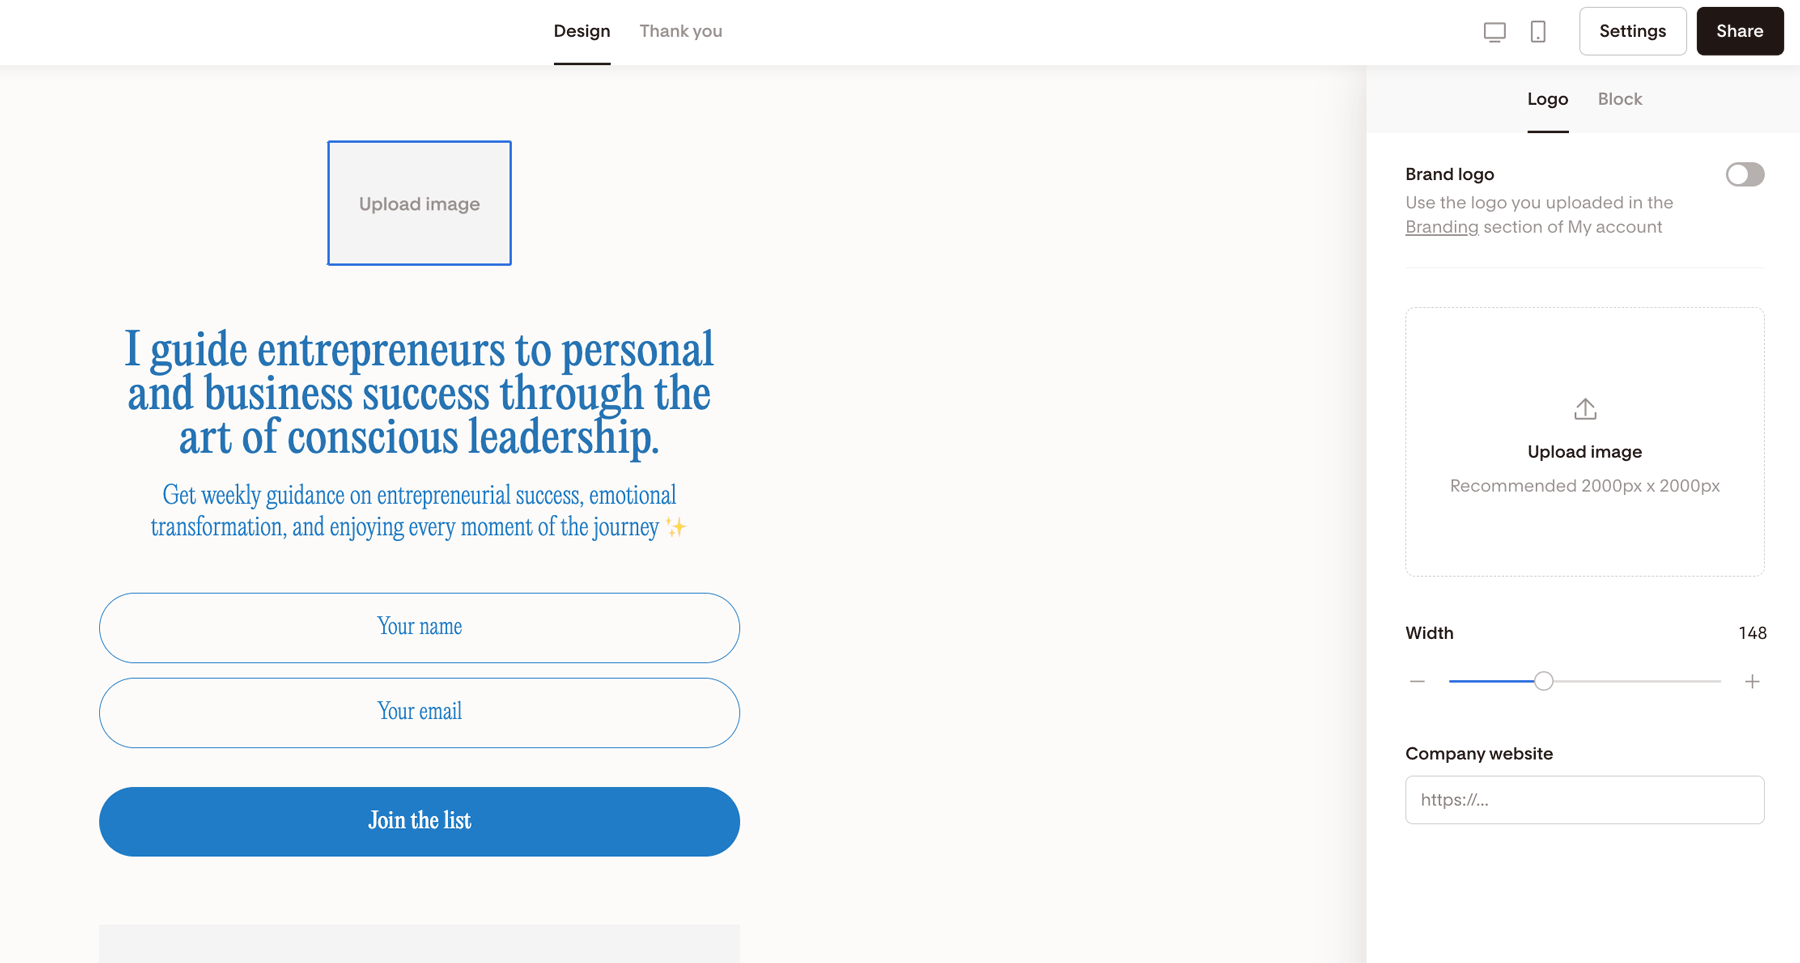
Logo
You can:
Use your saved brand logo (from Account settings → Branding)
Upload a different image
You can adjust:
Logo width
Alignment
Padding
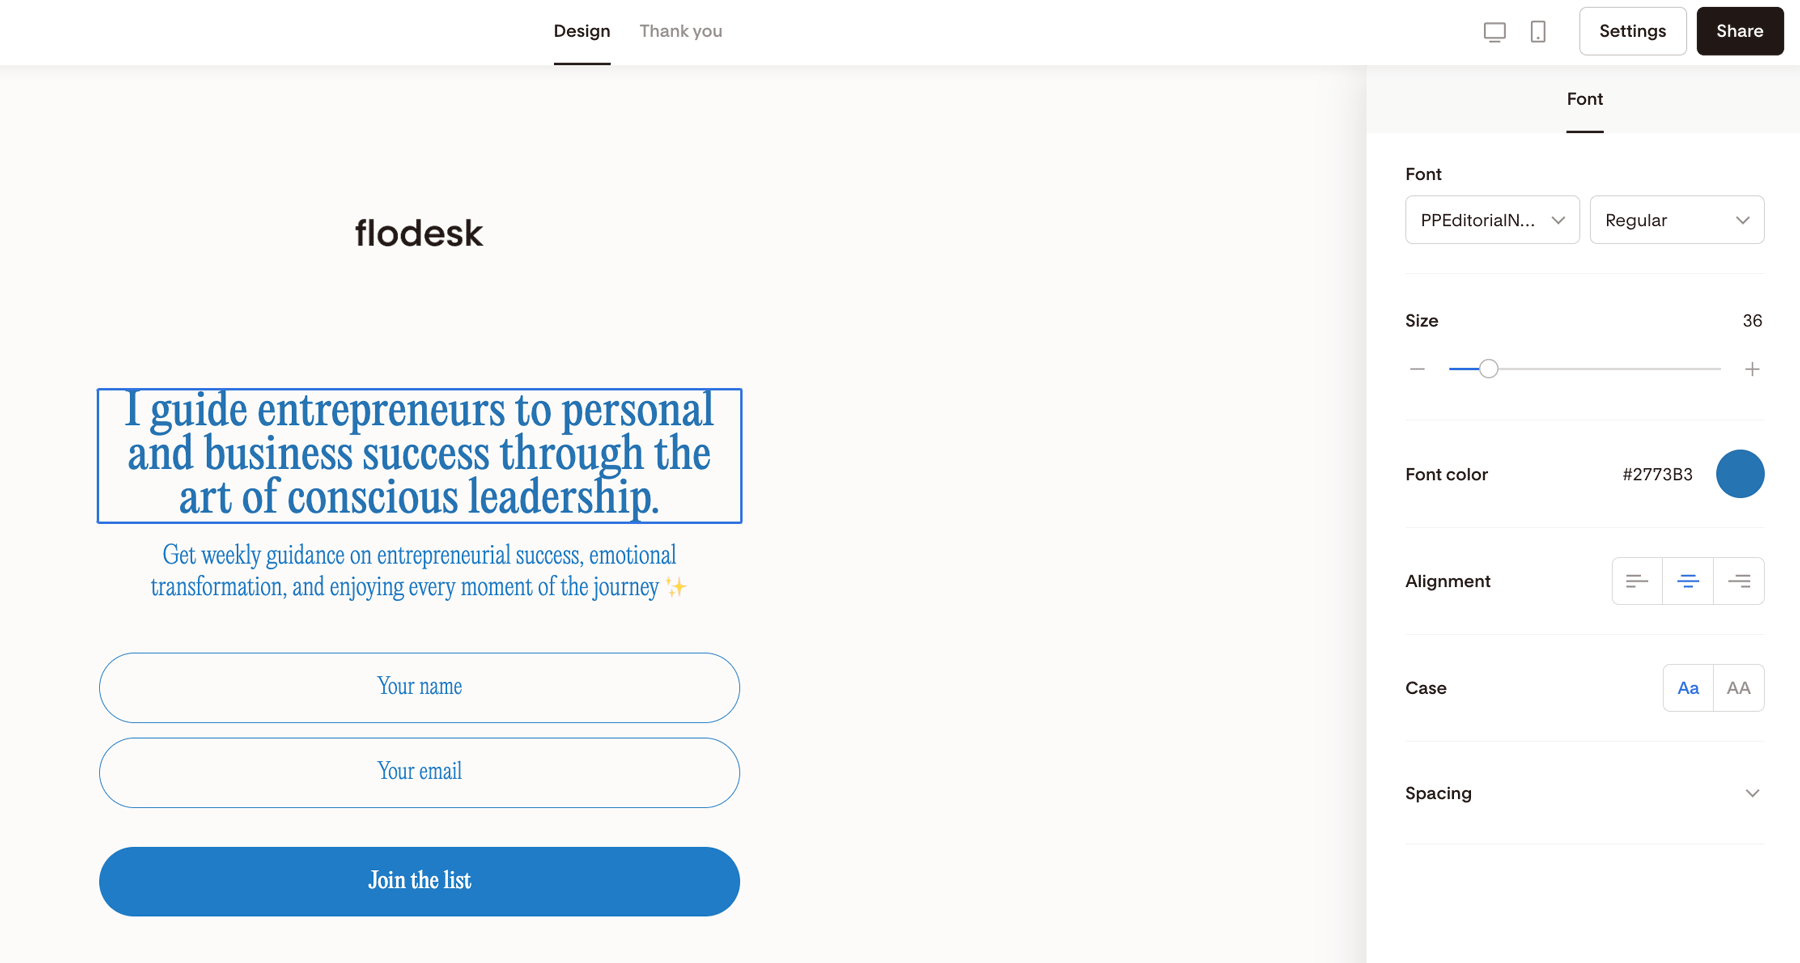
Opt-in form heading and body text
This is your main message.
You can:
Edit text
Change fonts
Adjust size and color
Add formatting
Keep your form message clear and focused. Tell visitors exactly what they’ll get.
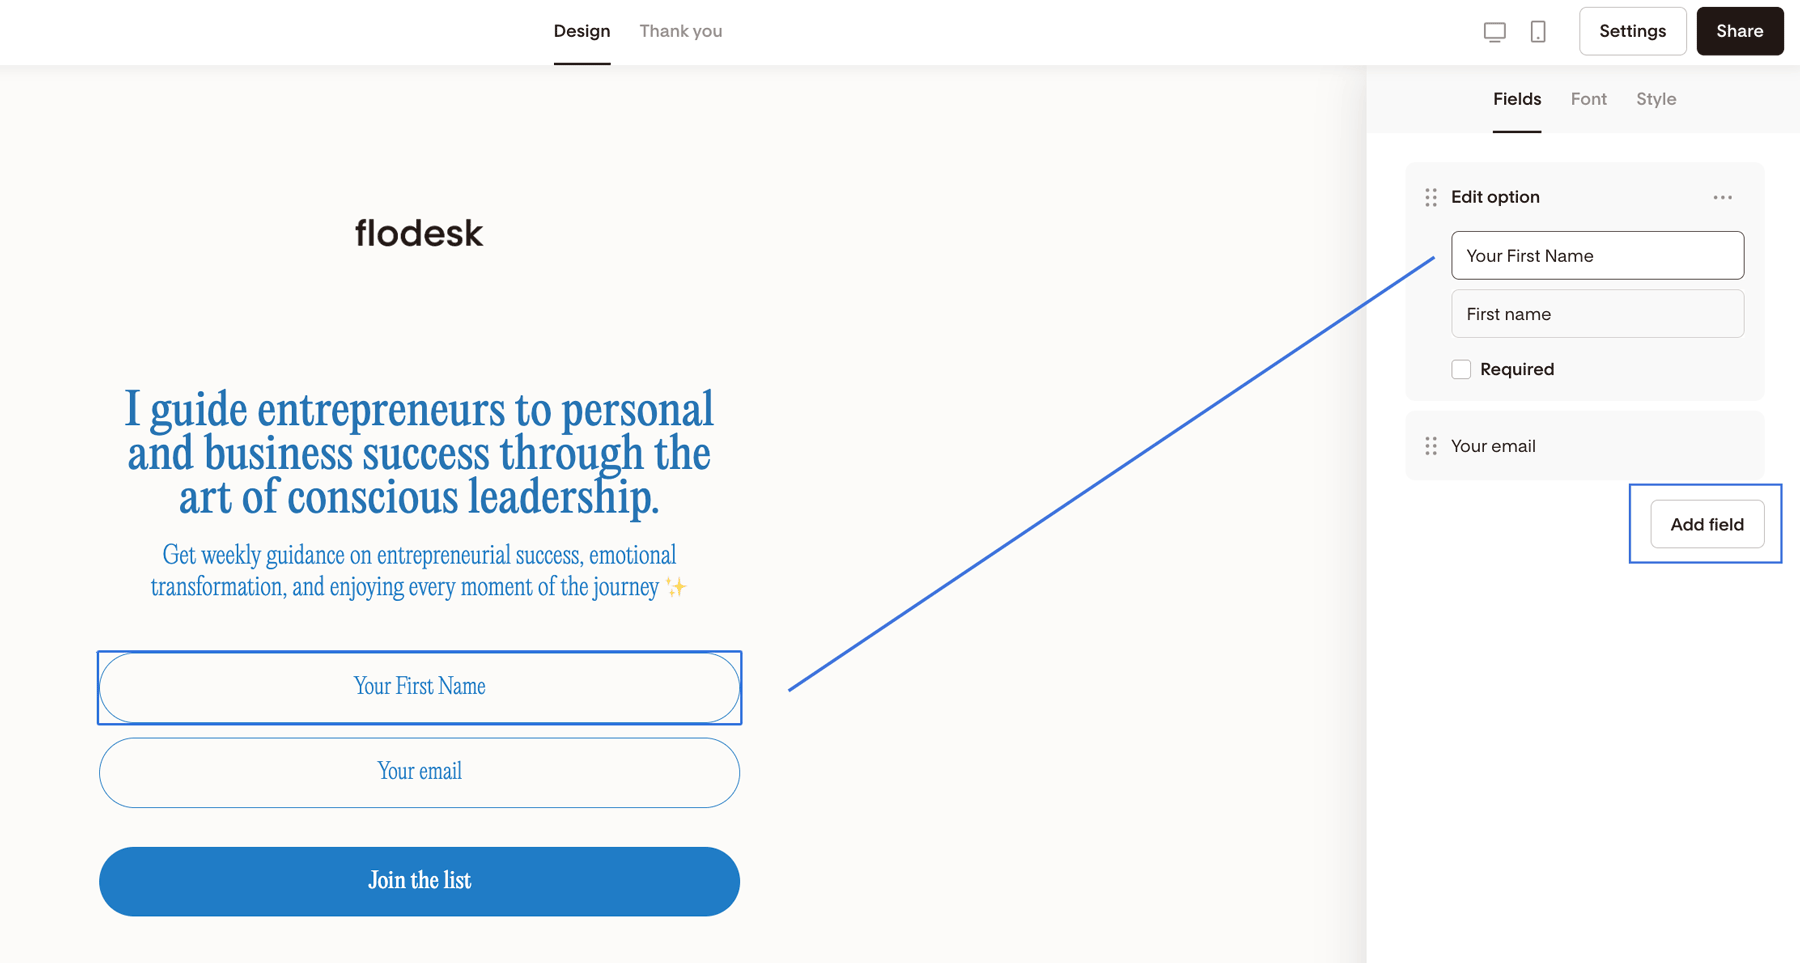
Form fields
By default, you’ll see email — but you can add more fields.
To add a field:
Click Add field
Customize the label
Adjust styling
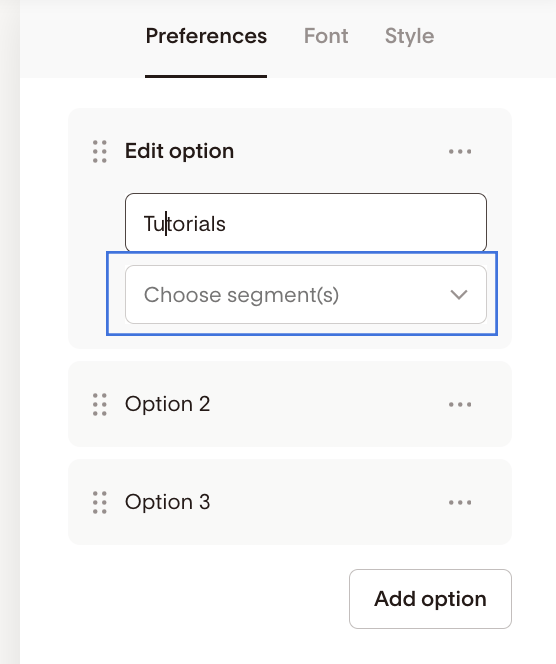
Preferences (optional but powerful)
Preferences allow subscribers to choose what they want to receive.
For example:
Weekly newsletter
Product updates
Free resources
Waitlist access
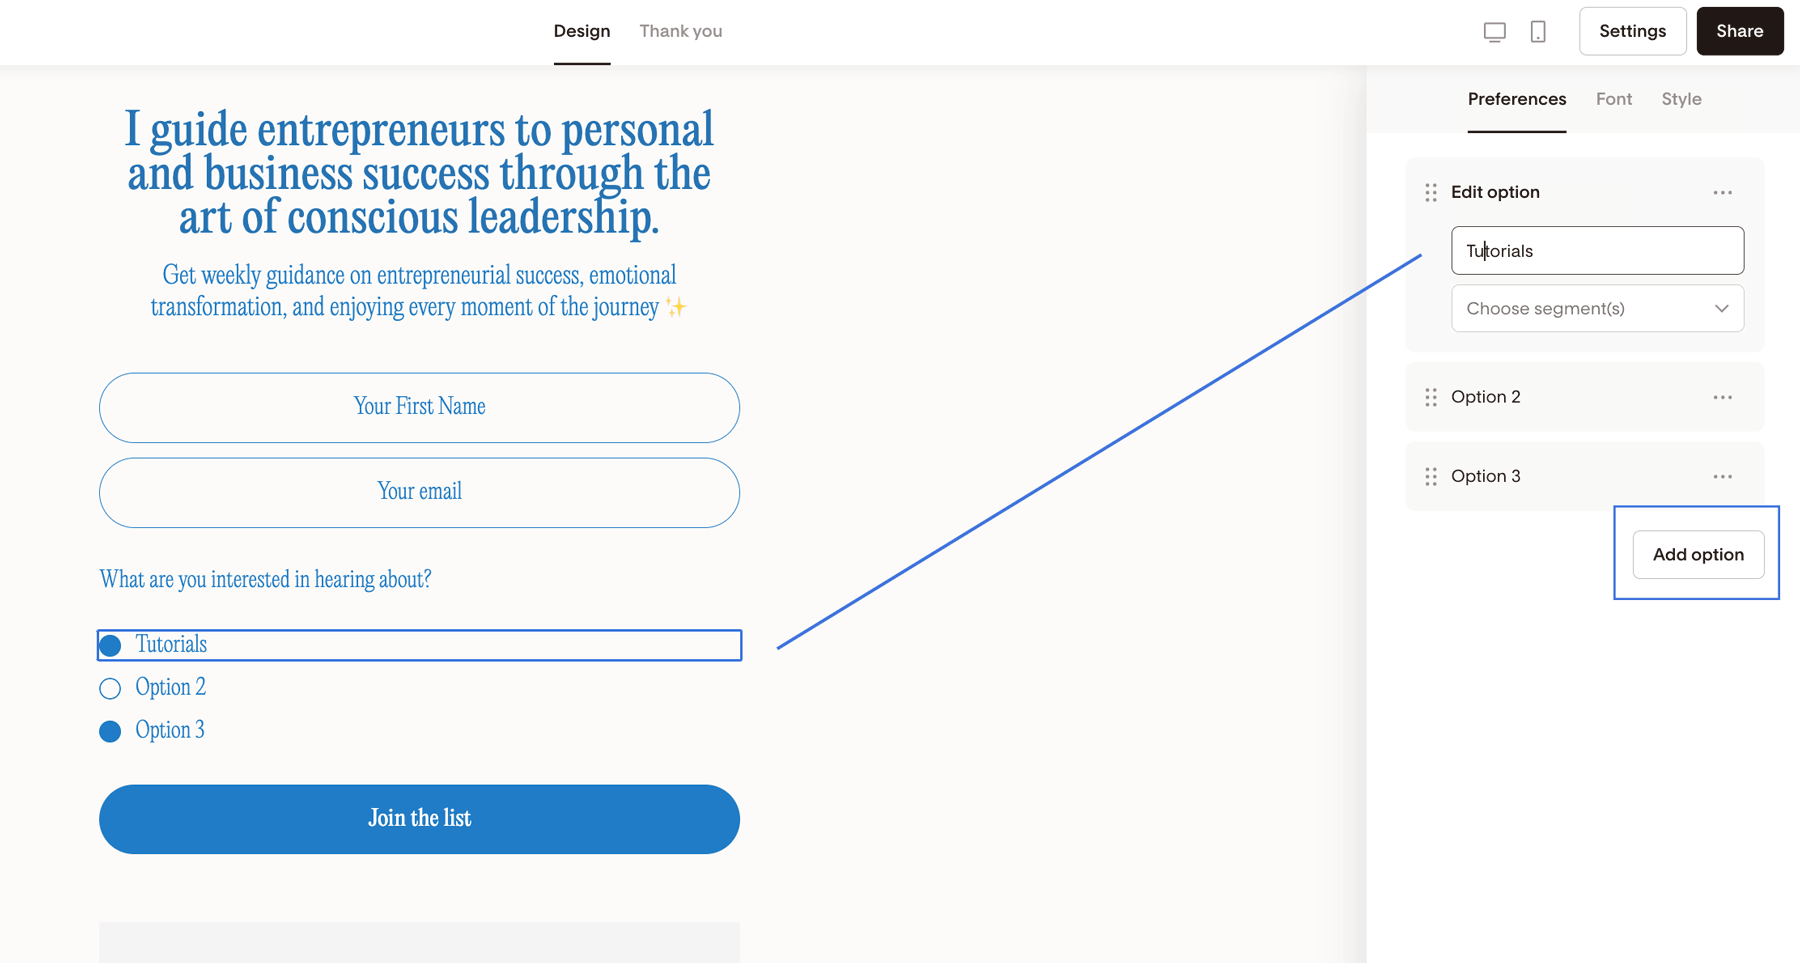
You can:
Add up to six preference options
Rename each option
Connect each one to a specific segment
Important: Each preference must be connected to a segment. Otherwise, selections won’t save.
Under the Font and Style tabs, you can further customize your form preferences to your brand by
selecting a matching font—you can even use your own brand fonts—
font color or
checkbox type and layout.
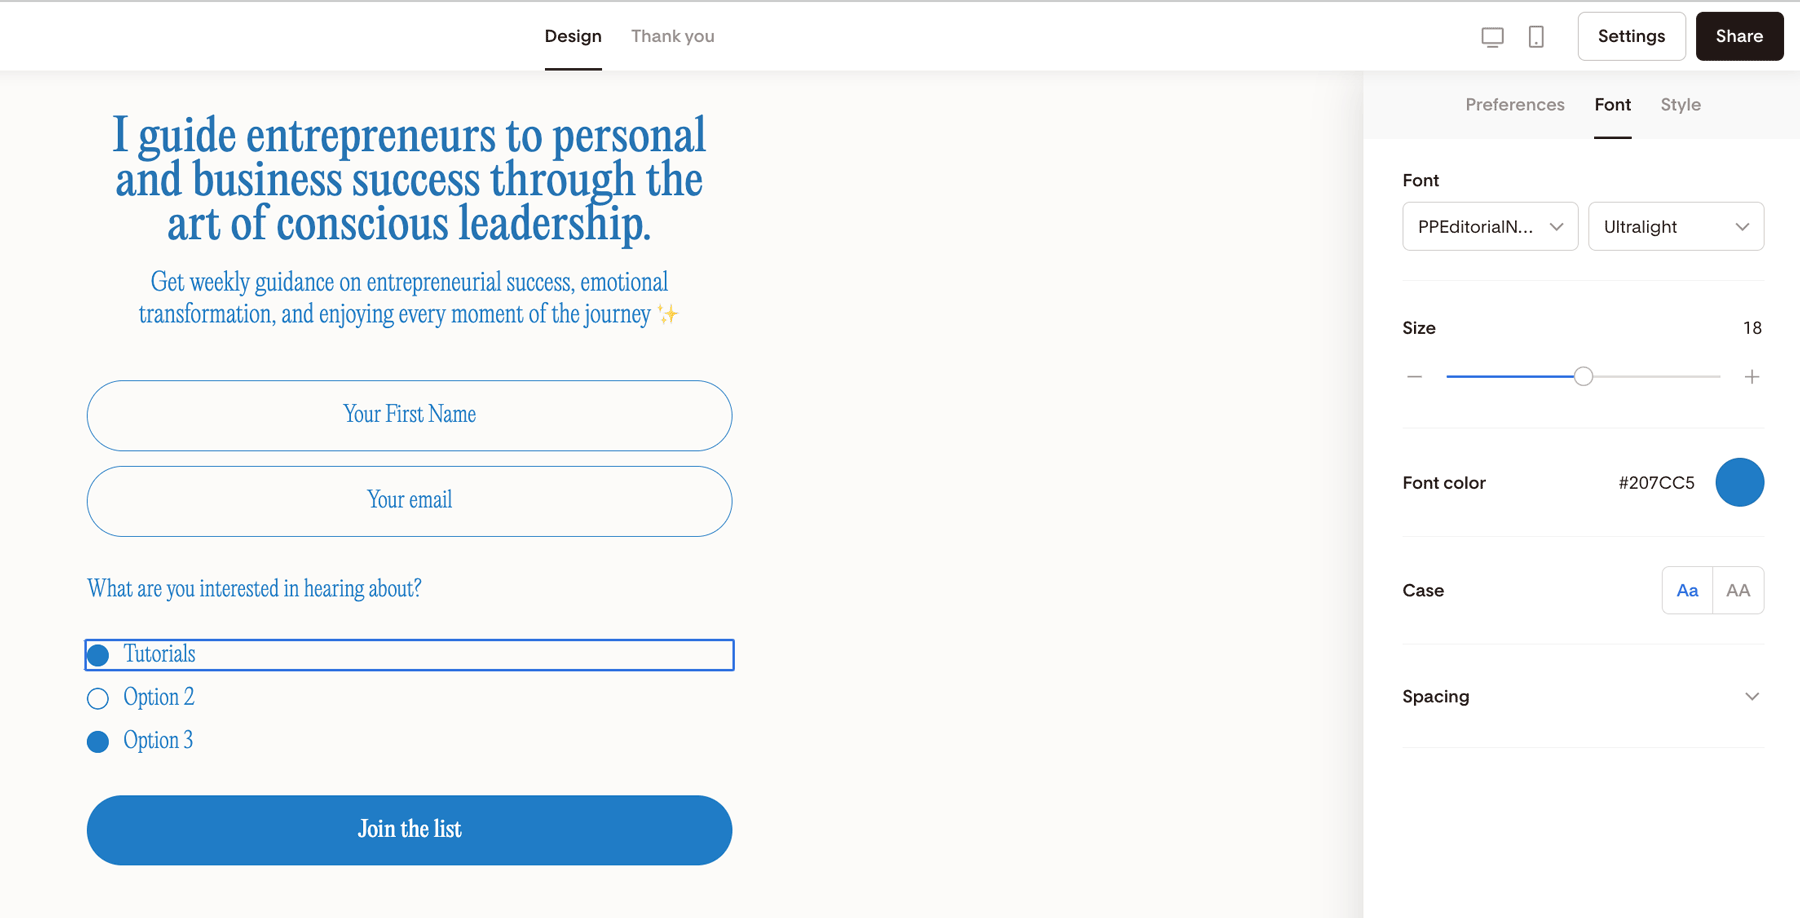
Opt-in form button
Your button is your call-to-action.
Customize:
Button text (e.g., “Get the guide”, “Join the list”)
Font
Style
Make it clear and action-focused.
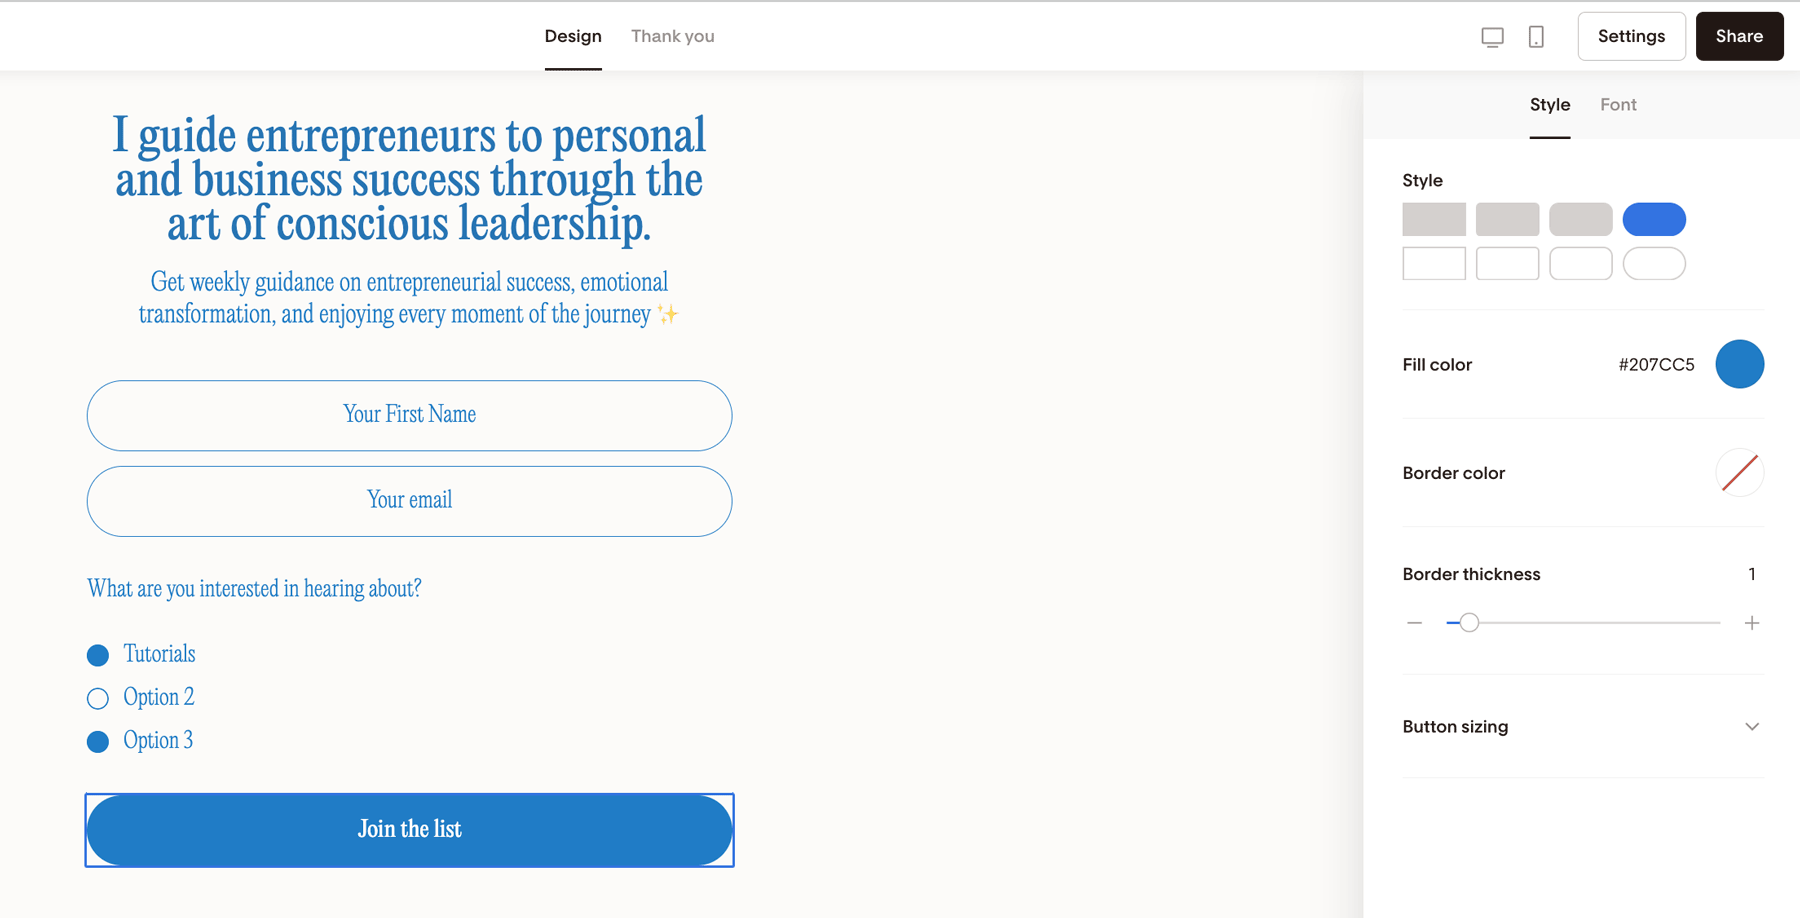
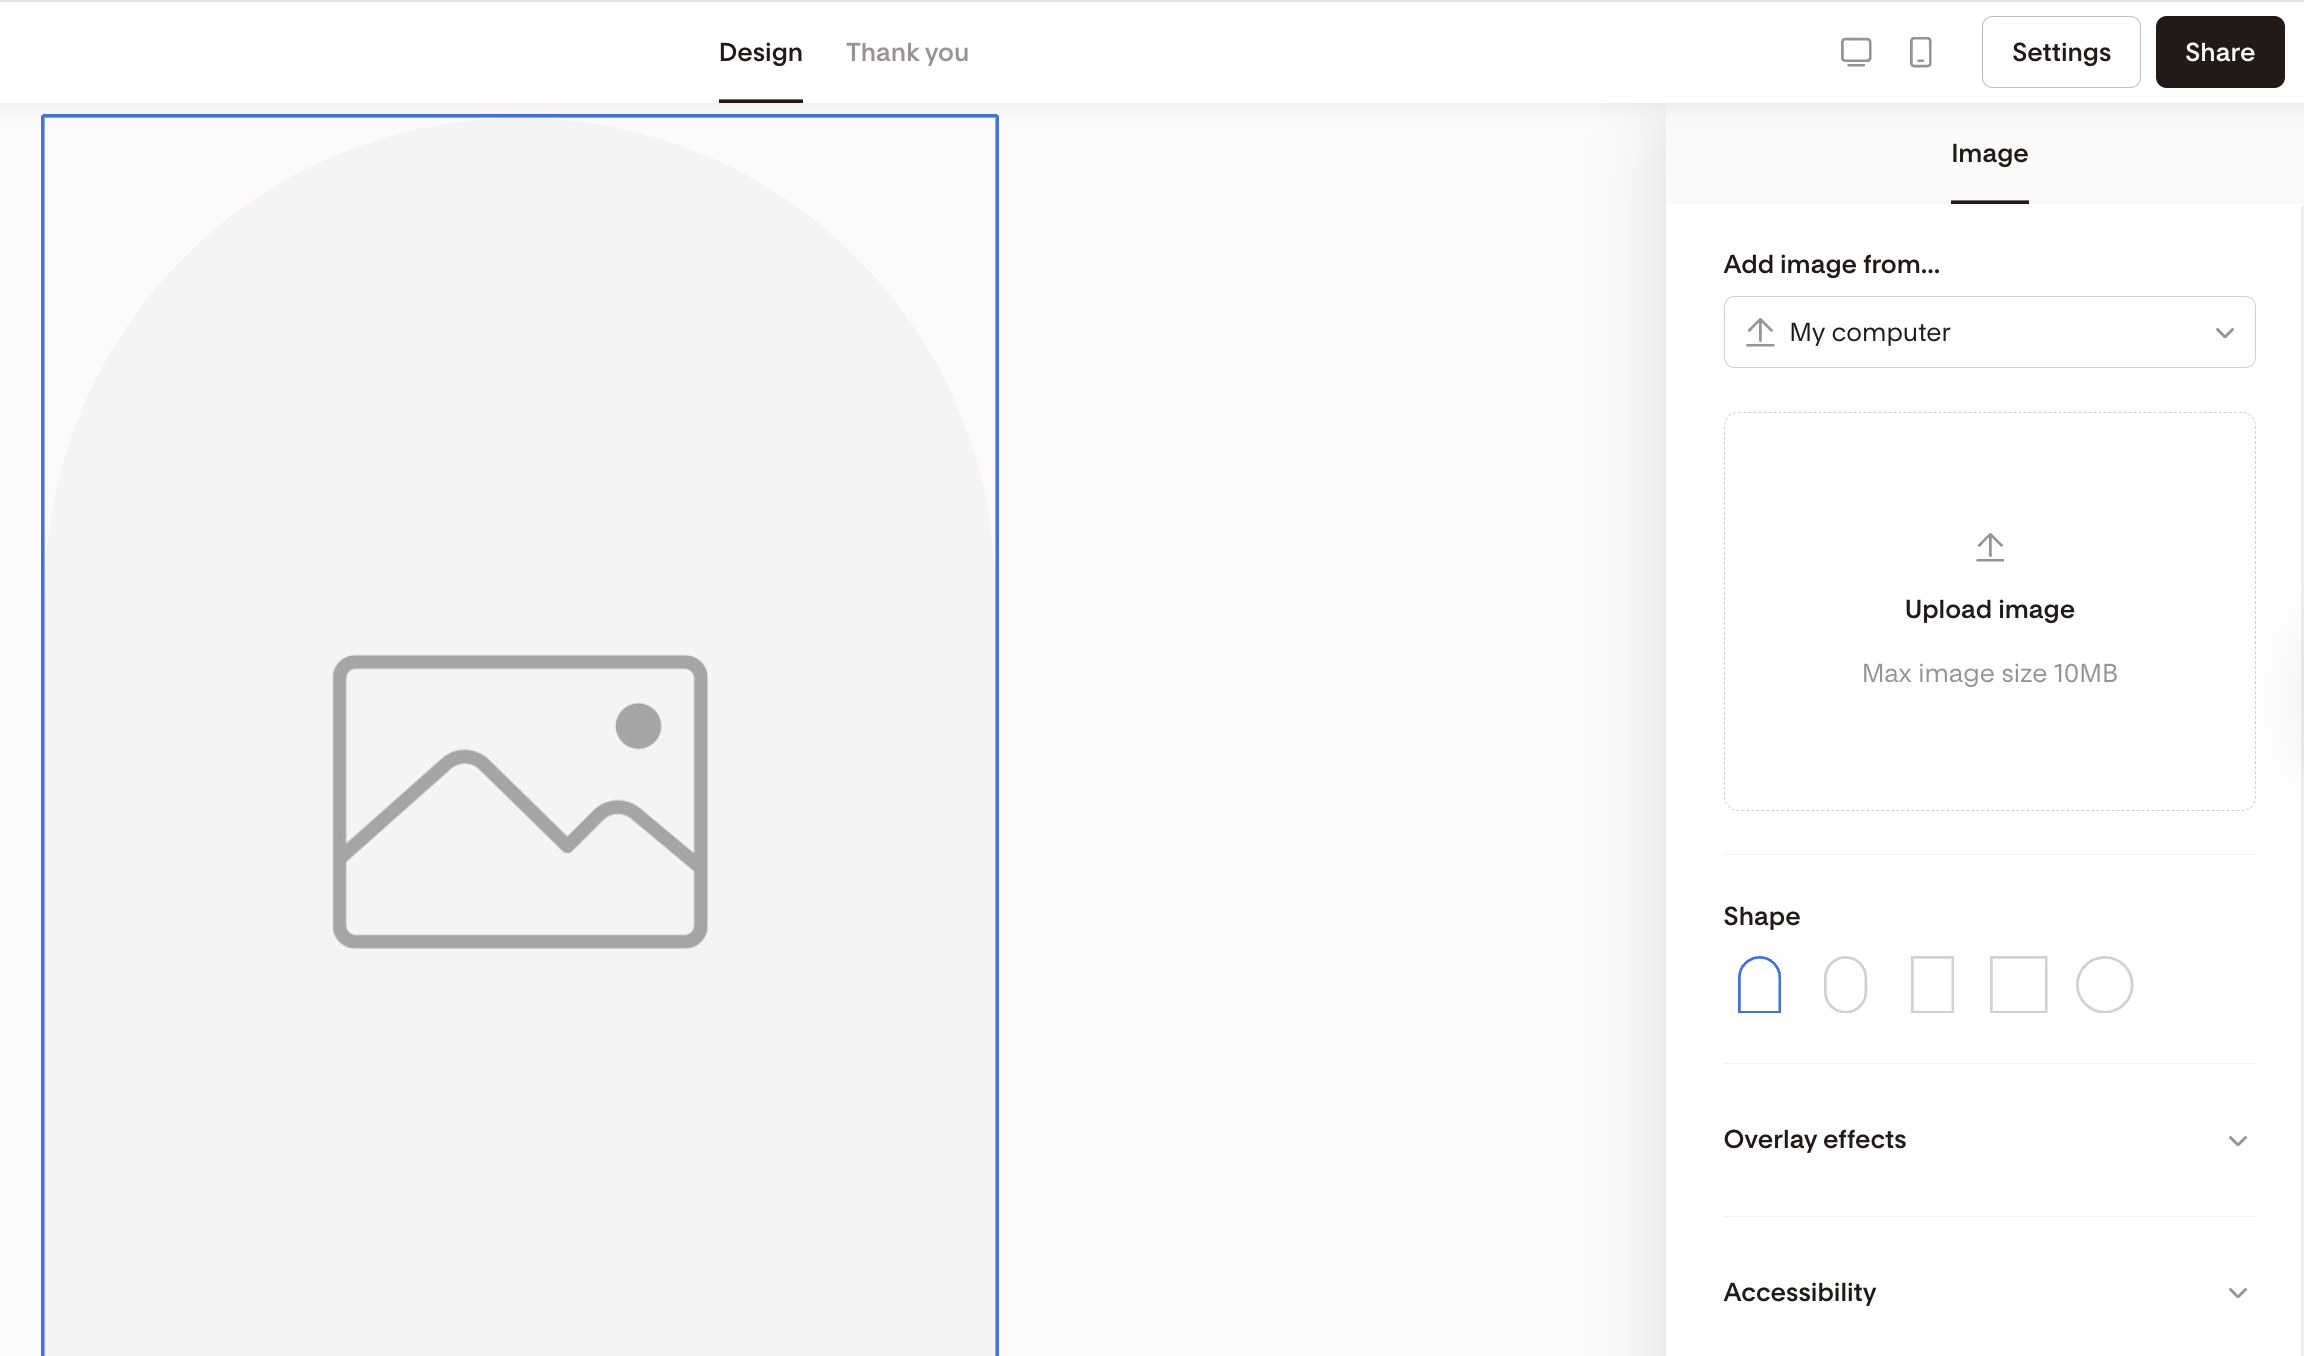
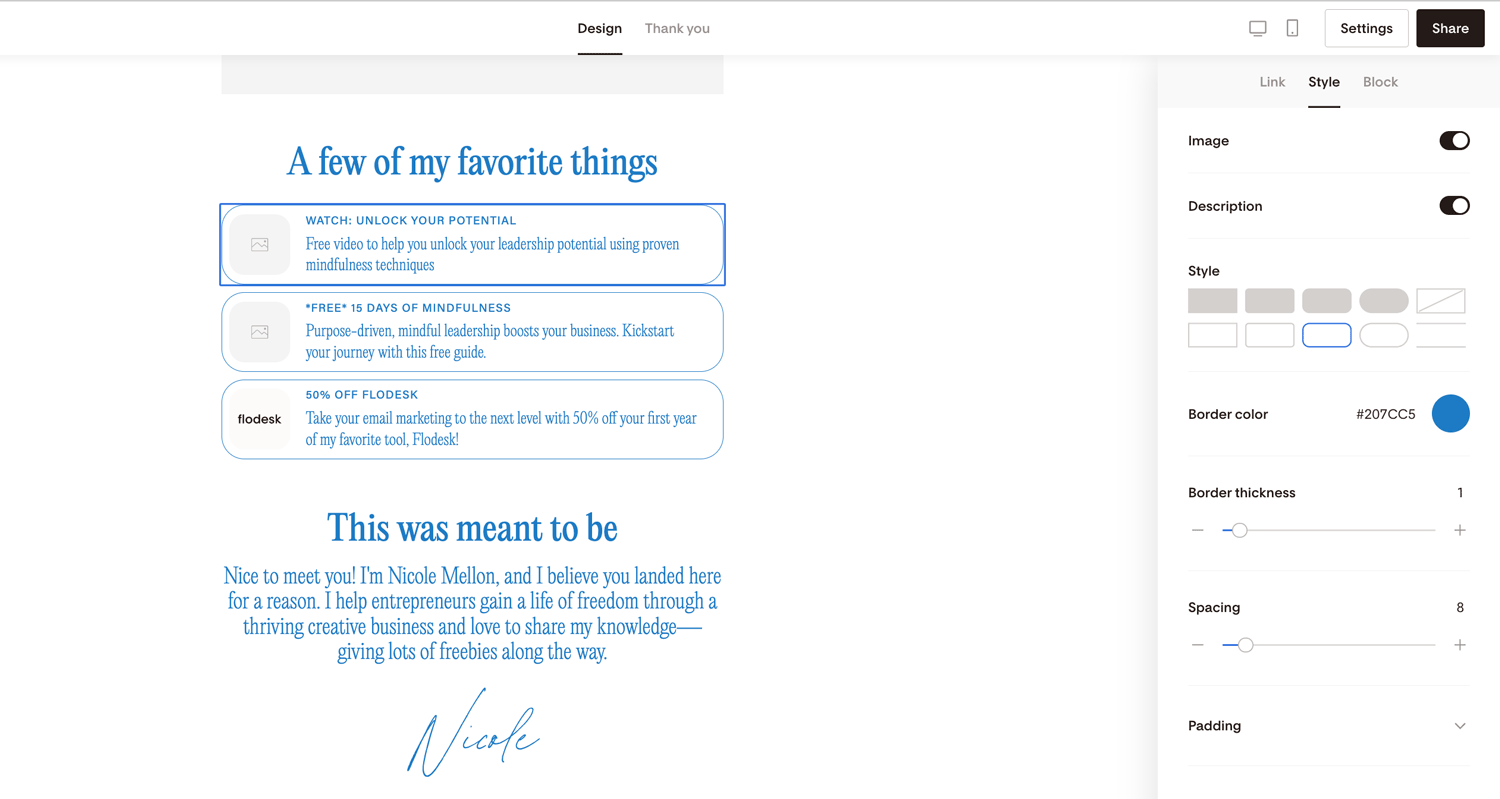
Image block
Add a:
Branded image from your computer
Product mockup from your connected Canva account
Lifestyle photo via Unsplash
Fun GIF via Giphy
You can experiment with shapes and styling.
Don’t need it? Toggle it off under the Form tab.
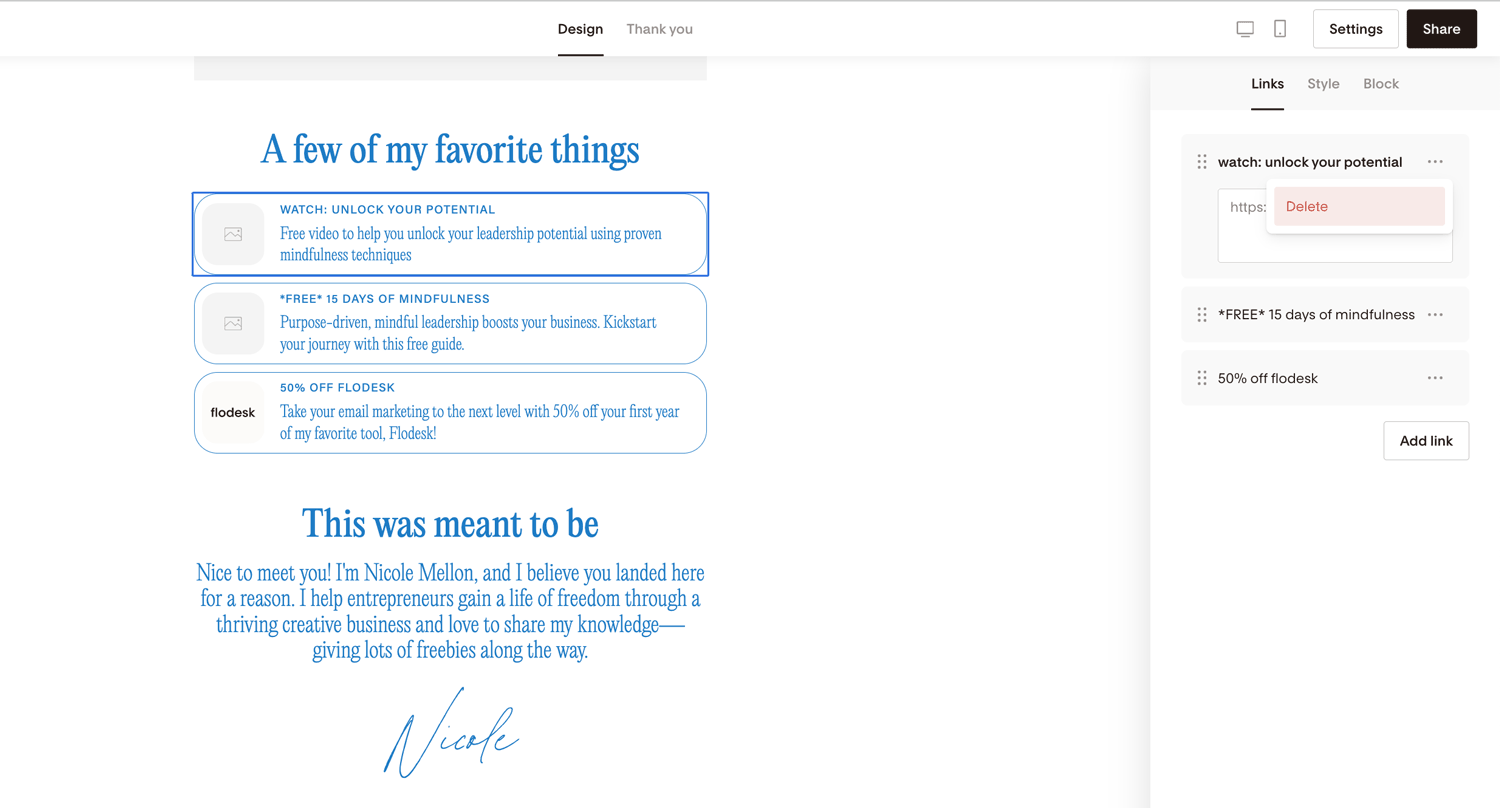
Link list
The link list lets you share additional links — even if someone doesn’t subscribe.
You can add up to six links, such as:
Your website
Booking page
Freebie
Blog
Shop
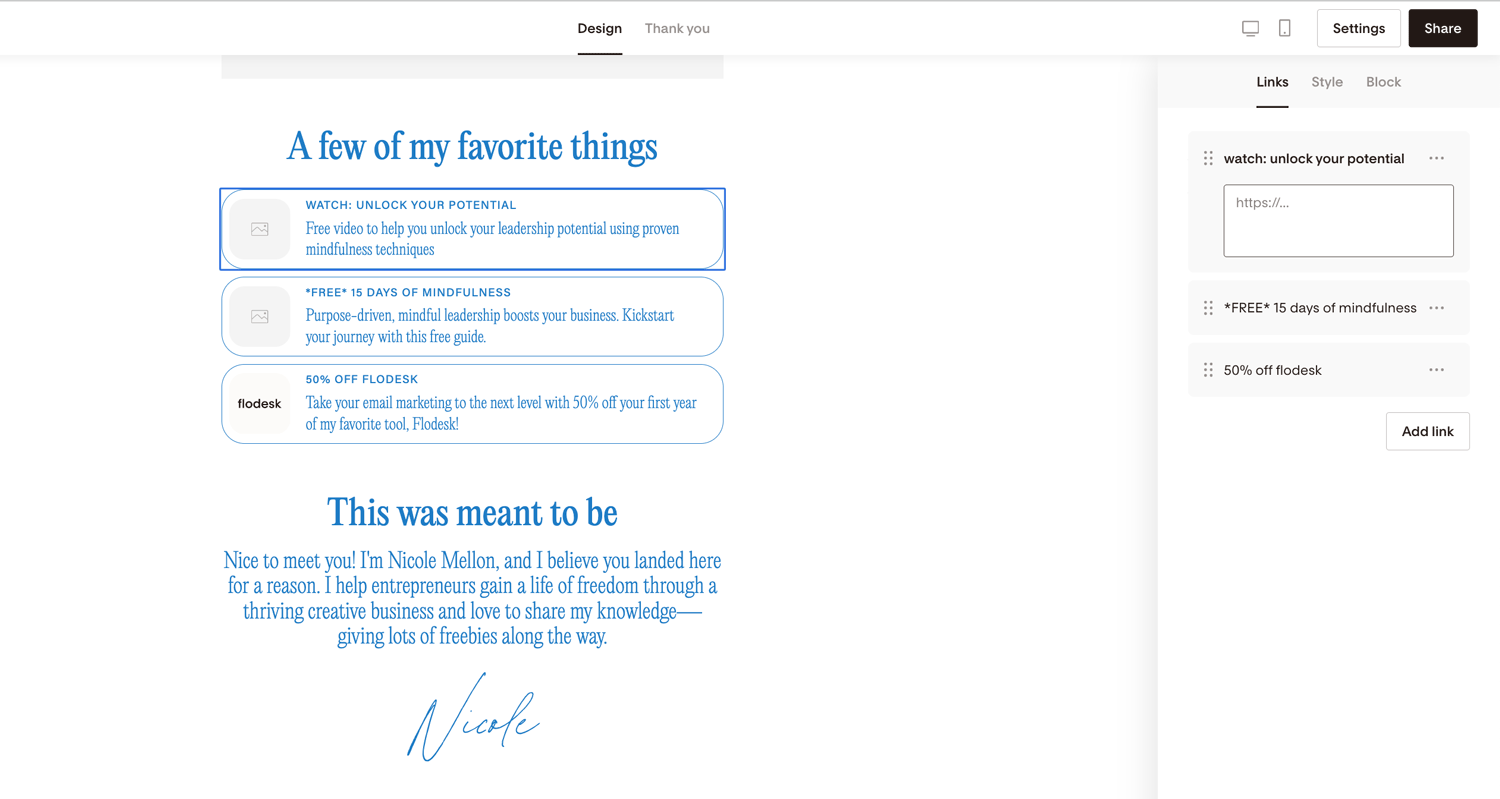
You can:
Rearrange links by dragging them on the right side panel
Delete a link by clicking the three dots on the link card and select 'Delete' (note: deleted links must be recreated from scratch)
Add images or descriptions
Customize button style and borders
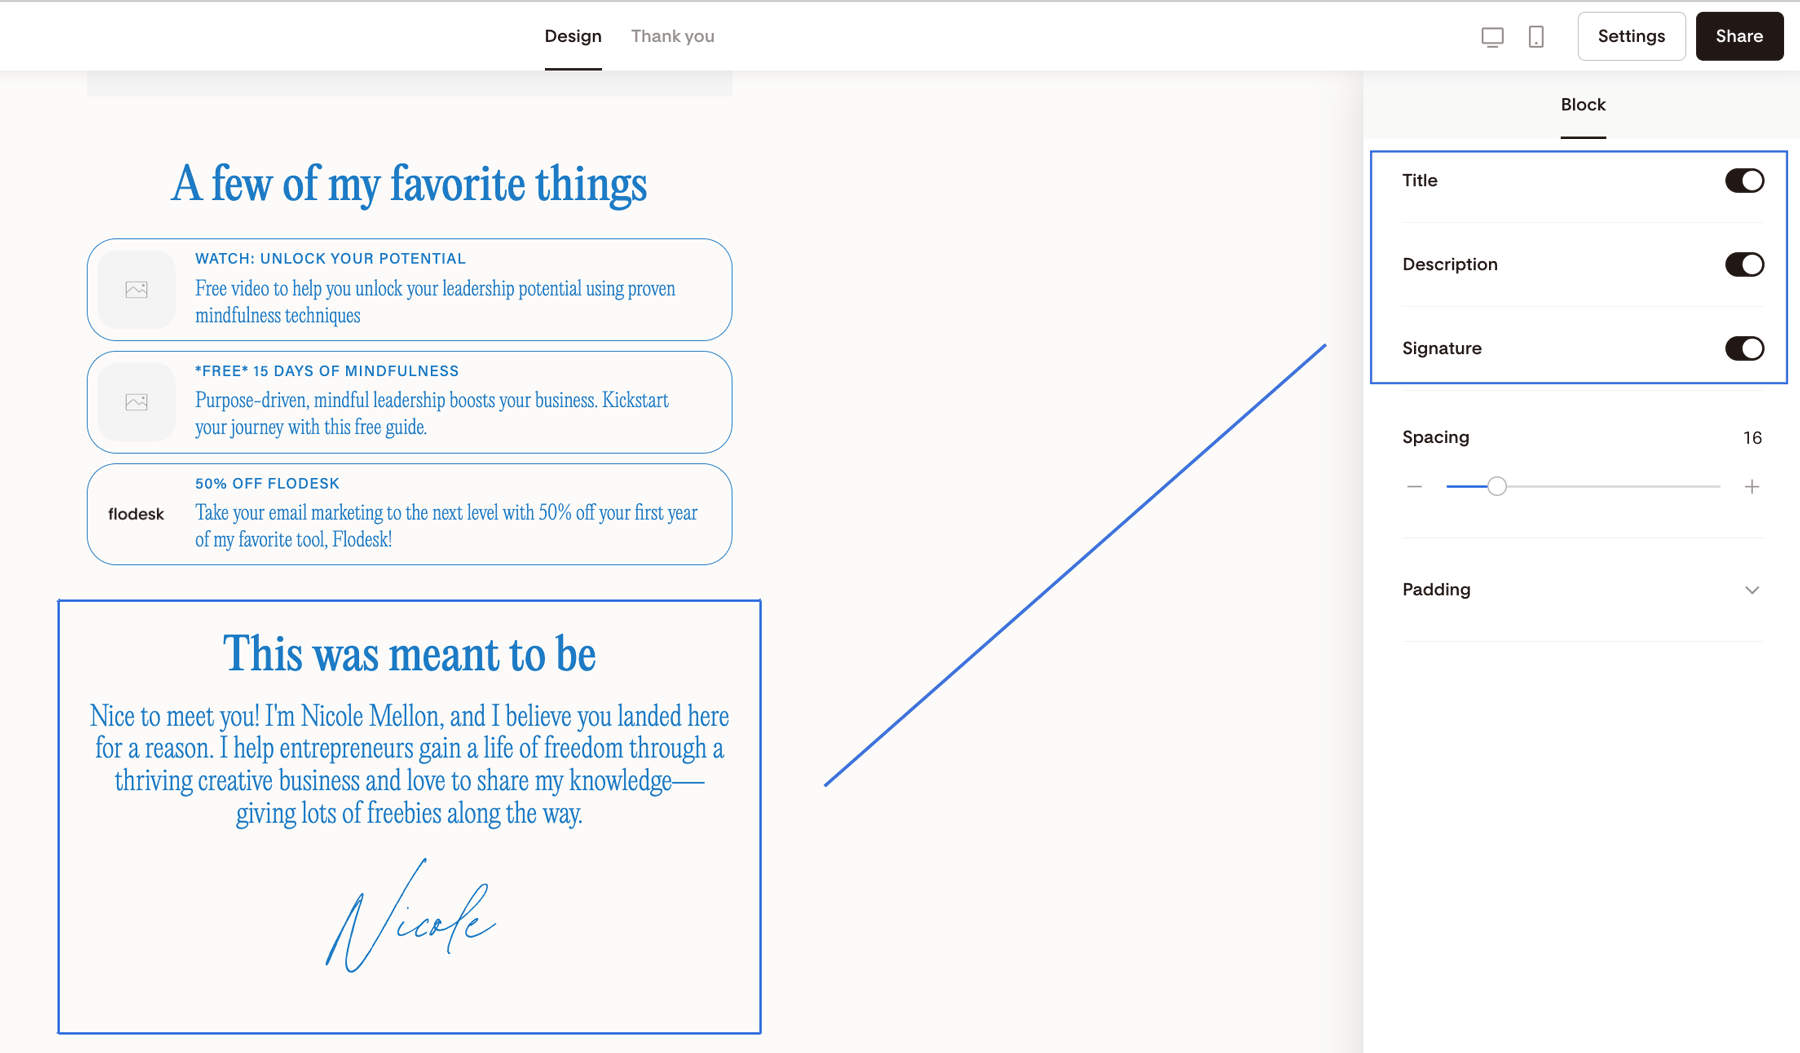
Bio block
Use the Bio section to:
Introduce yourself
Share your mission
Add a short description
Include your signature

You can toggle parts of this section on or off in the block settings.
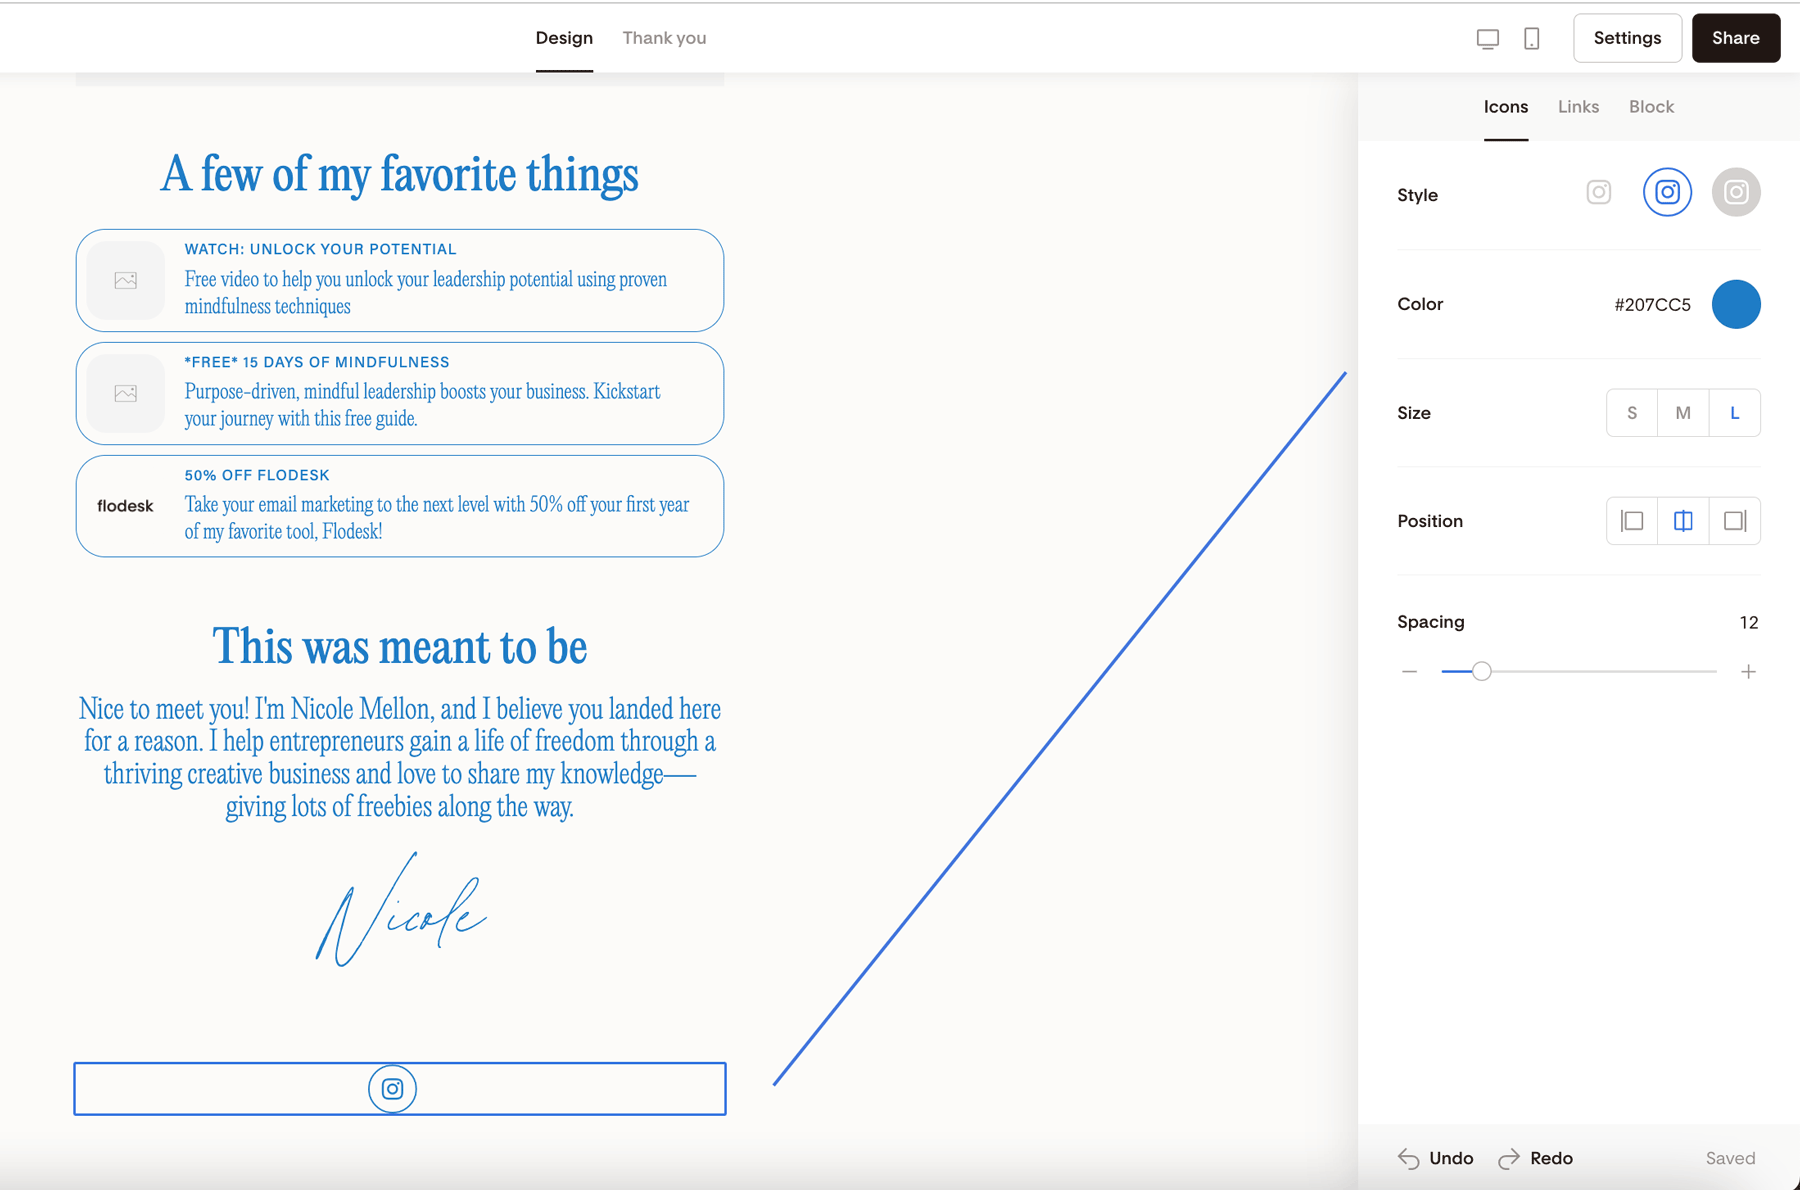
Social icons
You can display your social media icons at the bottom of the page.
To manage social accounts:
Go to Account settings → Branding
You can customize:
Icon color
Icon size
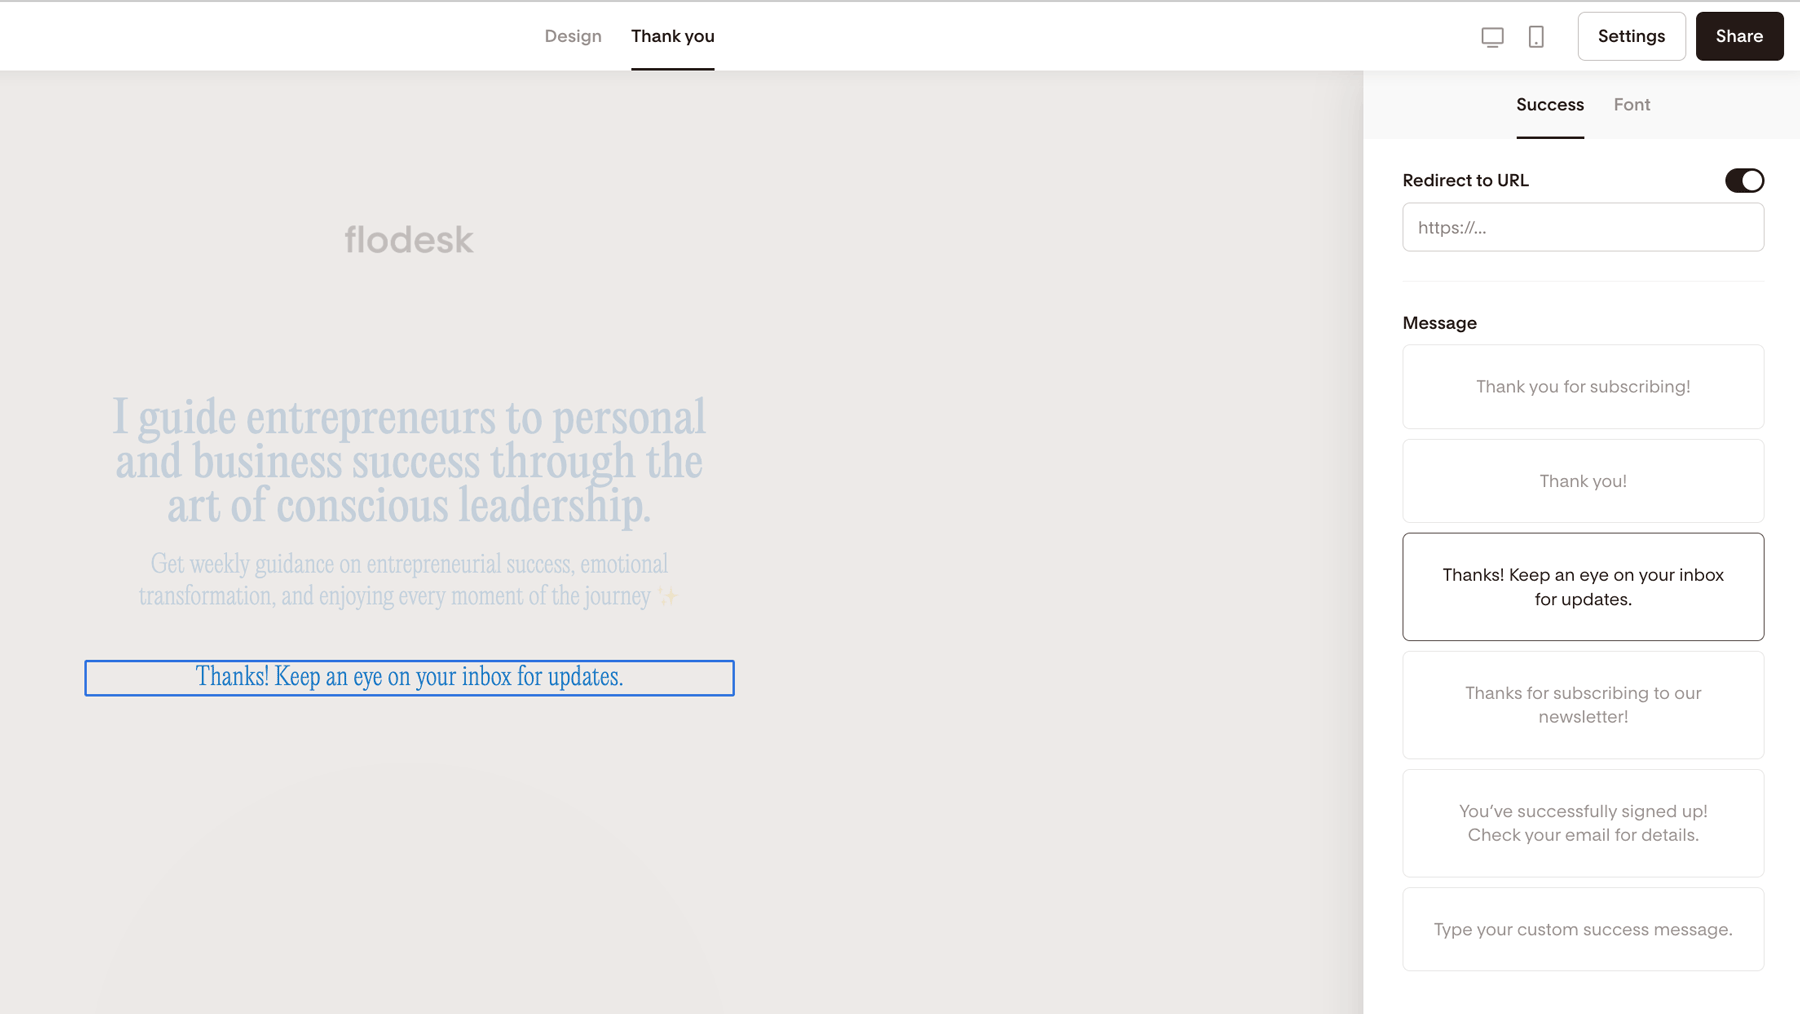
Customize the Thank You experience
After someone subscribes, click the Thank you tab.
You can:
Use a pre-written success message
Write your own custom message
Redirect subscribers to another page (like a freebie or website)
How to access settings and share your form
Once your design is ready:
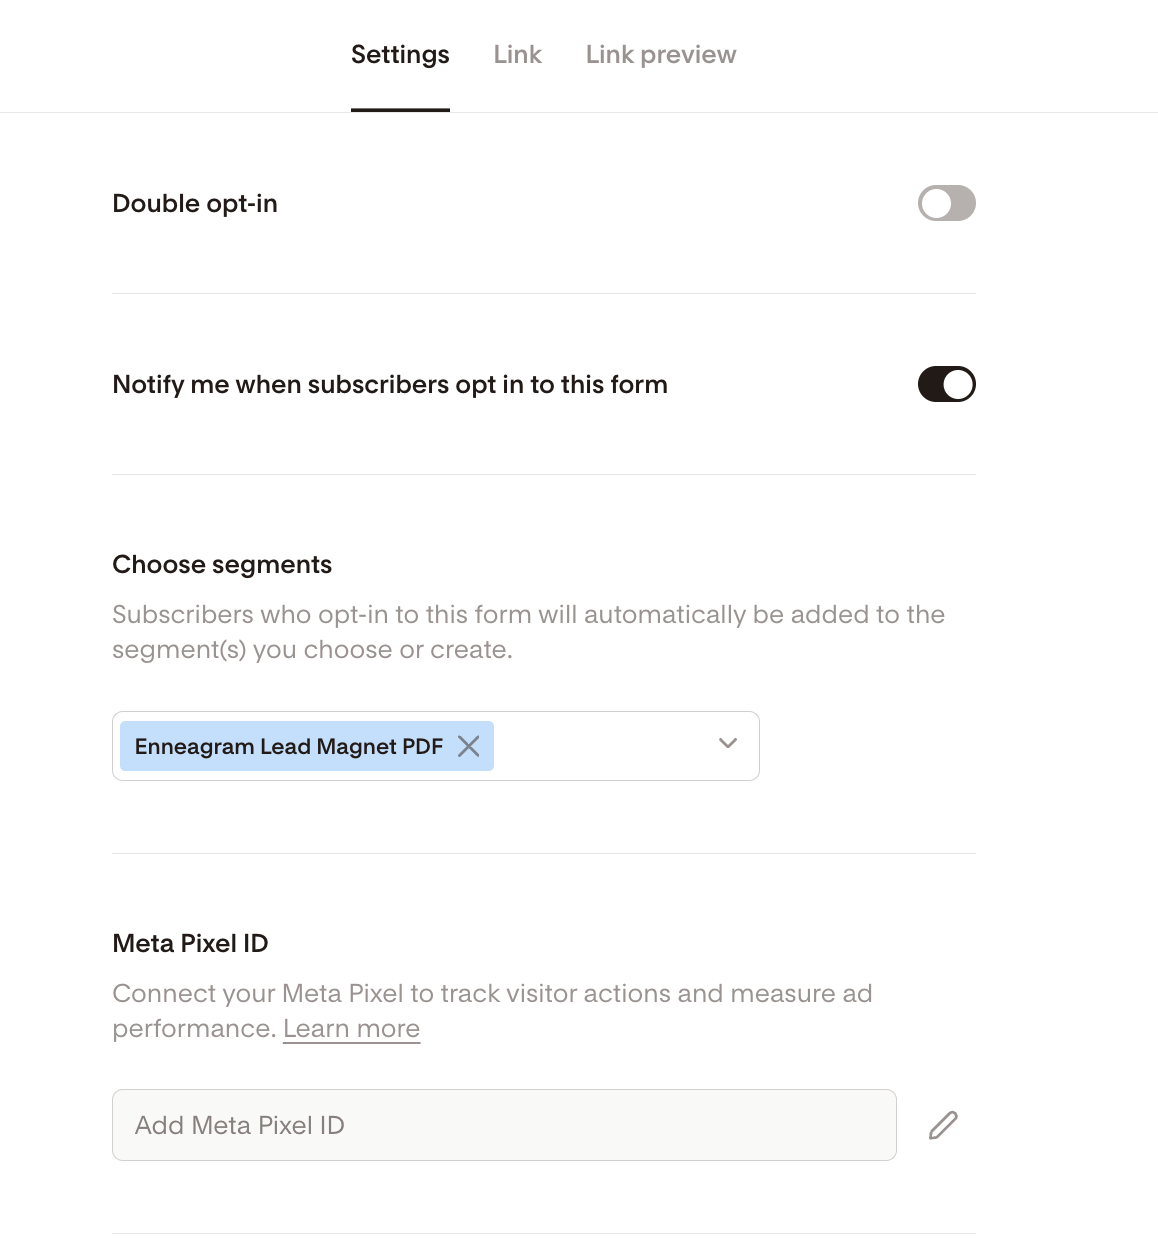
Click Settings in the top right corner.
Turn double opt-in on or off
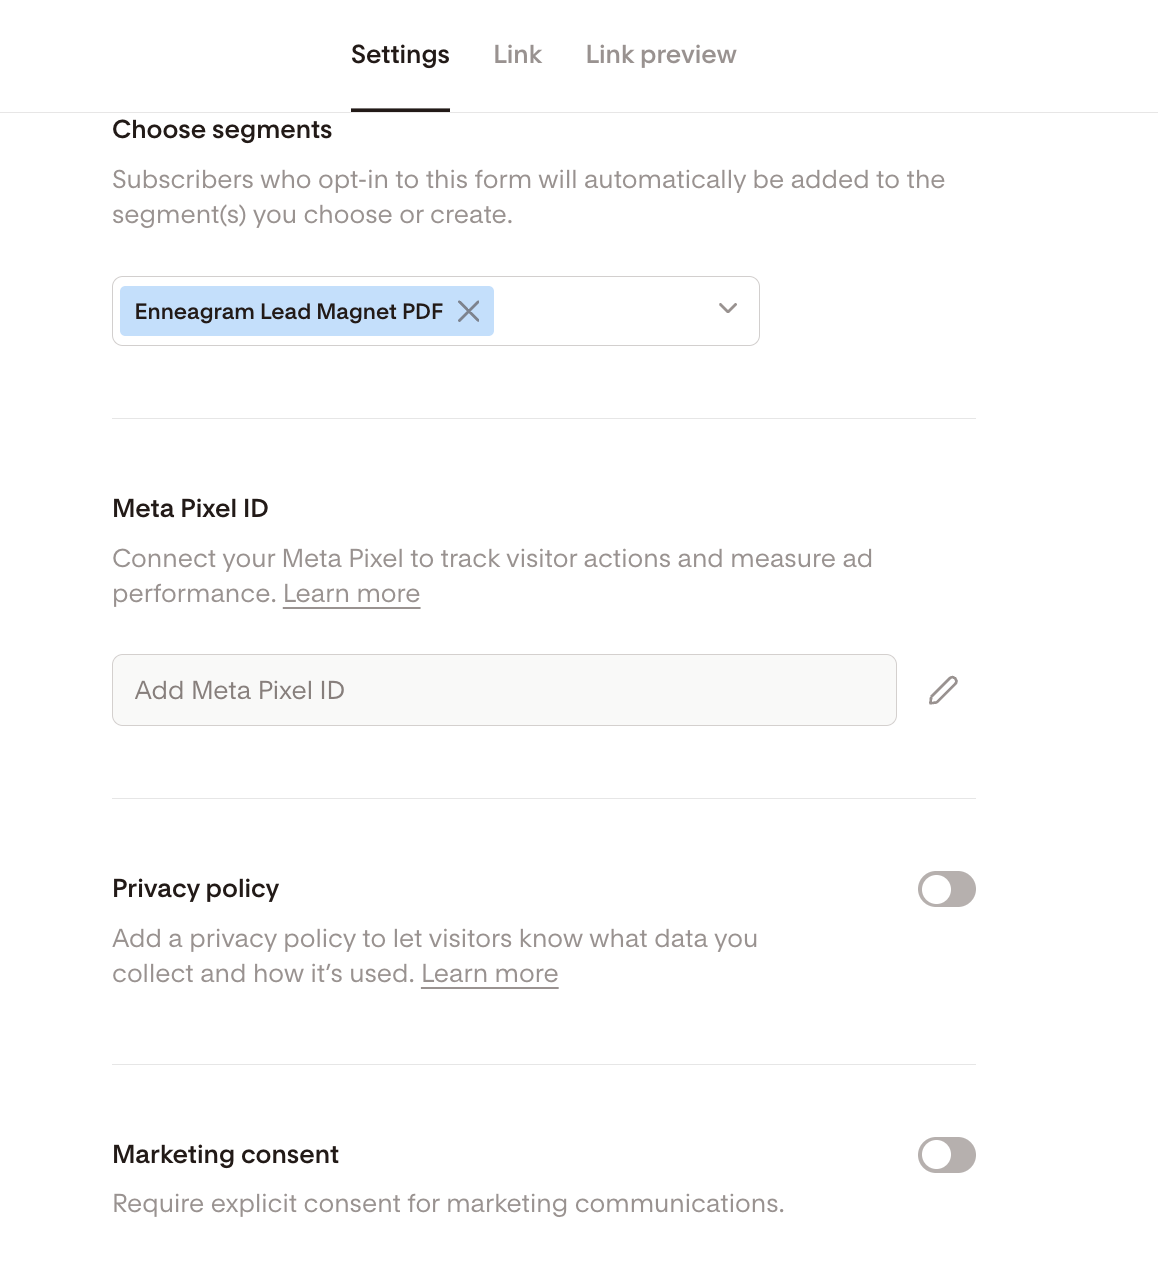
Choose which segments subscribers are added to
Enable subscriber notification emails (optional)
Connect your Meta pixel ID (if you are running ads)
Add your Privacy policy link to your full page form
Require explicit marketing consent
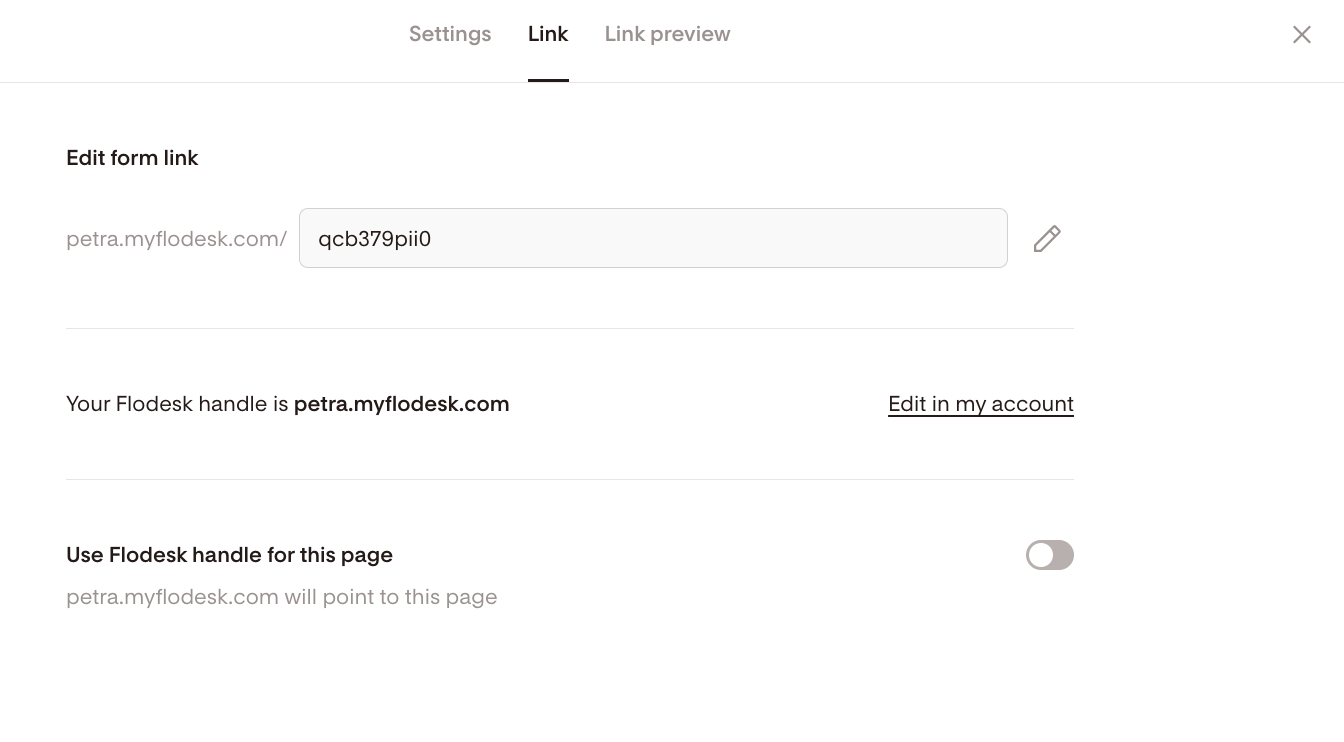
Customize your form link
Open the Link tab to:
Edit the form URL
Set your Flodesk handle (for a cleaner, branded link)
Under Link preview, you can control:
Preview image
Page title
Description
This affects how your form appears when shared on social platforms or in messages.

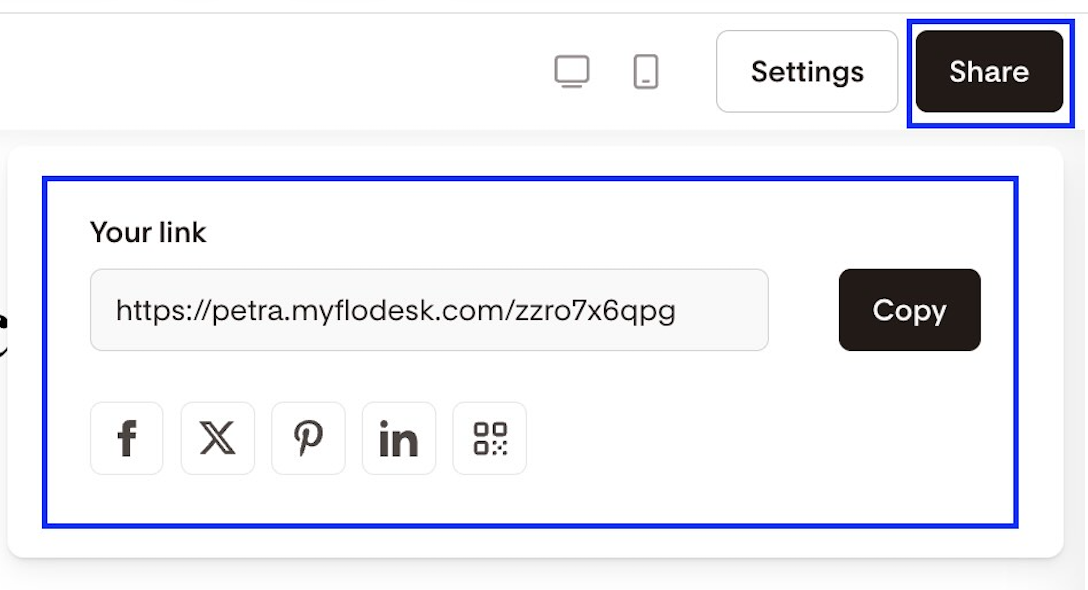
How to share your form
Click Share, then:
Copy the form link, or
Share directly to Facebook, X (Twitter), Pinterest, or LinkedIn
Grab the form's QR code
That’s it—your opt-in form is live.
When should I use a Link in bio Form?
Link in bio Forms are great if you:
Don’t have a website
Want a social landing page
Want to collect email subscribers from Instagram or TikTok
Want to segment subscribers based on interest
Want a Linktree alternative with email capture
FAQ
Is a Link in bio Form the same as a regular opt-in form?
No. A Link in bio Form is a standalone, shareable page. It’s not embedded on a website — it lives on its own URL.
Can I use this without a website?
Yes. Link in bio Forms are perfect if you don’t have a website.
Can I collect subscribers and still share other links?
Yes. You can capture emails and also include up to six additional links.
Can subscribers choose what they want to receive?
Yes — if you enable the Preferences section and connect each option to a segment.
What happens if I delete a link from the link list?
Once deleted, that link’s information is removed. You’ll need to create a new link and re-enter the details.
Can I customize how my form link appears on social media?
Yes. In the Link preview tab, you can edit the meta image, title, and description.
Should I enable double opt-in?
That depends on your preference and compliance needs. Double opt-in adds an extra confirmation step before someone is added to your list.
Can I change the form URL?
Yes. You can edit the link under the Link tab in Settings.
In summary
Link in bio Forms help you turn social media followers into email subscribers — while sharing your content and showcasing your brand on one beautiful page.
To create yours:
Go to Forms > + New form > Link in bio
Customize it, click Share, and add the link to your social bio.
Your audience is now yours to grow — beyond the algorithm.