How to add a popup form to your Wix website
A step-by-step tutorial on how to embed a Flodesk popup form to a Wix website
Flodesk forms help you capture your visitors’ email addresses so you can build your list and start regularly sharing your brand message.
Popup forms are the best way to convert website visitors to subscribers. They grab the attention of visitors to your website or blog and call them to sign up for your newsletter.
How to add a Popup form to your Wix website
Step 1: Create your Popup form in Flodesk.
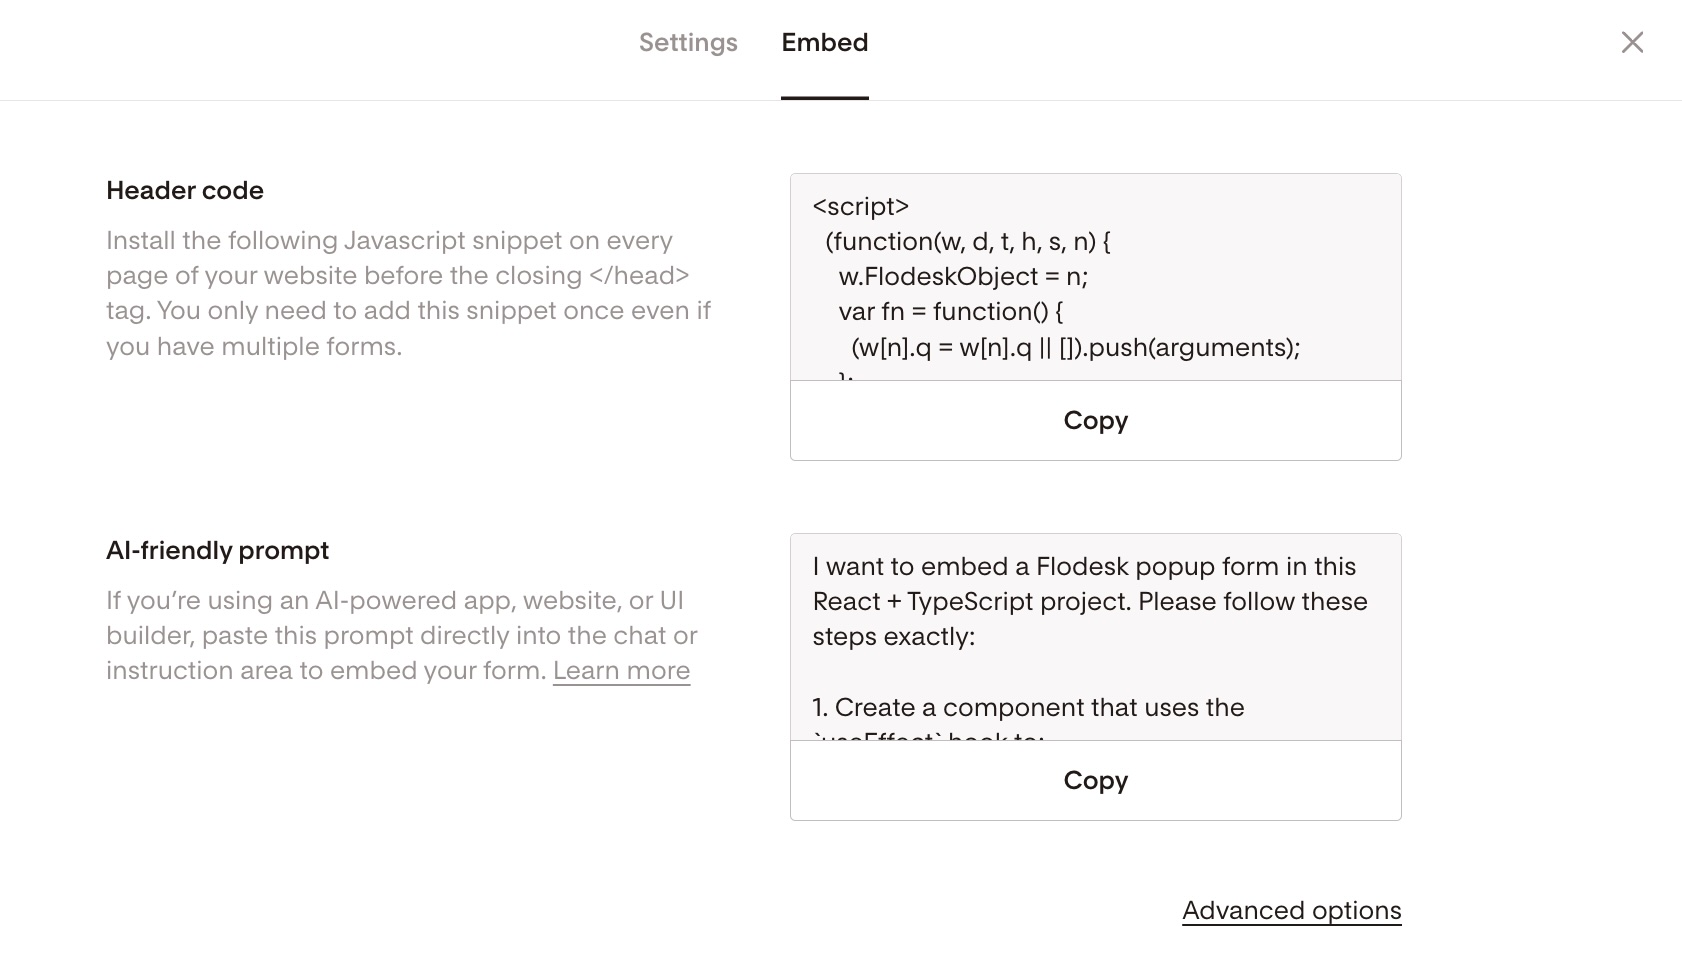
Step 2: After you create and customize your form, click the black Embed button in the top right corner and you will see the Header code that you need to copy.
Step 3: In your Wix dashboard, go to Settings, then Advanced. Click “Custom code.”
Step 4: Click on the + Add custom code button.
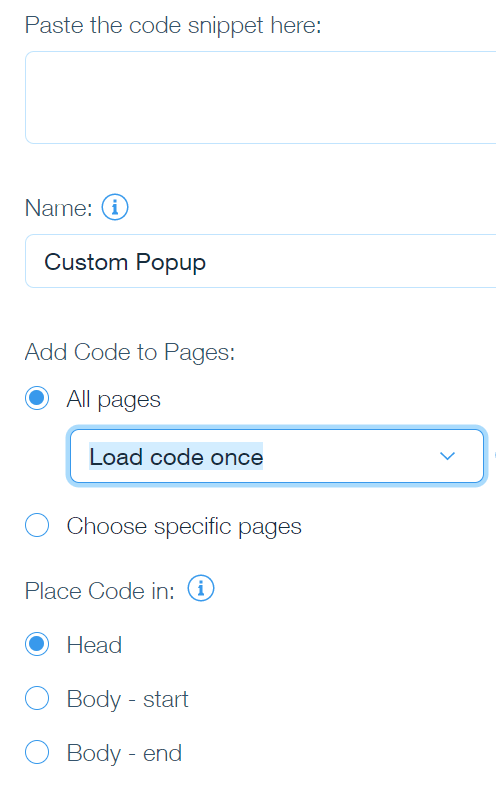
Step 5: Paste the Header code from the Flodesk popup form into the code field provided.
Give the form a unique name that will be easy to remember in case you need to make changes later.
Select which pages you want the form to appear on.
Make sure the code is placed in the “Head” as pictured below.
Click “Apply” to save your changes.
Step 6: Double-check that the form is active by making sure the toggle is on the right.
Step 7: Preview the form to make sure it looks how you intended. You now have a Flodesk Popup form on your Wix site! 🙌🏻
Summary
First, create your Popup form in Flodesk.
Next, copy the Flodesk Header code that’s generated for you. Paste it to your Wix website under Settings > Advanced > Custom Code.


