
How to segment subscribers in Flodesk after making a purchase in Shopify
A step-by-step guide to adding existing subscribers to a new segment after making a purchase in Shopify
How would you like to send targeted emails to subscribers after they purchase a specific product in your Shopify store? 🛍 Imagine being able to tell subscribers who previously bought a product that you have a new product that they’d love, based on past purchases.
You can set this up within minutes by connecting Shopify and Flodesk via Zapier.
Things you’ll need for the integration
Flodesk account
Zapier account
Shopify store
At least one product in Shopify
At least one segment in Flodesk
If you plan to use a zap to trigger a Workflow in Flodesk, we highly recommend creating the workflow in its entirety before creating and testing your zap.
In order to set up segmenting based on the product, you will need a paid Zapier account. This requires a multi-step zap, which is not included in their free plan.
Connecting Shopify and Flodesk via Zapier
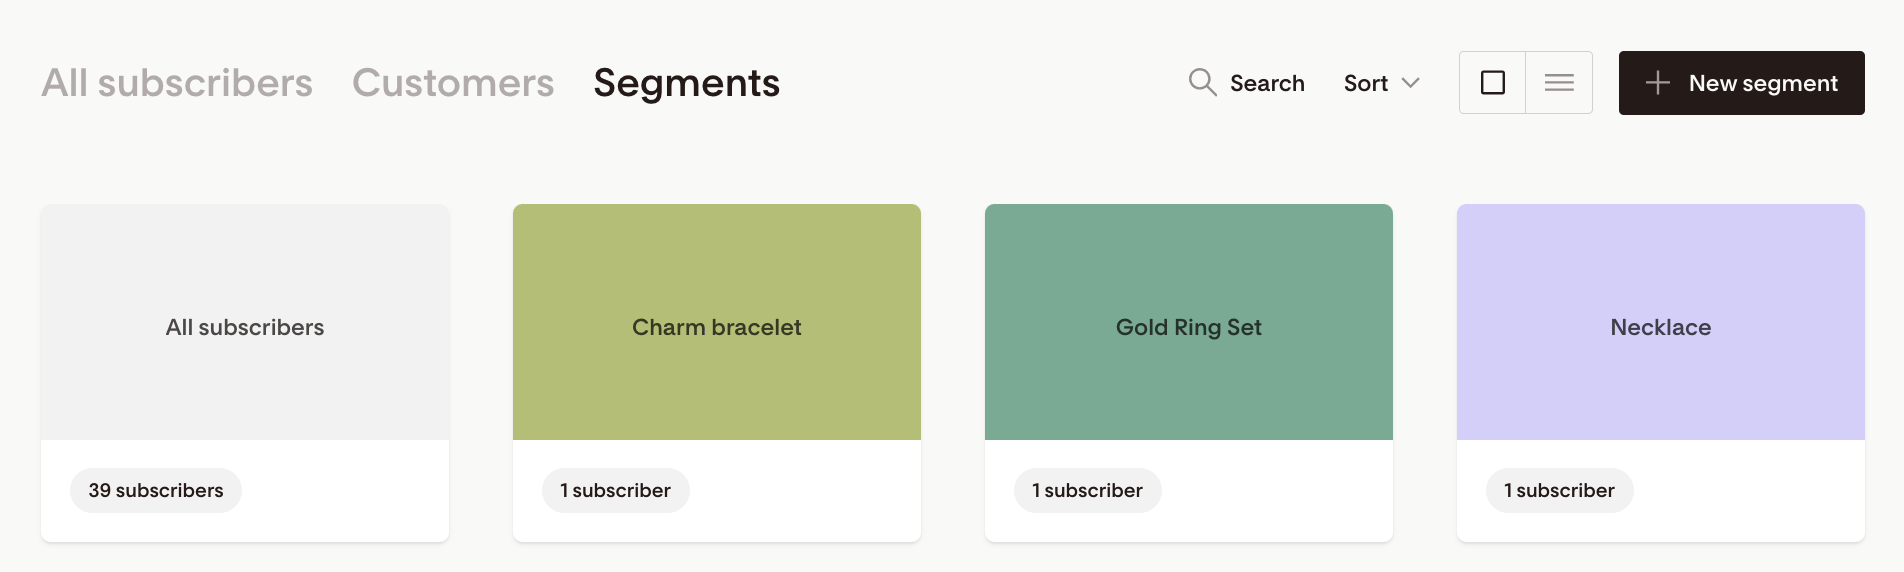
Step 1. Go into your Flodesk account and create a new segment for each product.
Label each segment with the same name as your product. This will make it easier for you to assign the right subscriber to the right segment in Zapier later.
Step 2. Create a new zap and give it a name.
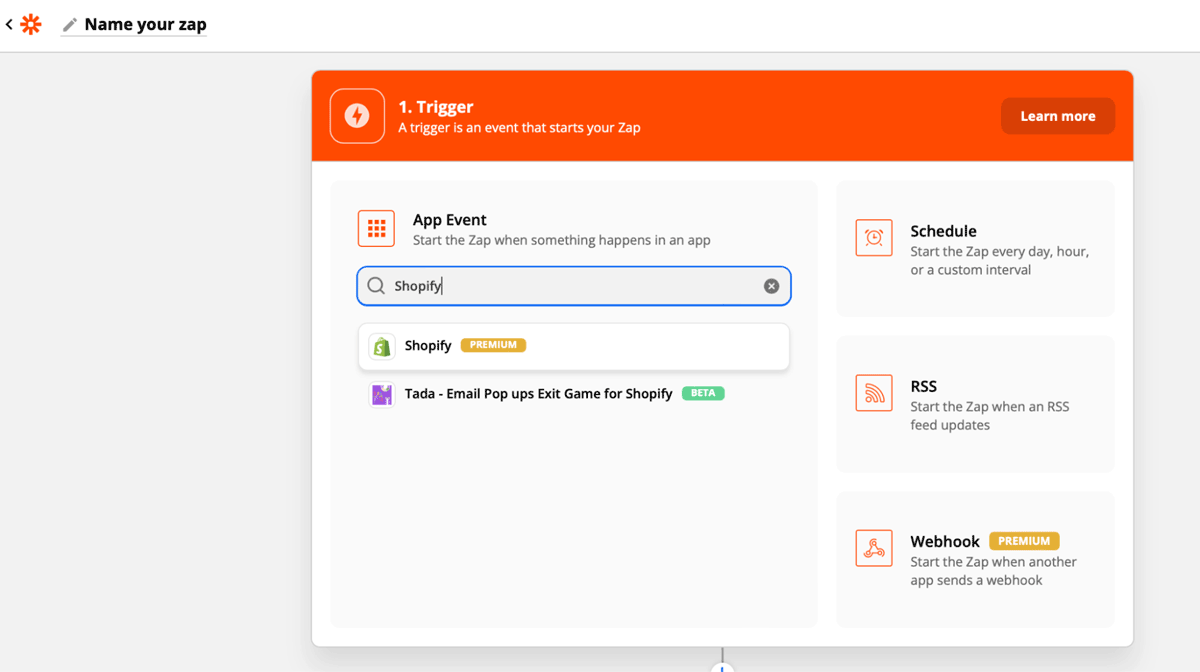
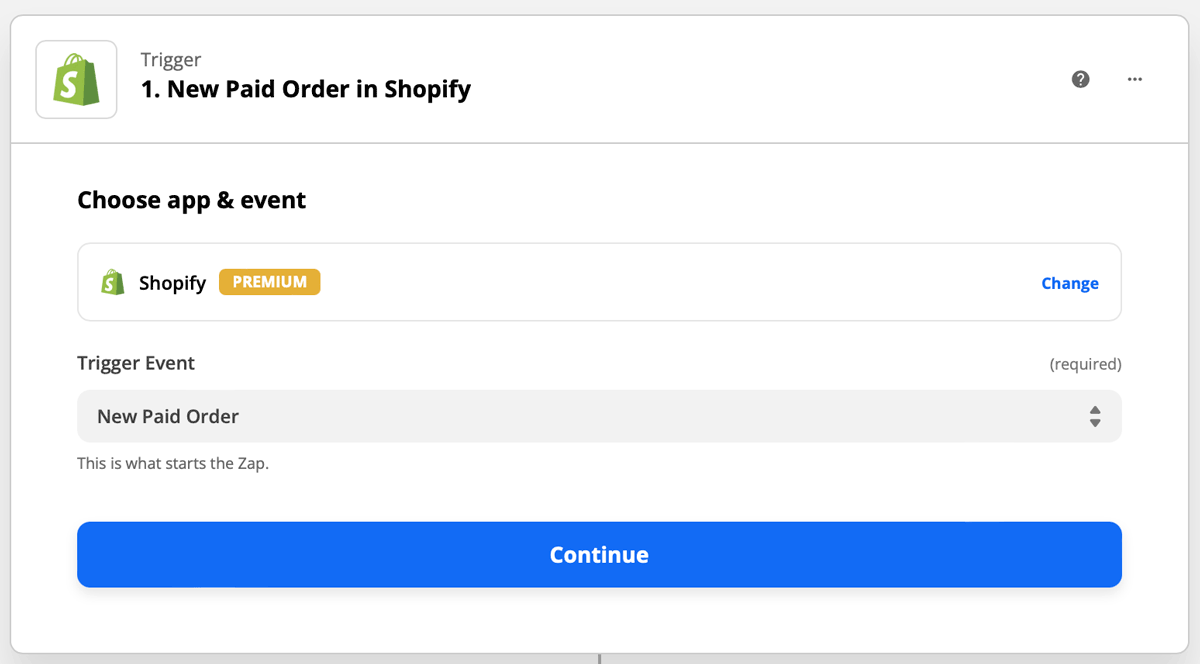
Step 3. Select Shopify as the Trigger and choose an Event.
For this example, we will use “New Paid Order” as the event that starts the zap. This means that the zap will start when you receive a paid order from a customer. We will customize the trigger event later.
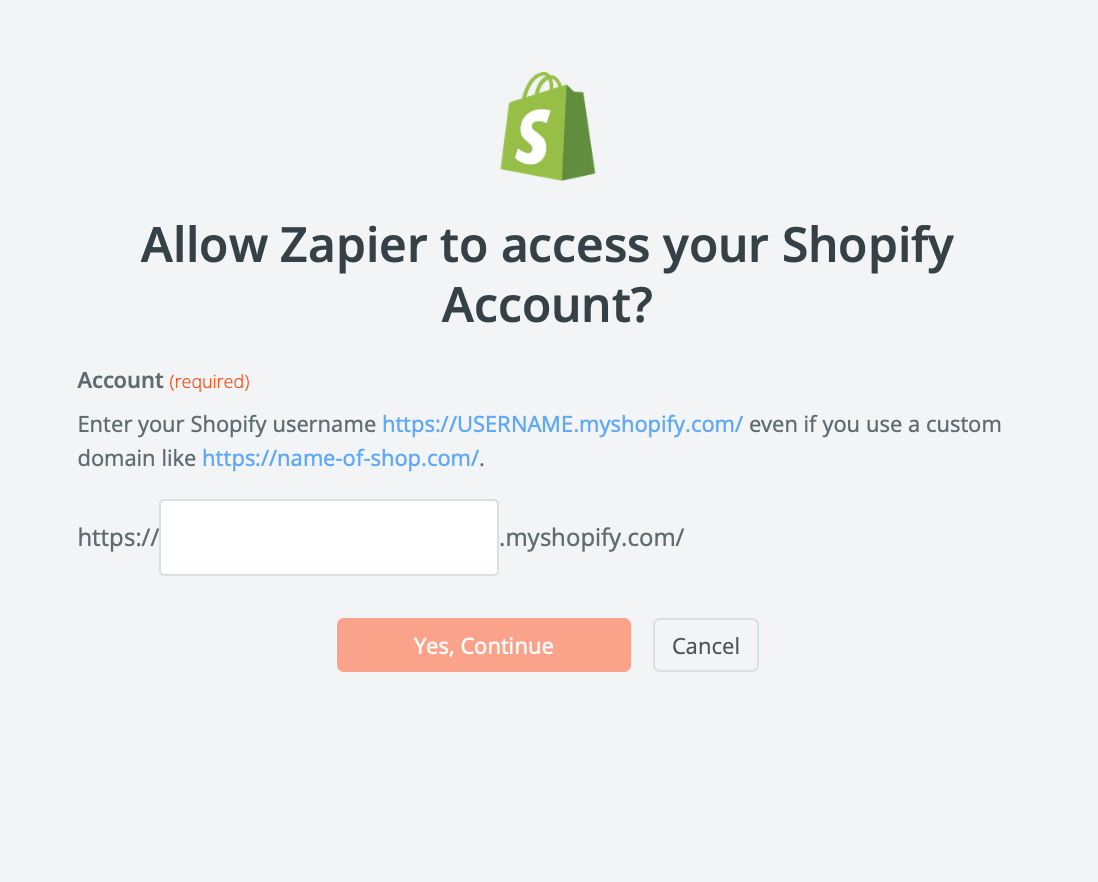
Step 4. Zapier will redirect you to sign in to connect to Shopify. If you're connecting Shopify to Zapier for the first time, you will be asked for your Shopify site URL.
You’ll be redirected to Shopify where you can review permissions and give Zapier access to your Shopify account.
Step 5. After you connect Zapier to your Shopify account, you can customize the Paid Order trigger. For this example, we will select the following:
Payment Status: Paid
Order Status: Open
Fulfillment Status: Unshipped
This means that the zap will start when you receive a paid order that has not been fulfilled or shipped.
Step 6. Zapier will test the trigger to make sure it works properly. This step is optional.
Step 7. Select “Filter” from the list of actions to the right of the Action menu. Using a Filter means that the zap will continue only when specific conditions are met.

This is going to bring up the Filter setup card. Here, you’ll fill out each field, which tells Zapier to only continue to Flodesk if these conditions are met.
For this example, the condition will be if a specific product was purchased.
Field: Line Items Name
Condition: (Text) Contains
Value: Use the name of your product
Since one of our products is a necklace, we will manually type that in the Value field. Make sure that the value you enter in Zapier matches the name of the product in Shopify.
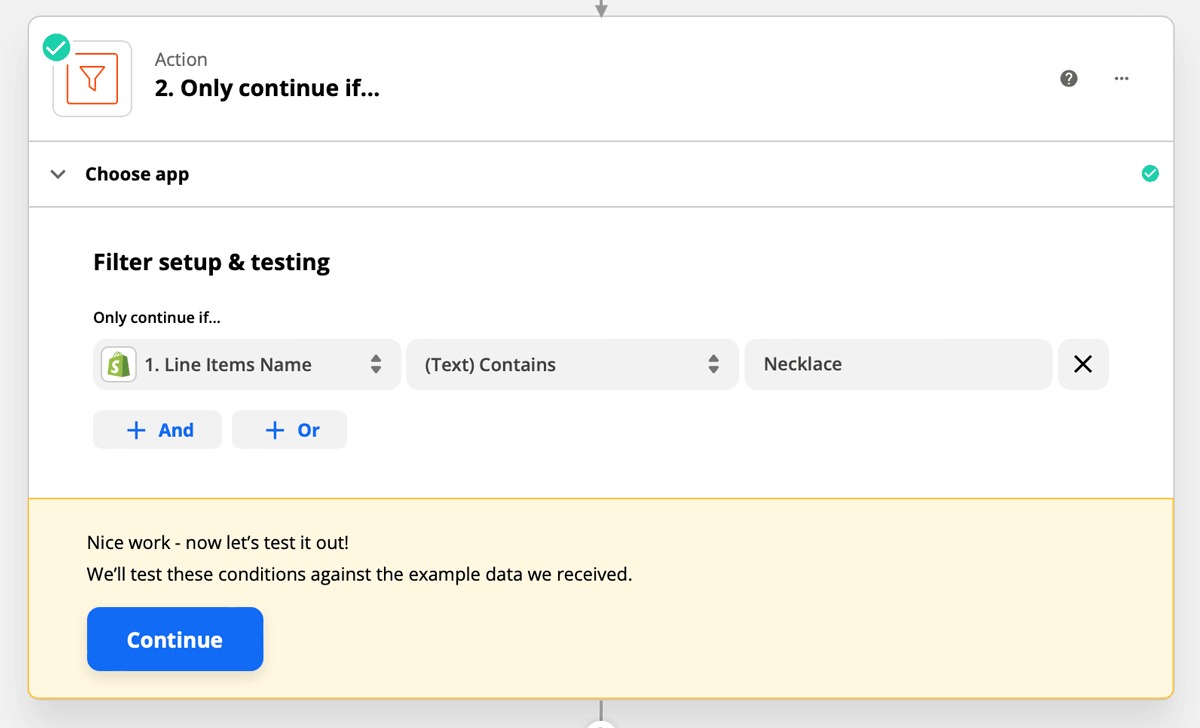
Step 8. Click Continue to test the filter.
Zapier may tell you that the zap would not have continued. This is because we are using test data. These conditions will only be met when someone makes a purchase, so you can ignore this message.
If you set up your zap with an existing unfulfilled order that meets the filter condition, you will receive a success message when you test the zap.
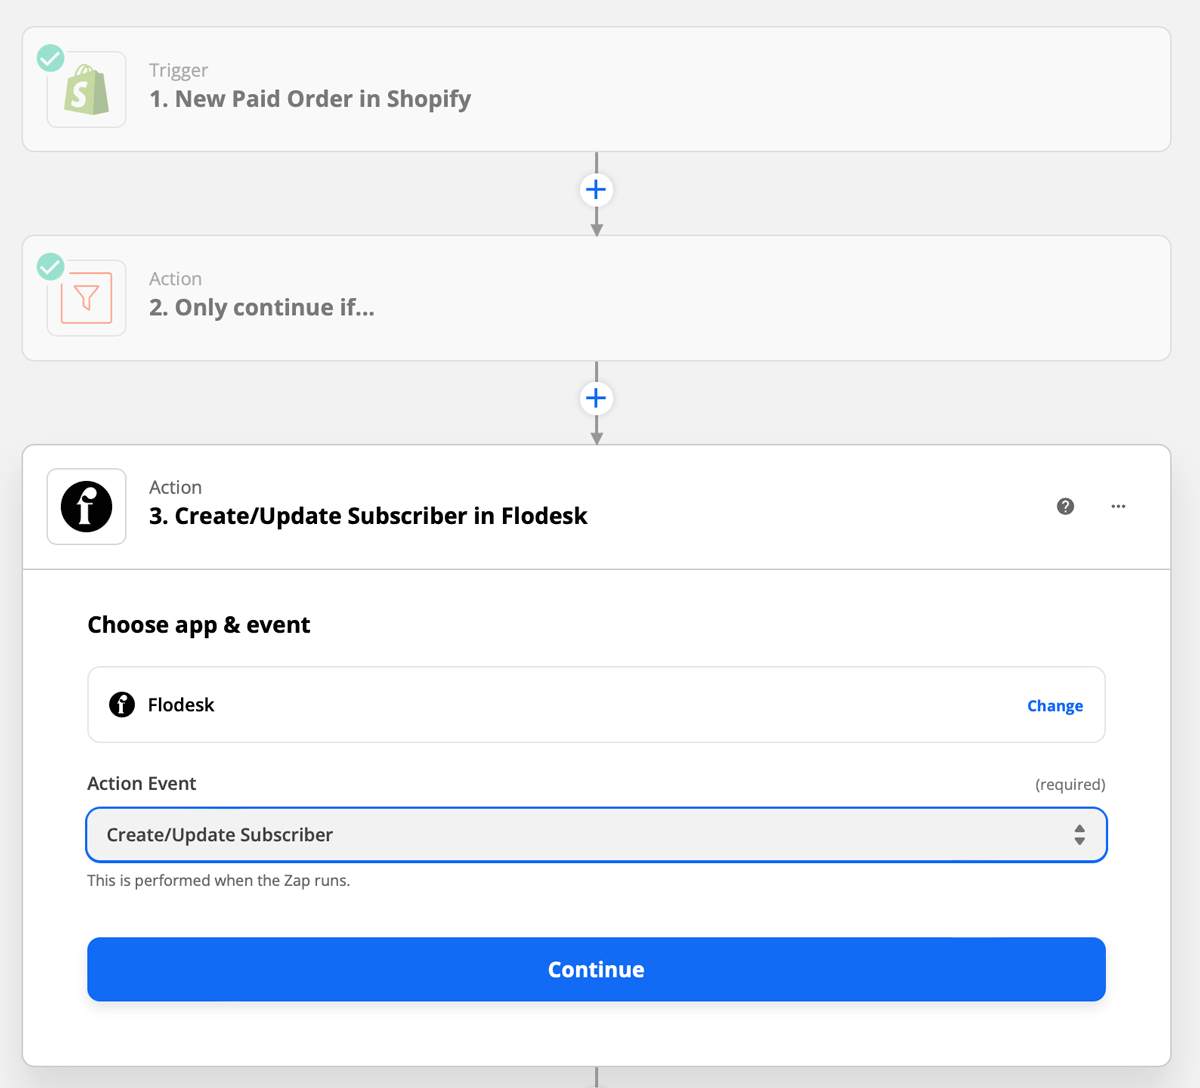
Step 9. Add a new Action step.
Select Flodesk as the Action and choose the event. For this example, we will “Create/Update Subscriber” as the action that happens when the zap runs.
The first step almost always should be 'Create/Update Subscriber' in Flodesk. Unless the subscriber’s address already exists in Flodesk, they can't be added to segments, workflows, etc.
Note: Whenever you add customers from Shopify to Flodesk, make sure that you obtain their permission to send them email marketing.
Step 10. If this is your first time connecting Flodesk and Zapier, you’ll be prompted to log into your Flodesk account.
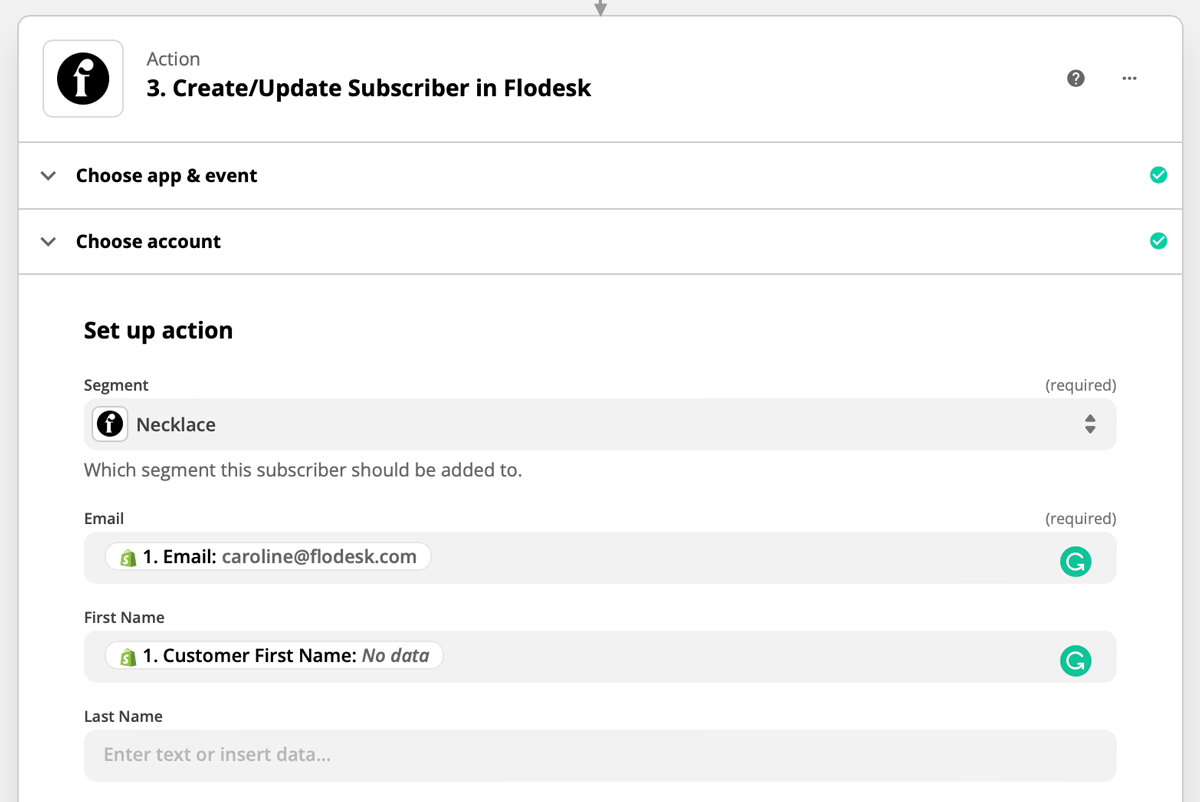
Step 11. Choose your segment and any additional data fields that you want to map when the subscriber is added to Flodesk.
Step 12. Test your zap.
Now that the Trigger, Filter, and Action are set up for one of your products, you’ll want to repeat these steps for your remaining products that you want to use for segmenting when subscribers make a purchase.
More Shopify + Flodesk integration ideas
In addition to adding subscribers who completed a purchase in Shopify to your Audience in Flodesk, here are two more integration examples:
Trigger: New Abandoned Cart in Shopify
Action: Create/Update Subscriber in Flodesk
Trigger: New Cancelled Order in Shopify
Action: Remove Existing Subscriber From Workflow in Flodesk
Summary
You can use Zapier to connect Shopify to Flodesk. When a subscriber completes a purchase in Shopify, Zapier will automatically add them to a segment in your Flodesk Audience.
When you’re creating the zap in Zapier, use Shopify as the trigger segment and Flodesk as the action segment.
Finally, make sure that customers from Shopify meet the required permission guidelines for Flodesk before you email them.