
How to add a popup form to your Showit website
A step-by-step guide to embedding a Flodesk popup form on your Showit website.
Flodesk popup forms help you capture your visitors’ email addresses so you can grow your list and stay connected with your audience.
Popups appear on top of your website content and are designed to grab attention at the right moment—making them one of the most effective ways to turn visitors into subscribers.
This guide walks you through creating your popup form in Flodesk and adding it to your Showit website so it displays for your visitors.
Before you start
Make sure you have:
A popup form created in Flodesk
Access to your Showit website editor
You’ll need to copy the Flodesk popup header code and paste it into your Showit page settings.
Step 1: Create and customize your popup form
Log in to your Flodesk account.
Go to Forms.
Create a Popup form.
Customize the design, text, and settings to match your brand.
Once your form is ready, you’ll generate the embed code.
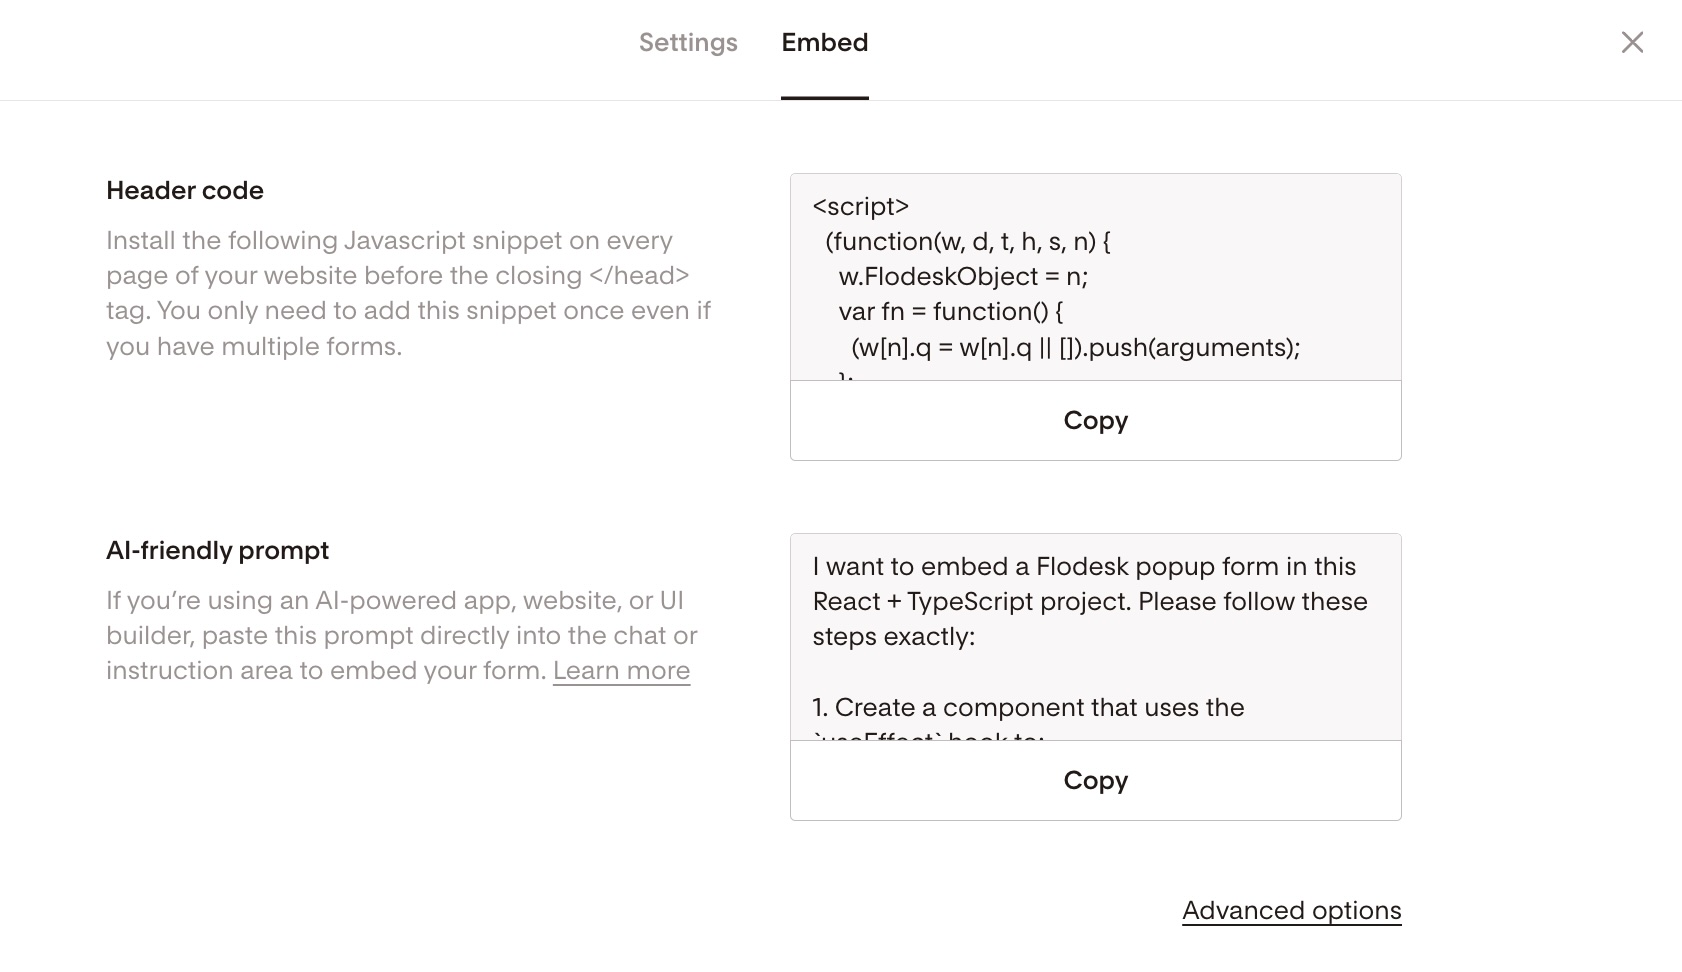
Step 2: Copy the popup form header code
Click Embed.
A window will appear showing the Header code.
Click Copy.
You’ll paste this code into Showit so your popup can display on your website.
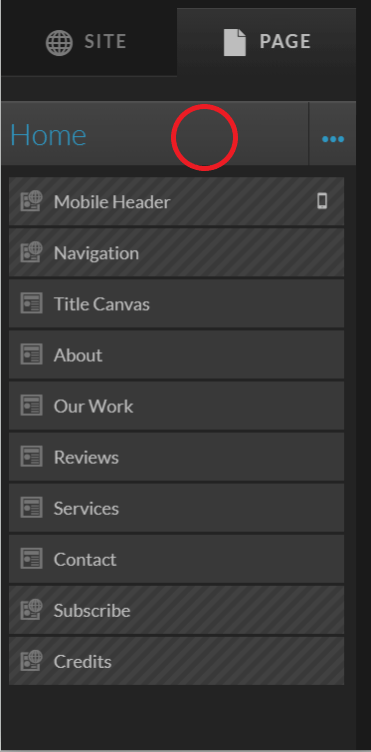
Step 3: Open the page where the popup should appear
Open your website in the Showit editor.
Select the page where you want the popup form to appear.
Make sure all canvases are minimized.
Click the page bar at the top so the page settings are selected.
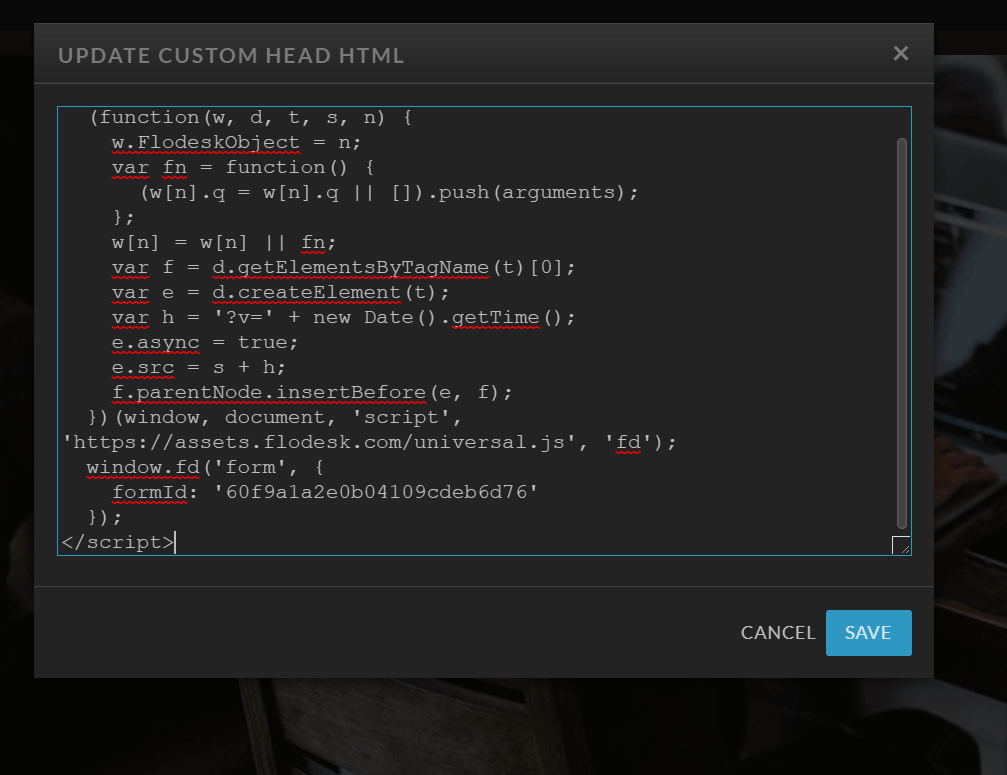
Step 4: Open the Custom Head HTML settings
In the right-side settings panel, open Advanced Settings.
Click Custom Head HTML.
This is where you can add scripts or code that should run on the page.

Step 5: Paste the popup header code
Paste the Flodesk header code into the Custom Head HTML field.
Click Save.
Your popup form is now connected to the page.
See the screenshot below as a reference.
Step 6: Preview and publish your website
Click Preview to test your popup.
Confirm that it appears as expected.
Publish your site when you're ready.
Your popup form will now display to visitors on that page.
Summary
To add a Flodesk popup form to Showit:
Create and customize your popup form in Flodesk.
Copy the popup header code from the Embed settings.
Open the desired page in the Showit editor.
Go to Advanced Settings → Custom Head HTML.
Paste the code and save.
Preview and publish your website.
FAQ
Why isn’t my popup appearing on my Showit website?
Check the following:
The header code is pasted correctly in Custom Head HTML
You saved and published your site after adding the code
Your popup’s display settings allow it to appear on that page
Also try clearing your browser cache or testing in a private window.
Can I show the popup on multiple pages?
Yes.
You’ll need to add the popup header code to each page where you want the popup to appear.
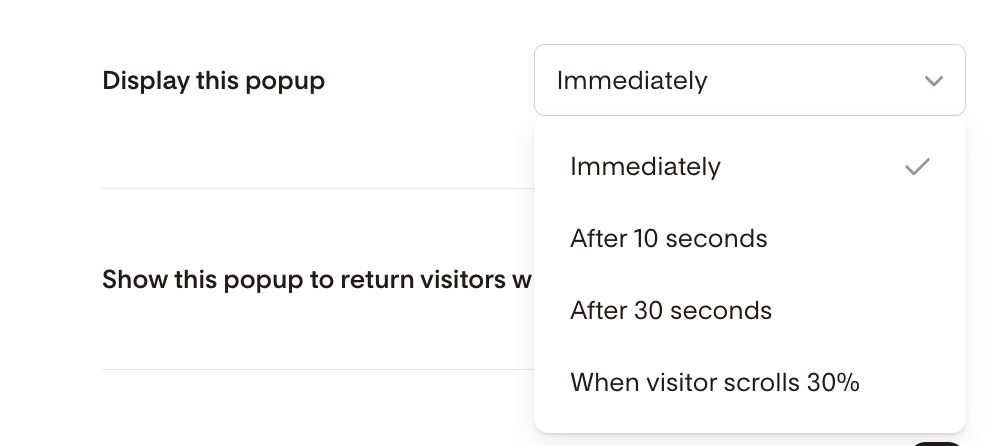
Can I control when the popup appears?
Yes. Popup timing and behavior are controlled inside Flodesk.
You can choose triggers such as:
Immediately
Time delay
Scroll percentage
These settings determine when visitors see your popup.
Do I need to add the code more than once?
No.
You only need to paste the header code once per page where the popup should appear.
Can I remove the popup later?
Yes.
Simply go back to Advanced Settings → Custom Head HTML in Showit and delete the Flodesk header code, then save and republish your site.