
How to add a Flodesk inline form into LeadPages
A step-by-step guide to embedding a Flodesk inline form on a LeadPages landing page, pop-up, or site without using Zapier.
Flodesk forms help you capture email subscribers so you can grow your list and stay connected with your audience. By embedding a Flodesk inline form directly inside LeadPages, visitors can subscribe without leaving your page.
LeadPages includes built-in form widgets, but these don’t integrate directly with Flodesk unless you use Zapier. Instead, you can simply embed your Flodesk form using an HTML widget, which connects the form directly to your Flodesk audience.
This guide walks you through creating your form in Flodesk, copying the embed code, and placing it into LeadPages.
Note: If you’re looking to use LeadPages Alert Banners with Flodesk you’ll need to utilize Zapier.
Before you start
Make sure you have:
A Flodesk inline form created
Access to your LeadPages account
Permission to edit your LeadPages landing page, pop-up, or site
You’ll need two pieces of code from Flodesk:
The header code
The inline code
Both are required for the form to display correctly inside LeadPages.
Step 1: Create and customize your Flodesk inline form
Log in to your Flodesk account.
Go to Forms.
Click + New Form.
Select Inline form.
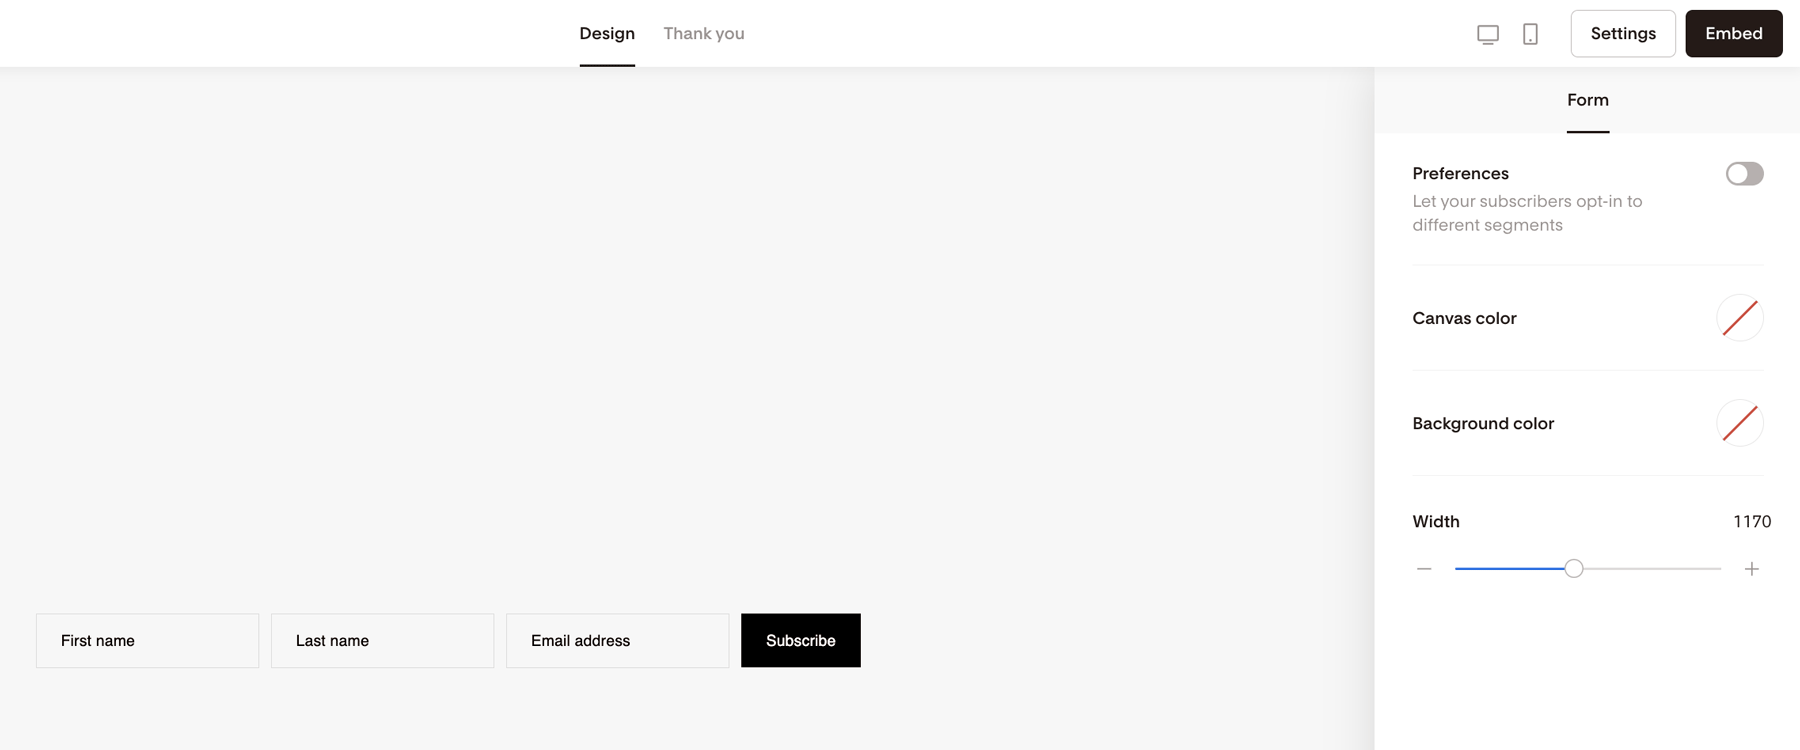
Customize the design and fields to match your brand.
Optional: Make the form background transparent
If you want the form to blend into your LeadPages design:
Click outside the form canvas.
In the right sidebar, select the Background color.
Choose No Color.
Repeat the same step for the Canvas color.
This allows the LeadPages background design to show behind your form.
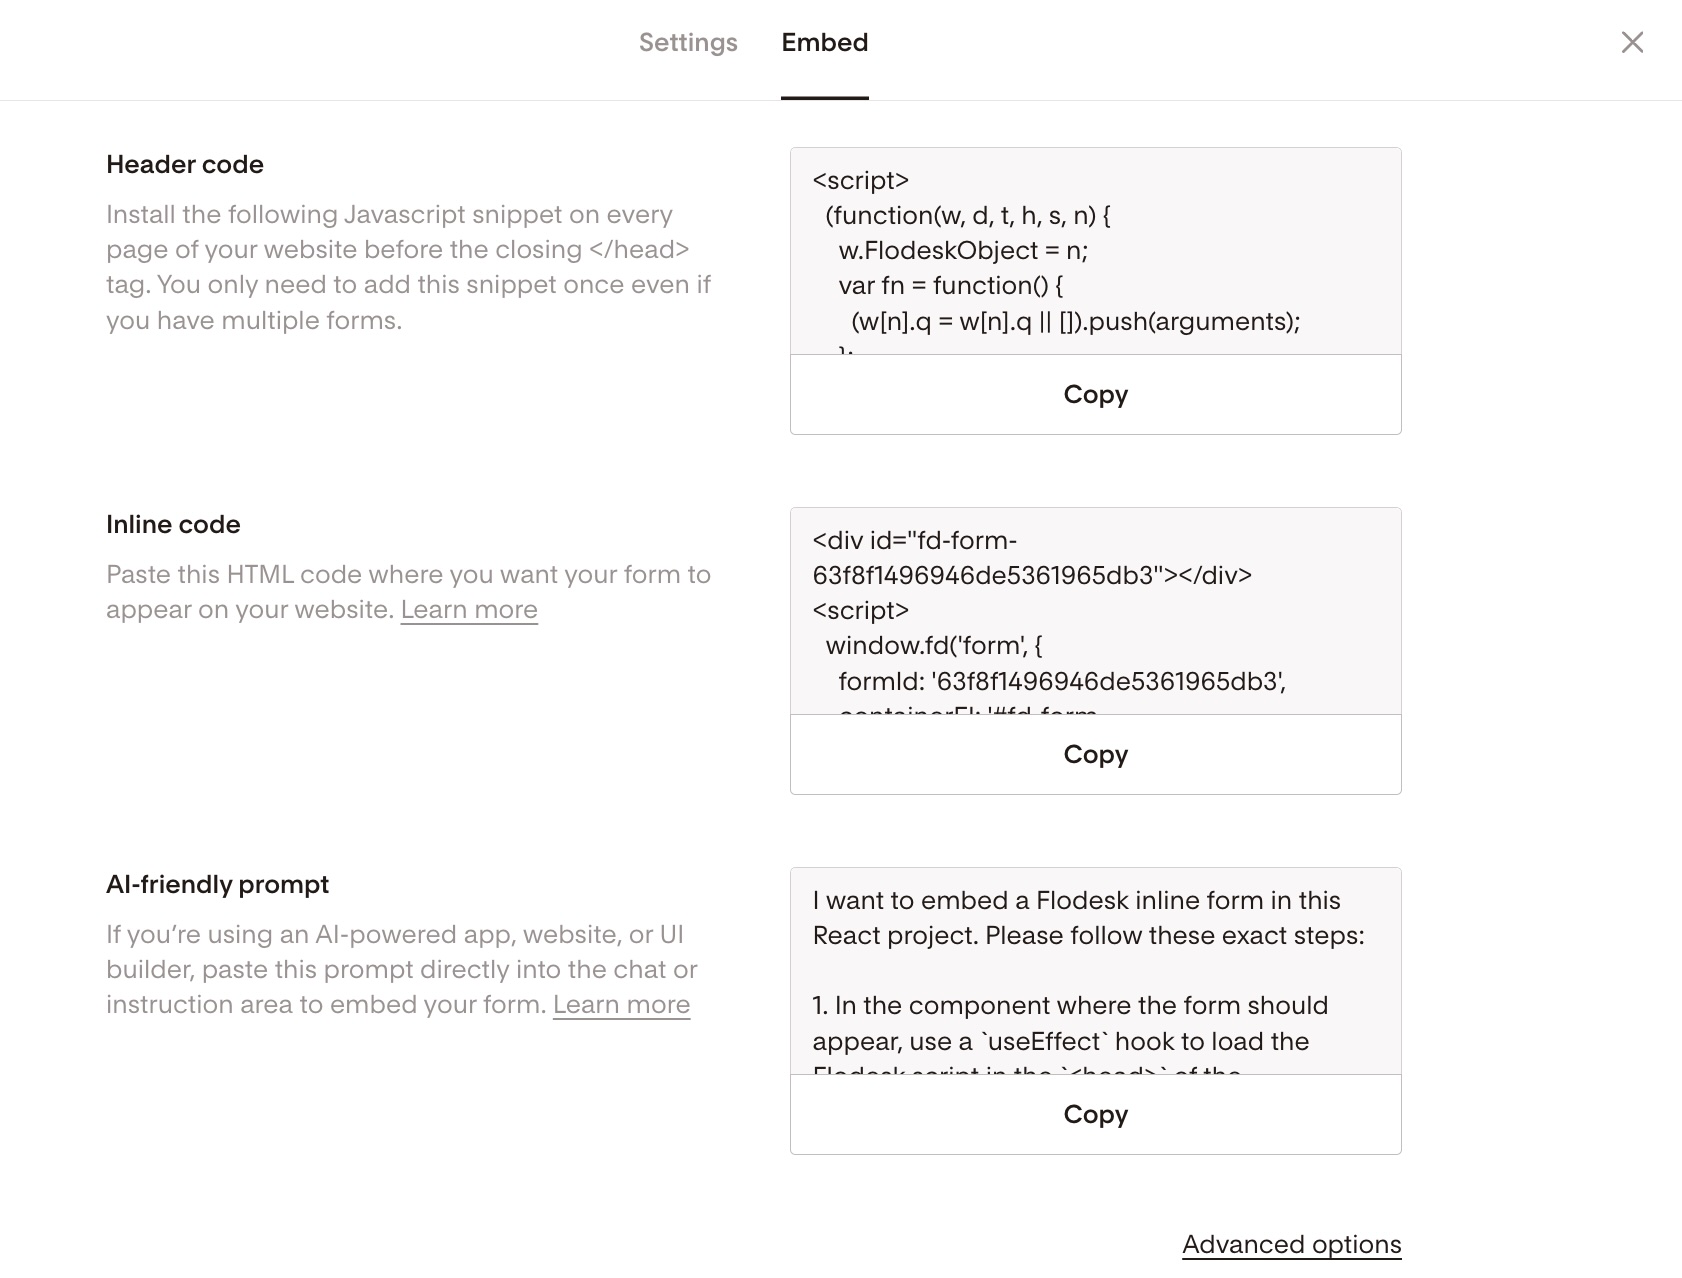
Step 2: Copy the Flodesk embed code
Once your form design is ready:
Click Embed.
Copy the header code.
Copy the inline code.
Keep both snippets handy—you’ll paste them into LeadPages in the next steps.
Step 3: Open your LeadPages page or template
Log in to your LeadPages account.
Open the landing page, pop-up, or site where you want your Flodesk inline form to appear.
You can use an existing template or build a page from scratch.
Many LeadPages templates include a two-step opt-in, where visitors click a button before the form appears.
Step 4: Enable conversion tracking on the Call To Action button (two-step opt-ins)
If your LeadPages template uses a button to trigger the form pop-up, you should enable conversion tracking before adding your form.
Hover over the Call To Action button.
Click Edit Click Event.
Check the option to count a click of your button as a conversion.
Because you’re embedding your Flodesk form instead of using LeadPages’ built-in form integration, this is the only way LeadPages can track conversions on the page.

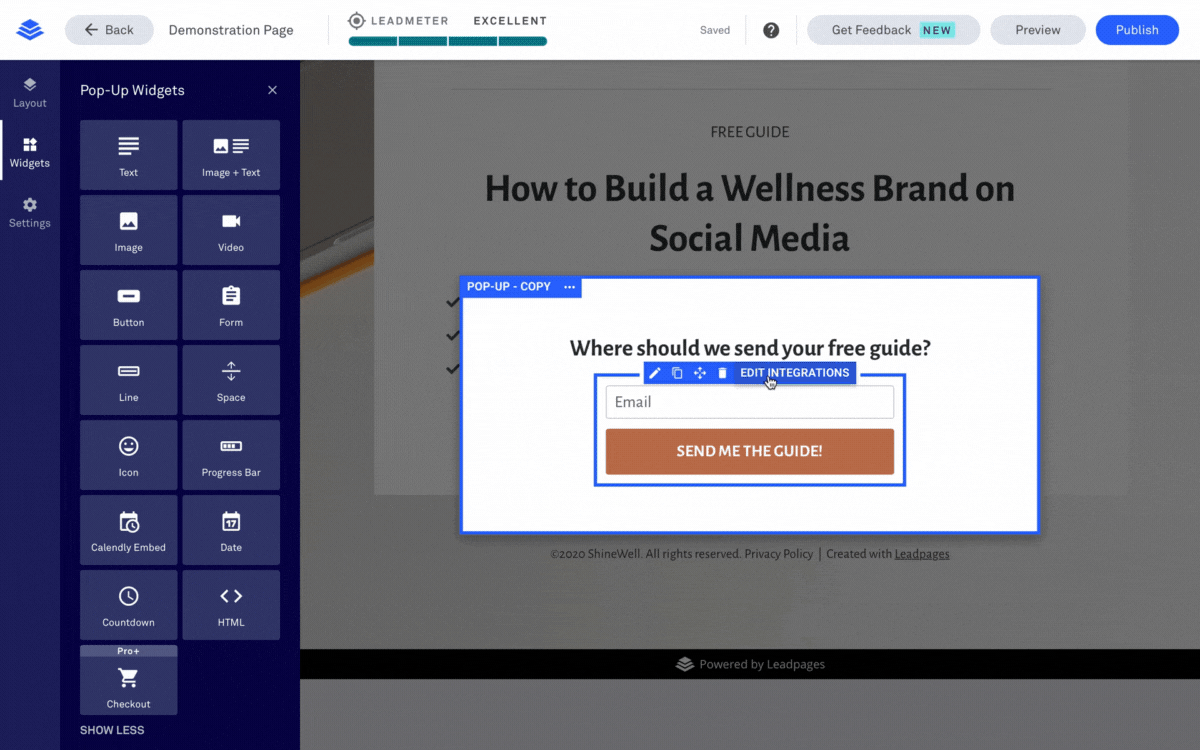
Step 5: Remove the default LeadPages form (if your template includes one)
If your template includes a preset LeadPages form:
Hover over the Call To Action button.
Click Edit Pop-Up.
When the pop-up editor opens, hover over the existing form block.
Delete the form.
This clears space so you can replace it with your Flodesk form.
Step 6: Add an HTML widget to your page
Now add the container where your Flodesk form will display.
Open the Widgets panel on the left side of the editor.
Drag the HTML widget into the section where you want the form to appear.
You can place the HTML widget:
Inside a pop-up
Directly on a landing page
Anywhere in your LeadPages layout
If you’re building your page from scratch, simply place the HTML widget where you want the form.
You can read more about creating an on page pop-up form in LeadPages help center.
Step 7: Paste your Flodesk embed code into the HTML widget
Click the HTML widget you added.
Paste the Flodesk header code first, followed by the inline code directly below it.
Save your changes.
Your Flodesk inline form will now appear inside your LeadPages design.
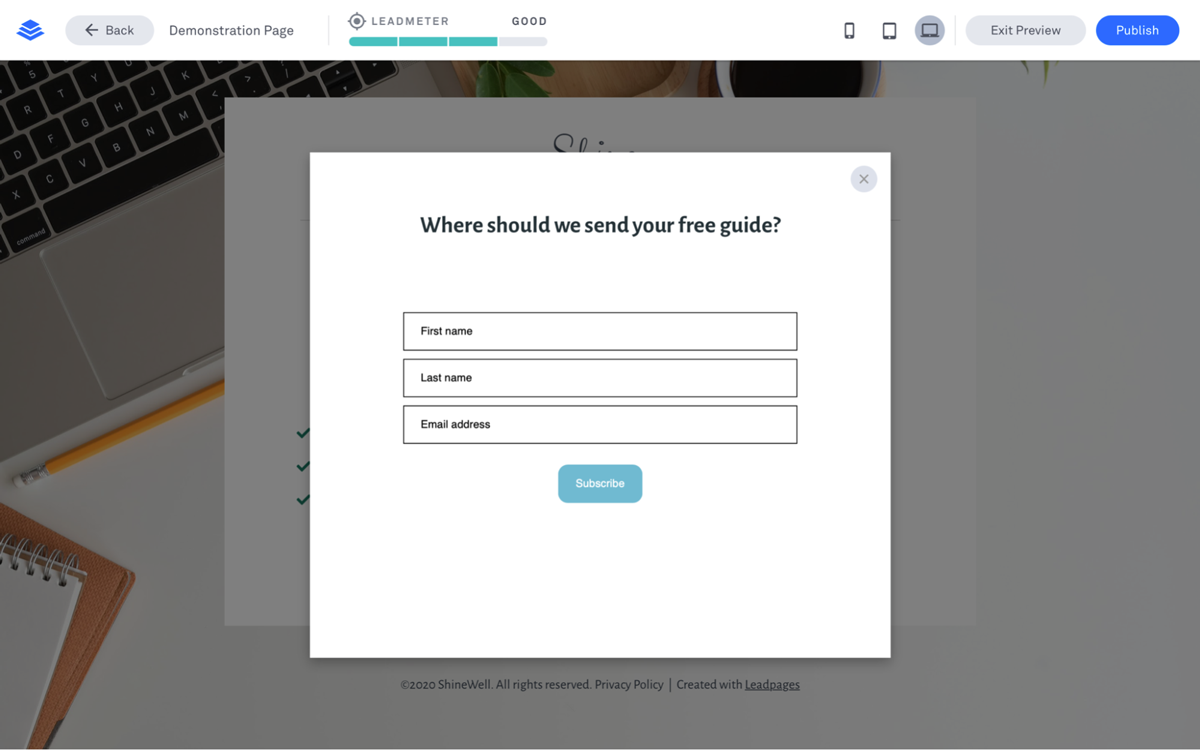
Step 8: Preview and publish your page
Click Preview in LeadPages to test your form.
Submit a test email address to confirm that:
The form appears correctly
Subscribers are added to your Flodesk audience
Once everything looks good, publish your page.
Your visitors can now subscribe directly through your Flodesk form.
Summary
To add a Flodesk inline form to LeadPages:
Create your form in Flodesk
Copy the header code and inline code
Open your LeadPages page
Enable conversion tracking for the CTA button (if using a two-step opt-in)
Replace the default form with an HTML widget
Paste the Flodesk embed code
Preview and publish your page
This allows you to collect subscribers directly in Flodesk without using Zapier.
FAQ
Can I use a Flodesk inline form on any LeadPages page?
Yes. You can embed a Flodesk inline form anywhere LeadPages allows an HTML widget, including landing pages, pop-ups, and full sites.
Do I need Zapier to connect LeadPages and Flodesk?
No. Embedding your Flodesk form using the header code and inline code connects the form directly to your Flodesk audience.
Why do I need both the header code and inline code?
The header code loads the form script, while the inline code displays the form. LeadPages requires both snippets inside the HTML widget for the form to work.
Can I make the form match my LeadPages design?
Yes. You can customize the form’s fonts, colors, fields, and button styles inside Flodesk. Many users also make the form background transparent so it blends into their LeadPages layout.
Why isn’t my Flodesk form appearing on the page?
Check that:
Both the header code and inline code are pasted into the HTML widget
The code was copied completely from Flodesk
The page has been saved and republished
Then preview the page again.
Will new subscribers automatically appear in Flodesk?
Yes. Anyone who signs up through the embedded form is added directly to your Flodesk audience and can trigger any workflows connected to that form.