
How to add an inline form to your Wix website
A step-by-step guide to embedding your Flodesk inline form on Wix.
Flodesk inline forms help you collect email addresses directly on your website—so you can grow your list and stay connected with your audience.
Inline forms are embedded into your page content (like a section on your homepage, a blog post, or your footer). Unlike popups, they’re always visible and feel like a natural part of your site.
Below, you’ll learn exactly how to add your Flodesk inline form to a Wix website.
Before you begin:
Make sure your inline form is created and customized in Flodesk.
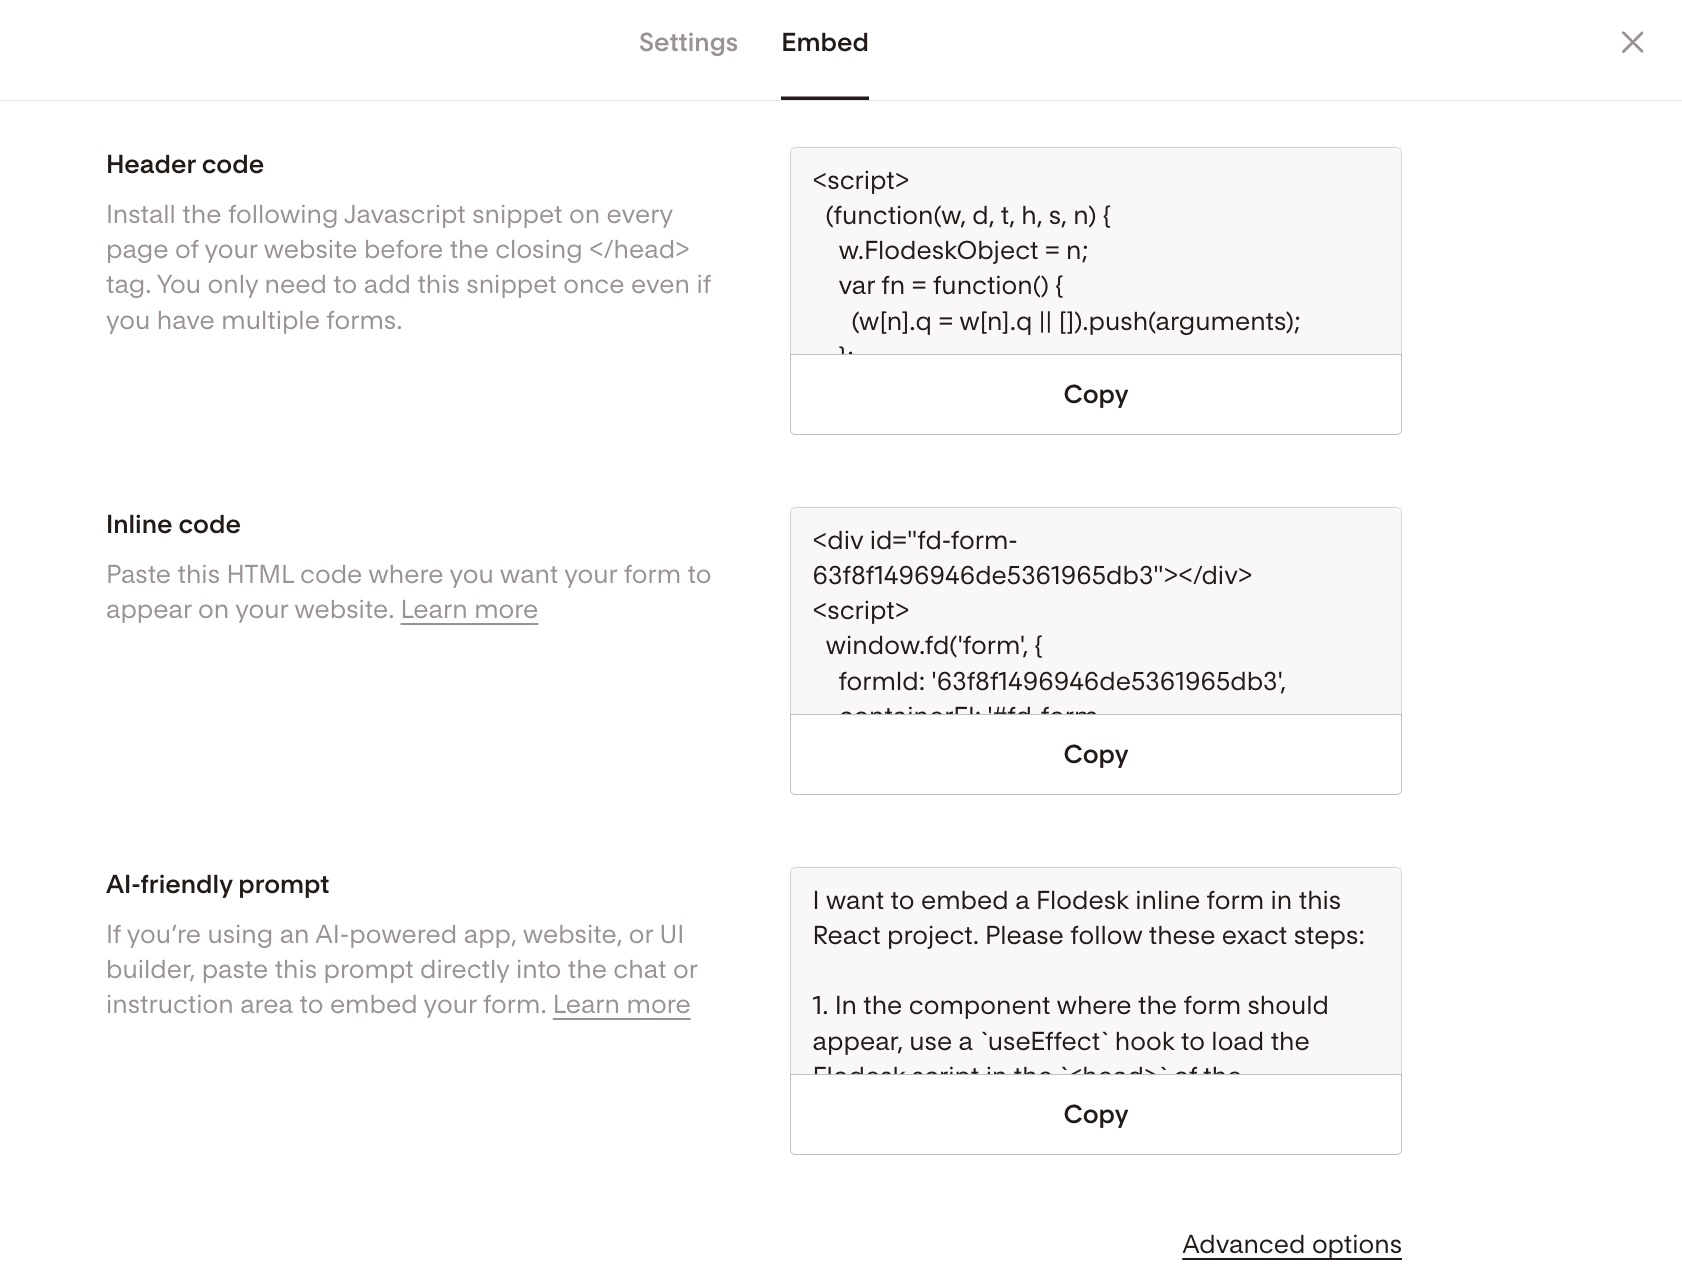
You’ll need both the Header code and the Inline code.
Adding only one of the codes will not display the form correctly.
Important: Wix requires you to add both code snippets into the same HTML embed element for the form to work correctly.
Step 1: Create and customize your inline form in Flodesk
Go to your Forms dashboard in Flodesk.
Create a new Inline form (or open an existing one).
Customize the design, fields, and segments.
Click Embed.
You’ll see two pieces of code:
Header code
Inline code
Keep this window open—you’ll need both.
Step 2: Add the form to your Wix website
Now let’s move to Wix.
Log in to your Wix account.
Open the site where you want to add the form.
Click Edit Site to open the Wix Editor.
Go to the page where you want the inline form to appear.
Step 3: Add an HTML embed element in Wix
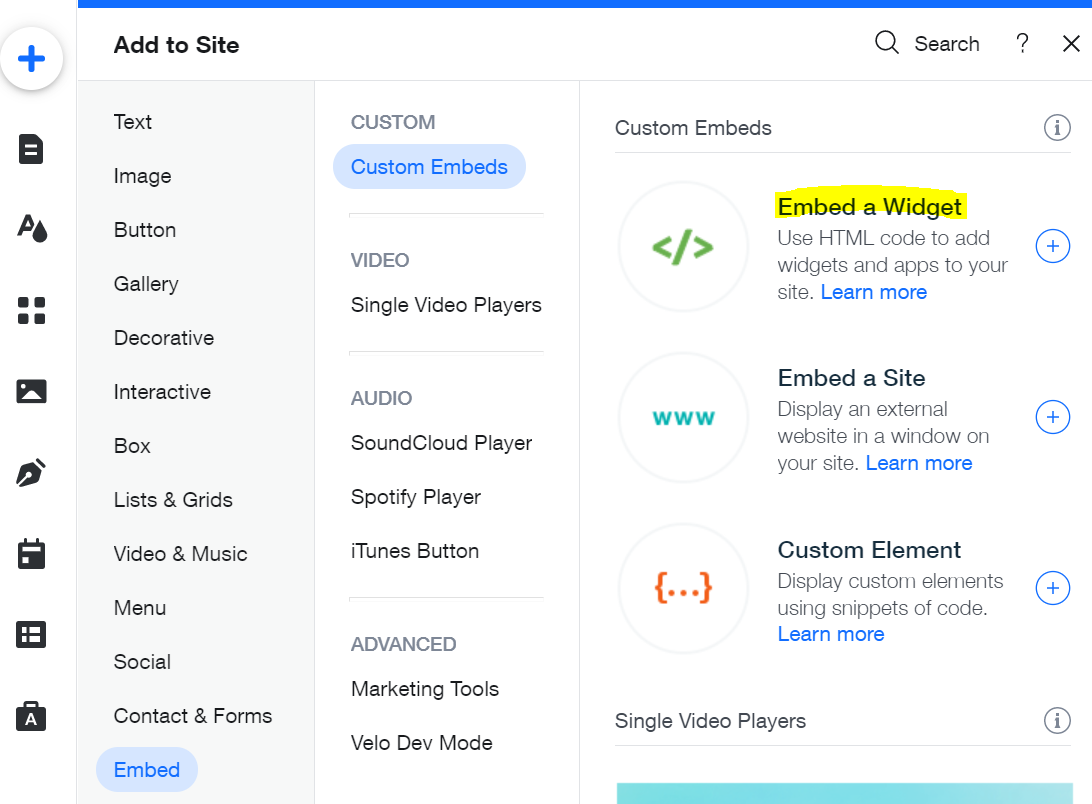
Click the blue + Add button on the left-hand side.
Scroll to Embed Code (sometimes listed under “Embed”).
Select Embed HTML (or “Embed a Widget”).
Drag the HTML box onto your page where you want the form to appear.
Step 4: Paste both Flodesk code snippets
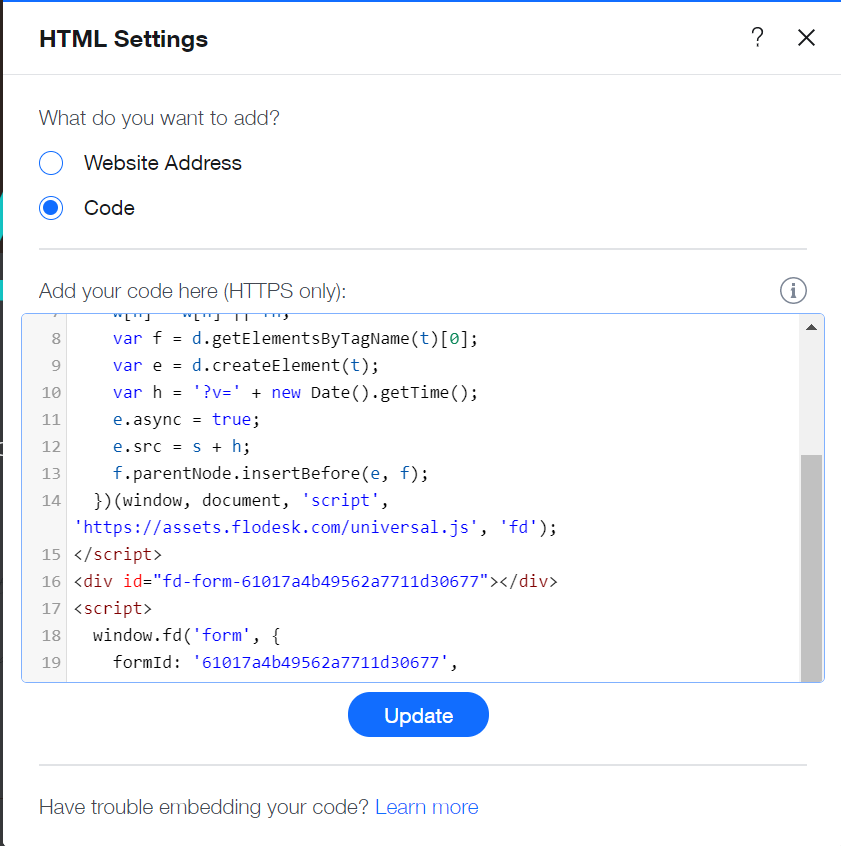
Click on the new HTML element.
Select Enter Code.
Paste the Header code first.
Paste the Inline code directly below it.
Click Update.
Your form should now appear inside the embed box.
Step 5: Resize and publish
Resize the HTML box so your form displays properly.
Adjust spacing and positioning as needed.
Click Publish in the top-right corner of Wix.
That’s it! Your inline form is now live on your Wix website.
Common issues and how to fix them
The form isn’t showing up
Make sure you pasted both the Header code and Inline code.
Double-check that the codes are inside the same HTML embed element.
The form looks cut off
Resize the HTML embed box in Wix.
Add more vertical space if needed.
I only added the inline code—will it work?
No. The Header code loads necessary scripts. Without it, the form won’t display correctly.
Want to learn more?
You can also review Wix’s documentation on adding custom HTML to your site for additional layout options: Wix support documentation on how to add HTML content.
FAQ
What is an inline form?
An inline form is an email sign-up form that’s embedded directly into your webpage content. It stays visible at all times (unlike popups).
Why do I need both the Header code and Inline code?
The Header code loads the required script that powers the form. The Inline code tells Wix where to display the form. Both are required for it to work.
Can I add the Header code in Wix’s site header instead?
Most Wix templates don’t allow direct access to the <head> section. That’s why we recommend placing both code snippets inside the same HTML embed element.
Can I add the same inline form to multiple pages?
Yes! Just repeat the same steps on each page where you want the form to appear.
Do I need to republish my Wix site every time I edit my form?
If you edit the design or content of your inline form in Flodesk, you do not need to re-embed the code. However, if you change placement in Wix, you’ll need to republish your Wix site.
If your form still isn’t displaying correctly, double-check that both code snippets are included. When in doubt, remove the embed element and add it again fresh.