
How to add an inline form to your WordPress website with the Genesis eNews extended widget
A step-by-step guide to embedding a Flodesk inline form on your WordPress website using the Genesis eNews Extended widget.
Flodesk opt-in forms help you capture your visitors’ email addresses so you can grow your list and stay connected with your audience.
Inline forms are the most common type of signup form on websites. They appear directly inside a page, sidebar, footer, or blog post, and stay visible as part of the page layout.
This guide walks you through how to add your Flodesk inline form to WordPress using the Genesis eNews Extended widget.
Before you start
Make sure you have:
An inline form created in Flodesk
The Genesis eNews Extended widget installed on your WordPress site
Access to your WordPress dashboard
You’ll need to add two pieces of code from Flodesk:
The header code (added once to your website)
The Genesis eNews widget snippet values
Both are required for the form to work correctly.
Step 1: Create and customize your inline form
Log in to your Flodesk account.
Go to Forms.
Create a new Inline Form or open an existing one.
Customize the design, text, and segments as needed.
Once your form is ready, click Embed.
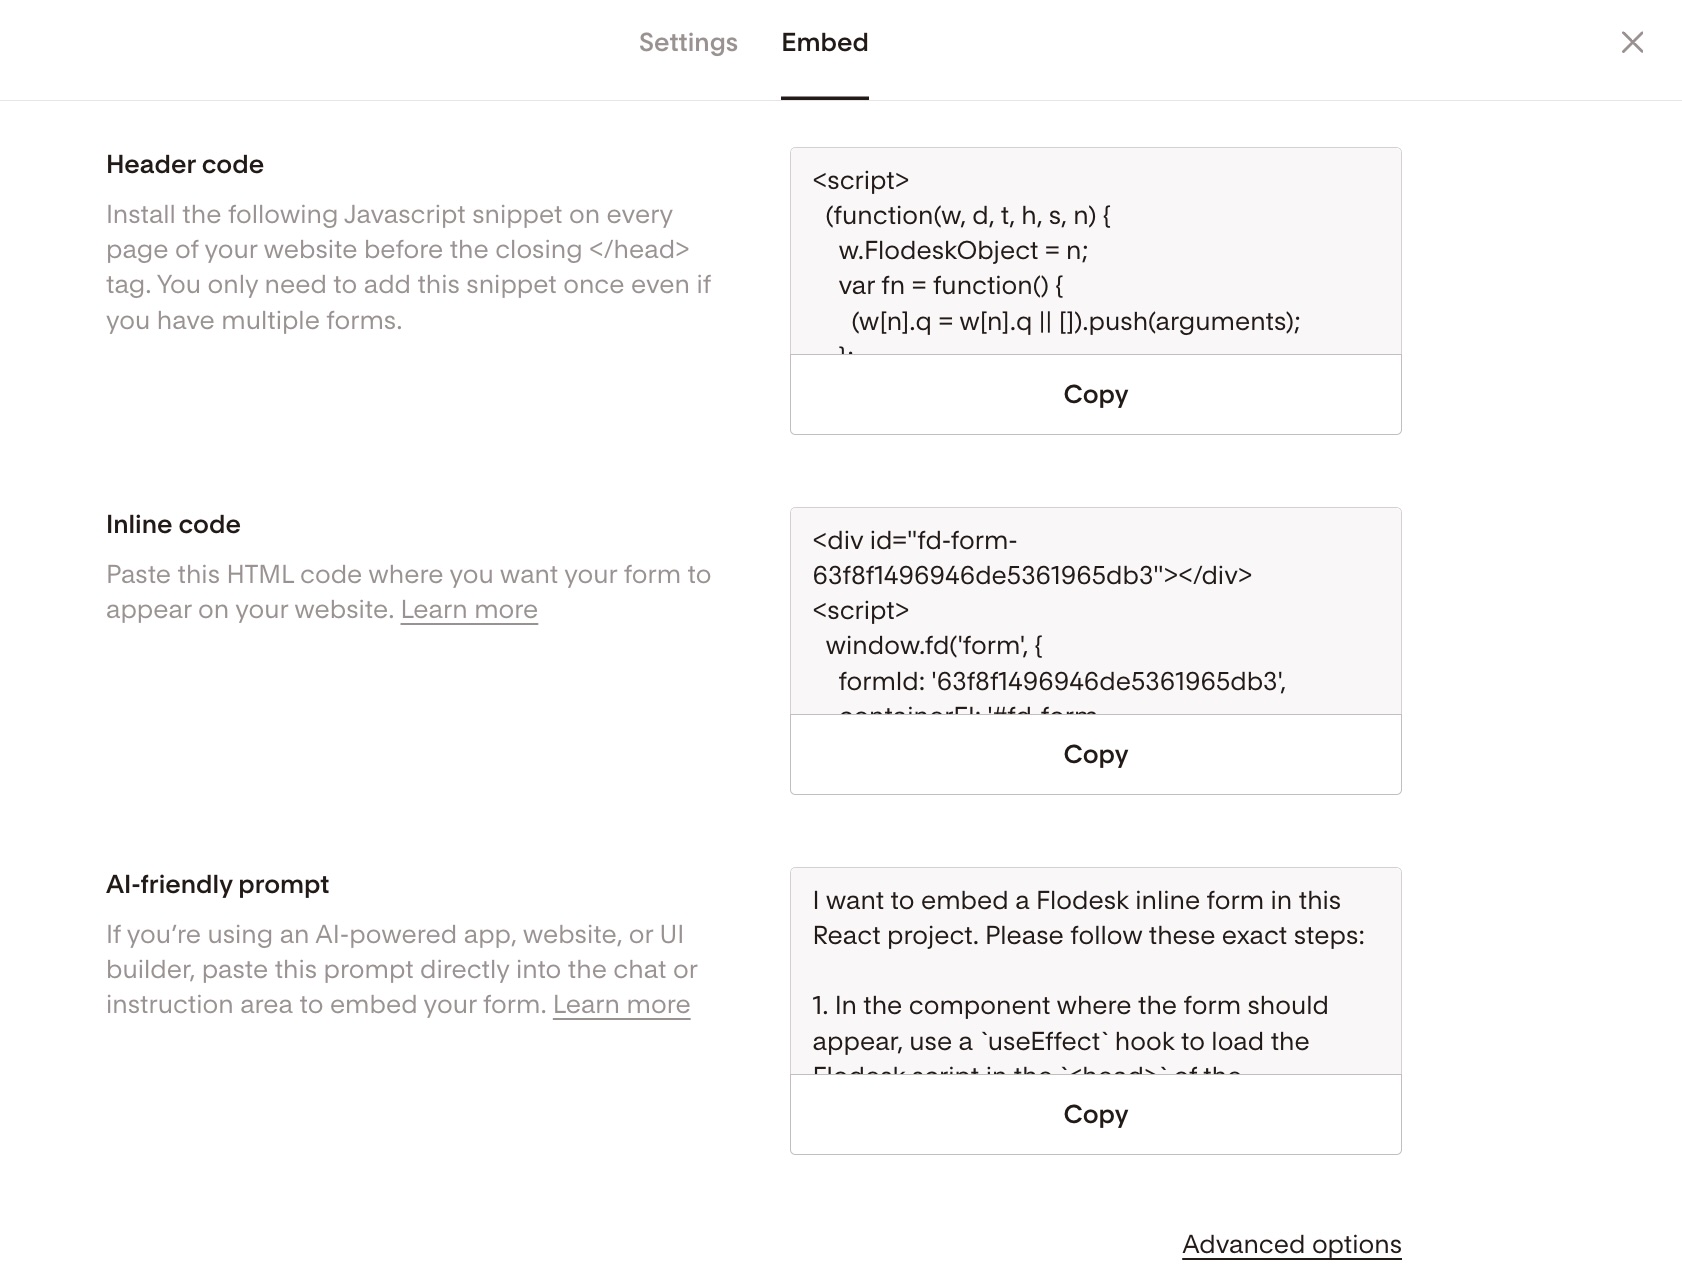
Step 2: Copy the embed code from Flodesk
After clicking Embed, you’ll see two code snippets:
Header code
Inline code
You’ll add the header code to your website first, then retrieve the Genesis widget values from the advanced embed options.
Important:
Both the header code and the Genesis widget values must be added to your website.
Step 3: Add the Header code to WordPress
The header code only needs to be added once to your website.
There are two ways to do this.
Option 1 (Recommended): Use a plugin
Using a plugin is the easiest and safest option.
Log in to your WordPress Dashboard.
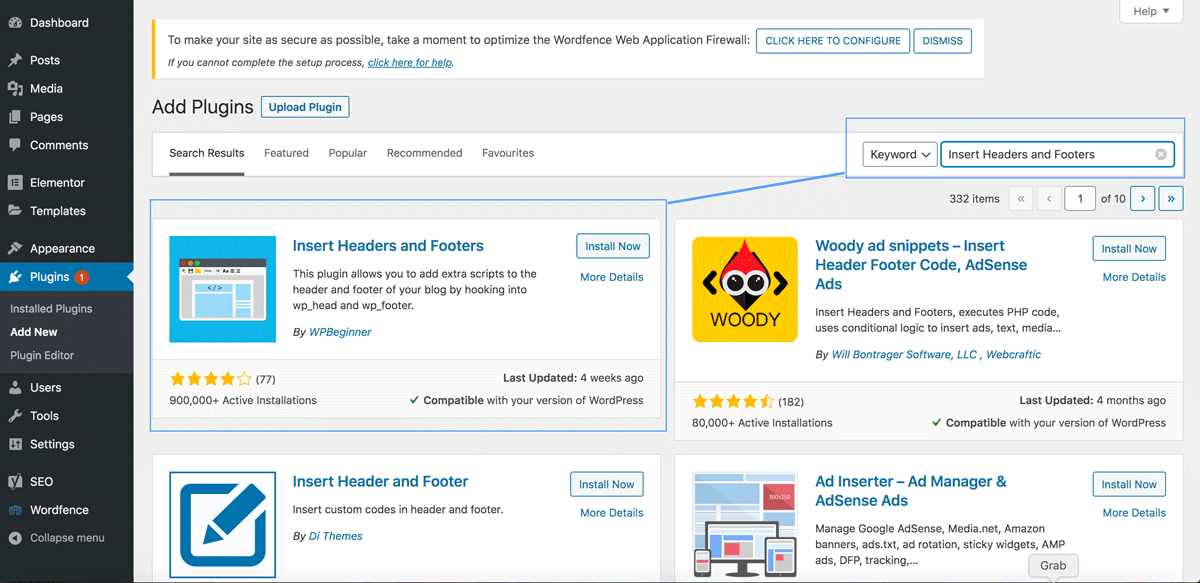
Go to Plugins → Add New.
Search for Insert Headers and Footers.
Click Install Now.
Click Activate.
Once you’ve installed and activated the plugin it will appear under Settings.
After installing:
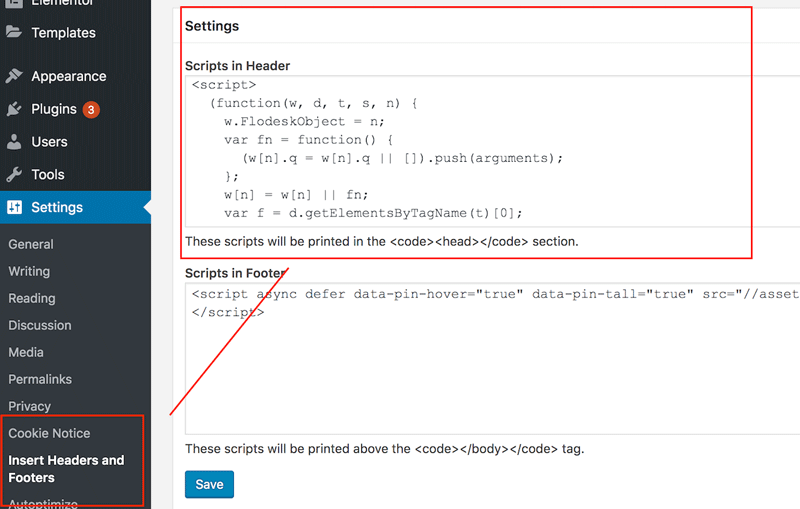
Go to Settings → Insert Headers and Footers.
Find the Scripts in Header field.
Paste the Flodesk header code into that box.
Click Save.
Note: Your settings screen may look slightly different depending on your installed plugins. This is normal.
You can also use other similar plugins if you prefer.
Option 2: Add the header code manually (advanced)
Advanced users can add the code directly to their theme’s functions.php file.
This method requires editing theme code and is not recommended unless you're comfortable working with WordPress files.
Learn how to add code to your theme's functions.php file here.
Step 4: Get the Genesis eNews widget snippets
Next, retrieve the values designed for the Genesis eNews Extended widget.
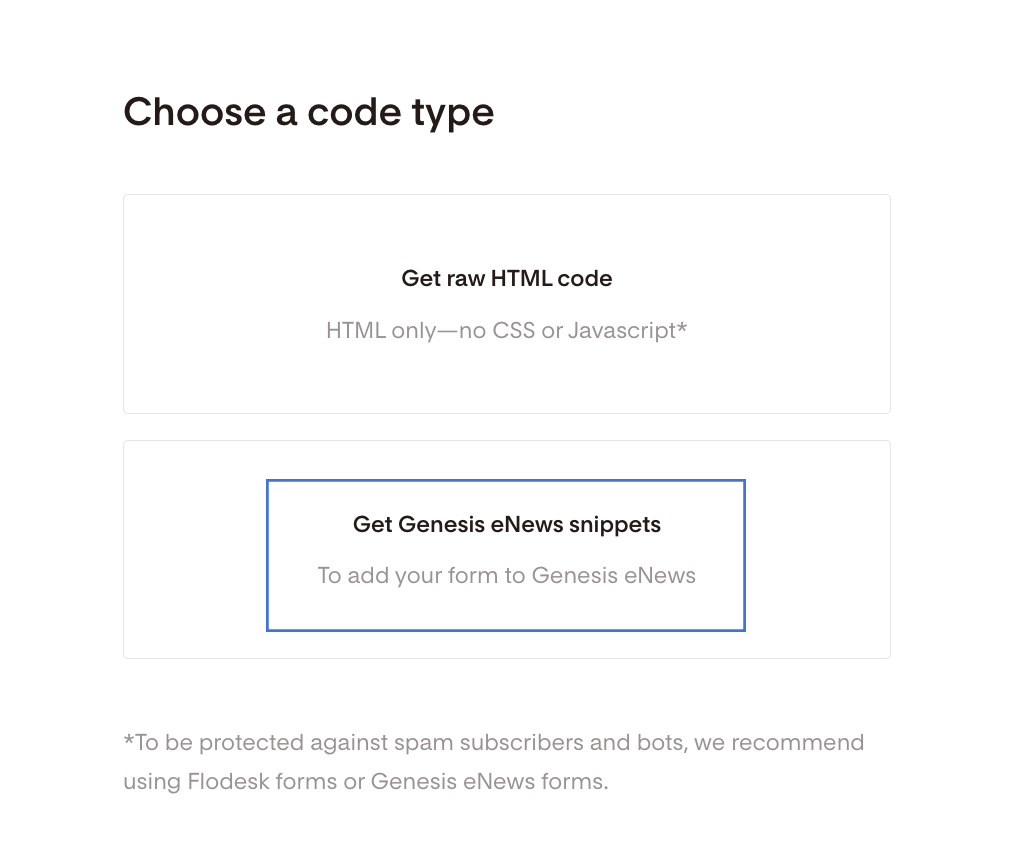
In the Embed window in Flodesk, scroll down to Advanced Options below the inline code.
Click Get Genesis eNews snippets.
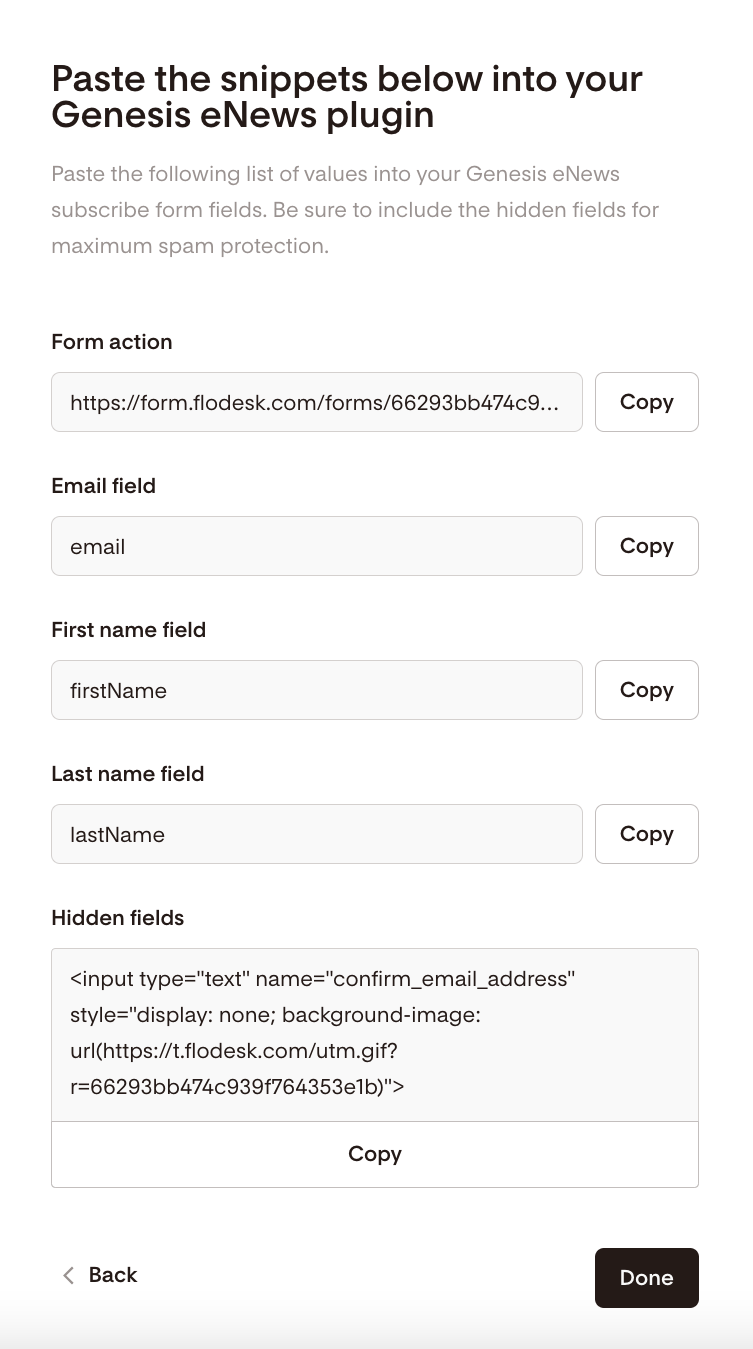
You’ll see several fields containing values you can copy.

Step 5: Add the values to your Genesis eNews widget
Now connect your Flodesk form to the widget.
In WordPress, go to Appearance → Widgets.
Add or open the Genesis eNews Extended widget.
Copy each value from Flodesk.
Paste it into the matching field in the widget settings.
Click Save.
Your inline form should now appear wherever the widget is placed on your website.
Note: the screenshot below is only an example. Your values may look slightly different.
Summary
To add a Flodesk inline form using the Genesis eNews Extended widget:
Create an inline form in Flodesk.
Copy the header code and add it to your WordPress site.
Open Advanced Options in the embed window.
Select Get Genesis eNews snippets.
Paste the values into the Genesis eNews Extended widget fields.
Save the widget.
Your form will now display on your website and allow visitors to subscribe to your email list.
FAQs
Do I need both the header code and the Genesis widget values?
Yes. The header code loads the Flodesk form script on your website, and the Genesis widget values connect your widget to your specific form. Both are required for the form to work.
Do I need the Genesis eNews Extended plugin?
Yes. This setup only works if your WordPress site uses the Genesis eNews Extended widget. If you are not using this widget, you can embed the standard Flodesk inline code instead.
Where can I place the Genesis eNews widget?
Anywhere your WordPress theme supports widgets, such as:
Sidebar
Footer
Homepage widget areas
Can I use multiple inline forms on my website?
Yes. You can embed multiple forms across different pages. The header code only needs to be installed once.
What should I do if the form doesn’t appear?
Check the following:
The header code is installed on your site
The Genesis widget values were pasted correctly
Your site cache has been cleared if you use a caching plugin