How to add an inline form to your WordPress website with Gutenberg editor
A step-by-step tutorial on how to embed a Flodesk inline form to a WordPress website using the Gutenberg editor
Flodesk opt-in forms help you capture your visitors’ email addresses so you can build your list and start regularly sharing your brand message.
And adding them to your WordPress website with the Gutenberg editor couldn’t be easier.
The most common sign-up forms you find on websites are inline forms. They’re the ones that are embedded into website pages, blog posts, sidebars or footers. Unlike popup forms, they appear as a natural, built-in part of the web page and are displayed at all times.
How do you embed an inline form to your website?
Just add two code snippets.
How to add an inline form to your WordPress website with the Gutenberg editor
Step 1. Start by creating and customizing your inline form.
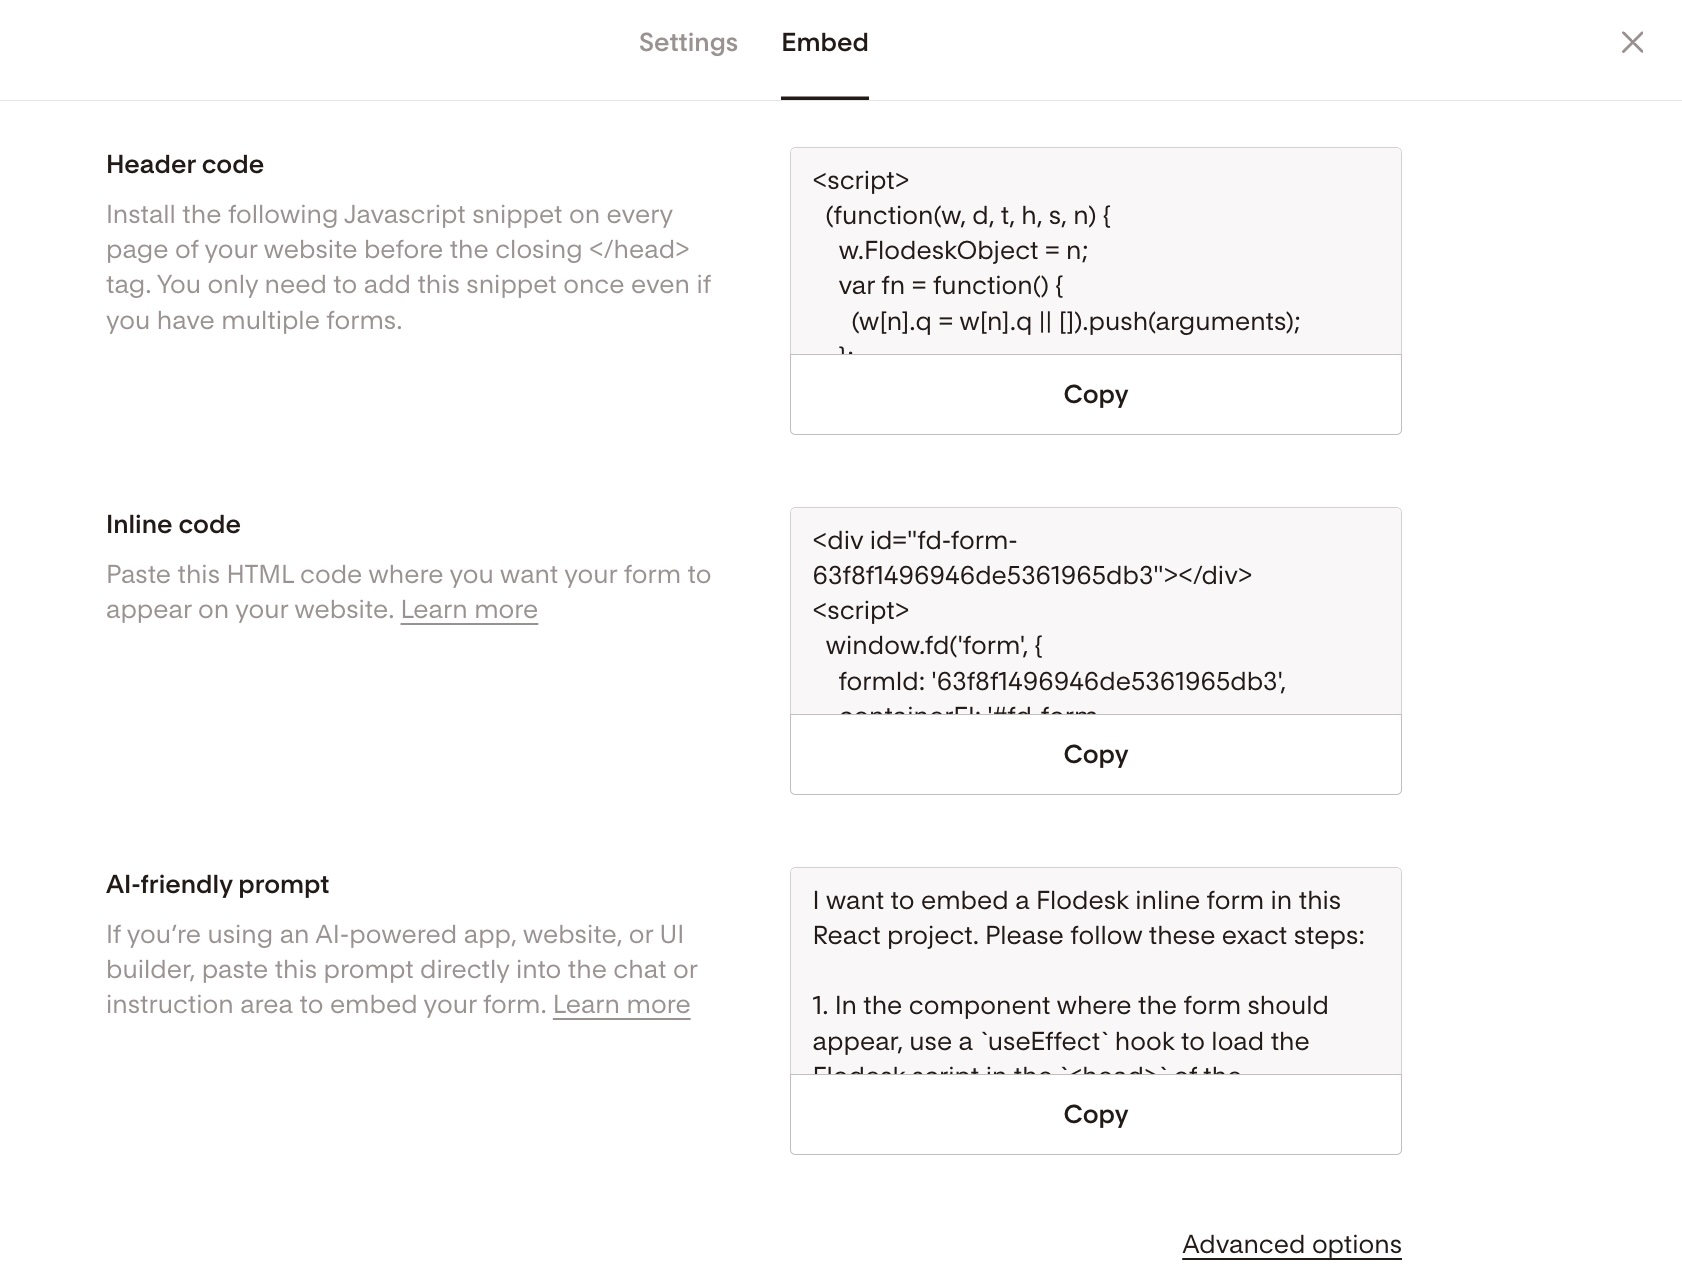
Step 2. Next, click the black Embed button in the top right corner. You'll see the two embed codes that you need to add to your WordPress website so that the form gets displayed and your subscribers can sign up. It will look something like the image below.
Note: Both the header code and the inline code have to be added to your website. It’s not enough to add only one of them.
How to add the Header code to your WordPress website
You can add the header code to your website either with the help of a plugin or manually.
Adding the header code with a plugin
The easiest way to add the Flodesk header and inline code snippets to your website is to install a plugin from the WordPress plugin library. It helps you add code snippets to your website’s header and footer section.
Step 1. Login to your WordPress Dashboard
Step 2. Go to Plugins > Add new
Step 3. In the Search plugins field on the top right, run a search for the “Insert Headers and Footers” plugin
Note: You can use any other suitable plugins, it does not have to be one in our example.
Step 4. Click on Install Now next to the “Insert Headers and Footers” plugin then click Activate
Once you’ve installed and activated the plugin it will appear under Settings.
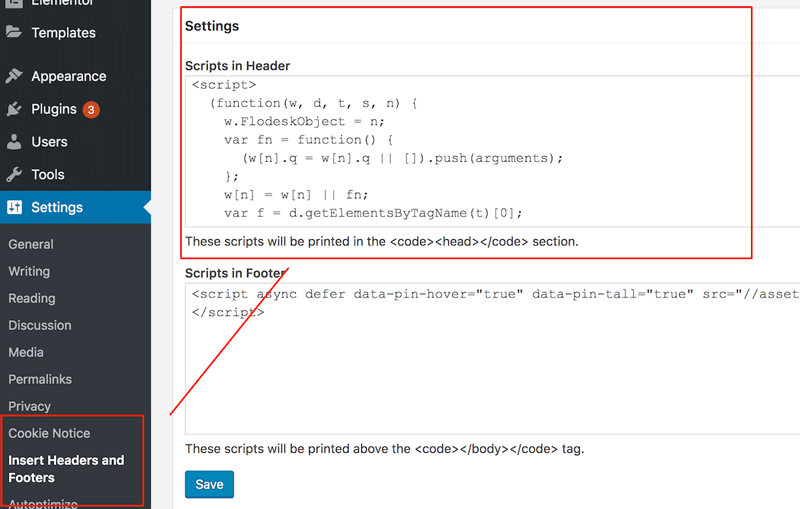
Step 5. Click on Settings, then click on "Insert Headers and Footers" in the left side panel—see the example screenshot below—and copy-paste the Flodesk header code into the "Scripts in Header" box
Note: your options under Settings may look somewhat different from the below screenshot example—depending on what additional plugins you have already installed. This is normal. Just locate the "Insert Headers and Footers" plugin, click on it and paste the header code from Flodesk into the "Scripts in Header" box.
Step 6. Save your changes
Adding the header code manually
This is an advanced method and would require you to write code directly into your theme’s functions.php file.
Learn how to add code to your theme's functions.php file here.
How to add the Inline code snippet to your WordPress website using the Gutenberg editor
Once the header code is added to your WordPress website—either via a plugin or manually—the next step is to add the Flodesk inline code where you want the form to show on the page.
Step 1. Copy the Flodesk inline code
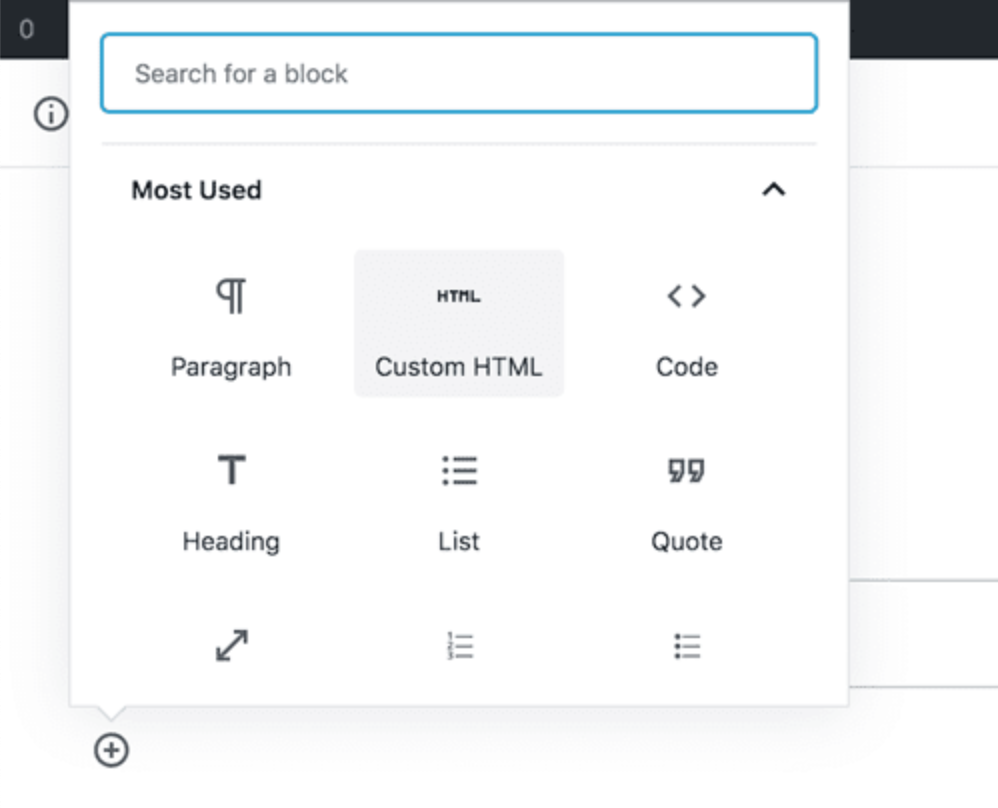
Step 2. Add a custom HTML block to your blog post or page where you want to embed your Flodesk inline form
Step 3. Paste the inline code snippet from Flodesk exactly as it is into the Gutenberg editor’s HTML block
Note: The inline form may not be visible in Gutenberg in edit mode. Save your page as a draft and check the live rendering via the Preview button and it should appear normally.
Step 4. Click Publish to set your page and form live
Summary
If you’re serious about increasing your sales, building your brand and positioning yourself as a thought leader, be sure to add an inline form to your website.
First, create an inline form.
Copy the header code snippet and add it to your website with the help of a plugin in WordPress or by adding the code directly into your theme’s functions.php file.
Copy the inline code snippet and add it where you want the form to appear on your webpage using a custom HTML block in the Gutenberg editor.


