
How to add an inline form to your WordPress website with Elementor
Flodesk inline forms help you collect email subscribers directly from your website so you can grow your list and stay connected with your audience.
If you’re using WordPress with the Elementor editor, embedding an inline form is straightforward and does not require advanced technical knowledge.
What is an inline form?
Inline forms are opt-in forms that are embedded directly into your website content. They appear as a natural part of the page and are always visible.
Inline forms are commonly added to:
Website pages
Blog posts
Landing pages
Sidebars or footers
Unlike popup forms, inline forms do not interrupt the visitor’s browsing experience.
What you need before you start
Before embedding your Flodesk inline form, make sure that:
You have created and customized an inline form in Flodesk
Your website is built on WordPress
You are using the Elementor page builder
You have permission to install plugins (or edit theme files, if using the manual method)
How embedding an inline form works
To display a Flodesk inline form on a WordPress website, you must add two code snippets:
Header code – added once to your website
Inline code – added wherever you want the form to appear
Both snippets are required. Adding only one of them will prevent the form from displaying correctly.
Step-by-step: How to add an inline form to WordPress with Elementor
Step 1: Create your inline form in Flodesk
In your Flodesk account, create a new inline form
Customize the design, text, and fields
Save your form
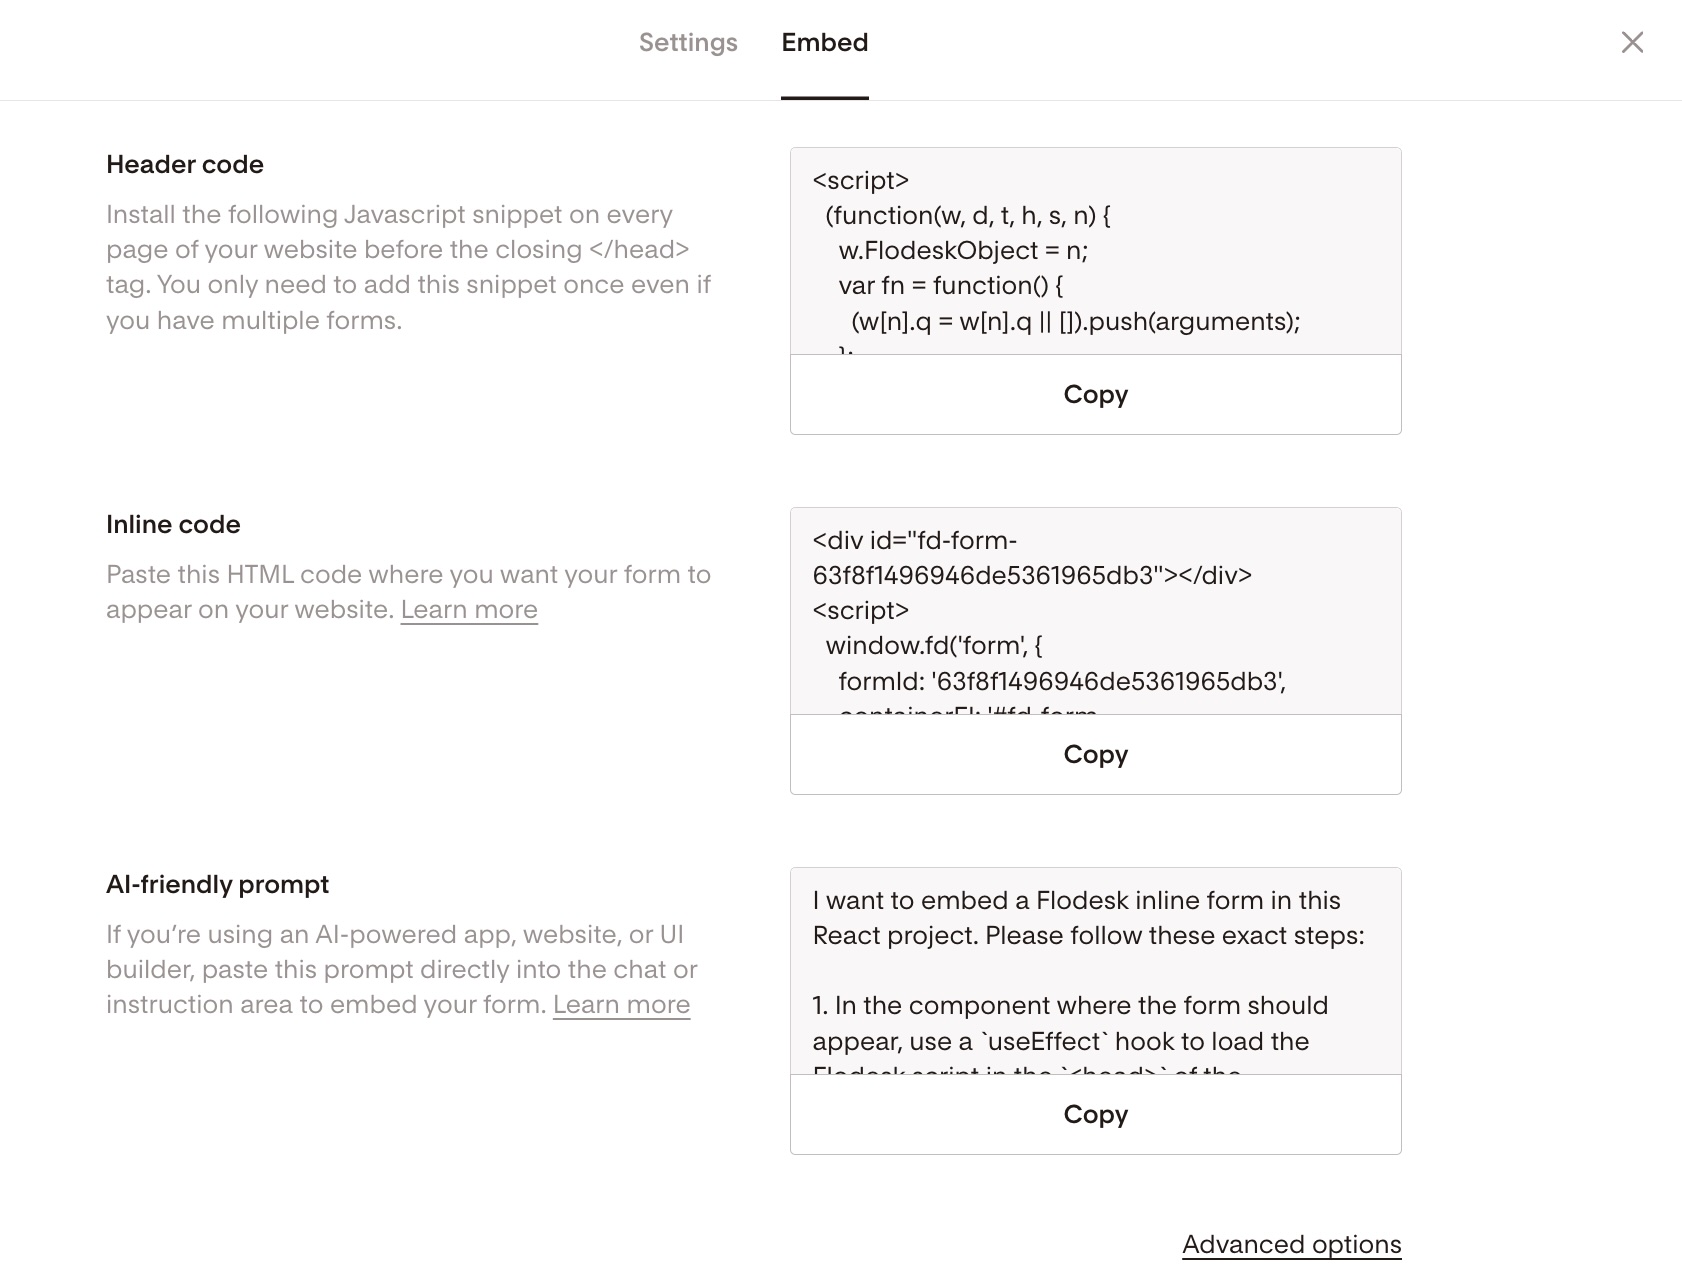
Step 2: Copy the embed codes from Flodesk
Click the Embed button in the top-right corner of the form builder
You’ll see two code snippets:
Header code
Inline code
Keep both snippets handy—you’ll need them in the next steps
Important: Both the header code and inline code must be added to your website.
How to add the header code to your WordPress website
You can add the Flodesk header code in two ways:
Using a plugin (recommended)
Manually editing your theme files (advanced)
Option 1: Add the header code using a plugin (recommended)
This is the easiest and safest method for most users.
Log in to your WordPress Dashboard
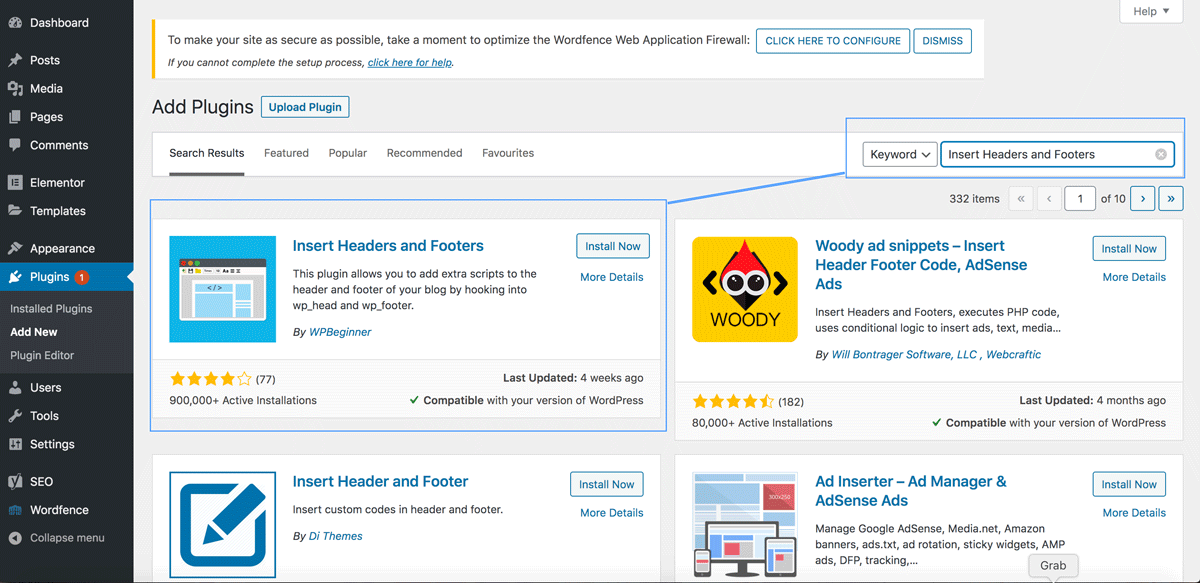
Go to Plugins → Add New
Search for Insert Headers and Footers
You may use a different plugin with similar functionality if you prefer
Click Install Now, then Activate
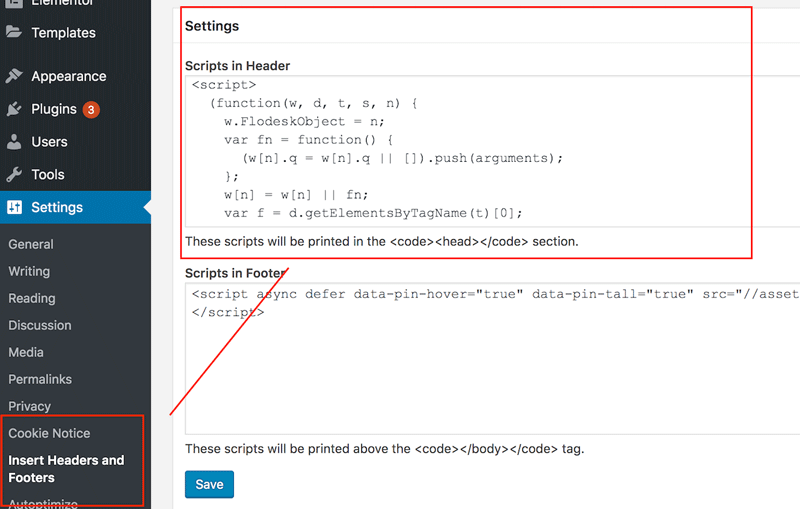
Once activated, go to Settings → Insert Headers and Footers
Paste the Flodesk header code into the Scripts in Header field
Click Save
Your Settings menu may look slightly different depending on other plugins installed. This is normal.
Option 2: Add the header code manually (advanced)
This method requires adding code directly to your theme’s functions.php file.
This approach is recommended only if you are comfortable working with code, as errors can affect your site. If you choose this method, follow WordPress best practices or consult a developer.
Learn how to add code to your theme's functions.php file here.
How to add the inline code using Elementor
Once the header code has been added, the next step is to place the inline form on your page.
Step 1: Copy the inline code from Flodesk
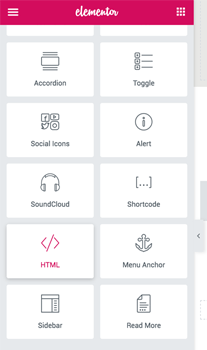
Step 2: Add an HTML widget in Elementor
Open the page in Elementor
Drag and drop the HTML widget onto the page where you want the form to appear
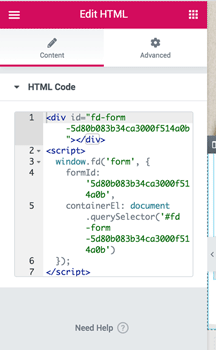
Step 3: Paste the inline code
Paste the Flodesk inline code exactly as provided into the HTML widget
The form may not appear while you are in edit mode—this is expected
Step 4: Save and preview
Click Update
View the live page to confirm the form is displaying correctly
Troubleshooting checklist
If your inline form is not appearing:
Confirm that both the header code and inline code were added
Make sure the header code is in the header, not the footer
Ensure the inline code is inside an Elementor HTML widget, not a text widget
Refresh the page or clear your cache
Summary
To add a Flodesk inline form to a WordPress website using Elementor:
Create and customize an inline form in Flodesk
Copy both the header code and inline code
Add the header code using a WordPress plugin or manually
Paste the inline code into an HTML widget in Elementor
Save and preview your page
Once published, your inline form will begin collecting subscribers directly from your site.
FAQ: Adding inline forms to WordPress with Elementor
How do I add a Flodesk inline form to WordPress using Elementor?
You embed it by adding two code snippets from Flodesk: a header code added site-wide, and an inline code added inside an Elementor HTML widget.
Do I need both the header code and inline code?
Yes. The header code loads the form functionality, and the inline code controls where the form appears on the page.
Where do I paste the inline form code in Elementor?
Paste the inline code into an HTML widget placed where you want the form to appear.
Why can’t I see the inline form in Elementor edit mode?
This is normal. Inline forms often do not render inside the editor and will appear only on the live page.
Can I use any plugin to add the header code?
Yes. Any plugin that allows you to insert scripts into the site header will work. “Insert Headers and Footers” is one commonly used option.
Can I add the same inline form to multiple pages?
Yes. Add the header code once, then reuse the inline code in HTML widgets on any page.