
Time Delays 101: How to Control Timing in Flodesk Workflows
Overview
A time delay is a pause you add between steps in a Flodesk workflow. Instead of sending every email back to back, you can control exactly when each step happens: after a set number of hours, on a specific day of the week, at a particular time, or on a calendar date like a launch day or holiday.
Think of it like setting timers between actions so your subscribers get the right content at the right moment, rather than everything arriving at once.
There are four types of time delay in Flodesk, and you can combine them for even more precise timing.
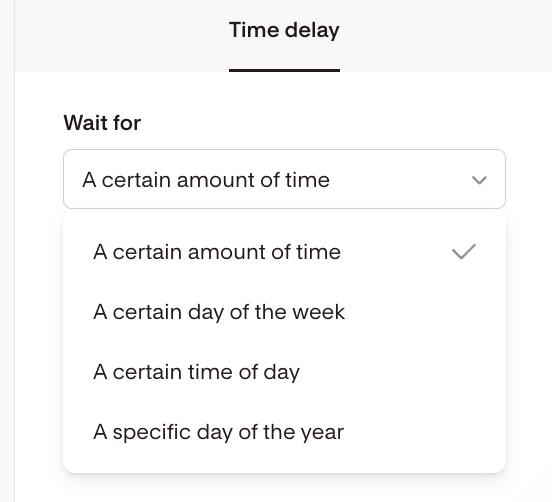
Delay by a certain amount of time
This is the simplest delay. You choose a fixed amount of time and Flodesk waits that long before moving to the next step.
You can delay by:
Minutes
Hours
Days
Example: if you set a "Wait 1 day" delay after an email that goes out on Monday at 10:00 am, the next step will run on Tuesday at 10:00 am, exactly 24 hours later.

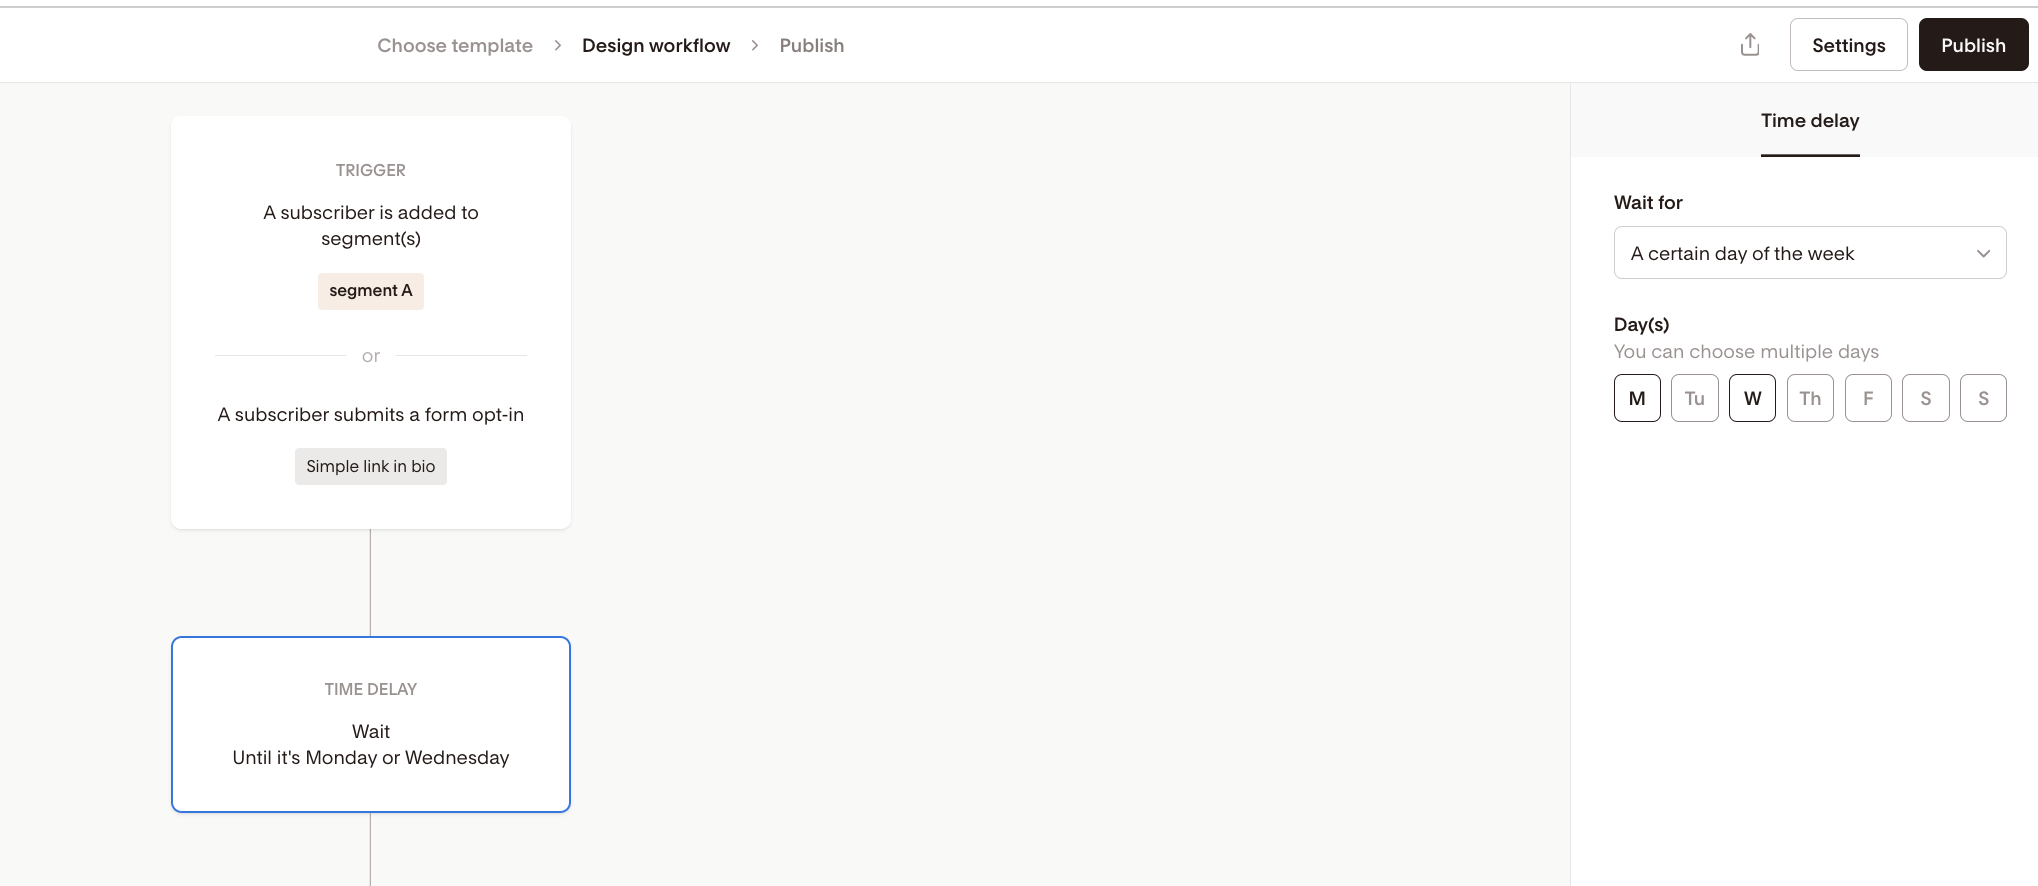
Delay until a certain day of the week
This delay holds subscribers at a step until a specific day (or days) of the week arrives.
You can select as many days as you like. Flodesk will move the subscriber forward on whichever selected day comes next.
Example: if you choose Monday and Wednesday, and a subscriber reaches this step on a Tuesday, Flodesk will wait until Wednesday to continue. If they arrive on a Thursday, they'll wait until the following Monday.
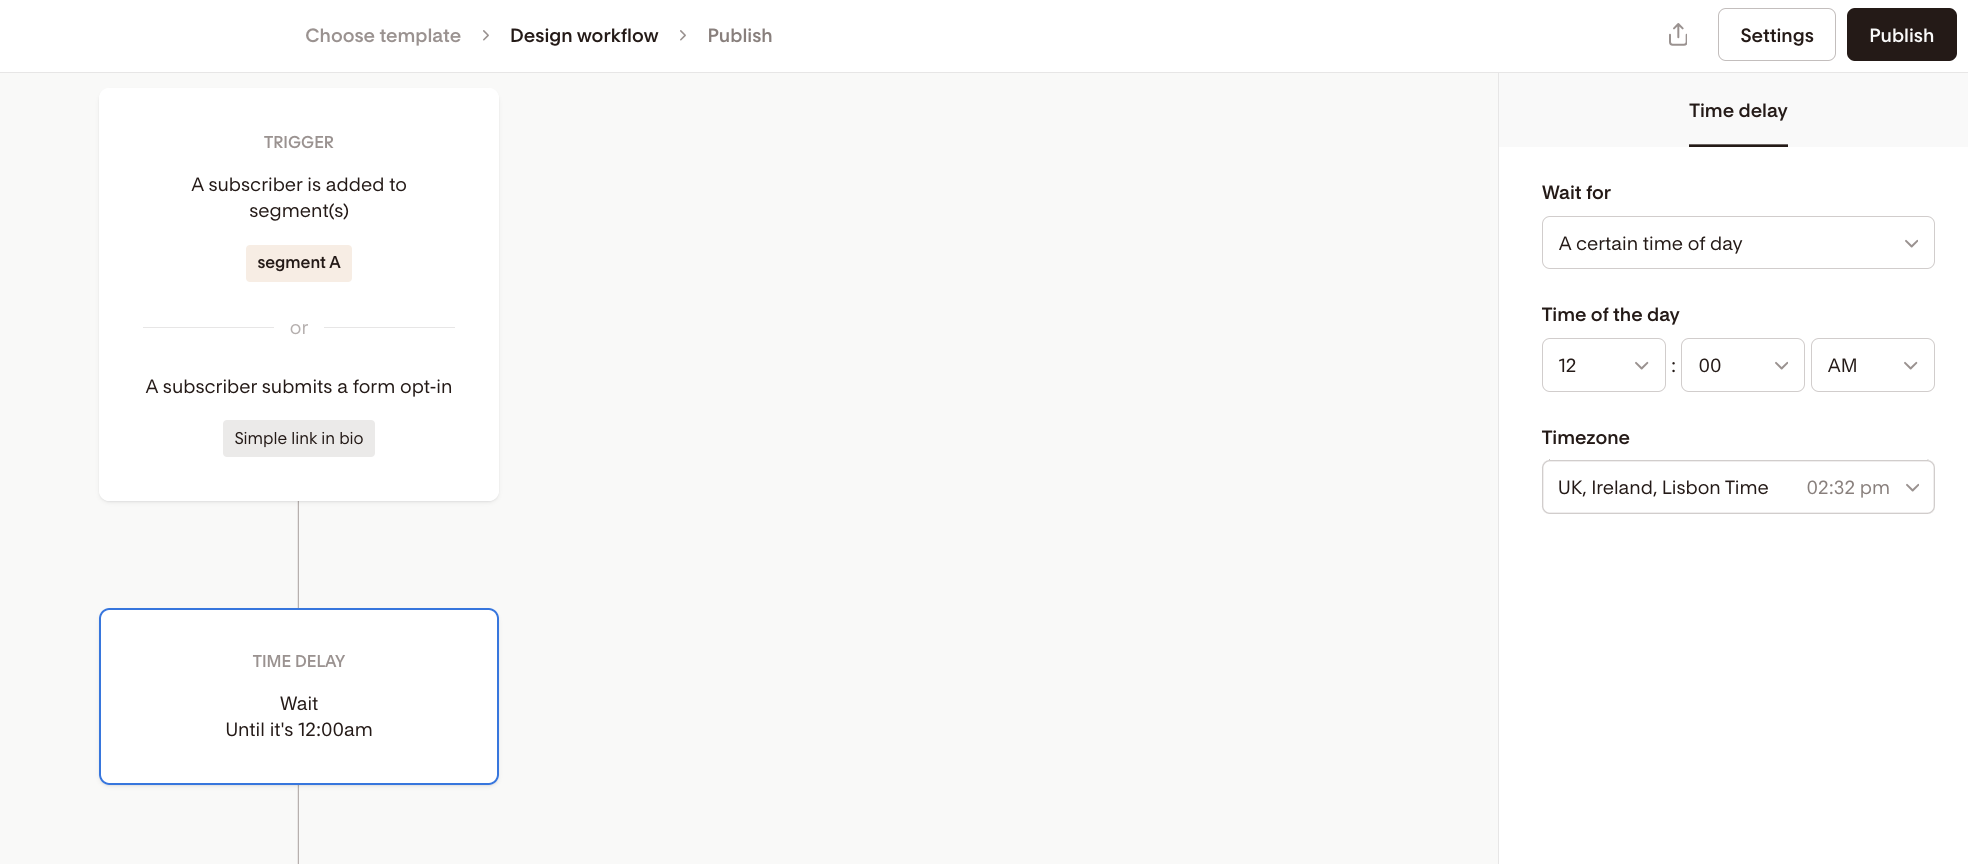
Delay until a certain time of day
This delay holds subscribers until a specific time of day before moving them forward. Flodesk will wait until that time arrives, either later the same day or the following day, depending on when the subscriber reaches the step.
Example: if your delay is set to 12:00 am and a subscriber enters the step at 1:00 am, Flodesk will wait until 12:00 am the next day to move them forward.
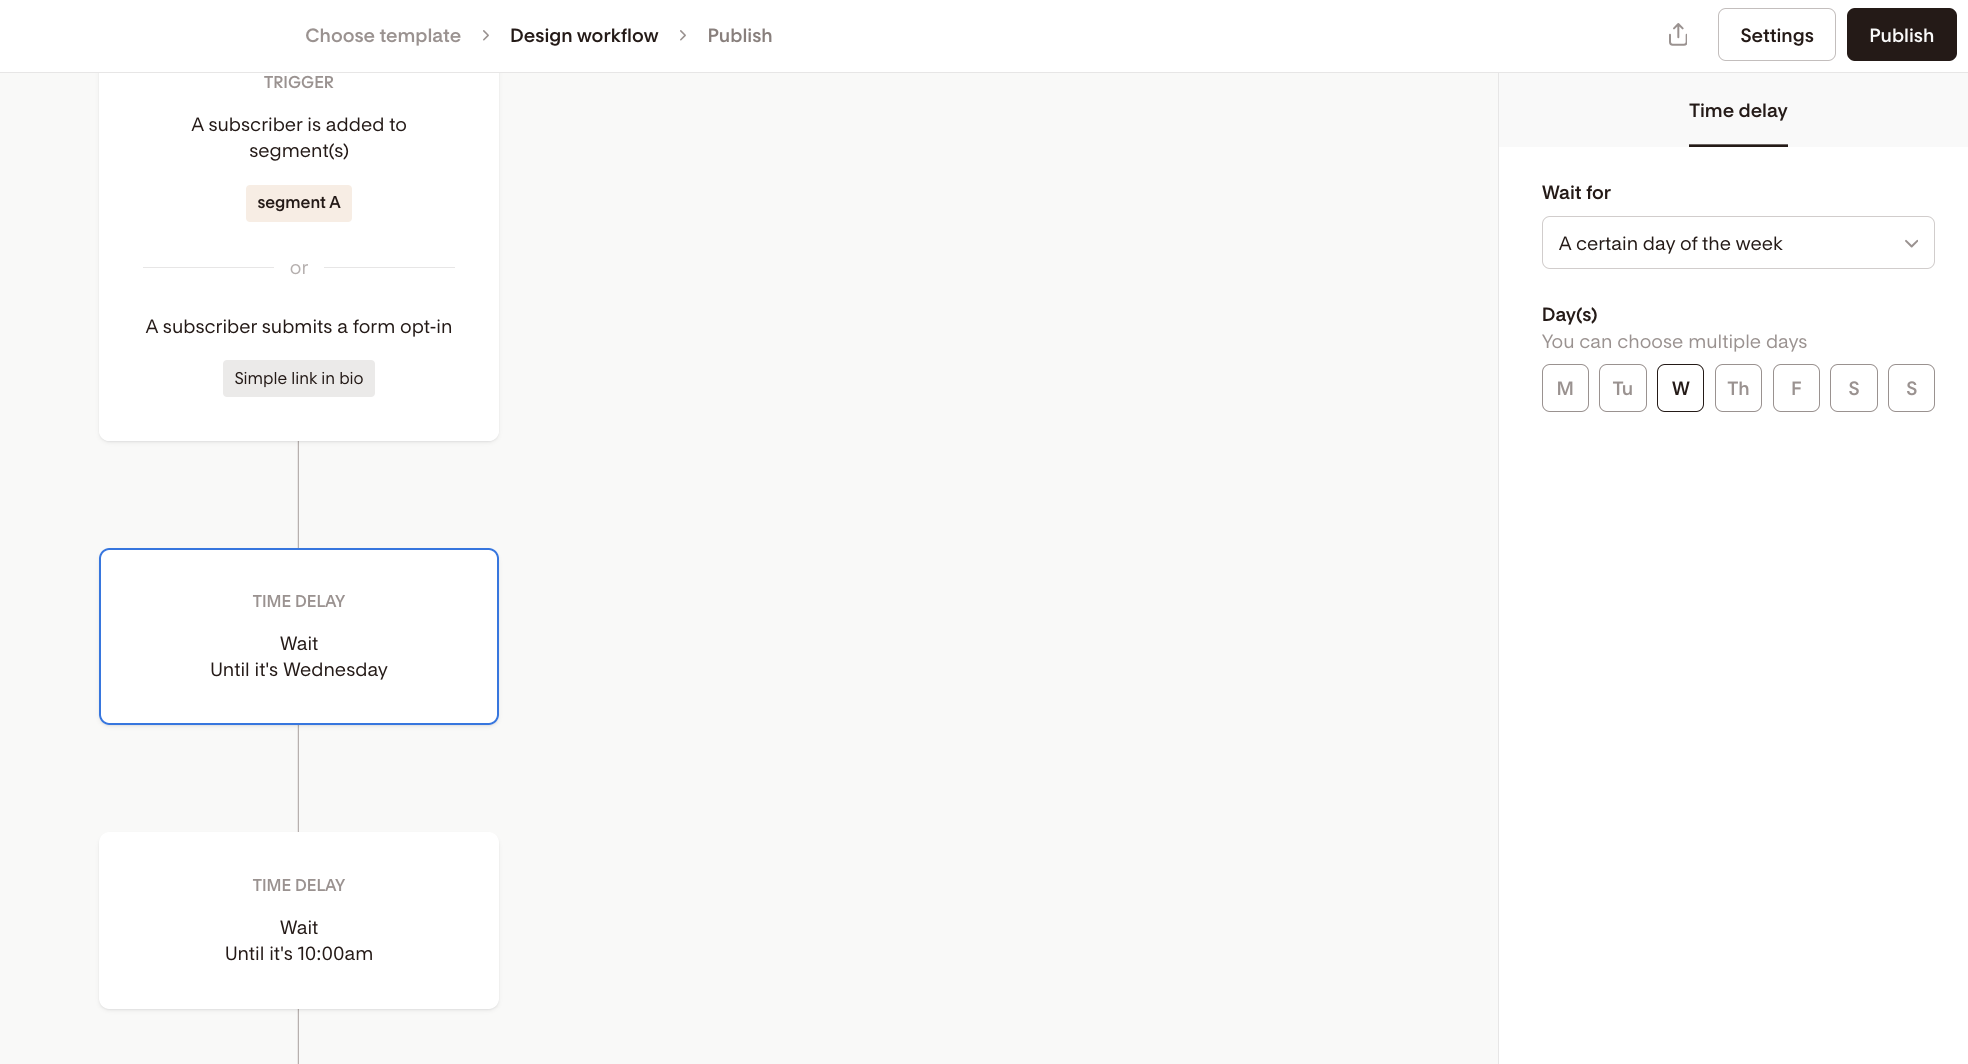
To delay until both a specific day and a specific time, stack two delay steps:
First: delay until the chosen day of the week
Second: delay until the desired time of day
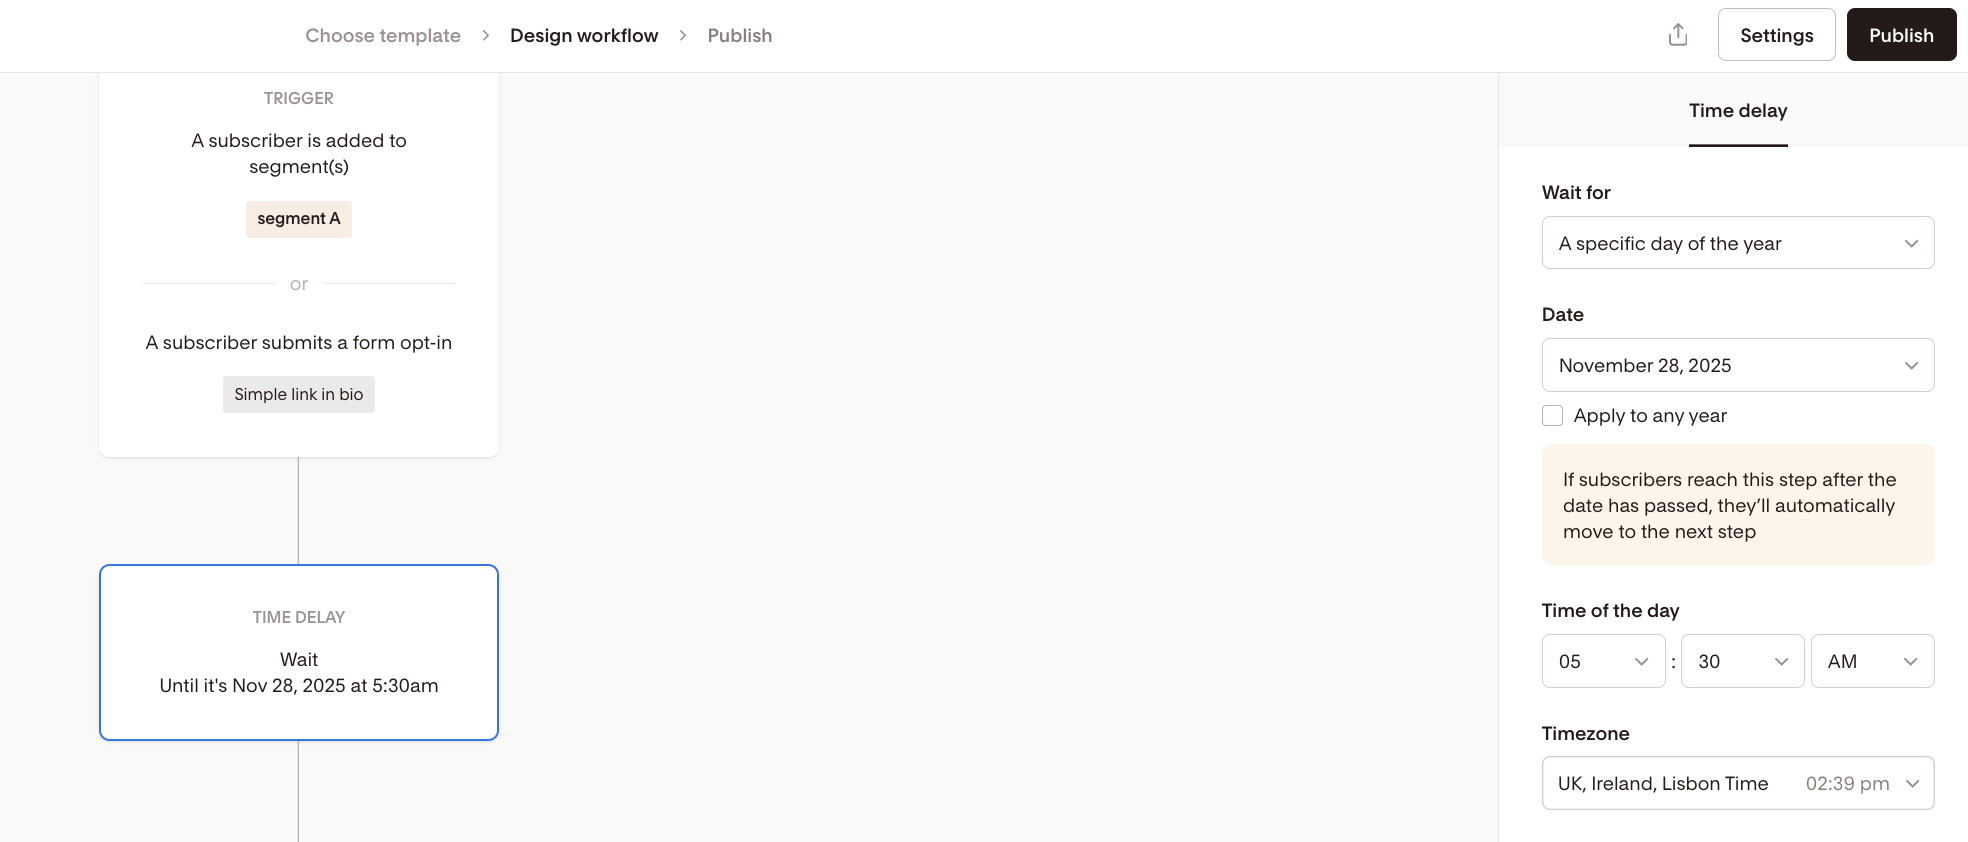
Delay until a specific date of the year
This delay holds subscribers until a particular calendar date and time. It's useful for planning ahead around launches, seasonal campaigns, or holidays.
You set the date, time, and whether the delay should repeat annually or apply only once.
Example: to prepare a Black Friday campaign in advance, you'd set the delay to November 28 at 5:30 am. Flodesk will hold subscribers until that exact date and time before sending the next step.
If “Apply to any year” is turned ON:
If the date has already passed when a subscriber enters this step, Flodesk will schedule the delay for the same date next year.

If “Apply to any year” is turned OFF:
If the date has already passed, the time delay is skipped and the subscriber moves straight to the next step.
Important: Only the time delay will be skipped, not the steps that follow it.
What does it mean in practice? If your workflow has several date-specific time delay steps with "Apply to any year" turned off, and a subscriber enters after those dates have passed, they won't get stuck waiting. Instead, they'll move through each skipped delay and trigger any email steps along the way. This means they could receive multiple emails at once.
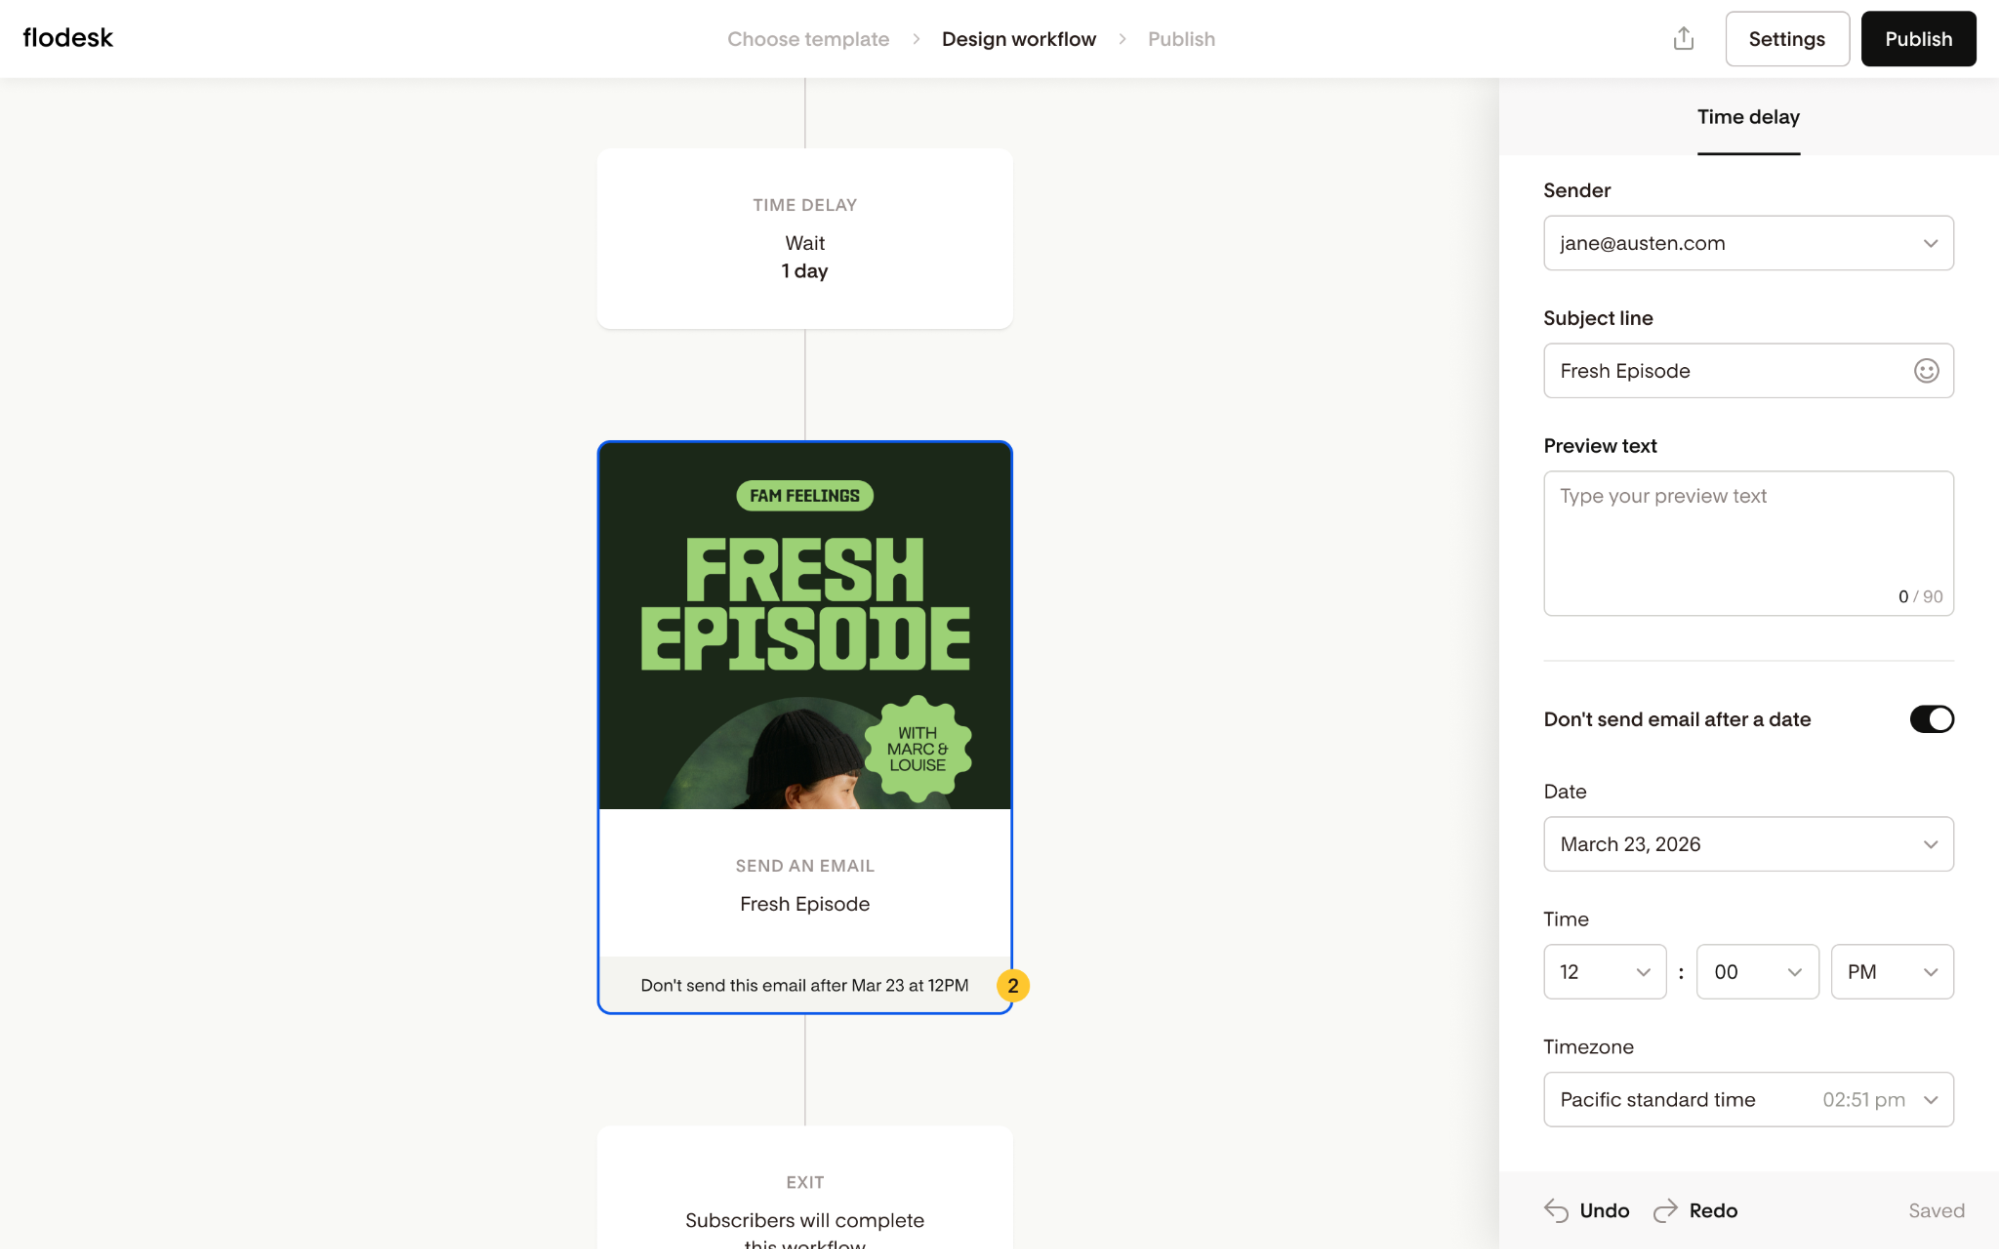
How to prevent multiple emails from sending at once
If you don't want subscribers to receive past emails when they enter a workflow after the cutoff date, use the "Don't send email after a date" setting on each Send Email step.
When this setting is turned on, any subscriber who reaches that email step after your chosen cutoff date will skip that email entirely and move on to the next step without any delay or interruption.
Without this setting, Flodesk will still send all of the emails tied to those skipped time delays, even if the dates are long past.
To set a cutoff date on a Send Email step:
Click the Send Email step you'd like to add a cutoff to
Toggle on "Don't send email after a date"
Use the date and time picker to set your cutoff
Select the appropriate timezone
Wait for your changes to autosave
For seasonal promotions or launch sequences with fixed end dates, it's a good idea to set a cutoff date on each time-sensitive email in your workflow, not just the final one.
Timezone settings
All time delays run based on your account's timezone. If your emails are going out at unexpected times, check that your timezone is set correctly.
To update it, go to Account settings > Overview
FAQ
What is a time delay in a Flodesk workflow?
A time delay is a pause between steps in your workflow. Instead of actions happening immediately one after another, a time delay tells Flodesk to wait a certain amount of time, until a specific day, until a certain time of day, or until a particular date before moving subscribers to the next step.
What types of time delays can I use in Flodesk?
There are four types: delay by a fixed amount of time (minutes, hours, or days), delay until a specific day of the week, delay until a specific time of day, and delay until a specific calendar date. You can stack multiple delay steps to combine these, for example to wait until both a certain day and a certain time.
How do I send an email on a specific day of the week at a specific time?
Stack two delay steps. First, add a "delay until day of the week" step and select your chosen day. Then add a "delay until time of day" step and set your desired time. Subscribers will be held until both conditions are met, in sequence.
What happens with a "delay until specific date" step if the date has already passed?
It depends on whether "Apply to any year" is turned on. If it's on, Flodesk will schedule the delay for the same date the following year. If it's off, the time delay is skipped and the subscriber moves straight to the next step. The steps after the time delay will still run as normal.
Do time delays affect subscribers who are already in the workflow when I make changes?
Yes. Subscribers who are currently waiting on a time delay step will continue to wait until the delay completes, then move forward from that point. Any changes you make to the workflow will only affect steps that haven't been reached yet.
My emails are going out at the wrong time. What should I check?
Check your account timezone first. All time delays are based on the timezone set in your Flodesk account. Go to My Account > Overview to review and update it. If your timezone is correct and timing still seems off, check the specific delay type you're using and confirm the settings match what you intended.
Can I use a time delay to send emails only on weekdays?
Yes. Use the "delay until day of the week" step and select Monday through Friday. Subscribers who reach that step on a weekend will be held until the next weekday before moving forward.
What's the difference between "delay by amount of time" and "delay until time of day"?
"Delay by amount of time" waits a fixed duration, for example exactly 24 hours, regardless of what time of day it is. "Delay until time of day" waits until a specific clock time arrives, such as 9:00 am, even if that means waiting less than an hour or nearly a full day depending on when the subscriber enters the step.