Update to date-specific time delays on Workflows v2
Workflows v2 gives you more control over date-specific time delays in your automations.
Learn how to leverage the flexibility of this powerful feature.
Step 1. Start building a new workflow
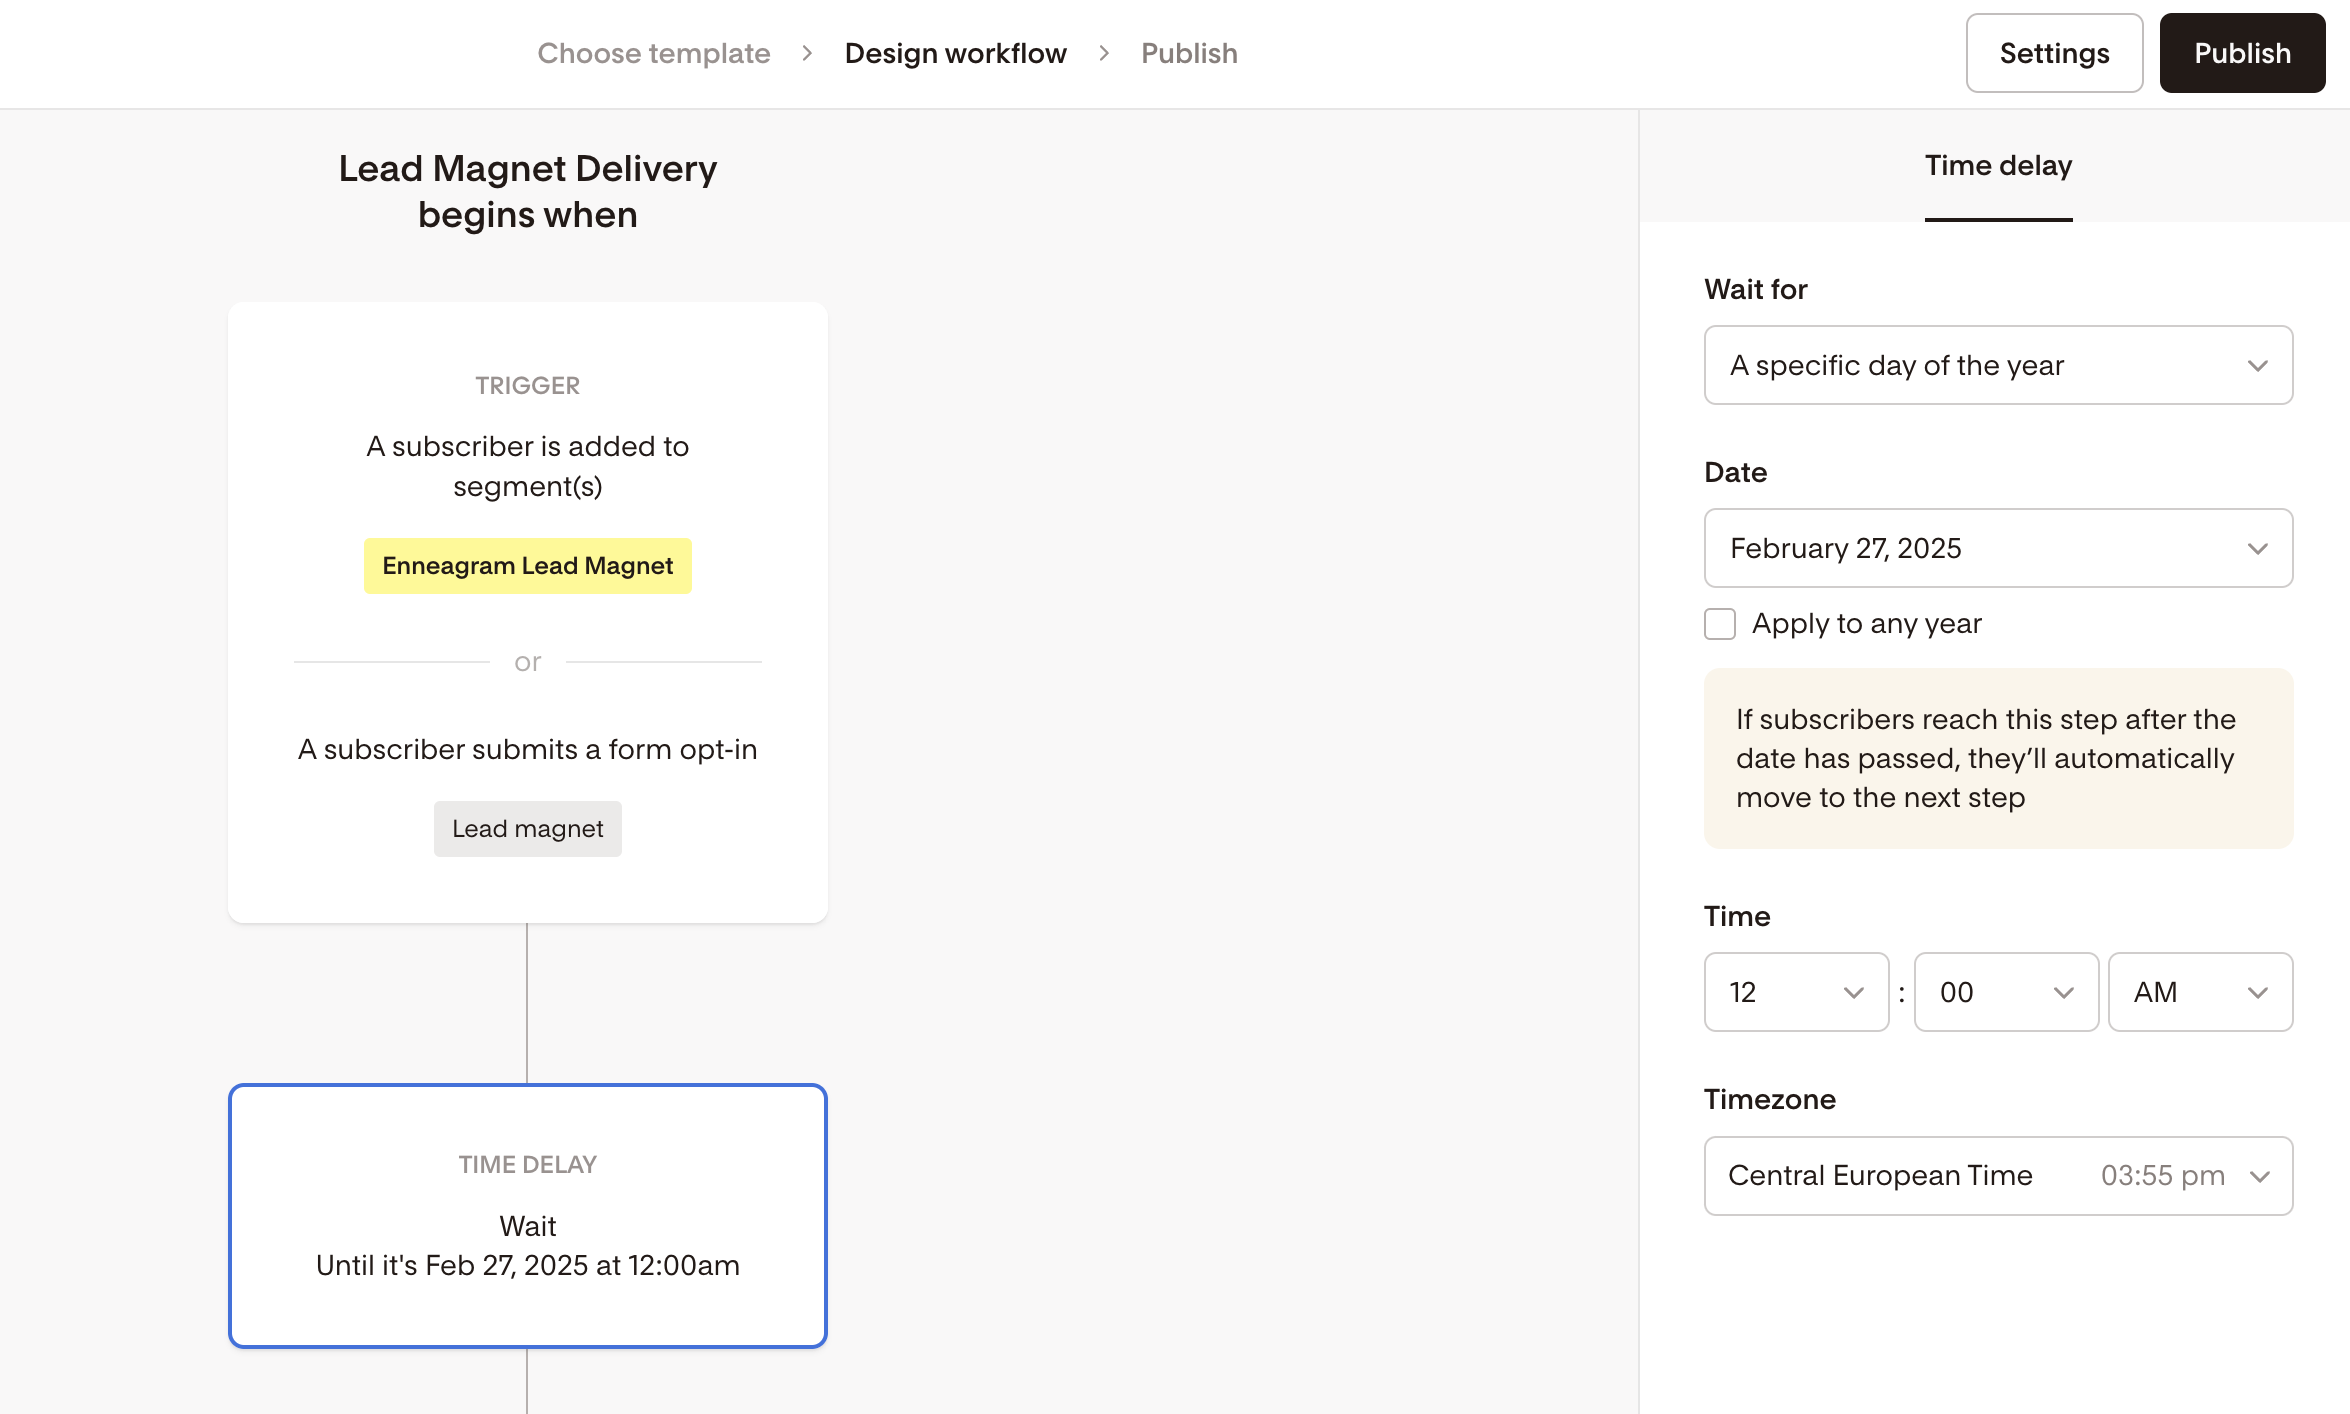
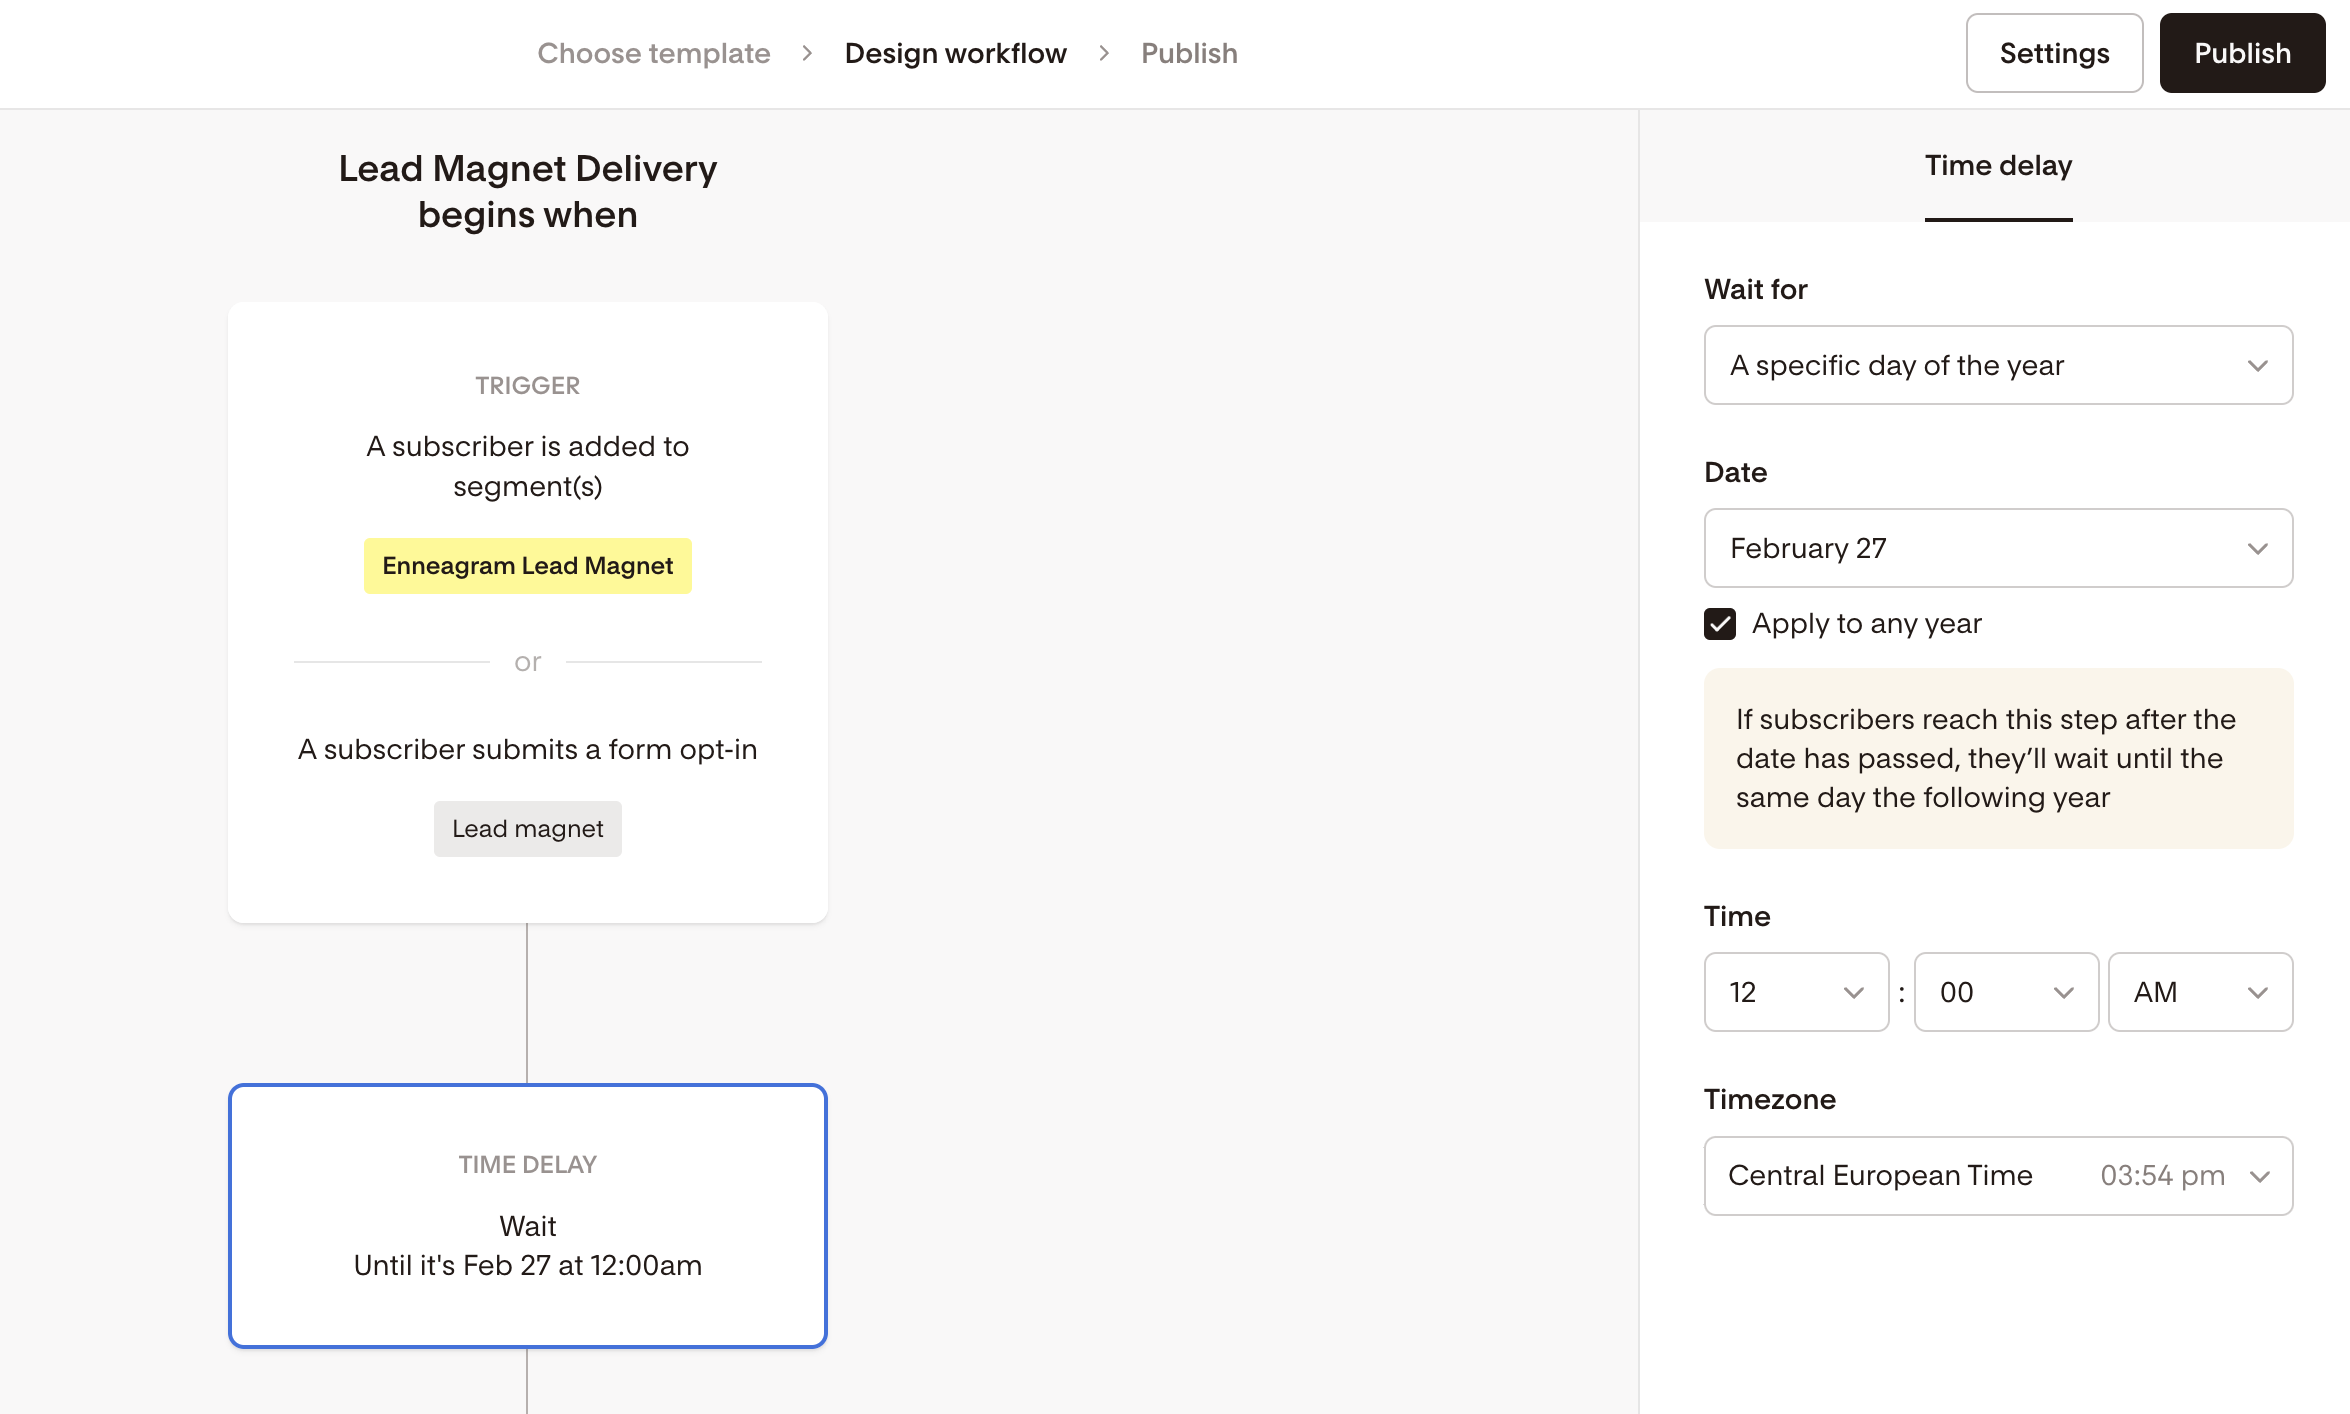
Step 2. Add a time delay step by selecting the specific day of the year option.
If the “Apply to any year” option is turned on and a subscriber enters the time delay step when the specified date has already passed, the time delay will be scheduled on the same day next year.
If the “Apply to any year” option is turned off and a subscriber enters the step when the specified date has already passed, the time delay step will be skipped and the subscriber is moved to the next step immediately.
Be mindful of the following: if you have several date-specific time delay steps with the “Apply to any year” option turned off in your workflow, and a subscriber enters the time delay steps after the specified dates, they will not get stuck on the time delay, but will move to the next step in the workflow—which may be Email steps.
Also, they will not jump and skip all time delays and emails that are past and move to the immediate "current" date step—but instead, all emails until the current step will be sent at once. This means that it is possible that they will receive multiple emails at once.