How to add a popup form to your WordPress website
A step-by-step tutorial on how to embed a Flodesk popup form to a WordPress website
Flodesk forms help you capture your visitors’ email addresses so you can build your list and start regularly sharing your brand message.
Popups are the best way to convert website visitors to subscribers. They grab the attention of visitors to your website or blog and call them to sign up for your newsletter.
How to add a popup form to your WordPress website
Step 1. Start by creating and customizing your popup form.
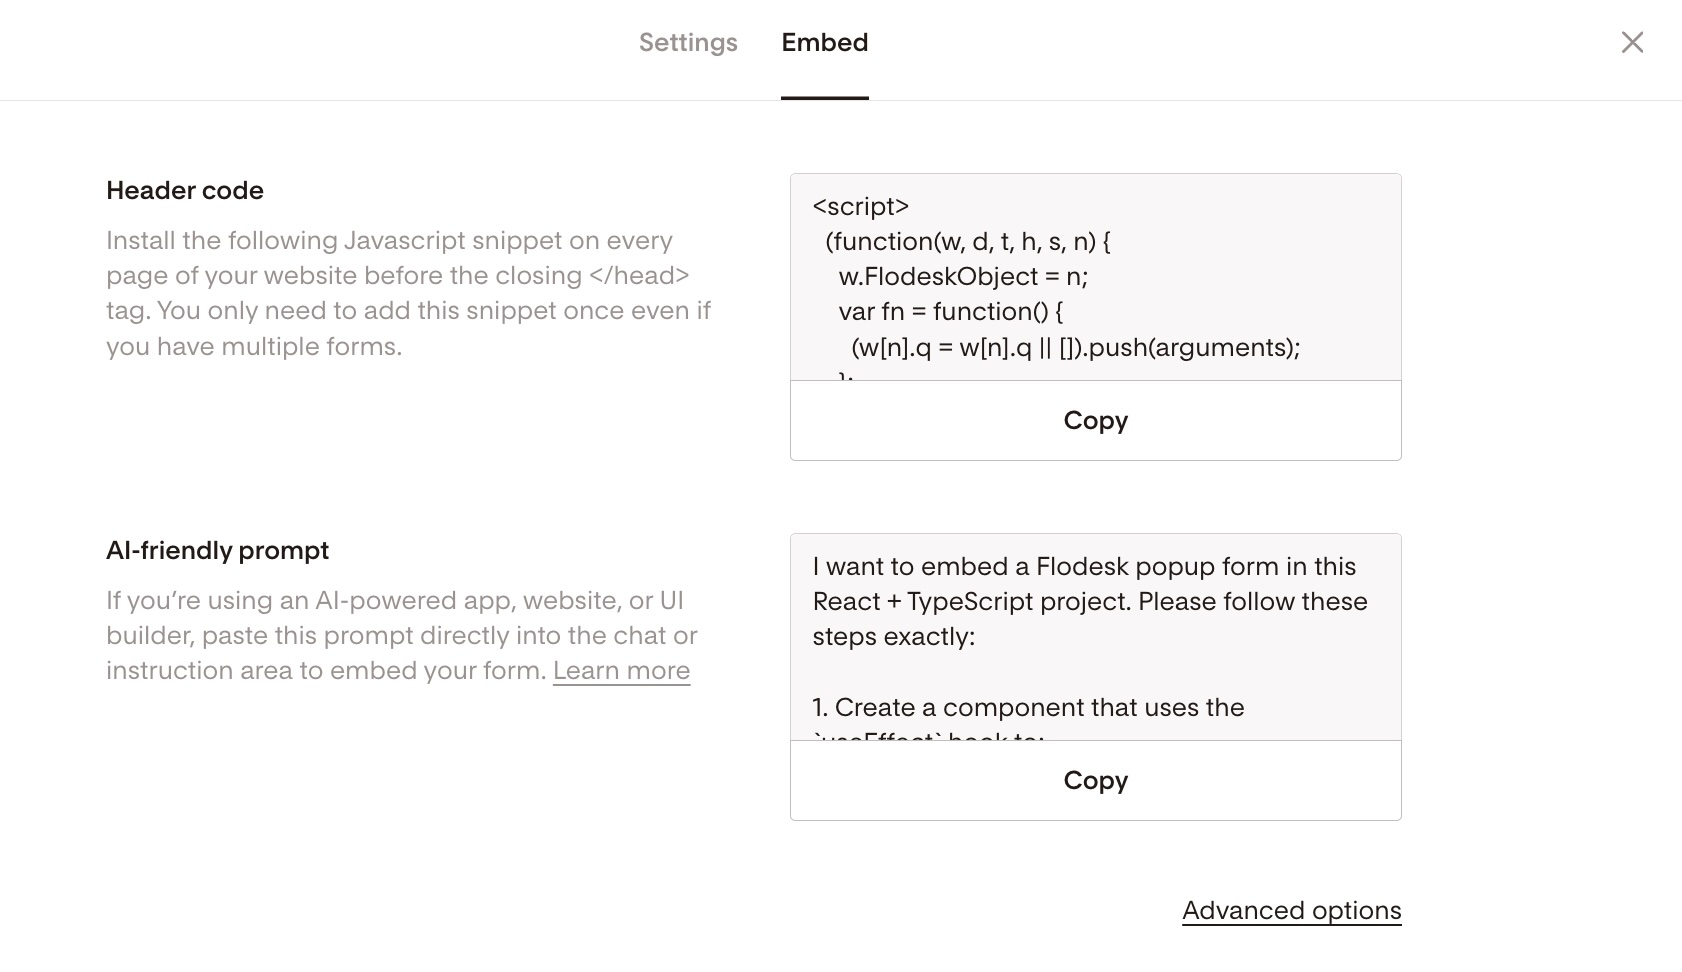
Step 2. After you create and customize your form, click the black Embed button in the top right corner and you will see the Header code that you need to copy.
You can add the header code to your WordPress website with the help of a plugin like this one (Header Footer Code Manager). If you already have a plugin like this, jump to Step 5 in the following section.
Otherwise, follow the steps to download and install the plugin first.
Note: Using a plugin like the Header Footer Code Manager
allows you to add the Flodesk popup form to your WordPress website regardless of which page builder (Bakery, Elementor, Gutenberg) or theme you use.
How to add the popup form’s header code to your WordPress website sitewide
Step 1. Login to your WordPress Dashboard.
Step 2. Go to Plugins > Add new.
Step 3. In the Search plugins field on the top right, run a search for the “Header Footer Code Manager” plugin.
Step 4. Click on Install Now, then click Activate.
Alternatively, if you’re an advanced WordPress user, you can download the plugin from here and install it directly by uploading header-footer-code-manager to the /wp-content/plugins/ directory.
Once you’ve installed and activated the plugin it will appear under your WordPress Dashboard’s sidebar.
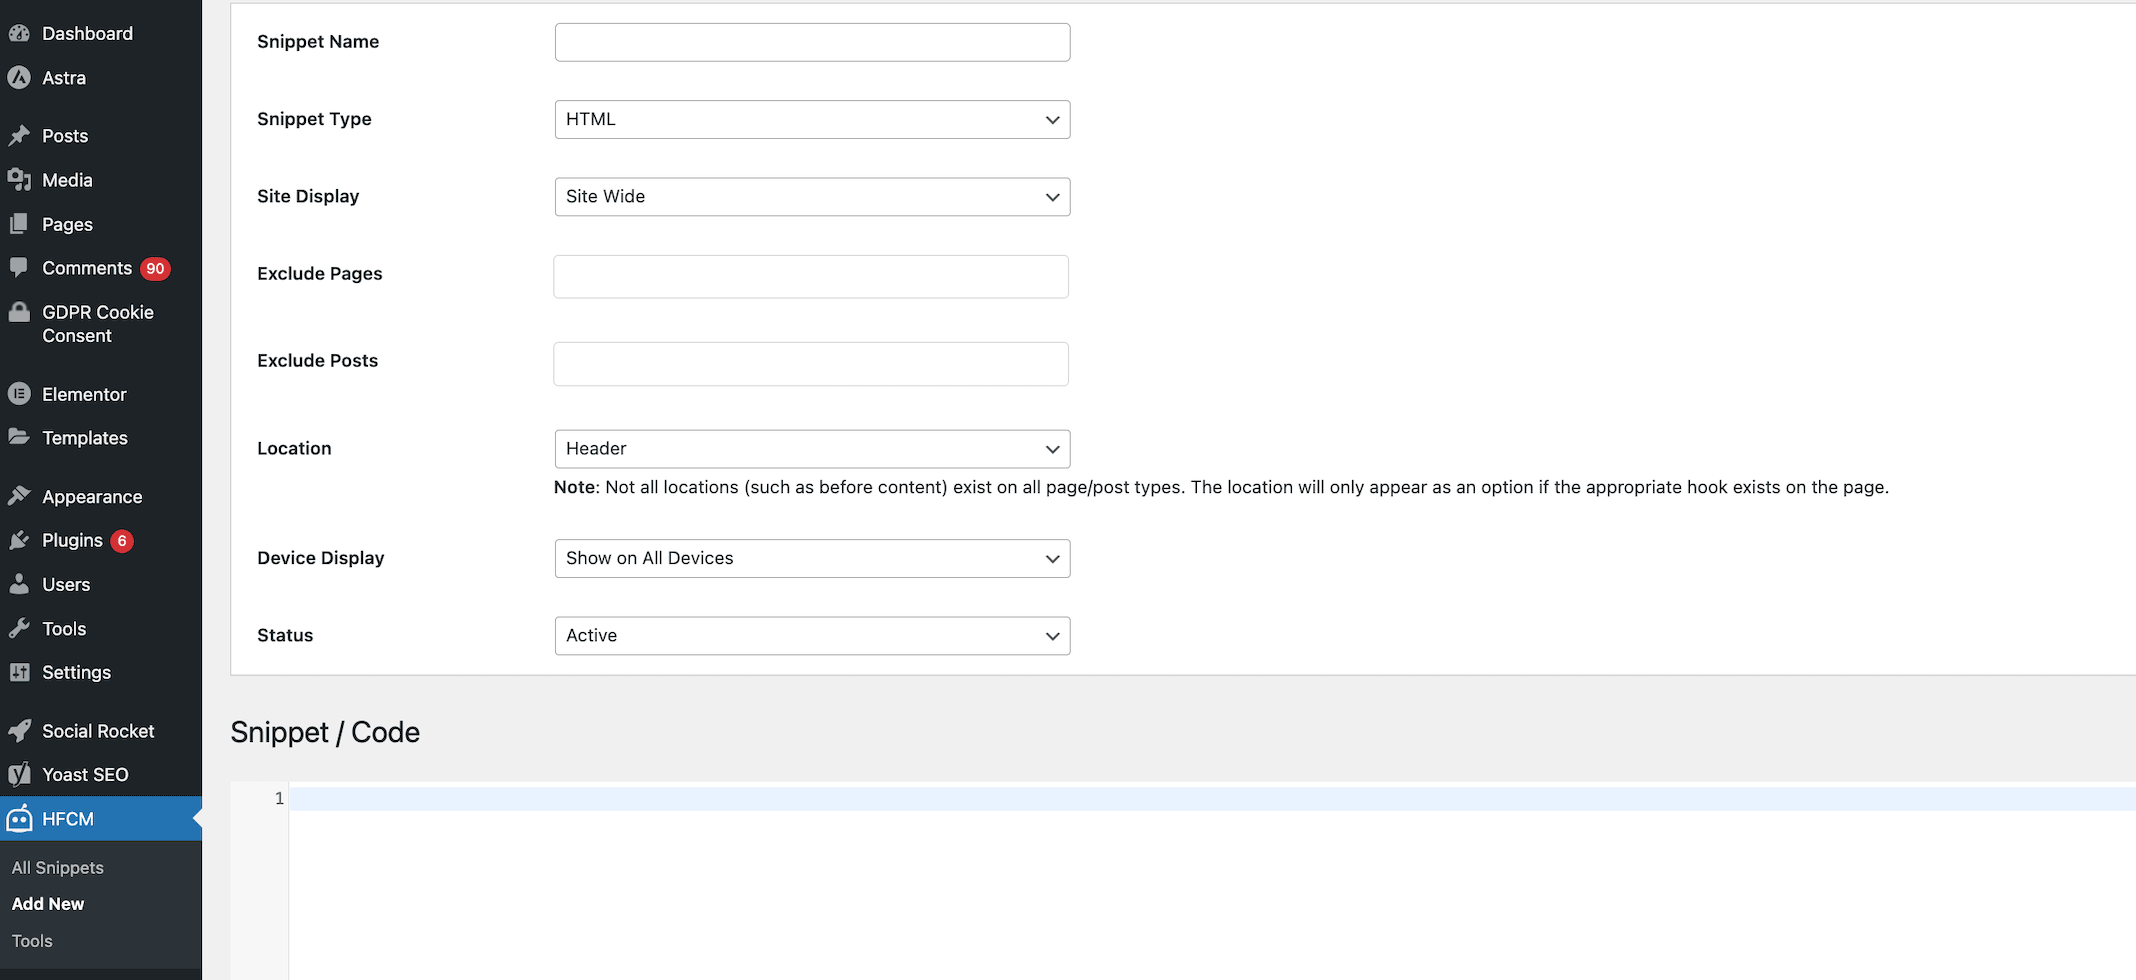
Step 5. Click “Add new”
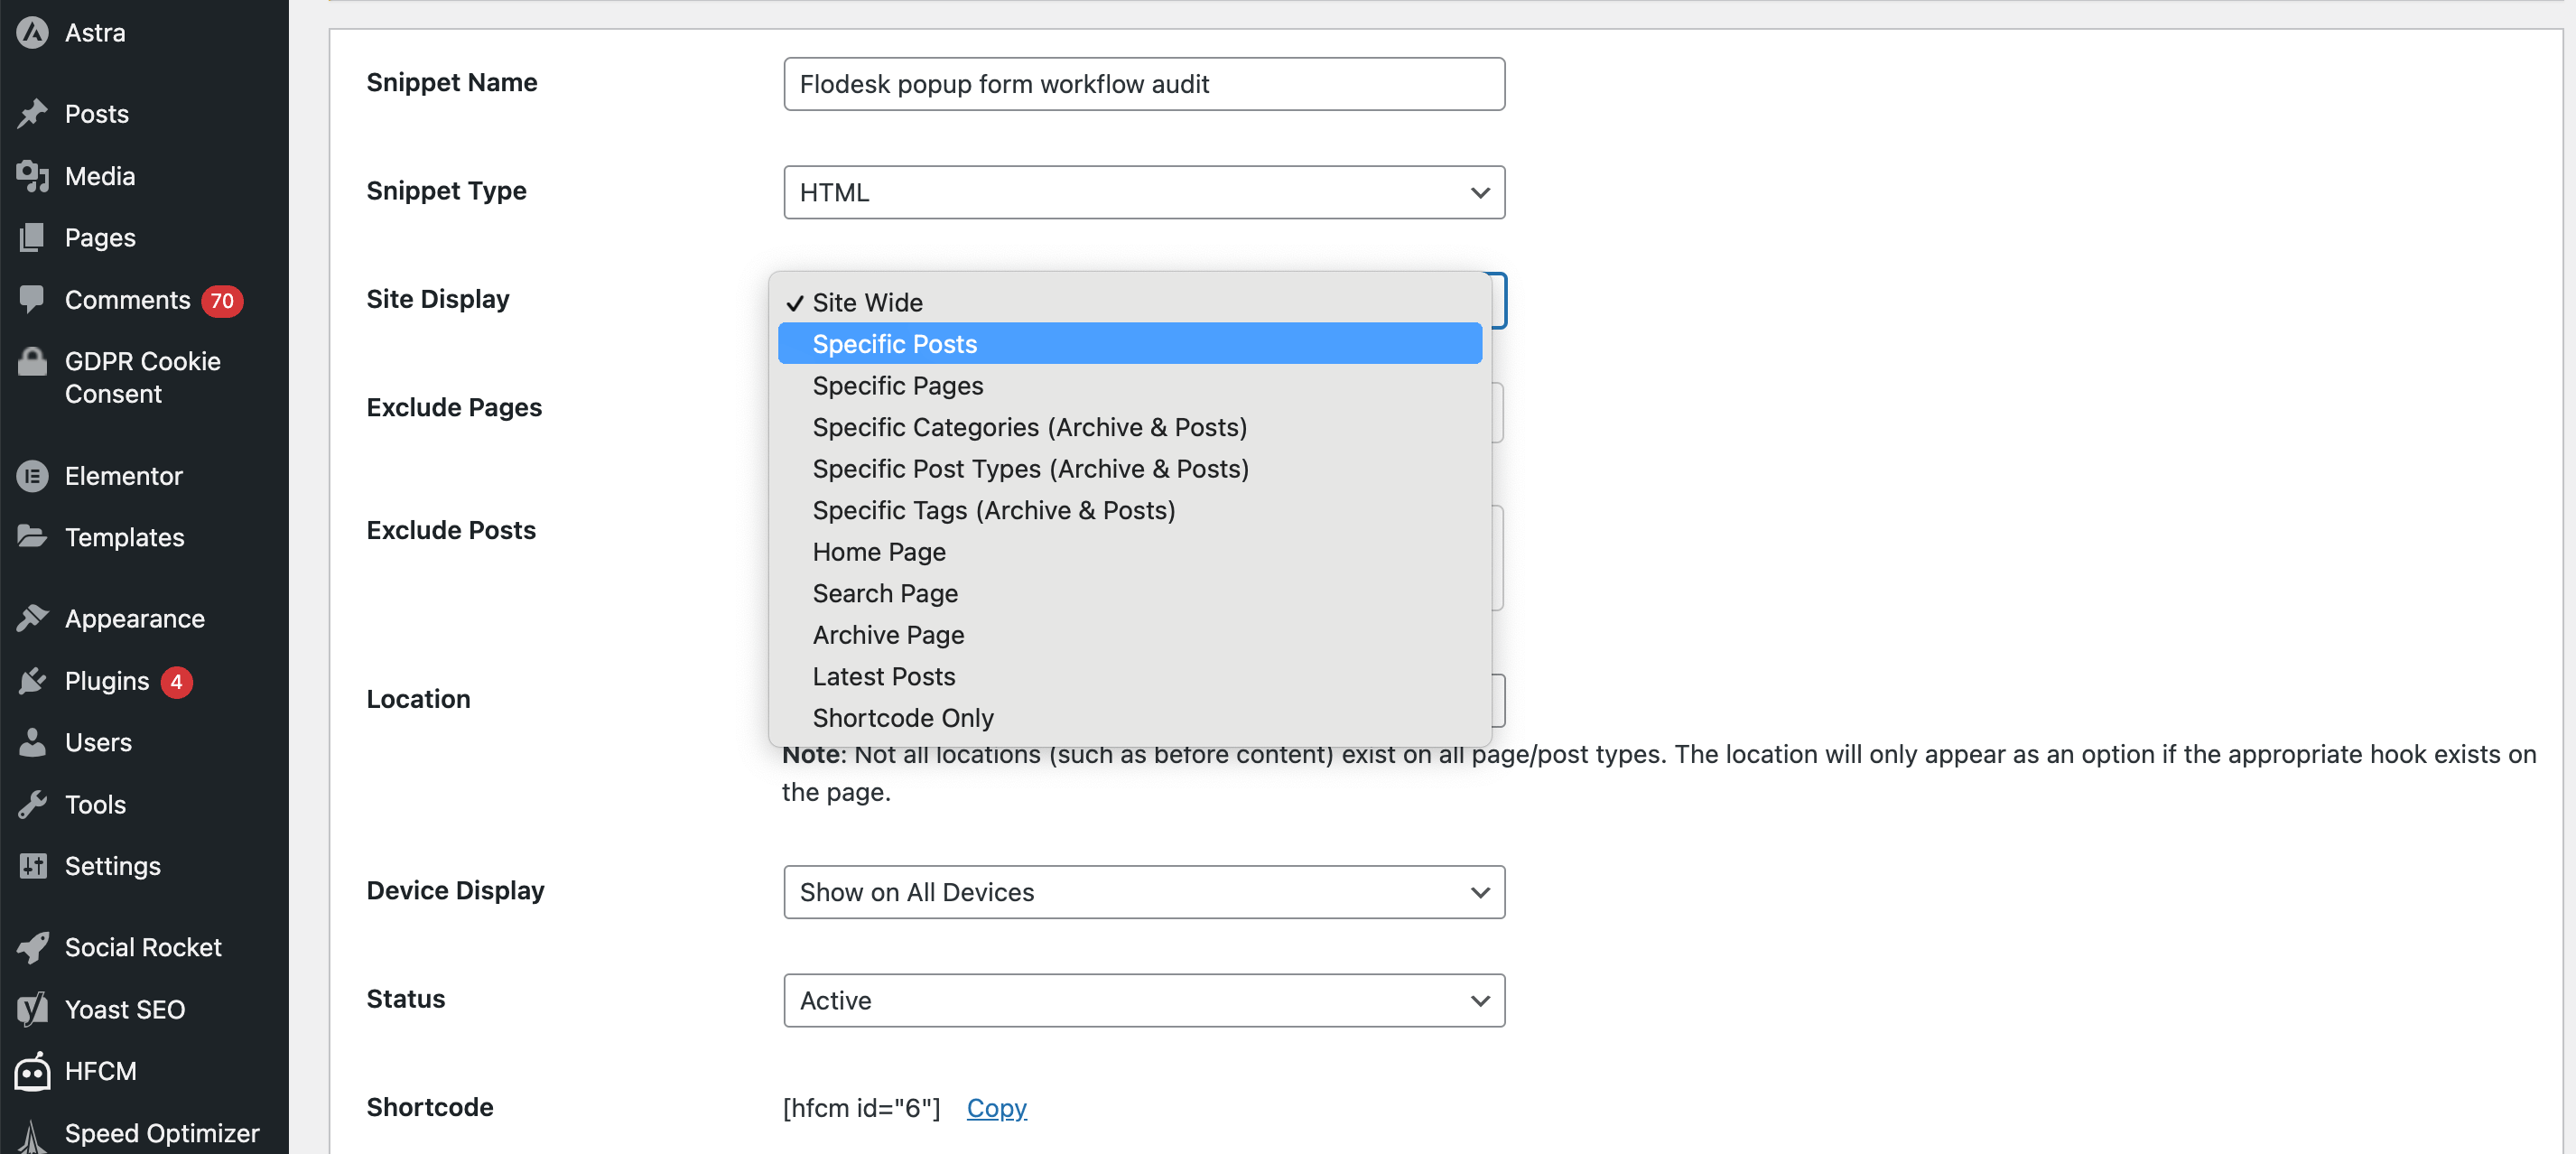
If you want the Flodesk popup form to appear on all pages of your website, fill in the details as follows:
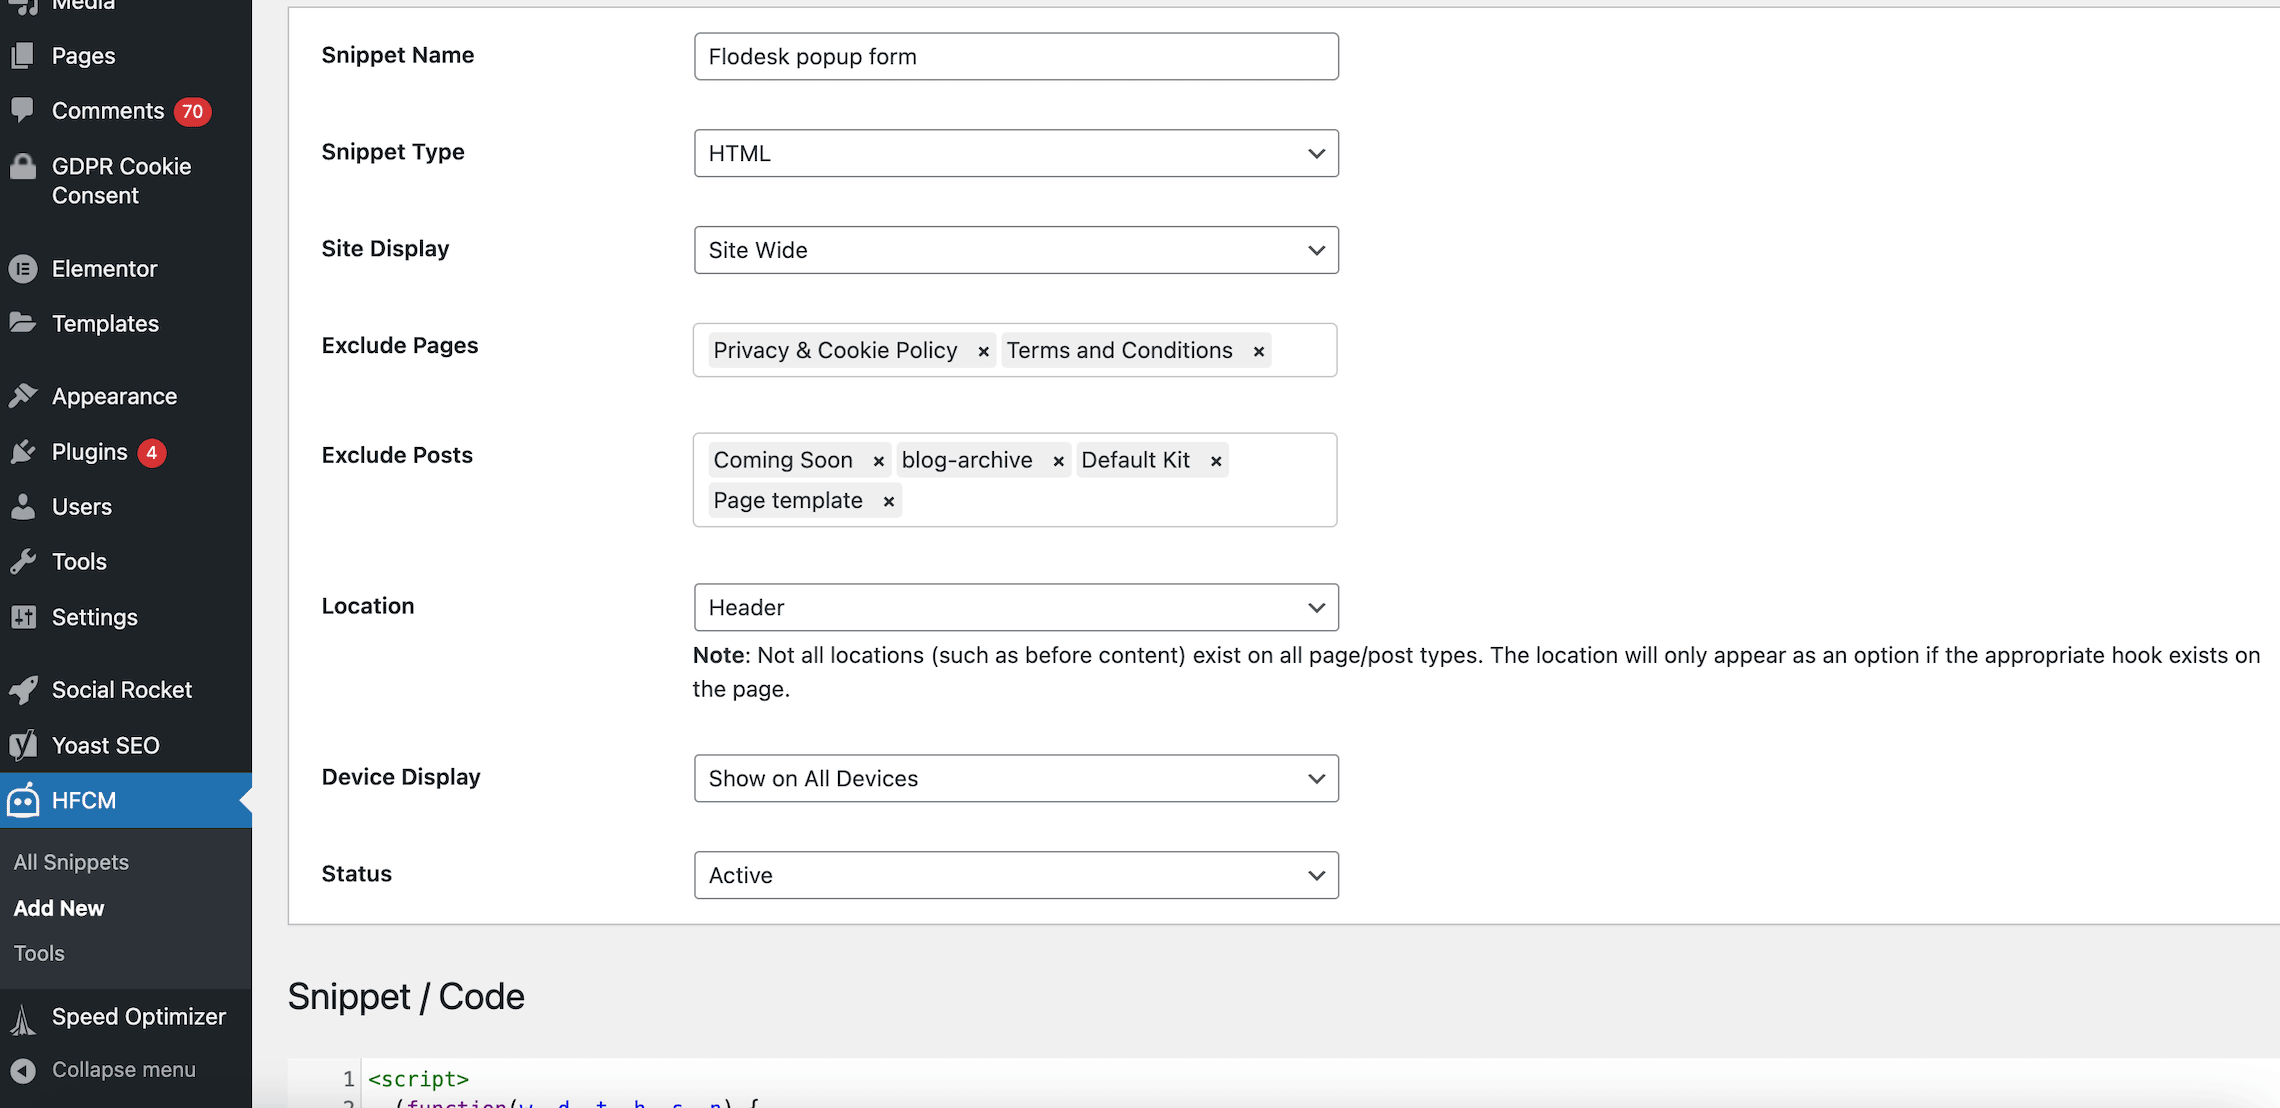
Snippet Name: It can be anything. It’s for you to quickly understand what that code does
Snippet type: HTML
Site display: Site Wide
Exclude Pages: if you don’t want the popup to appear on certain pages, like your Privacy Policy page or Terms and Conditions page, list them here. Otherwise, leave it empty.
Exclude Posts: if you don’t want the popup to appear on certain posts, list them here. Otherwise, leave it empty.
Location: Header
Important: it must be set to header as it’s a header code.
Device Display: Show on All Devices.
Alternatively, pick your choice.
Status: Active
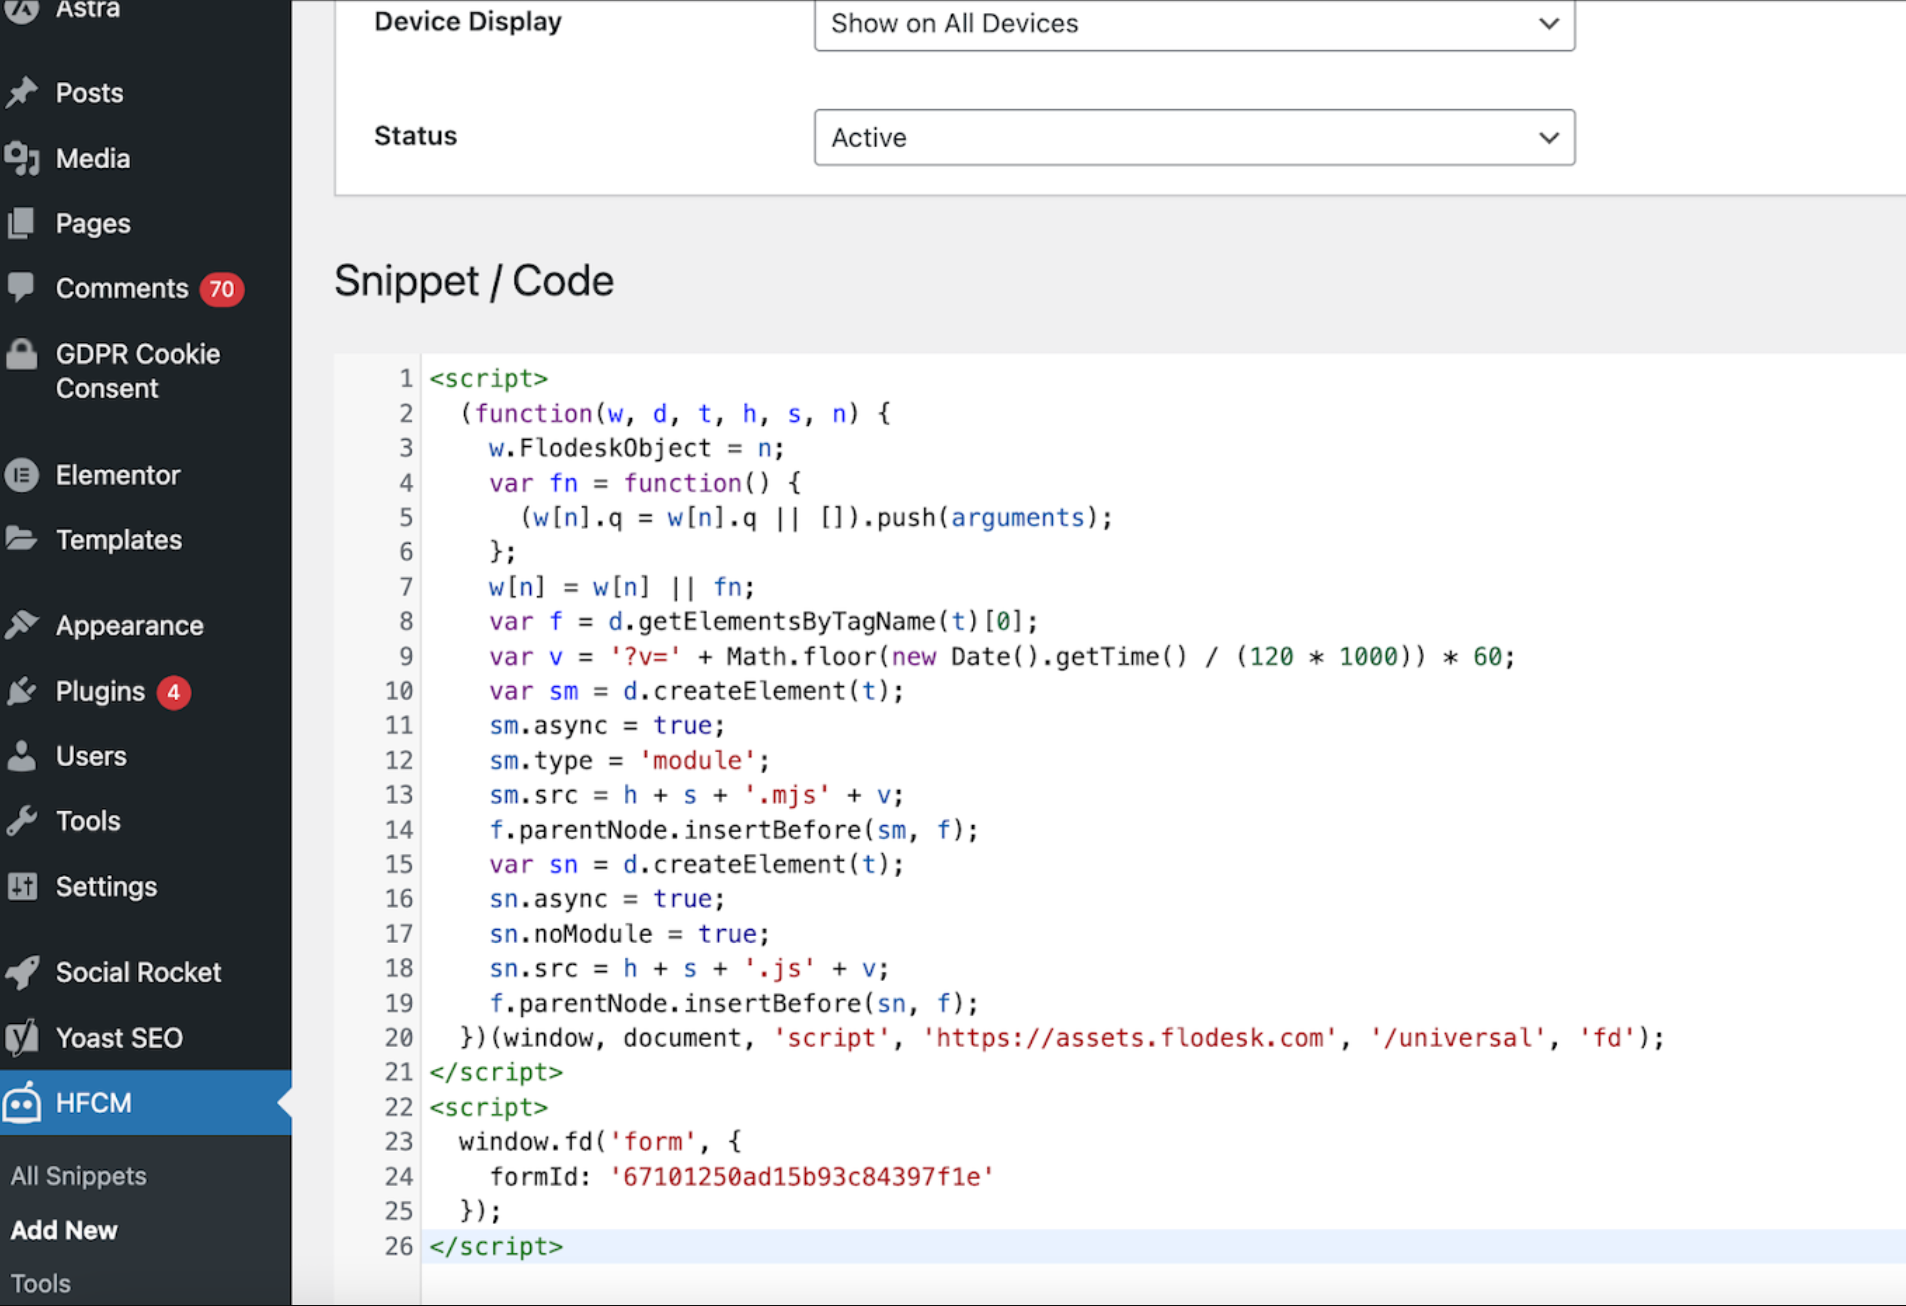
Step 6. Now copy and paste the popup form’s header code from Flodesk and add it to the Snippet / Code box.
Step 7. Scroll down and save your changes.
How to add the popup form’s header code to your WordPress website to specific pages only
The Header Footer Code Manager plugin allows you to add the popup form’s code to selected pages, posts, categories only.
This way, you can control where your popup form shows up or doesn’t show up. And if you use more than one popup form, you can easily specify which popup form should appear on which pages.
You can do that by changing the “Site Display” from Site Wide to your preferred choice.
Summary
First, create a popup form in your Flodesk account.
Then copy the header code snippet and add it to your WordPress website with the help of the Header Footer Code Manager plugin.

